
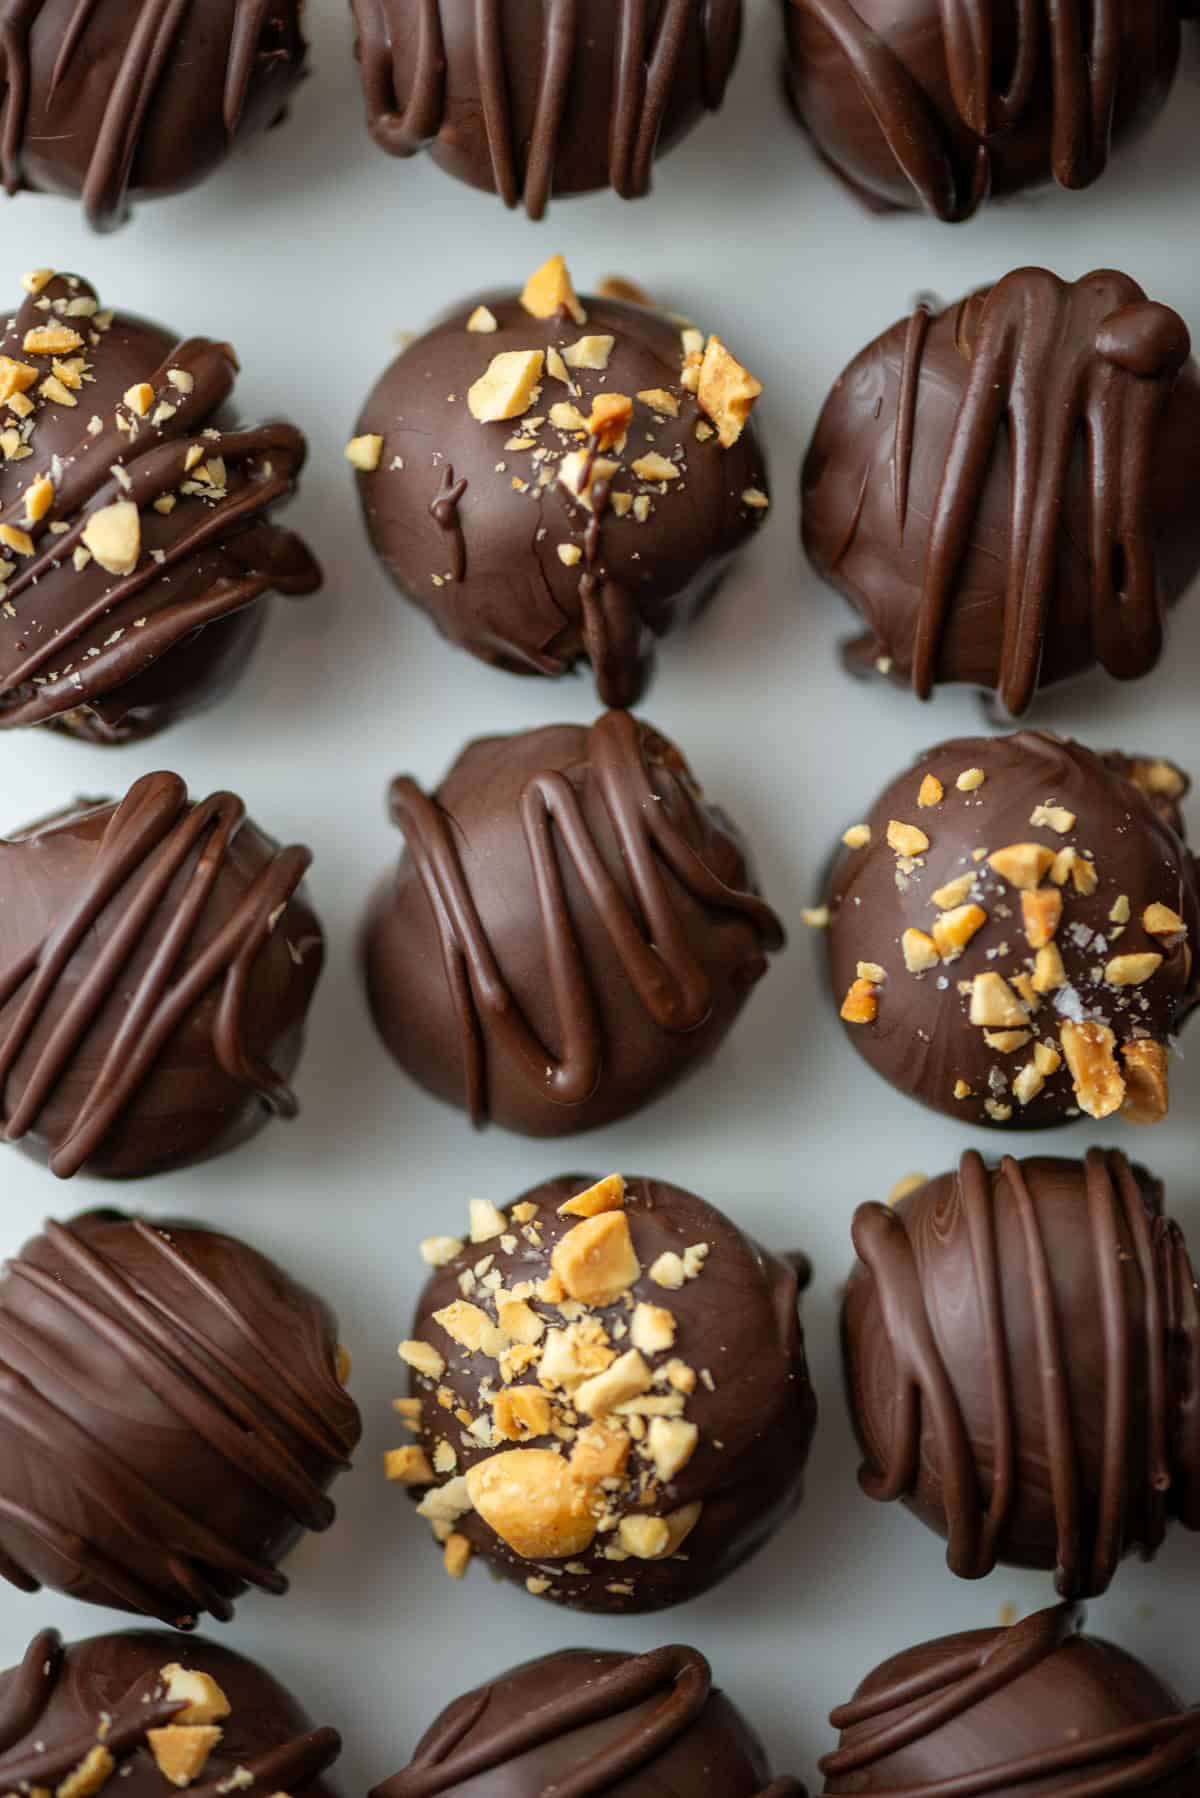
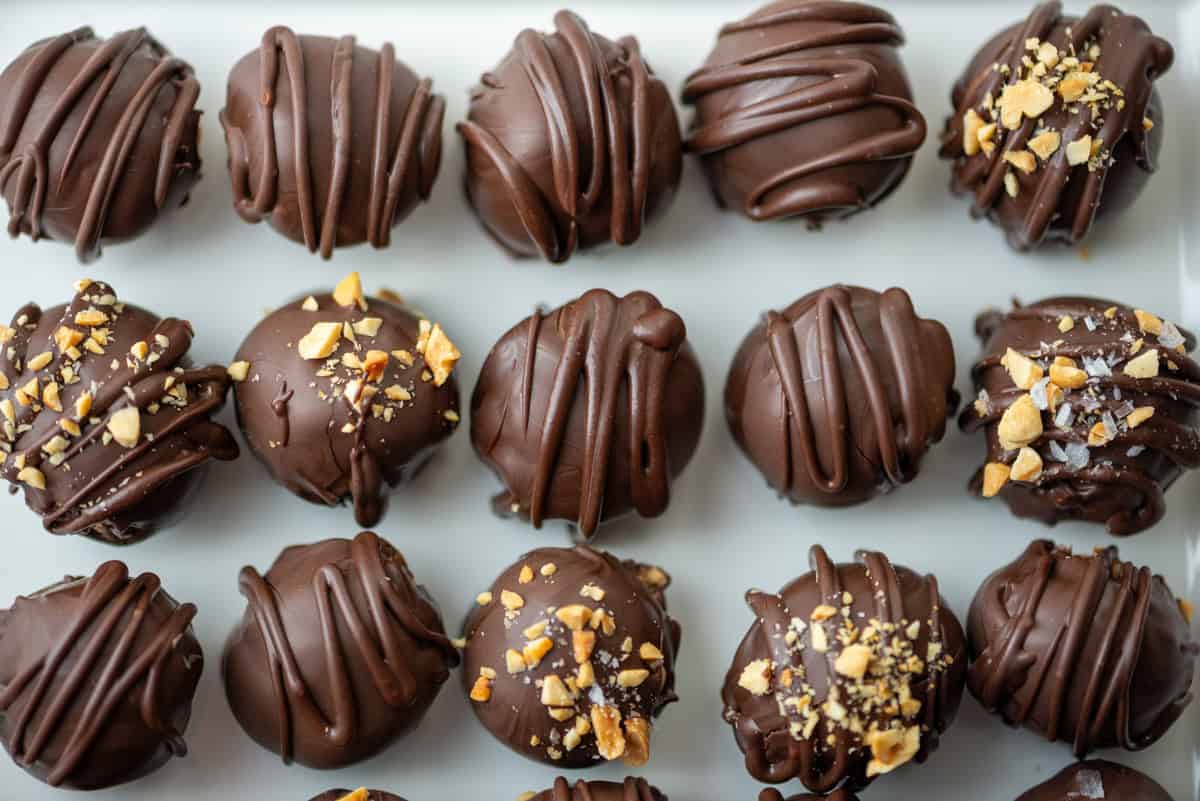
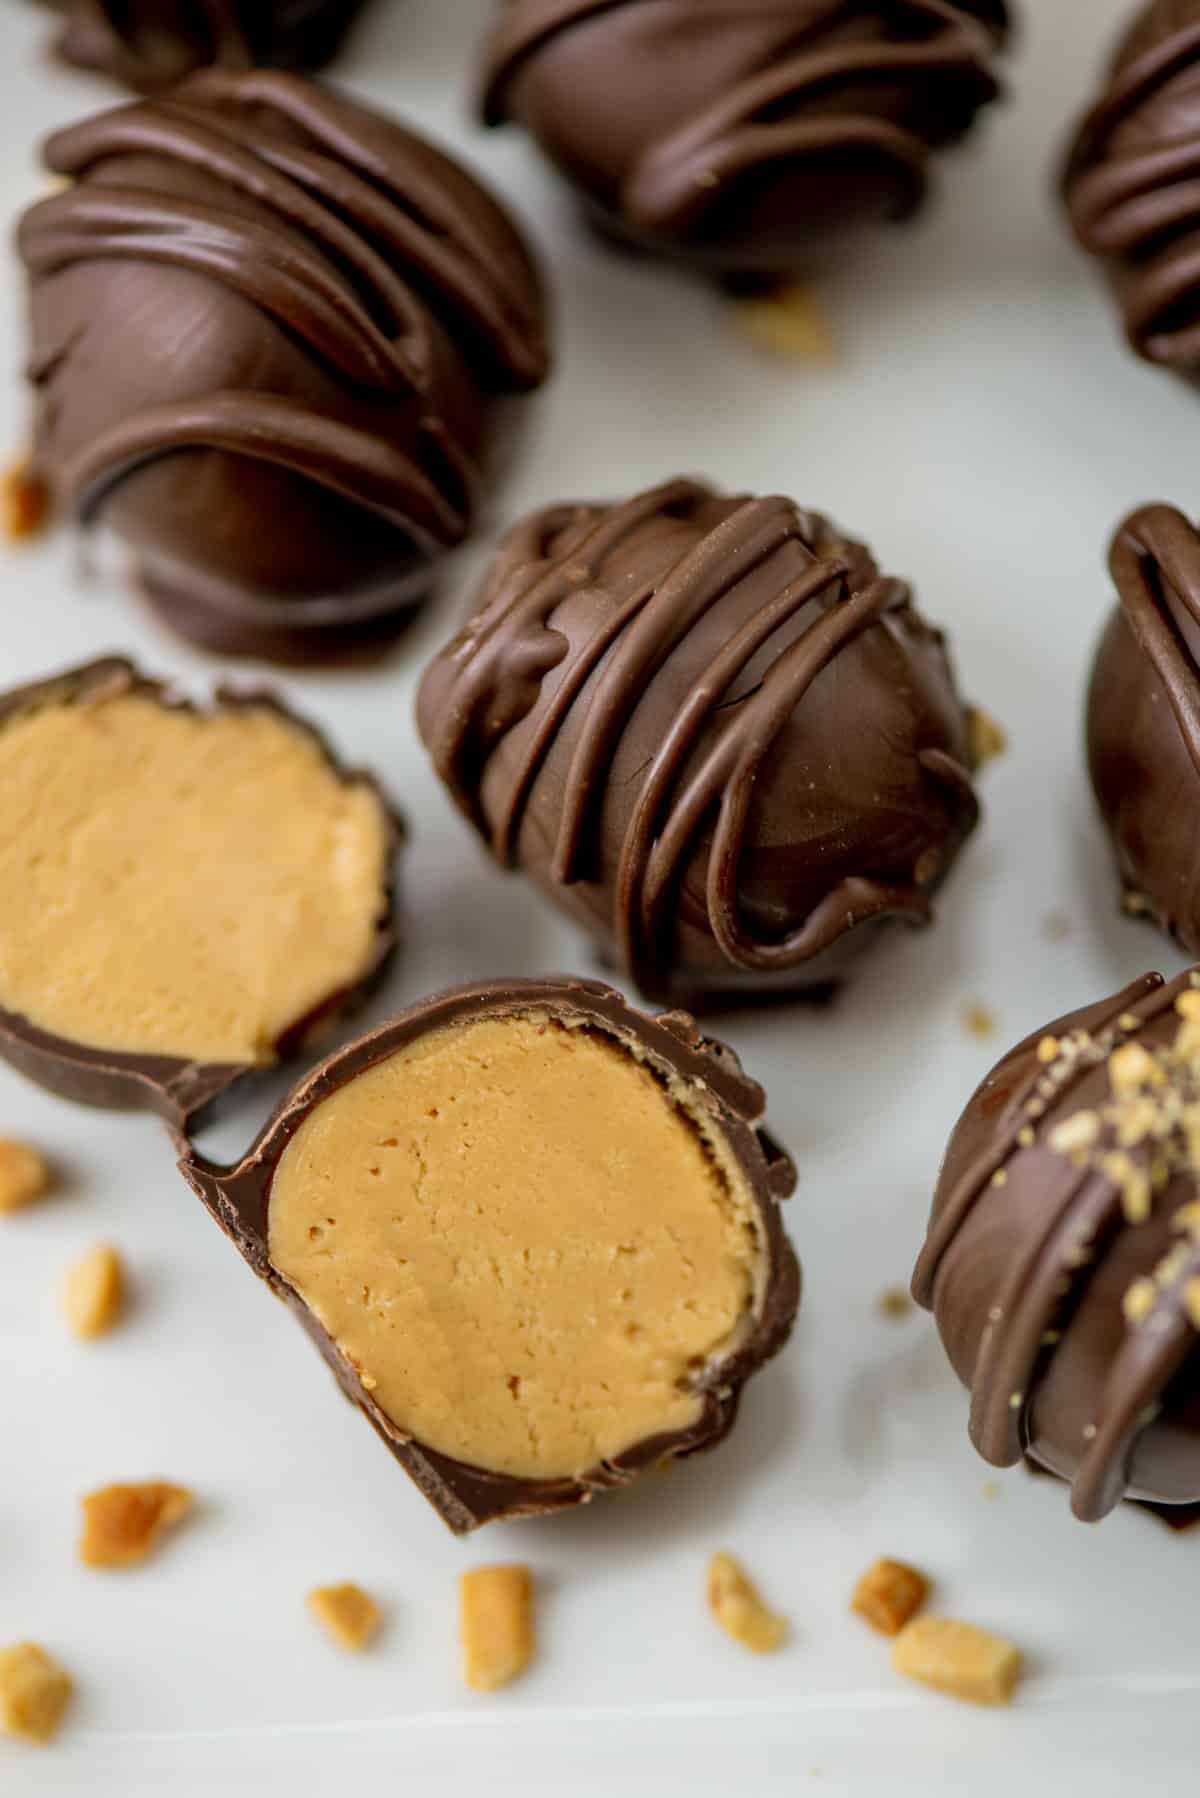
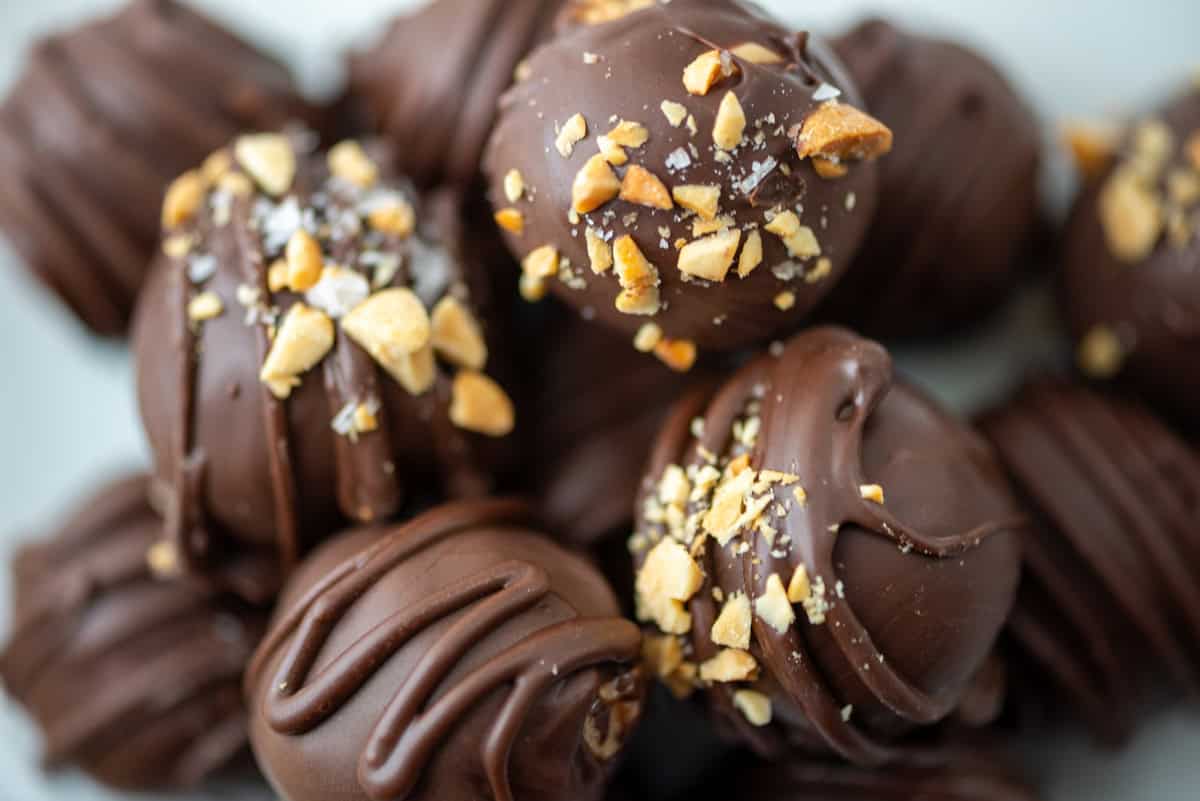
Chocolate peanut butter truffles prove that four simple ingredients can turn into something truly delicious. Each ball is rich and decadent with a creamy peanut butter center wrapped in crisp chocolate. Chocolate peanut butter truffles are perfect for holidays, gifting or keeping in the fridge for an easy sweet fix.
The pairing of chocolate and peanut butter goes back to H.B. Reese who later created Reese's peanut butter cups. No surprise there. But, fun fact: the combo is over 100 years old and Reese's peanut butter cups (est. in 1928) are almost 100 years old. That's kind of wild to think about. But I'm not saying these taste like Reese's peanut butter cups. I think they taste even better! And truffles look a lot prettier. But instead of boring you with a long story about some nostalgic childhood memory, I figured I would throw in a fun fact about the pairing of chocolate and peanut butter.
Jump to:
Ingredients
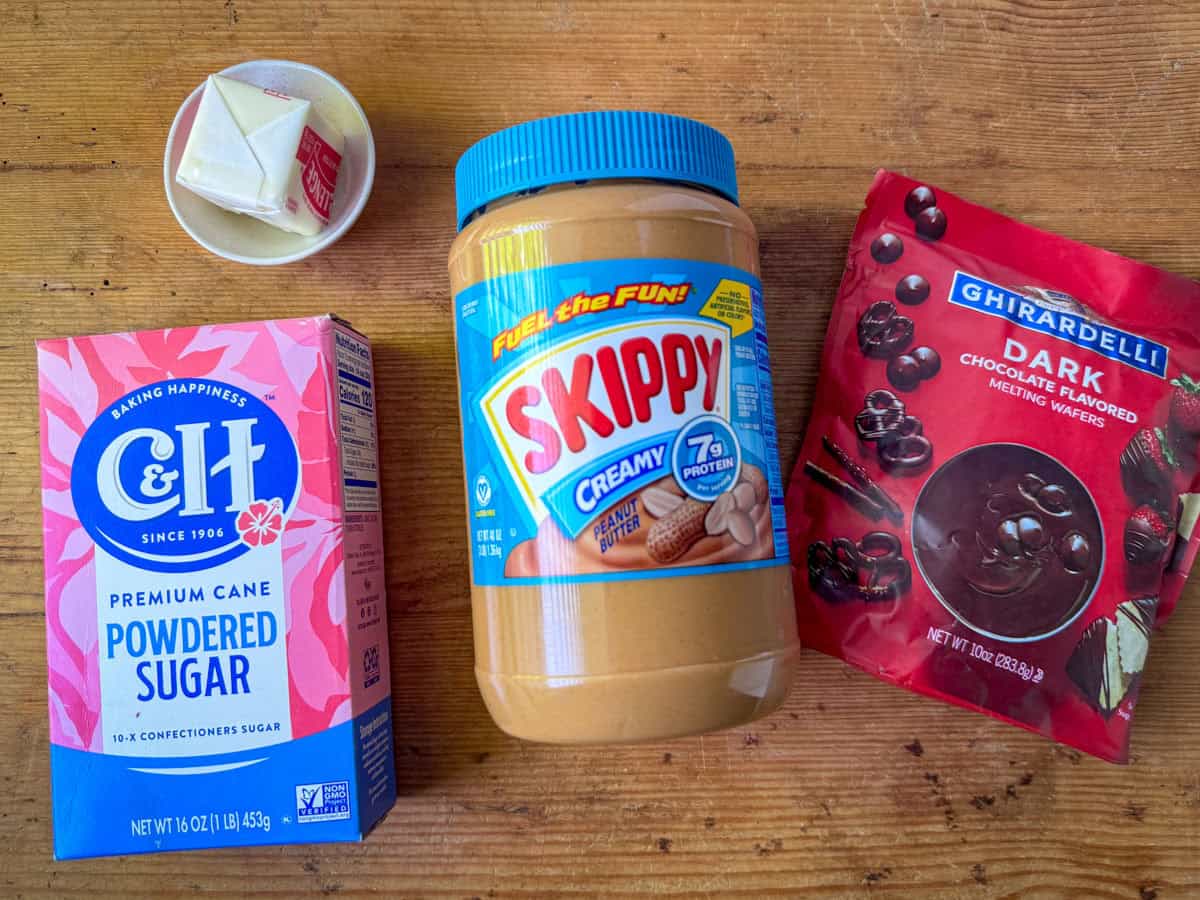
- Creamy peanut butter
- Salted butter
- Powdered sugar
- Chocolate melting wafers
- Optional toppings like crushed peanuts, sprinkles or fancy salt
Substitutions and Variations
- Gluten free - these chocolate peanut butter balls are naturally gluten free.
- Vegan - use vegan butter and vegan chocolate chips to make these truffles vegan.
- Melting chocolate - you can substitute chocolate chips or chocolate for the melting wafers but it is thick when melted. So, you'll want to add one tablespoon of vegetable shortening or coconut oil to the chocolate while you are melting it to thin it down. However, as this is not tempered chocolate, so you will need to keep these in the refrigerator and not leave them out too long when serving as they will soften.
Equipment
A stand or hand mixer is helpful to make these chocolate peanut butter truffles.
Storage
Store peanut butter balls in an airtight container in the refrigerator for up to 7 days.
Next Level Tips
- I prefer dark chocolate melting wafers, but you can use your favorite kind of chocolate melting wafers.
- If you don't have special chocolate dipping tools, you can use two forks to dip the balls. Just drop a chilled ball into the melted chocolate, and use one fork to roll it around and lift it out. Then, tap the fork on the side of the bowl to help excess chocolate drip off. Use the second fork to help slide the ball off the first fork onto the parchment paper so that you don't end up with a large pool of chocolate at the base of the ball.
- If the chocolate starts to thicken too much while you are working on coating the balls, you can pop it back in the microwave for 10 seconds to thin it back out.
- When using crushed peanuts or sprinkles as decorations, you'll want to decorate the ball immediately after dipping or drizzling the chocolate on top as melting wafer chocolate hardens very quickly. We need the chocolate to be melty enough for the decorations to stick.
- When I bring a dessert to a party, I like to decorate it so people get a little hint of what is on the inside too. For anyone with allergies, sprinkling crushed peanuts on the outside makes these truffles clear it's a dessert made with peanuts. But it also looks cute and classy too. Bonus!
FAQ
Chocolate melting wafers make coating truffles so much easier because you do not have to mess with tempering chocolate. Regular chocolate needs to be heated and cooled to just the right temperatures to get that shiny finish and snap. And if it's not done right, the finished chocolate can look dull or stay soft. Melting wafers melt smoothly, dip easily and set up firm and glossy. They just make the whole process a lot easier.
I use a small cookie scoop to portion out one tablespoon of the peanut butter mixture at a time so that the balls are all about the same size. To form the main ball shape, roll each scooped mixture between the palms of your hands. If needed, use your fingers to finish shaping into a ball. The balls need to set in the freezer for 30 minutes before you coat them with chocolate. If you are not happy with the initial shape, take them out after about 10 minutes, quickly reshape them and return them to the freezer to finish setting.
Related
Looking for other recipes like this? Try these:


Chocolate Peanut Butter Truffles
Equipment
- 1 Stand or hand mixer
Ingredients
- 1 cup creamy peanut butter room temperature
- ¼ cup salted butter room temperature
- 2 cups powdered sugar
- 10 ounces chocolate melting wafers
Instructions
- Line a baking sheet with parchment paper.
- In a large bowl, mix together the room temperature peanut butter and salted butter until well blended and no lumps remain.
- Add the powdered sugar ½ cup at a time, mixing well after each addition until well blended.*
- Shape the mixture into one tablespoon sized balls and place them on the baking sheet. (A small one-tablespoon cookie scoop is perfect to get the right amount.) Transfer the baking sheet to the freezer for 30 minutes.
- Melt the chocolate wafers according to the package instructions or in the microwave in 30 second intervals, stirring between each interval. When the wafers are almost melted, stir until all chocolate is melted and no lumps remain.
- Line a second baking sheet or plate with parchment paper.
- Remove the balls from the freezer in 2 or 3 batches, keeping the rest frozen.
- Drop one ball at a time into the melted chocolate and roll to coat completely. Use a chocolate dipping tool or two forks to lift it out, letting the excess chocolate drip back in to the bowl.
- Place the coated balls on the baking sheet to set. Melting chocolate hardens fast. If you are decorating with sprinkles or crushed peanuts without a chocolate drizzle, add them right away before the chocolate hardens.
- If you have leftover chocolate, heat it in the microwave for 10-15 seconds. Put it in squeeze bottle or use a spoon to drizzle it over the balls. You can add crushed peanuts or sprinkles after the drizzle as well.
- Once the chocolate has hardened, place them in the refrigerator until ready to serve.
Notes
Would you like to save this?
Don't worry! We won't spam you!


Leave a Reply