
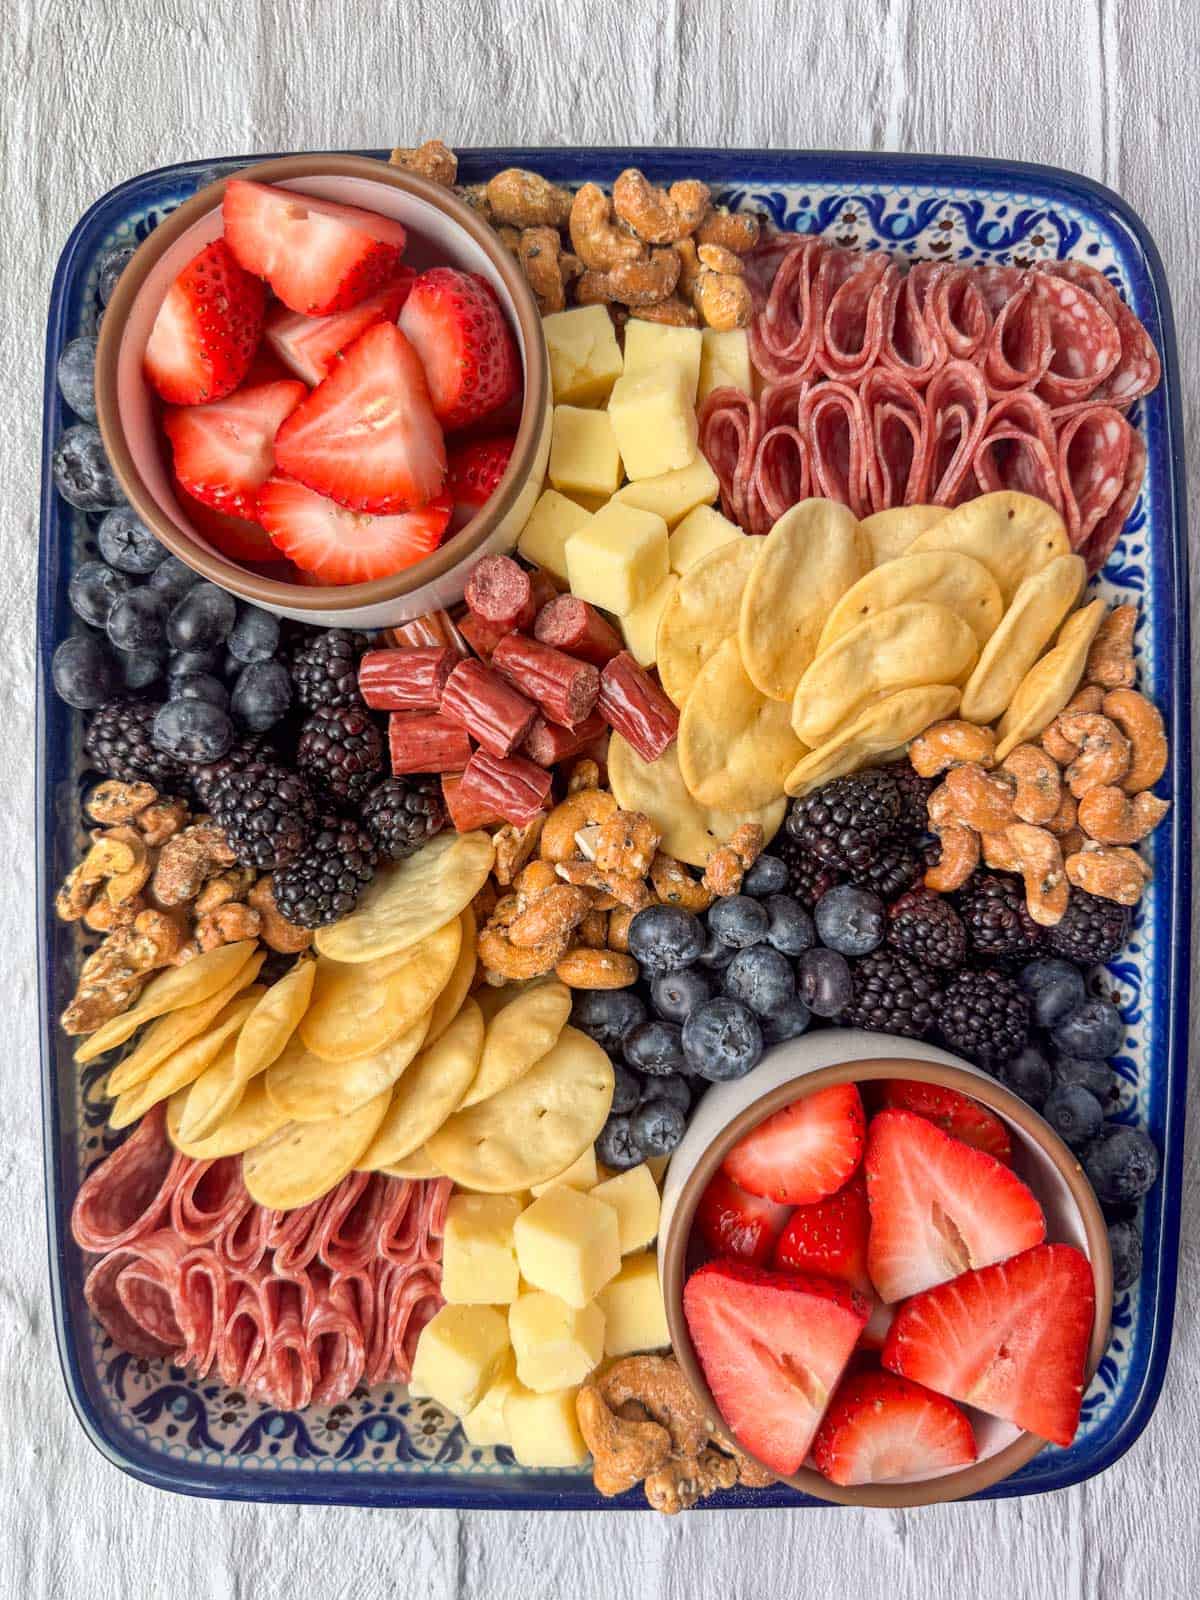
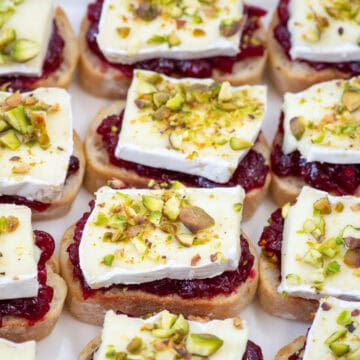
Aldi makes shopping for cheeses, meats, fruits and fancy snacks for a charcuterie board cheap and easy. The best of both worlds! Aldi has a great selection of very budget friendly choices that look great and taste fantastic. And we'll show you how to create an Aldi Charcuterie Board for under $30 too. No, this post is not sponsored by Aldi. I just love the store.
Charcuterie boards are fun and fancy, which is a great combination. A lot of things are fun but not fancy or fancy but not fun. Yet, charcuterie boards are both! I used to find building them stressful and expensive though. But after I learned a few tips on how to build them and create them cheaply, it's now super easy. For this charcuterie board, we bought everything at Aldi and the goal was to stay under $30, which we did. Aldi seems to be opening a lot of new stores near us, so they are very convenient. But if you don't have an Aldi near you, look for a Trader Joe's. Then check out my how to build a cheap charcuterie board post where we bought all the ingredients at Trader Joe's.
Jump to:
Aldi Charcuterie Board Shopping List
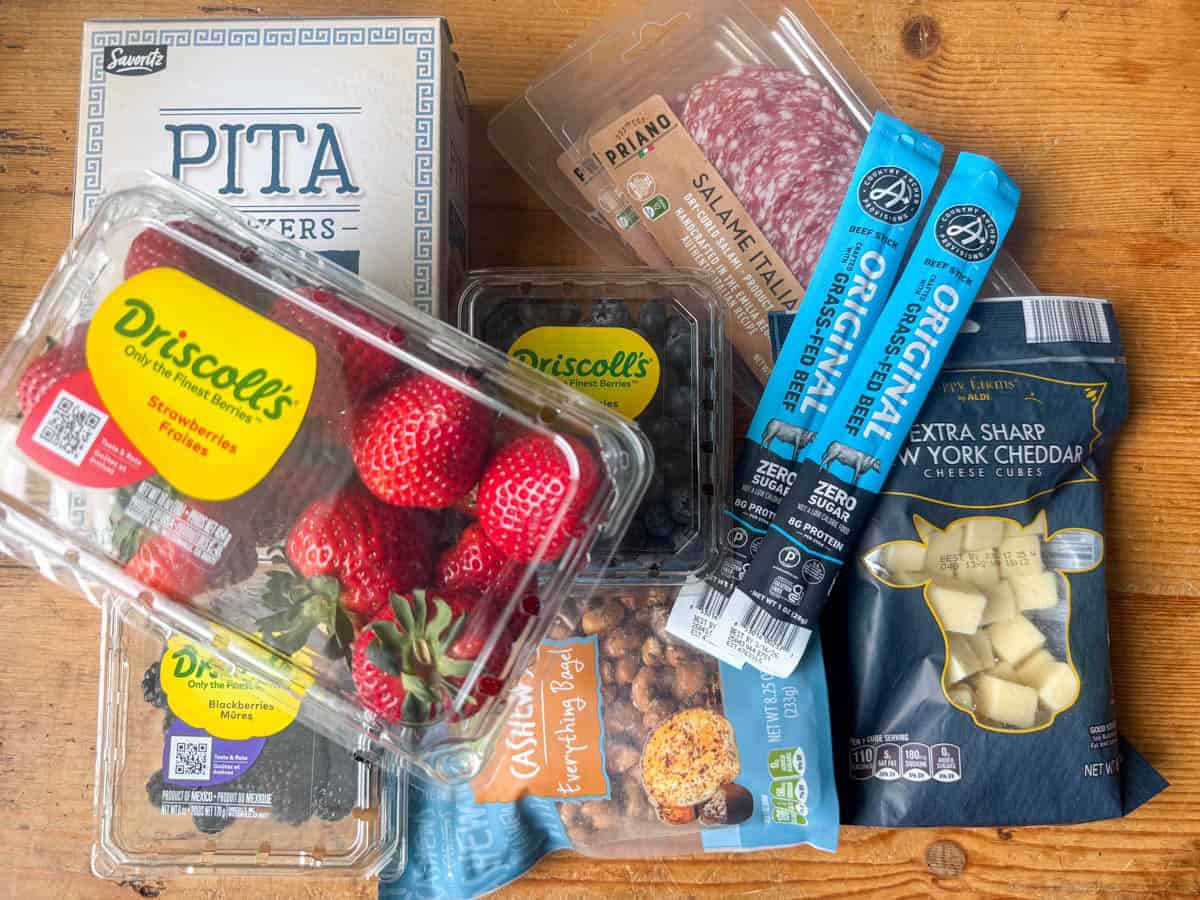
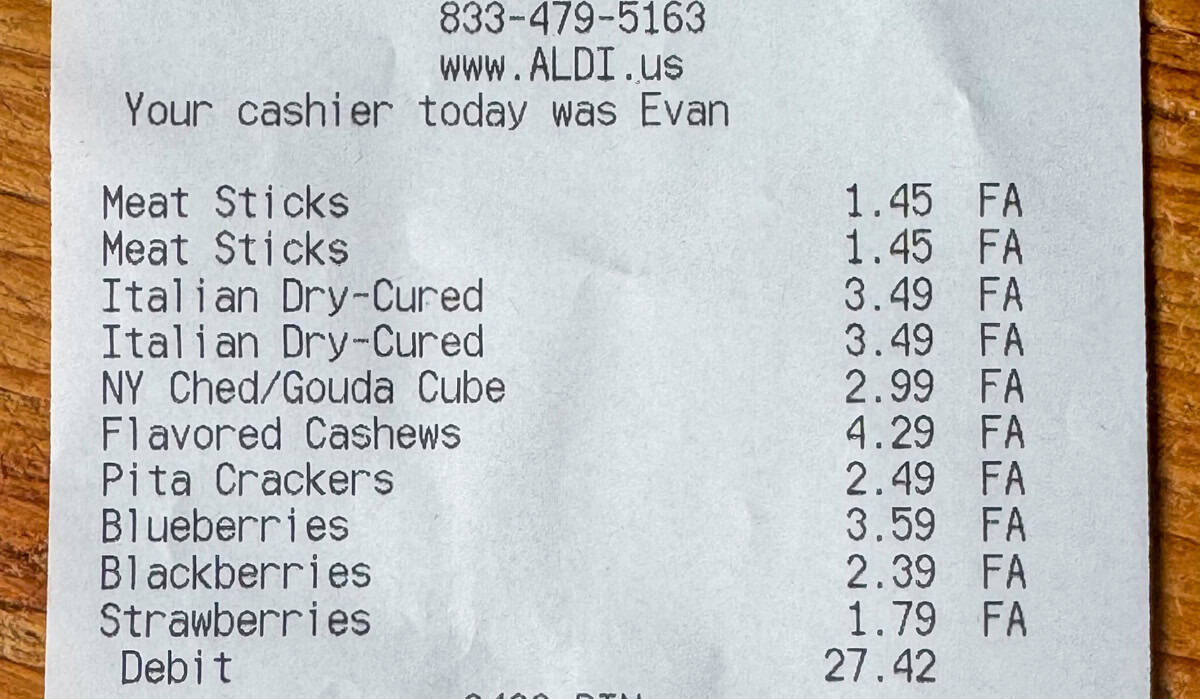
Here is what we bought (see receipt below):
- One pack of cheese cubes ($2.99)
- One package of pita crackers ($2.49)
- Two beef sticks ($1.45 each)
- Two packages of salami ($3.49 each)
- One package of everything bagel cashews ($4.29)
- Strawberries ($1.79), Blueberries ($3.59) and Blackberries ($2.39)
Cost
The cost of a charcuterie board can get expensive if you're shopping at a regular grocery store. However, making a charcuterie board shopping list and shopping at a low cost store like Aldi will help bring down the cost. Our budget was $30, and our total came in under budget at $27.42. See the receipt photo above. It's totally reasonable and actually easy to make a cheap charcuterie board that looks and tastes fabulous.
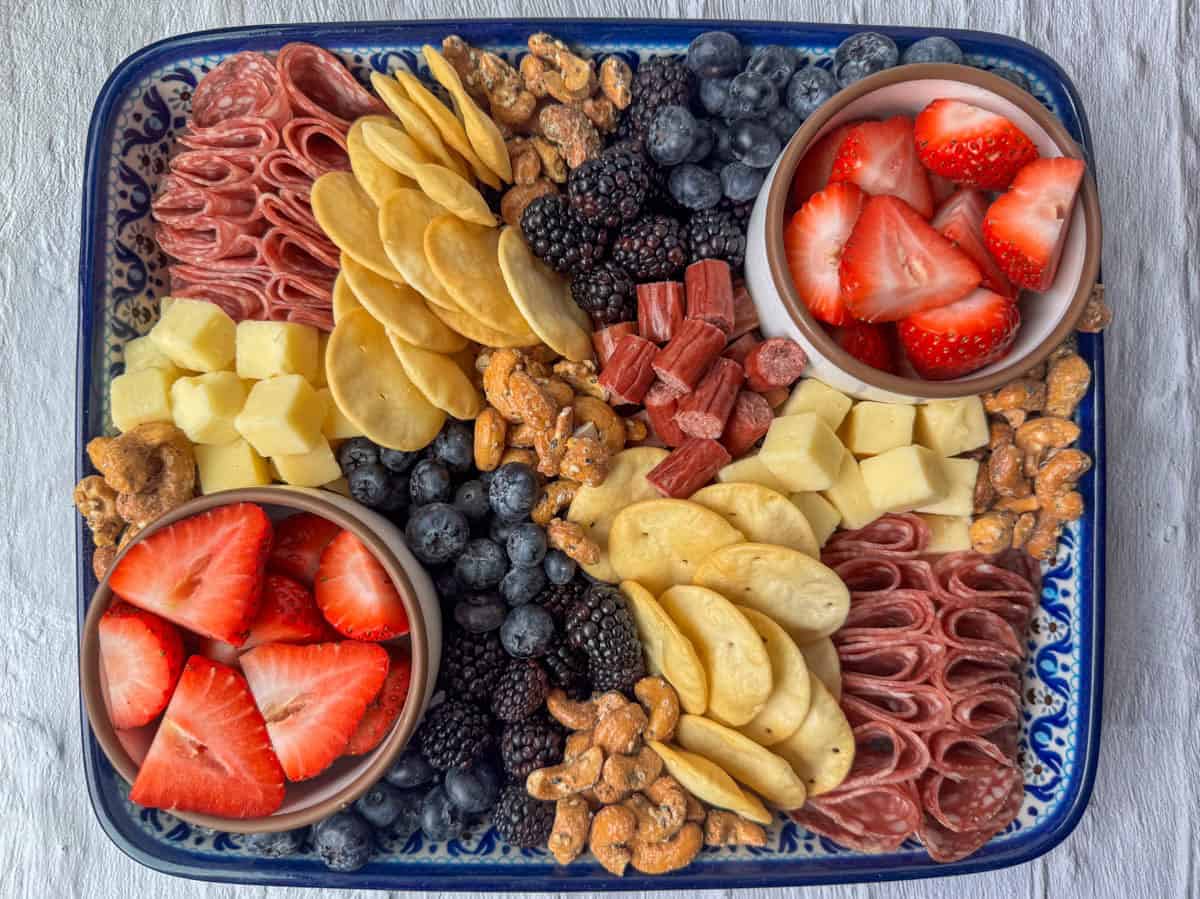
Instructions for making the charcuterie board
If you want step by step instructions with photos on how to build another cheap charcuterie spread from Trader Joe's, check out my how to make a cheap charcuterie board post with step by step photos and instructions.
What is a charcuterie box?
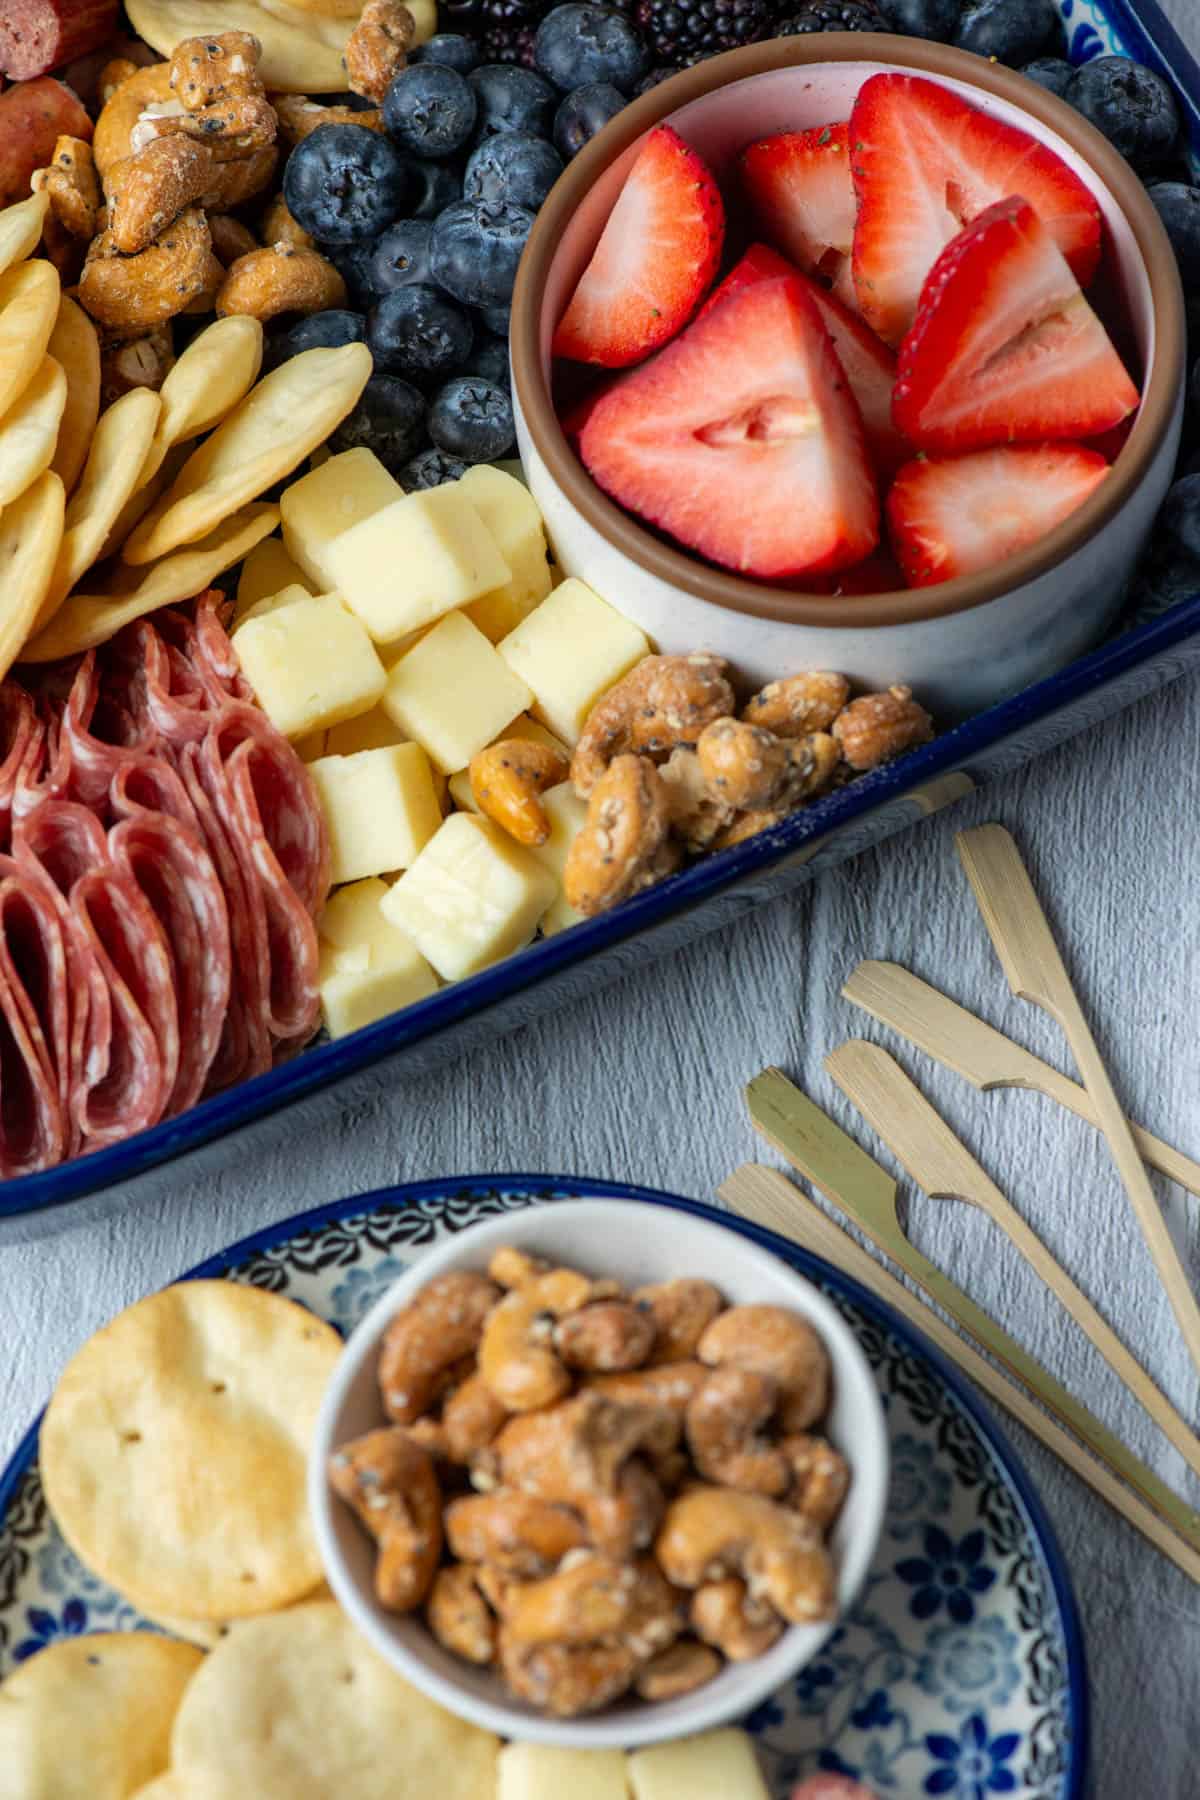
A charcuterie box is a more portable charcuterie spread that is typically packaged in a bakery box or in a pan with a lip. The pan we used for this charcuterie spread was 10.5 inches by 12.5 inches with a 1.5 inches high lip. So why did we put our charcuterie spread in a pan? Because we were taking it to a get together, and it's so much easier to transport! If you're serving your charcuterie spread at home, using a board is easy. But transporting the board isn't always easy. So using a pan or a bakery box where the ingredients don't shift while traveling is key. Using a ceramic pan or a box lined with parchment paper helps prevent any staining of your charcuterie board too. Here are some common options for a charcuterie box:
- A baking or serving pan with a lip
- A quarter-sheet or half-sheet baking sheet
- A bakery box lined with parchment paper
You can buy bakery boxes at places like Hobby Lobby or Amazon. A 10x10 inch box is perfect for a smaller square spread and a 10x14 inch box is perfect for a more typical sized charcuterie spread. Some bakery boxes have cute little windows too.

Substitutions
- Gluten free - make sure to choose gluten free crackers.
- Vegan - skip the meats (or use meat substitutes) and use vegan cheeses.
Storage
To store leftover charcuterie board ingredients, separate them into different air tight containers. Meats, cheeses and fruits go in the refrigerator. Crackers can be stored at room temperature.
Next Level Tips
- We built this Aldi charcuterie board with only ingredients we purchased at Aldi with a budget of $30. But, you can always fill in your board with ingredients you already have at home. I usually have other nuts, olives, carrots, hummus and little jam and honey jars at home. Sometimes, I'll use baguette slices, mustards, chocolates and other candies if I have those too. The options are limitless, and it will save even more money if you use some ingredients that you already have on hand.
- Fruits for charcuterie boards can be one of the most expensive parts. Choosing fruits that are in season will help reduce the costs. When we were in the produce section, we noticed that strawberries were on sale so we knew our board would have strawberries!
- Putting your charcuterie spread in a box or a pan with a lip is perfect for traveling. But using a pan with a lip is a great idea to use at home too. The lip allows you to pile more ingredients on (so you have to refill it less) and it prevents any ingredients from tumbling off too.

Related
Looking for other recipes for brunch? Try these:


Aldi Charcuterie Board
Ingredients
- 1-2 different types of cheeses
- 1-2 different types of cured meats
- 1-2 different types of crackers
- 1 or more different fruits
- 1 or more different types of nuts
Instructions
- Chop any ingredients that need to be chopped.
- When you are building the board, start by adding enough ingredients to cover the bottom of the board. (Then go back in and layer more once you have added some of all of the ingredients and are happy with your basic design.)
- Place any ingredients that are watery, like cut strawberries or olives, in little bowls. You can also use little bowls for decorative purposes.
- If you are building a box, it's easier to start at the edges and work your way in. Start by placing some fruit and folded or rolled cured meats in opposite corners.
- Add some cheese(s) near the meats and some crackers near the cheese(s).
- Add in any other types of fruit near the existing fruit.
- Fill in any holes with nuts or more meats.
- Once the bottom of the board/box/pan is completely covered, layer in more ingredients to give the board more bulk. If you don't want to refill the board, make sure the board is as full as possible before serving.
- Serve or refrigerate.
Would you like to save this?
Don't worry! We won't spam you!


Leave a Reply