Next Level Baker

menu icon
go to homepage
  • Recipes
  • Contact
  • About
  • Privacy Policy
  • Subscribe
subscribe
search icon
Homepage link
  • Recipes
  • Contact
  • About
  • Privacy Policy
  • Subscribe
×
Home

How to Make a Cheap Charcuterie Board

March 7, 2025 by Tracy @ Next Level Baker Leave a Comment

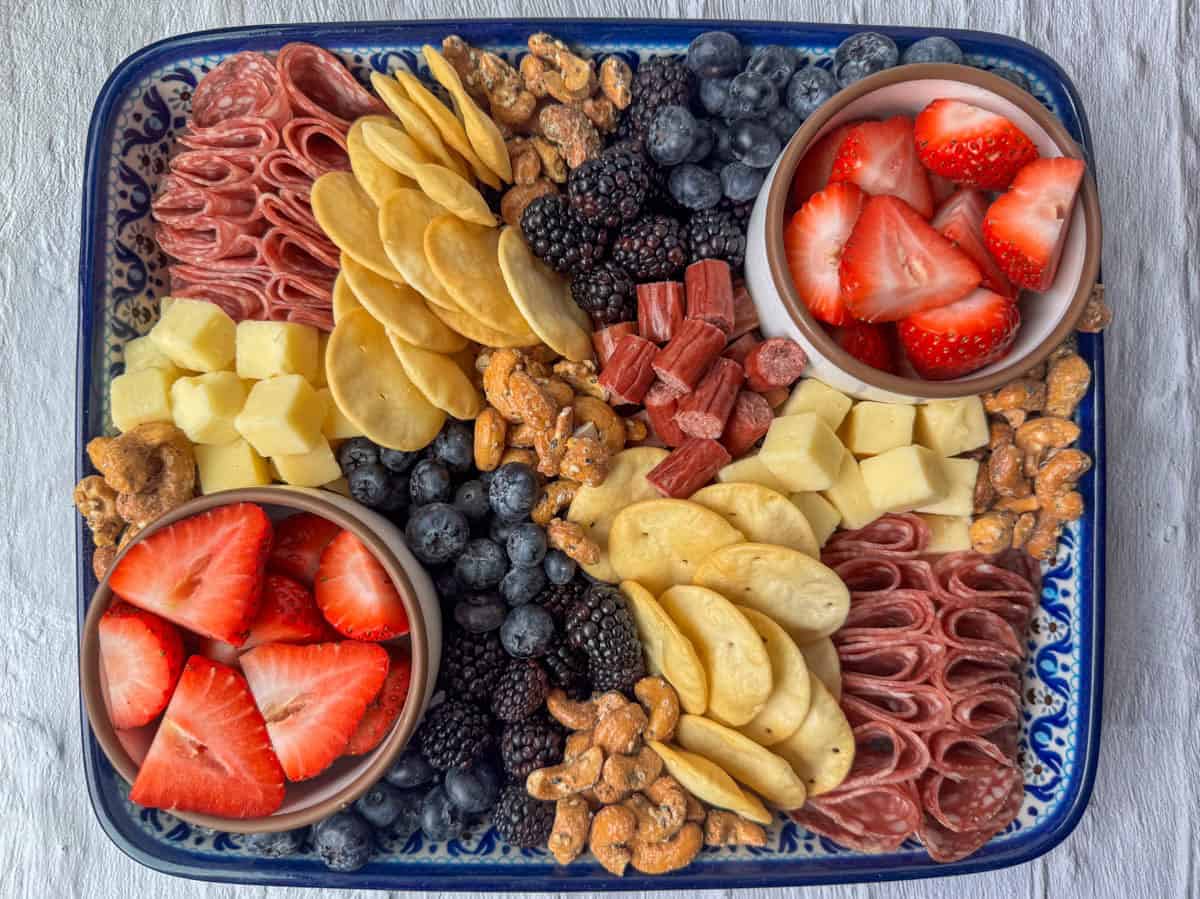
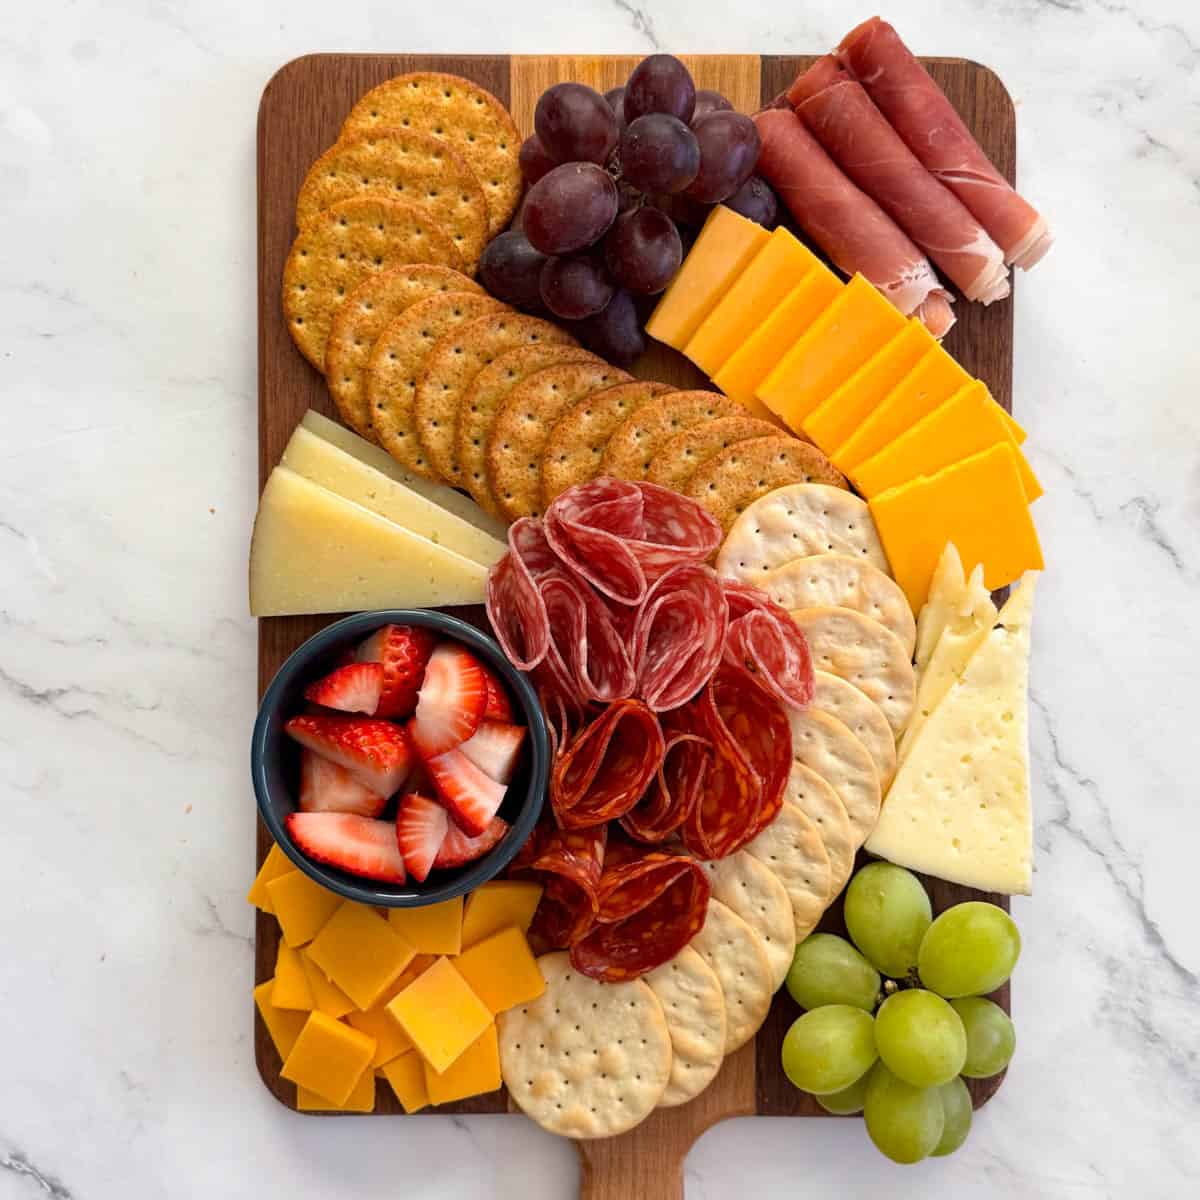
Building a cheap charcuterie board is easy if you follow a few simple tips. We will show you some cute and cheap charcuterie board ideas made with ingredients found at Trader Joe's. All for under $30 too! Cheap charcuterie boards are the perfect appetizer for your next game night, dinner party, holiday get together or brunch!

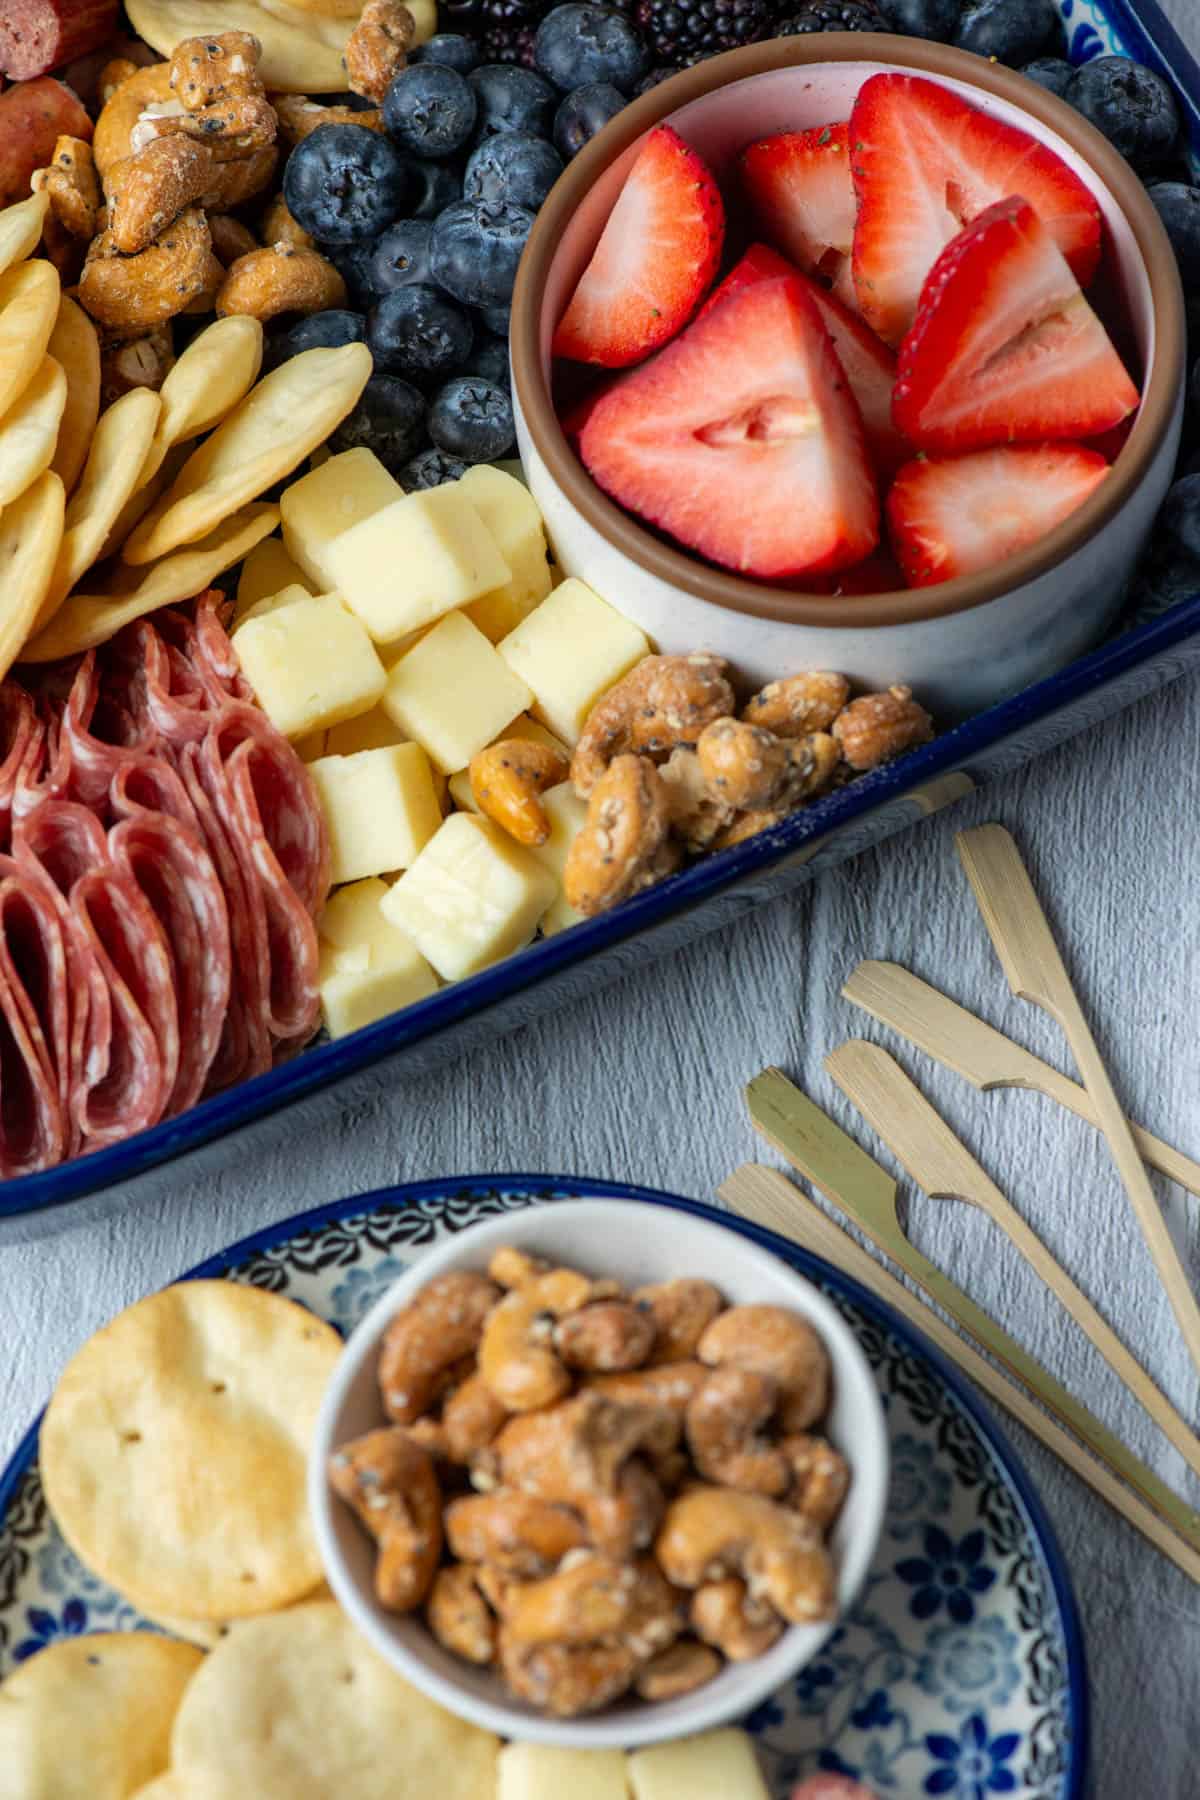
Top view of finished charcuterie board with assorted crackers, assorted meats, assorted cheeses, red and green grapes, and cut strawberries

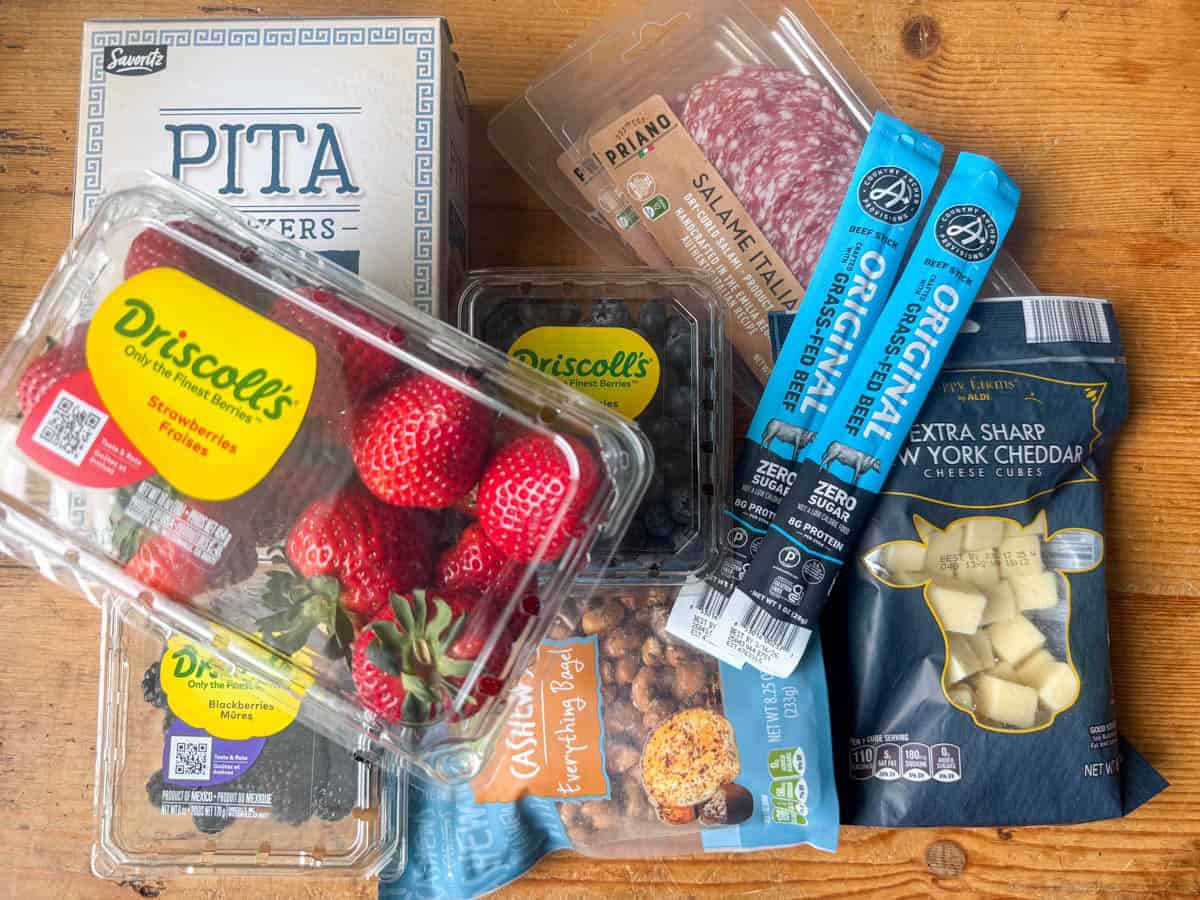
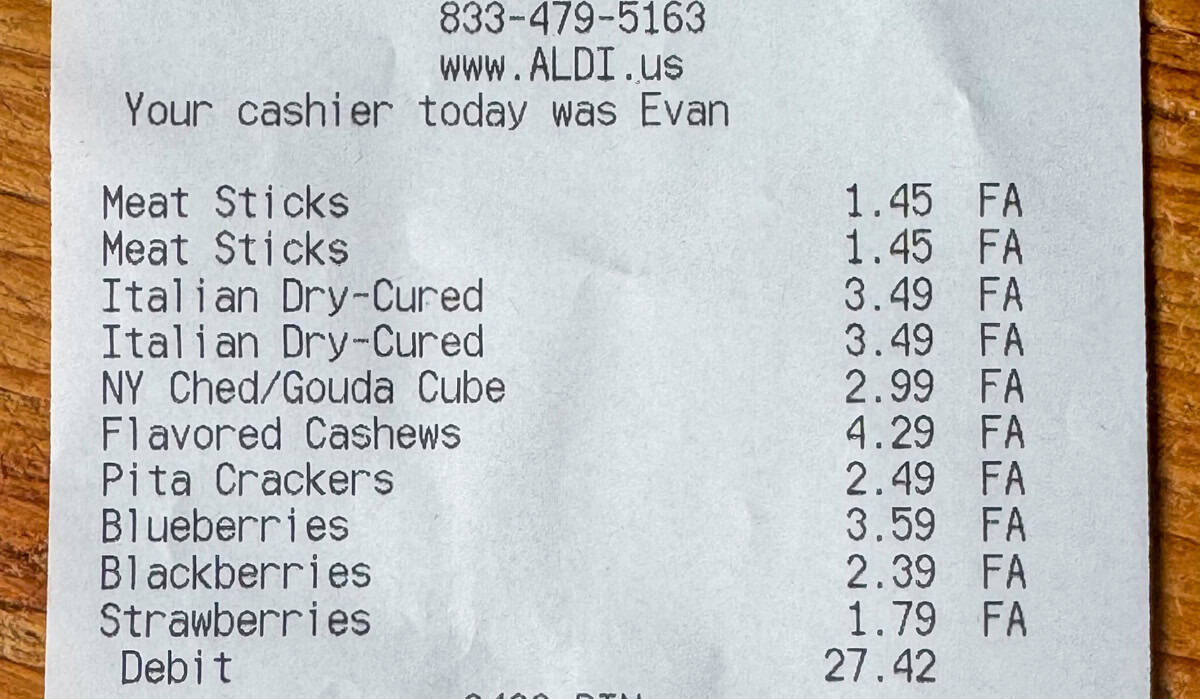
I'm not going to lie, making charcuterie boards used to cause me a little stress. But people love them. I love them. So I pressed on and made them anyway. But once I put different foods into category type and color, that made creating cute charcuterie boards a lot easier. However, charcuterie boards can get expensive if you're not careful. I found that both Trader Joe's and Aldi have perfect ingredients that cost a lot less. You can make a cute, easy charcuterie board from simple ingredients for under $30. For this post, we used ingredients from Trader Joe's. I'll even show you a step by step process and post my receipt!

[feast_advanced_jump_to]

Ingredients for an cheap charcuterie board

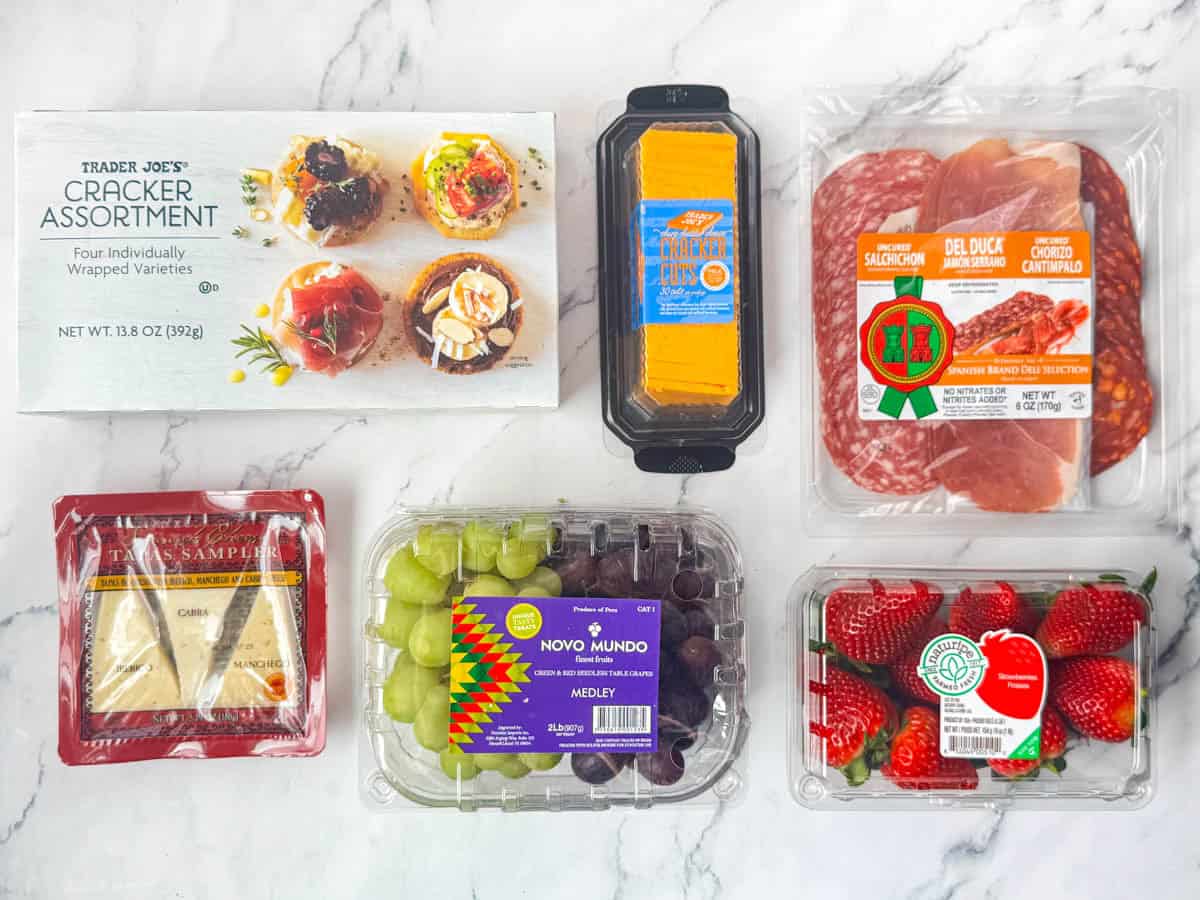
Ingredients need for making an easy charcuterie board: assorted crackers, cut cheddar cheese, assorted meats, Spanish white cheese sampler, red and green grapes, and strawberries
  • Two different colors or types of crackers (buy an assorted pack!)
  • Two different colors or types of cheeses (like cheddar or Spanish cheeses)
  • Two different types of meats (buy an assorted pack!)
  • Two different types of fruit (like grapes and berries)

Ideas for an easy charcuterie board

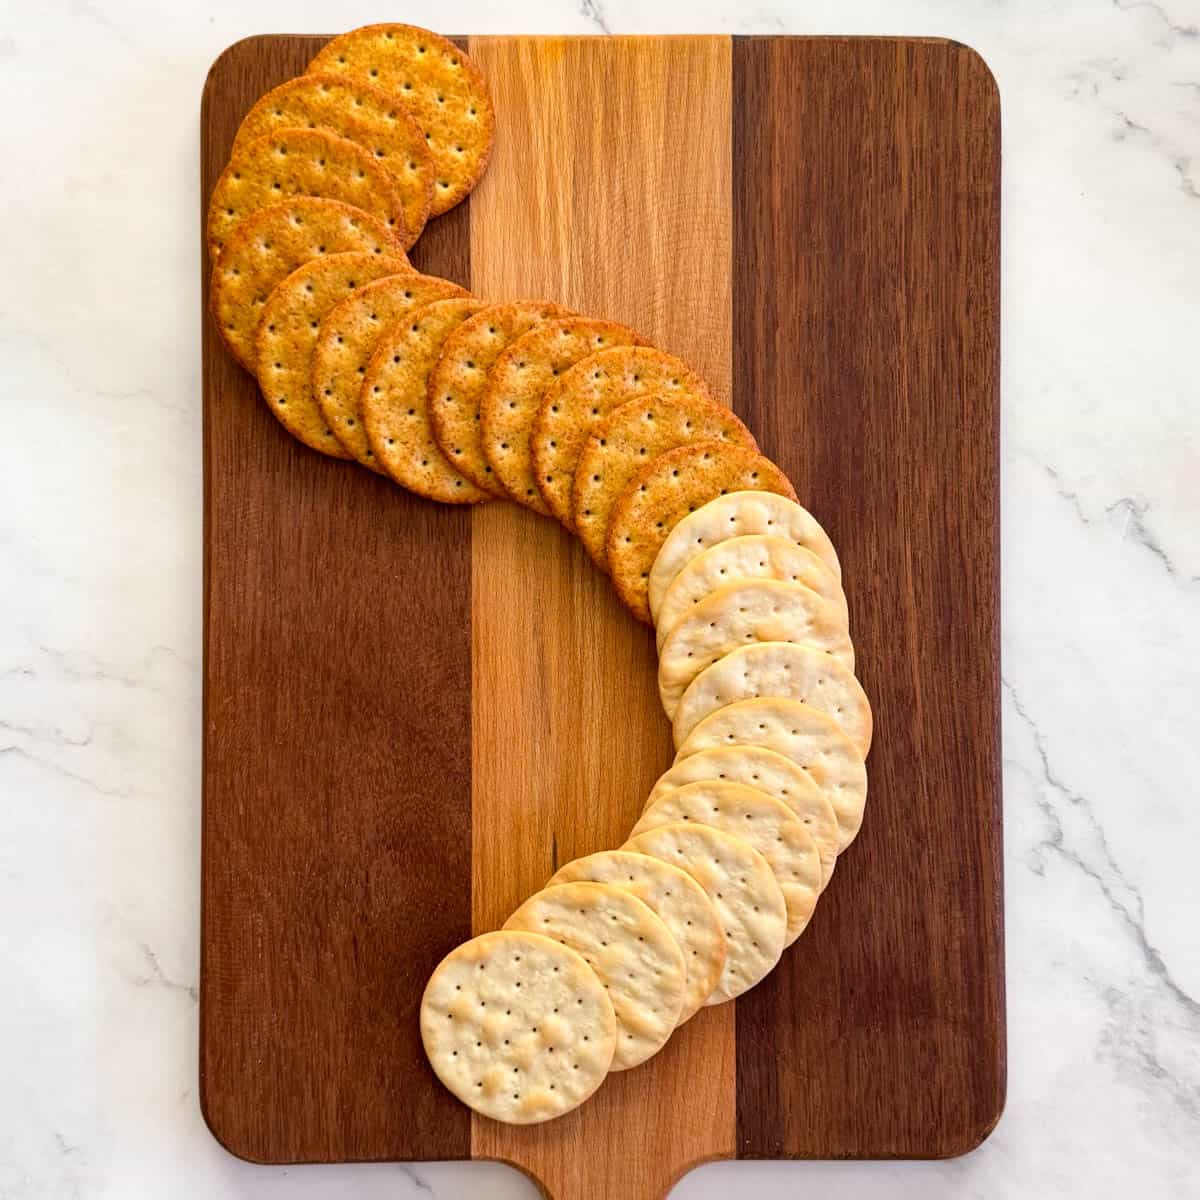
Step 1 of making a charcuterie board: place crackers in an S shape

Step 1: Lay out two different types of crackers in an S pattern.

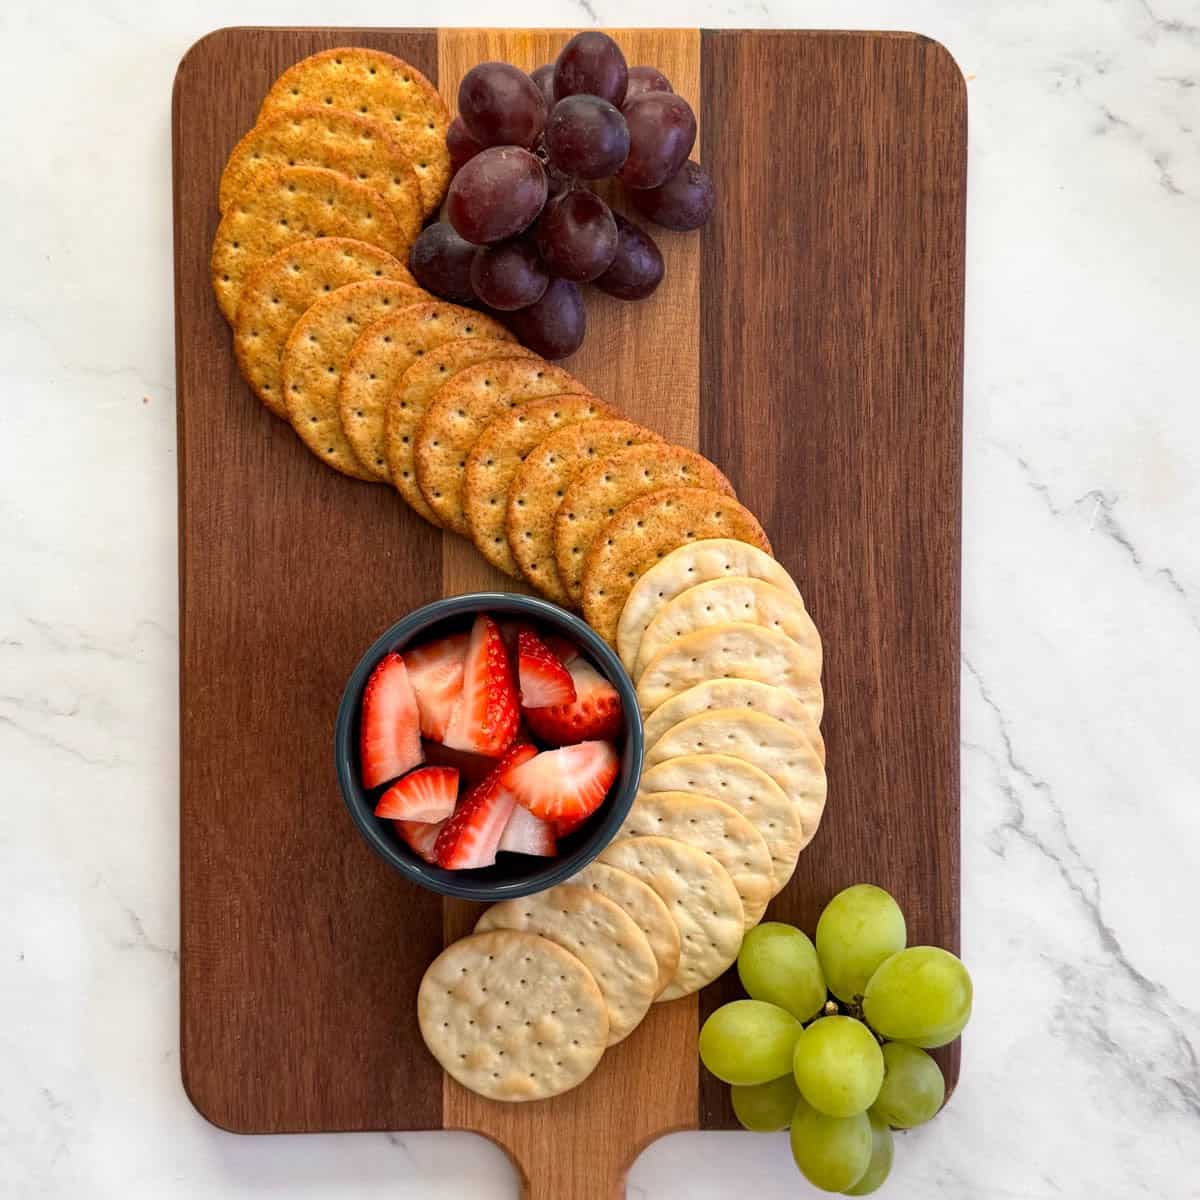
Step 2 of making a charcuterie board: add fruits near crackers on board

Step 2: Add two or more types of fruits in different spots so that they are not touching each other.

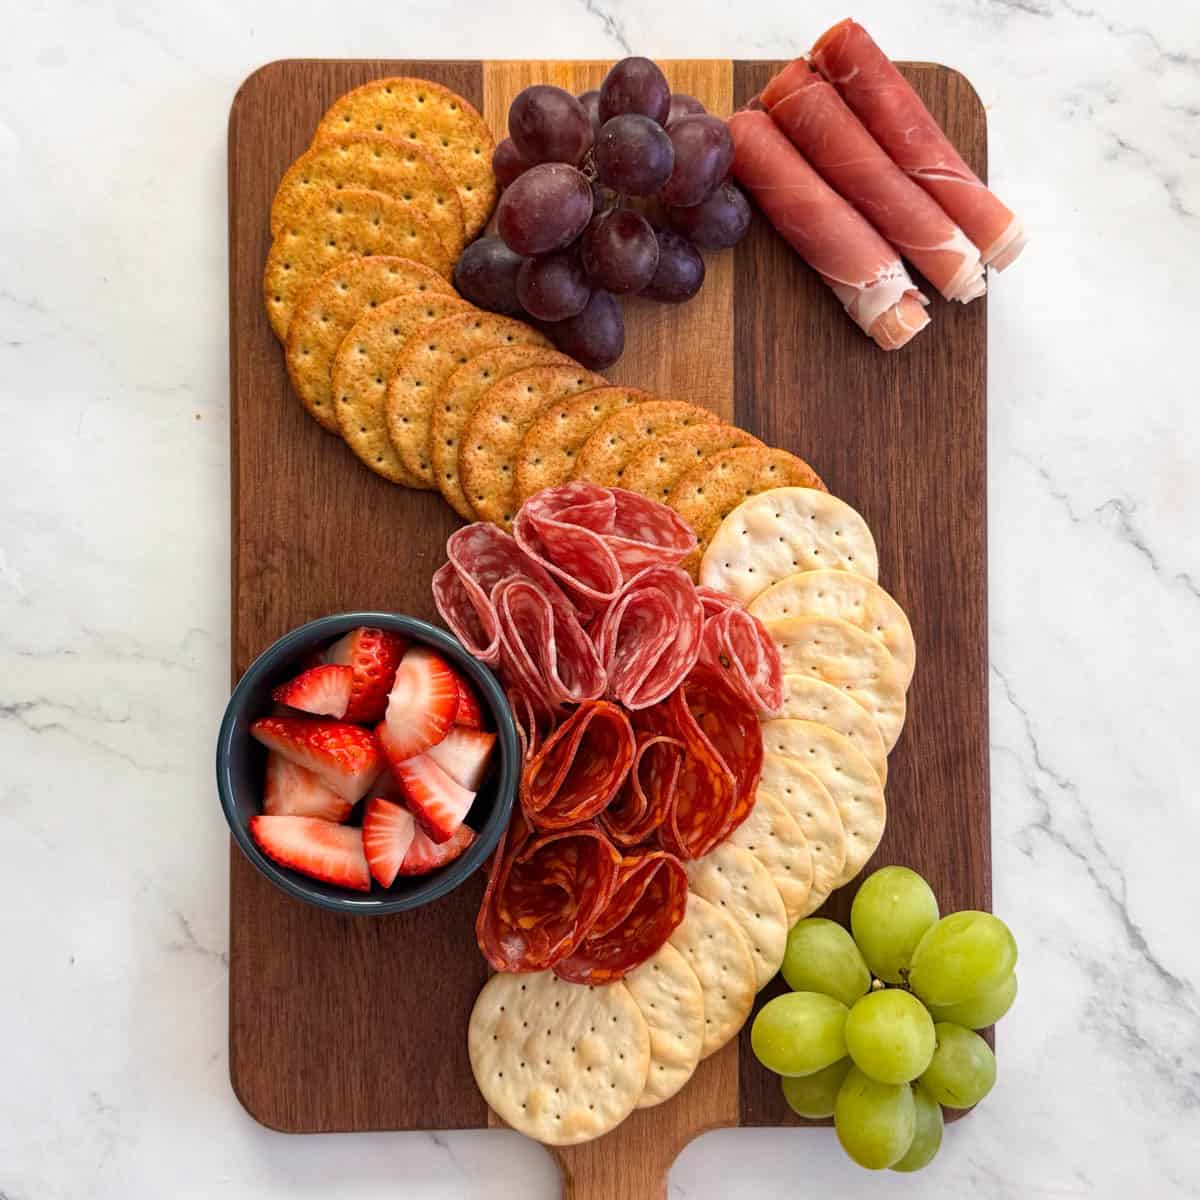
Step 3 of making a charcuterie board: add meats to crackers and fruits on the board

Step 3: Roll or fold two or more types of meats. Add them in different spots.

Step 4 of making a charcuterie board: fill in any remaining open spaces on the board with the cheeses

Step 4: Fill in all the remaining spots with two or more colors/types of cheeses.

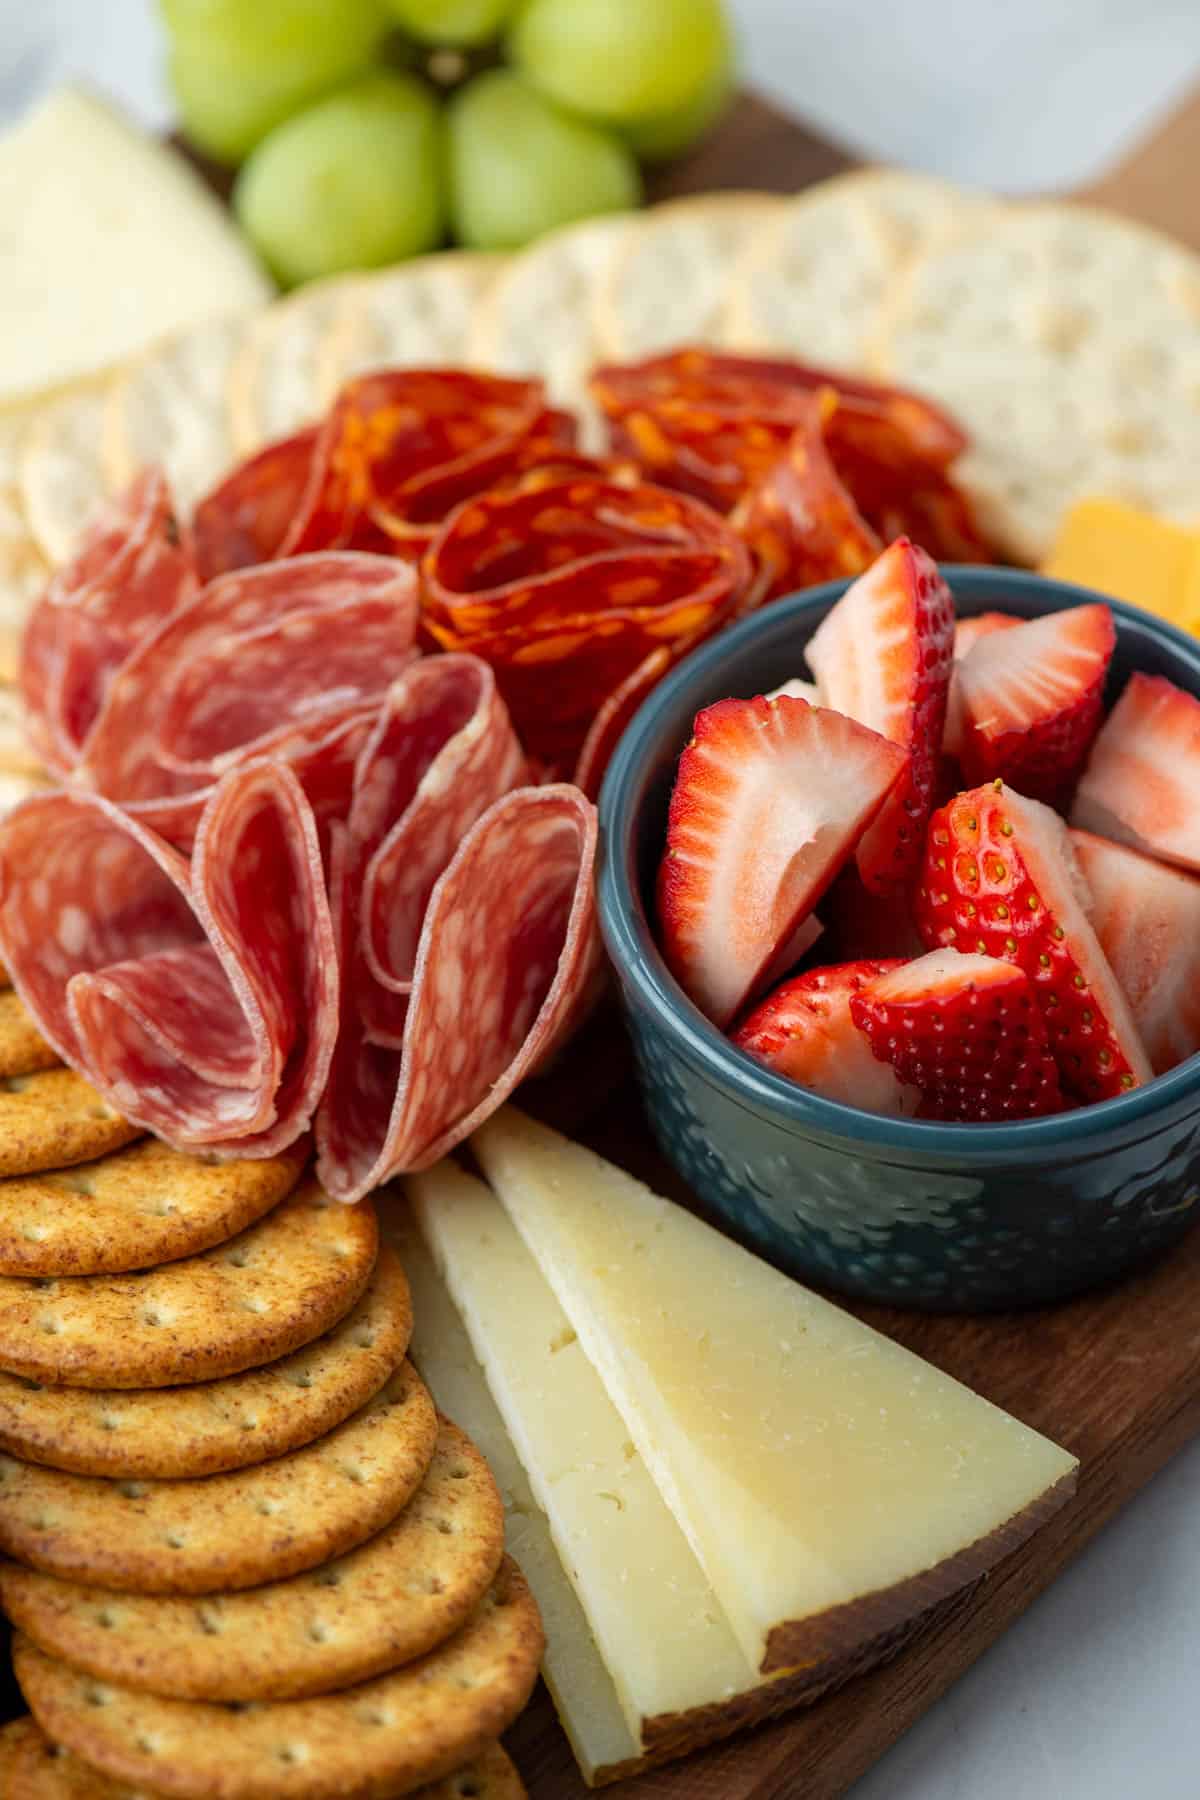
Close up photo of a charcuterie board

Substitutions

  • Gluten free - make sure to choose gluten free crackers.
  • Vegan - skip the meats (or use meat substitutes) and use vegan cheeses.

Storage

To store leftover charcuterie board ingredients, separate them into different air tight containers. Meats, cheeses and fruits go in the refrigerator. Crackers can be stored at room temperature.

Next Level Tips

  • This post was about making an easy and cheap charcuterie board from ingredients found at Trader Joe's. But you can always fill in your board with ingredients you already have at home. I usually have nuts, olives, carrots, hummus and little jam and honey jars at home. Sometimes, I'll use baguette slices, mustards, chocolates and other candies if I have those too.
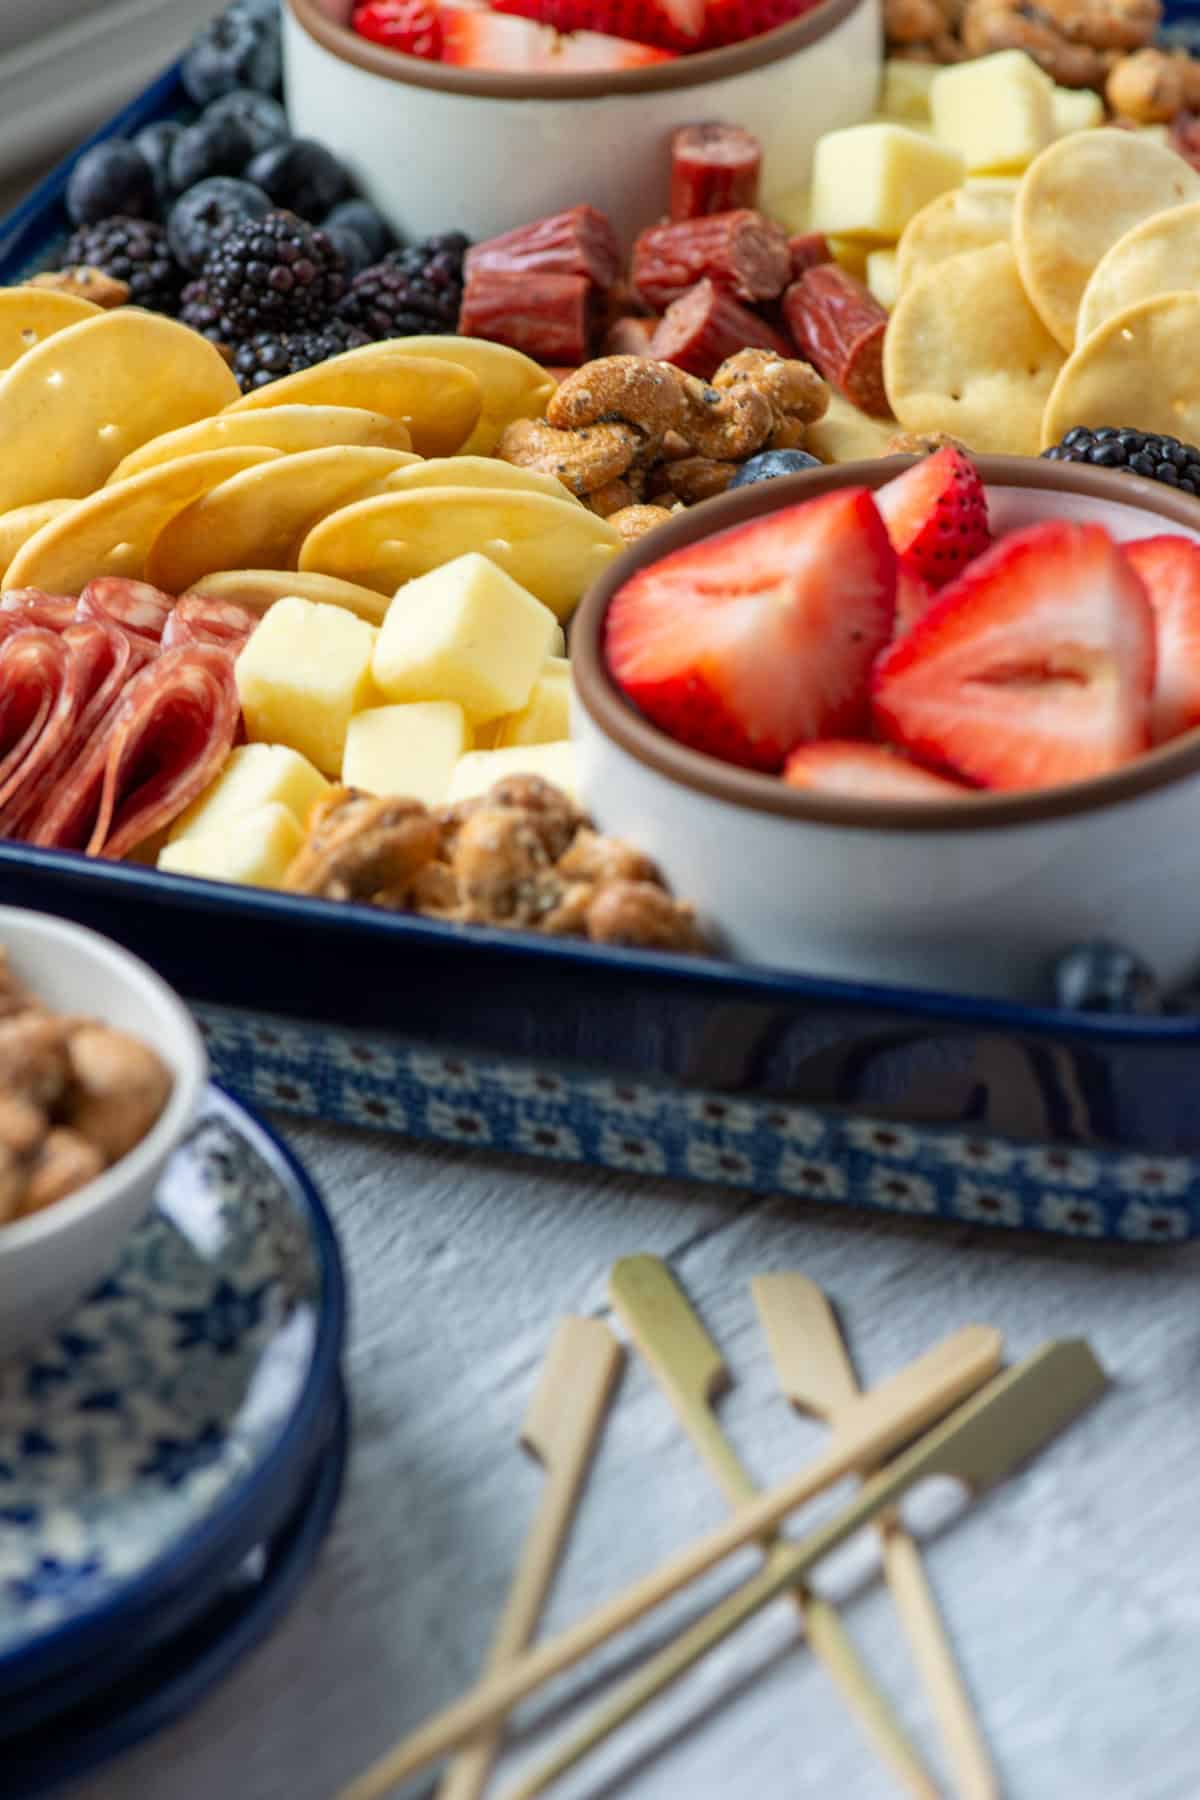
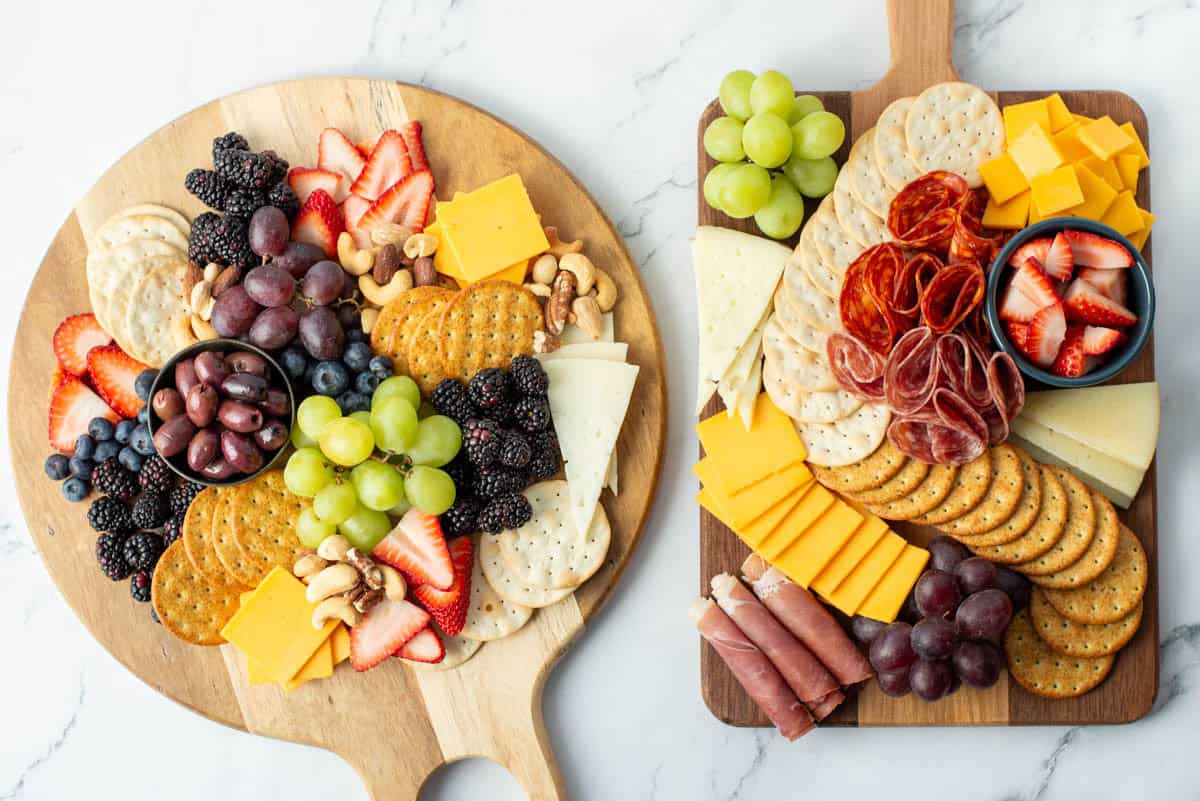
  • You can use any style or shape of board for your charcuterie board. You can even just use parchment paper on the counter! The dimensions of the boards in the photos are as follows: the rectangle board is 9x13 inches and the circle board is 13.5 inches in diameter.
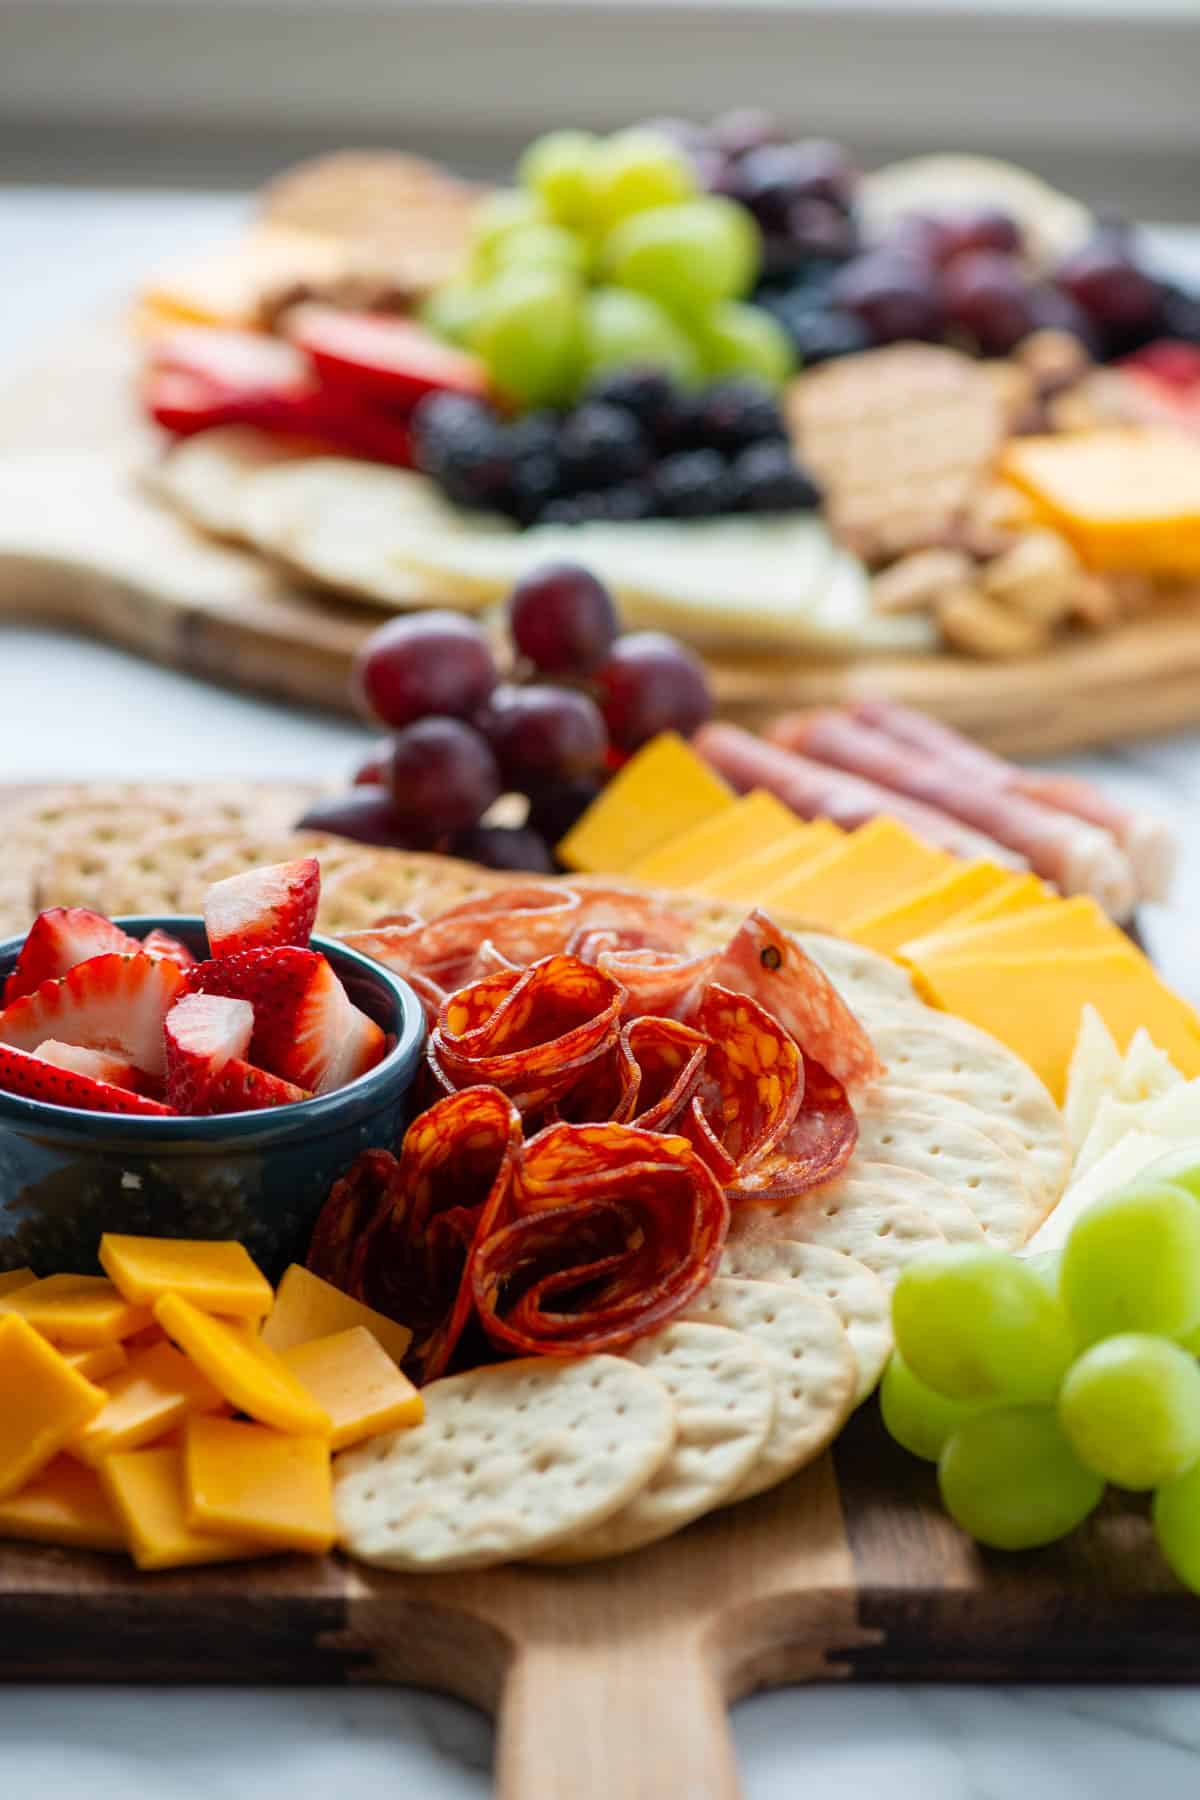
Side view of a full charcuterie board with another full charcuterie board in the background

Cost

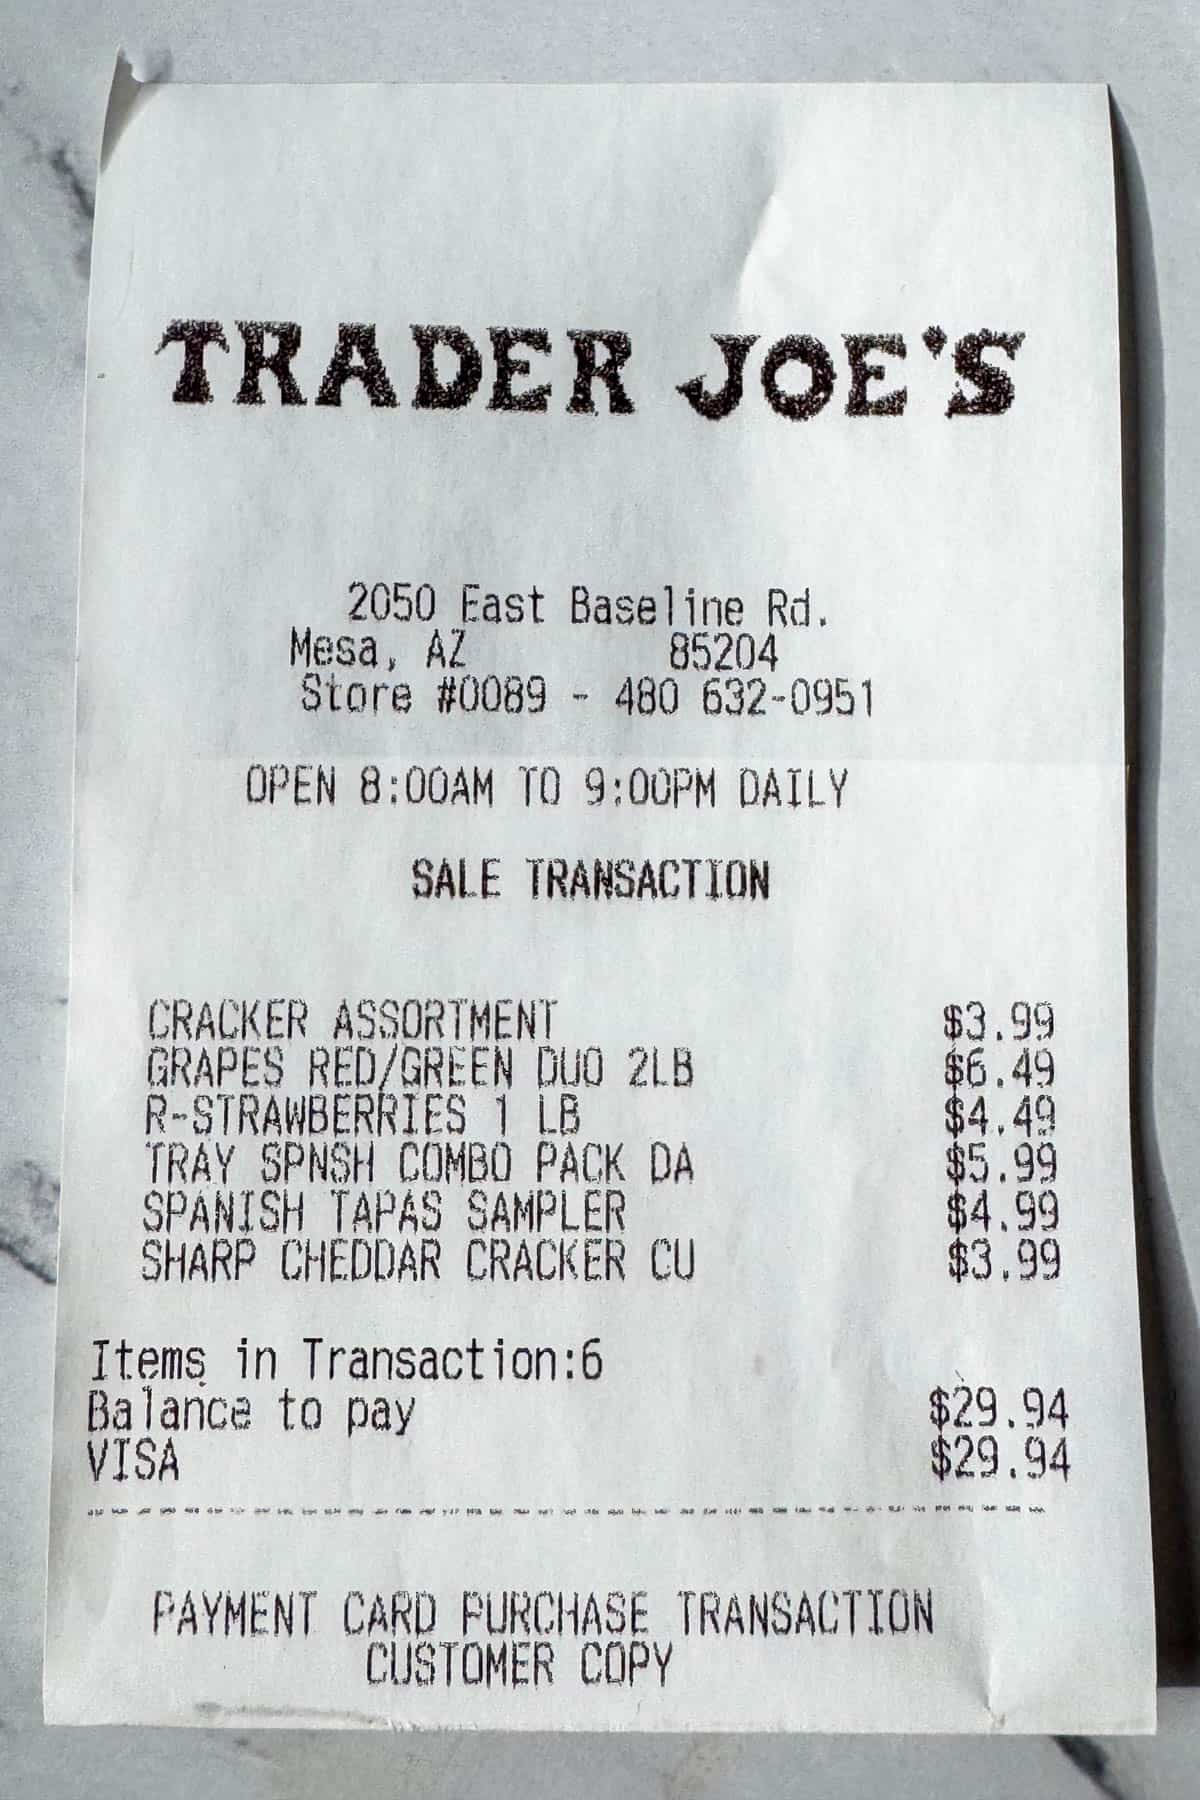
For this easy and cheap charcuterie board, we wanted to stay under a budget of $30. It was close, but we did by 6 cents! The most expensive part of our purchase was the fruit. My daughter loves to use grapes and strawberries in her charcuterie boards, but I think we could have saved money by picking other fruits that were cheaper at Trader Joe's.

Receipt from Trader Joes for charcuterie board ingredients

I've seen a lot of posts online where they say they made a charcuterie board for X dollars but then add a whole bunch of other stuff from home. So I wanted to make sure that our first board (the rectangle board) only used the items that we bought at Trader Joe's. And guess what? We did it and had leftovers too! So we decided to make a second board (the circle board). We had some meat leftover from the first board, but my daughter may have eaten it. Ahem. So for the second board, we decided to add items from home which were the nuts, olives, blackberries and blueberries. Even after the second board, we still had some leftover fruit and crackers from our Trader Joe's purchase.

Overhead view of two charcuterie boards next to each other

FAQ

How big of a board should I make?

If you're making a board on a budget, I would recommend using a medium-sized board. The rectangle board in the photos is 9x13 inches. If you are hosting, you can always refill the board as needed or make a second board with the leftovers. If you're taking the board to a party, medium size works for that too. You don't want to take a massive board somewhere if you don't know if it will fit and what other foods will be there.

What types of cheese should I use?

When you're doing a charcuterie board on a budget, we suggest using different colored and textures of cheeses. You can use a hard cheddar or a gouda for orange. For white, you can use a manchego (we bought a Spanish sampler at Trader Joe's), a soft brie, havarati or Monterey Jack. You can pick cheeses that would normally be eaten with crackers or cut the cheeses into smaller cubes or pieces so that they can be eaten any themselves.

What type of meats should I use?

Use at least two different types of meats. Prosciutto can be rolled. Pre-sliced hard salami meats are always a hit. Little beef sticks are a great finger food too. Even lunch meat will work! Just roll it and make it took pretty.

What types of crackers should I use?

Flat crackers like table water crackers always work. Buttered crackers and flavored crackers work too. If you have spicy cheeses and meats, pick plain crackers. If you're using more plain cheeses, then a flavored cracker is a perfect pick. Sliced baguette is a filling and inexpensive option too.

Related

Looking for other recipes like this? Try these:

  • Overhead view of randomly placed prosciutto wrapped dates on a white serving platter, some topped with balsamic glaze and some topped with hot honey and chopped pistachios
    Prosciutto Wrapped Dates
  • A bowl of guacamole with a chip sticking out surrounded by chips on a plate
    Easy 4-Ingredient Guacamole Recipe
  • Close up overhead view of squash toast cut in four pieces
    Butternut Squash Toast
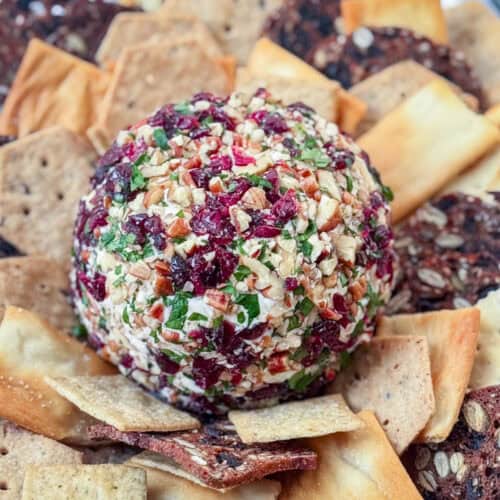
  • Cranberry and Pecan encrusted cheese ball surrounded by 4 different types of crackers
    Cranberry Pecan Cheese Ball

Pairing

These are my favorite dishes to serve with [this recipe]:

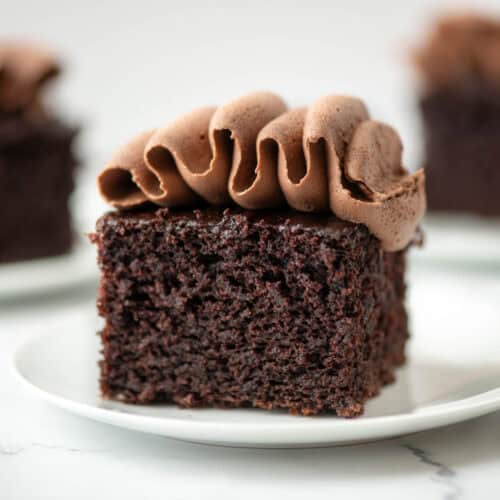
  • Close up photo of a slice of chocolate zucchini cake with chocolate buttercream frosting.
    Easy Chocolate Zucchini Cake
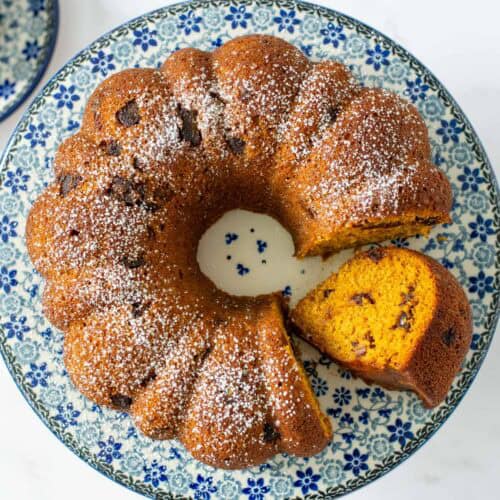
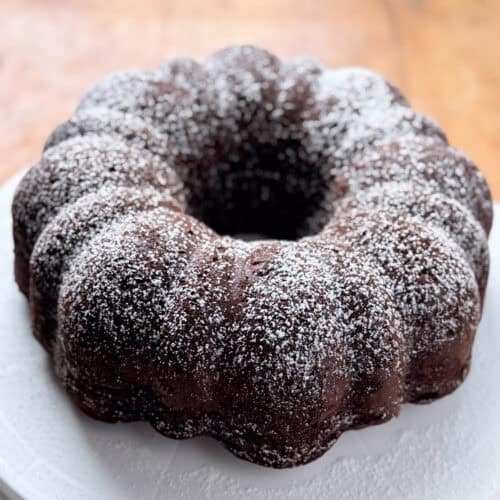
  • Top view of a chocolate bundt cake topped with powdered sugar
    Chocolate Bundt Cake
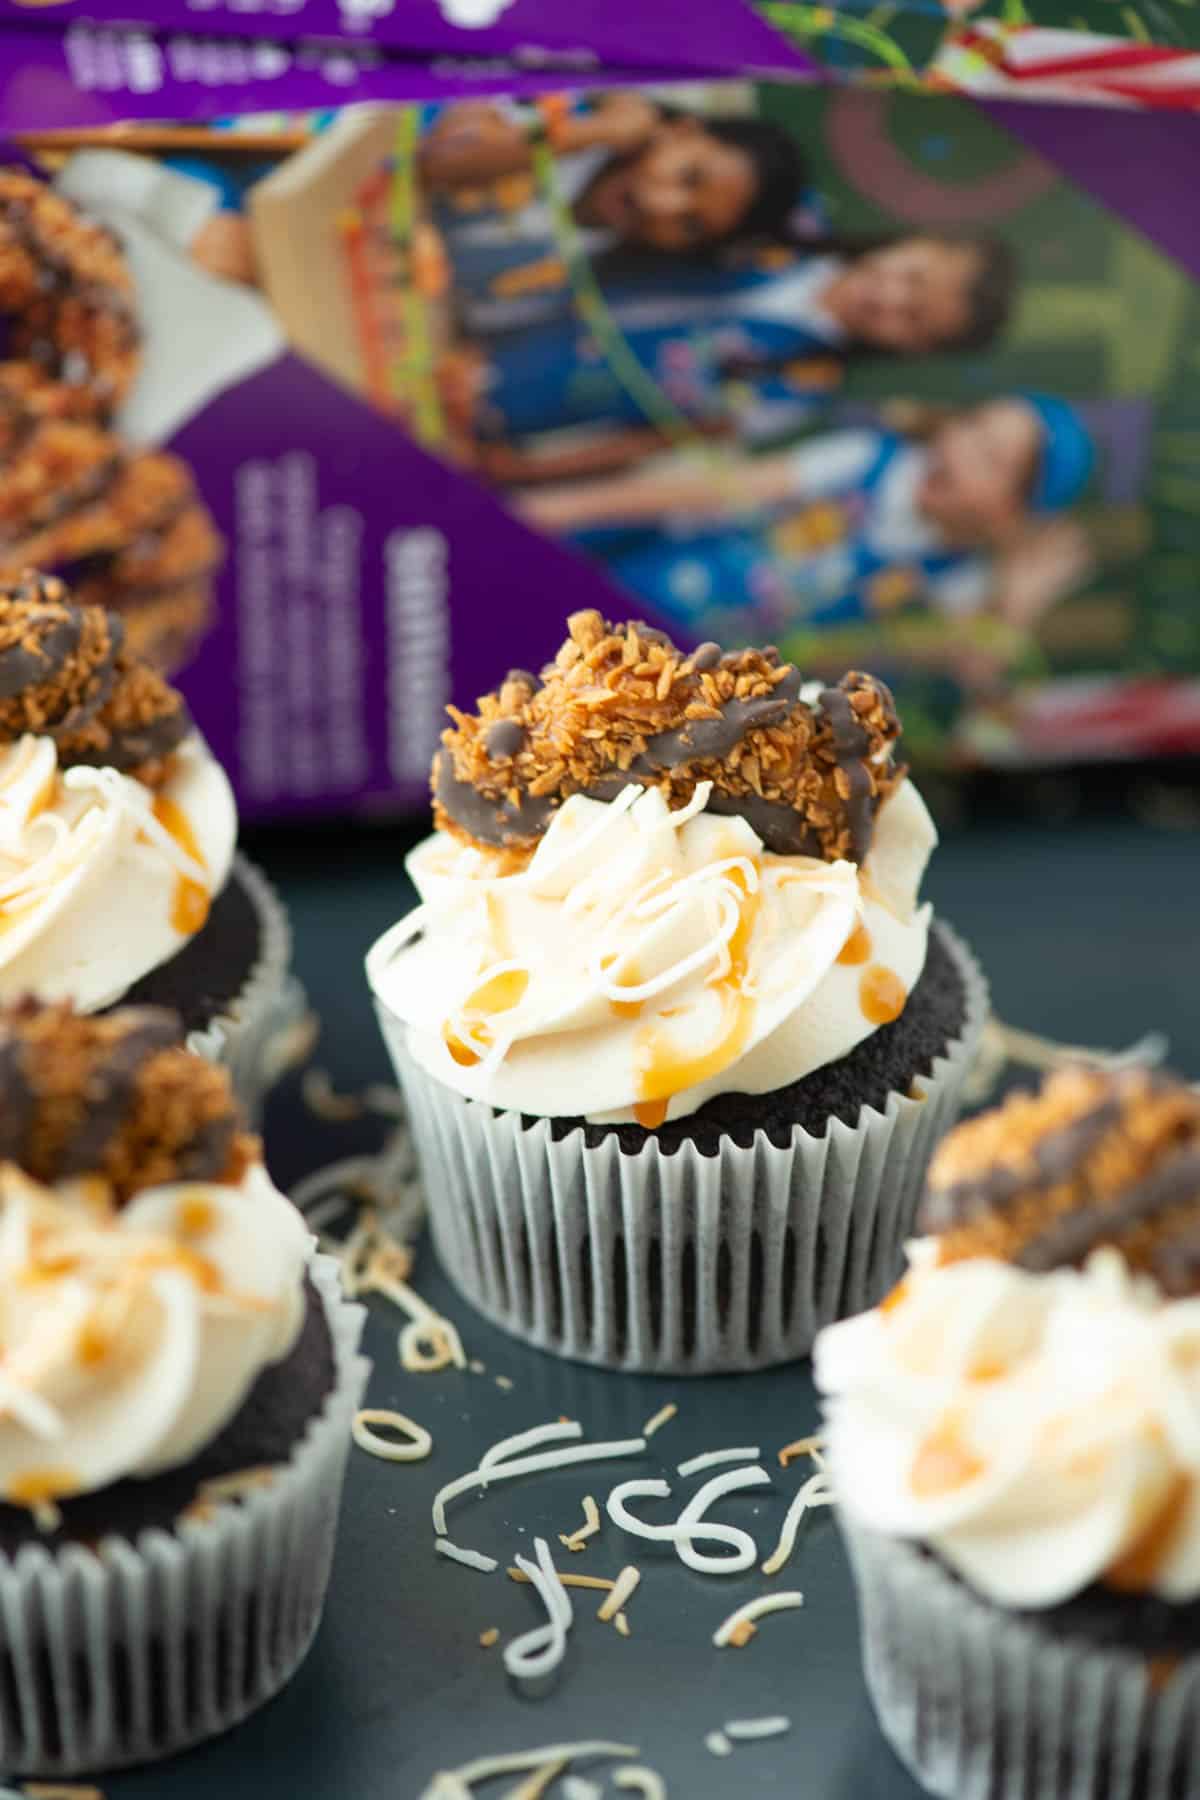
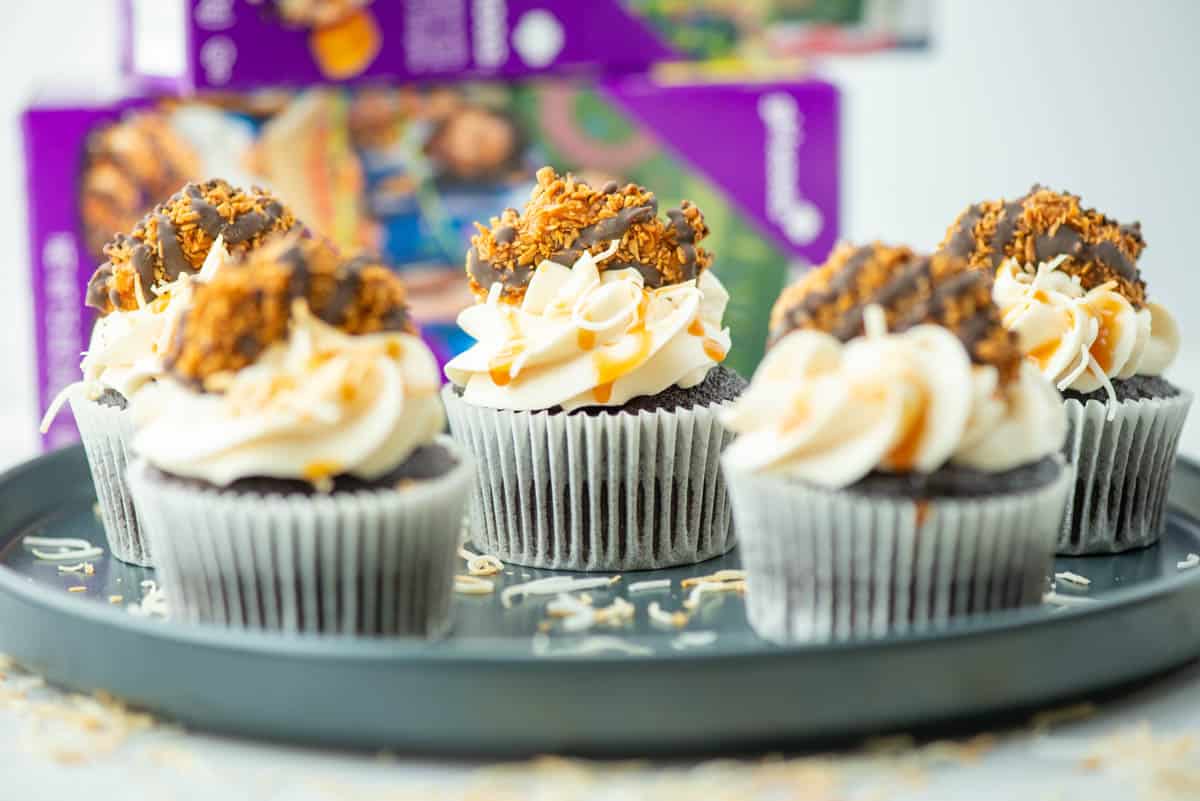
  • Close up of Samoas cupcakes on a plate with toasted coconut and a box of Samoas cookies blurred in the background
    Samoas Cupcakes
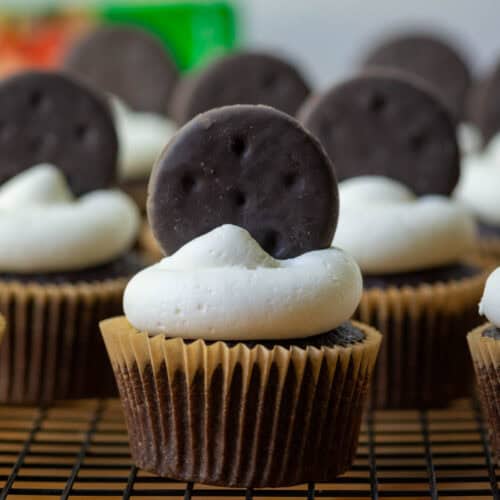
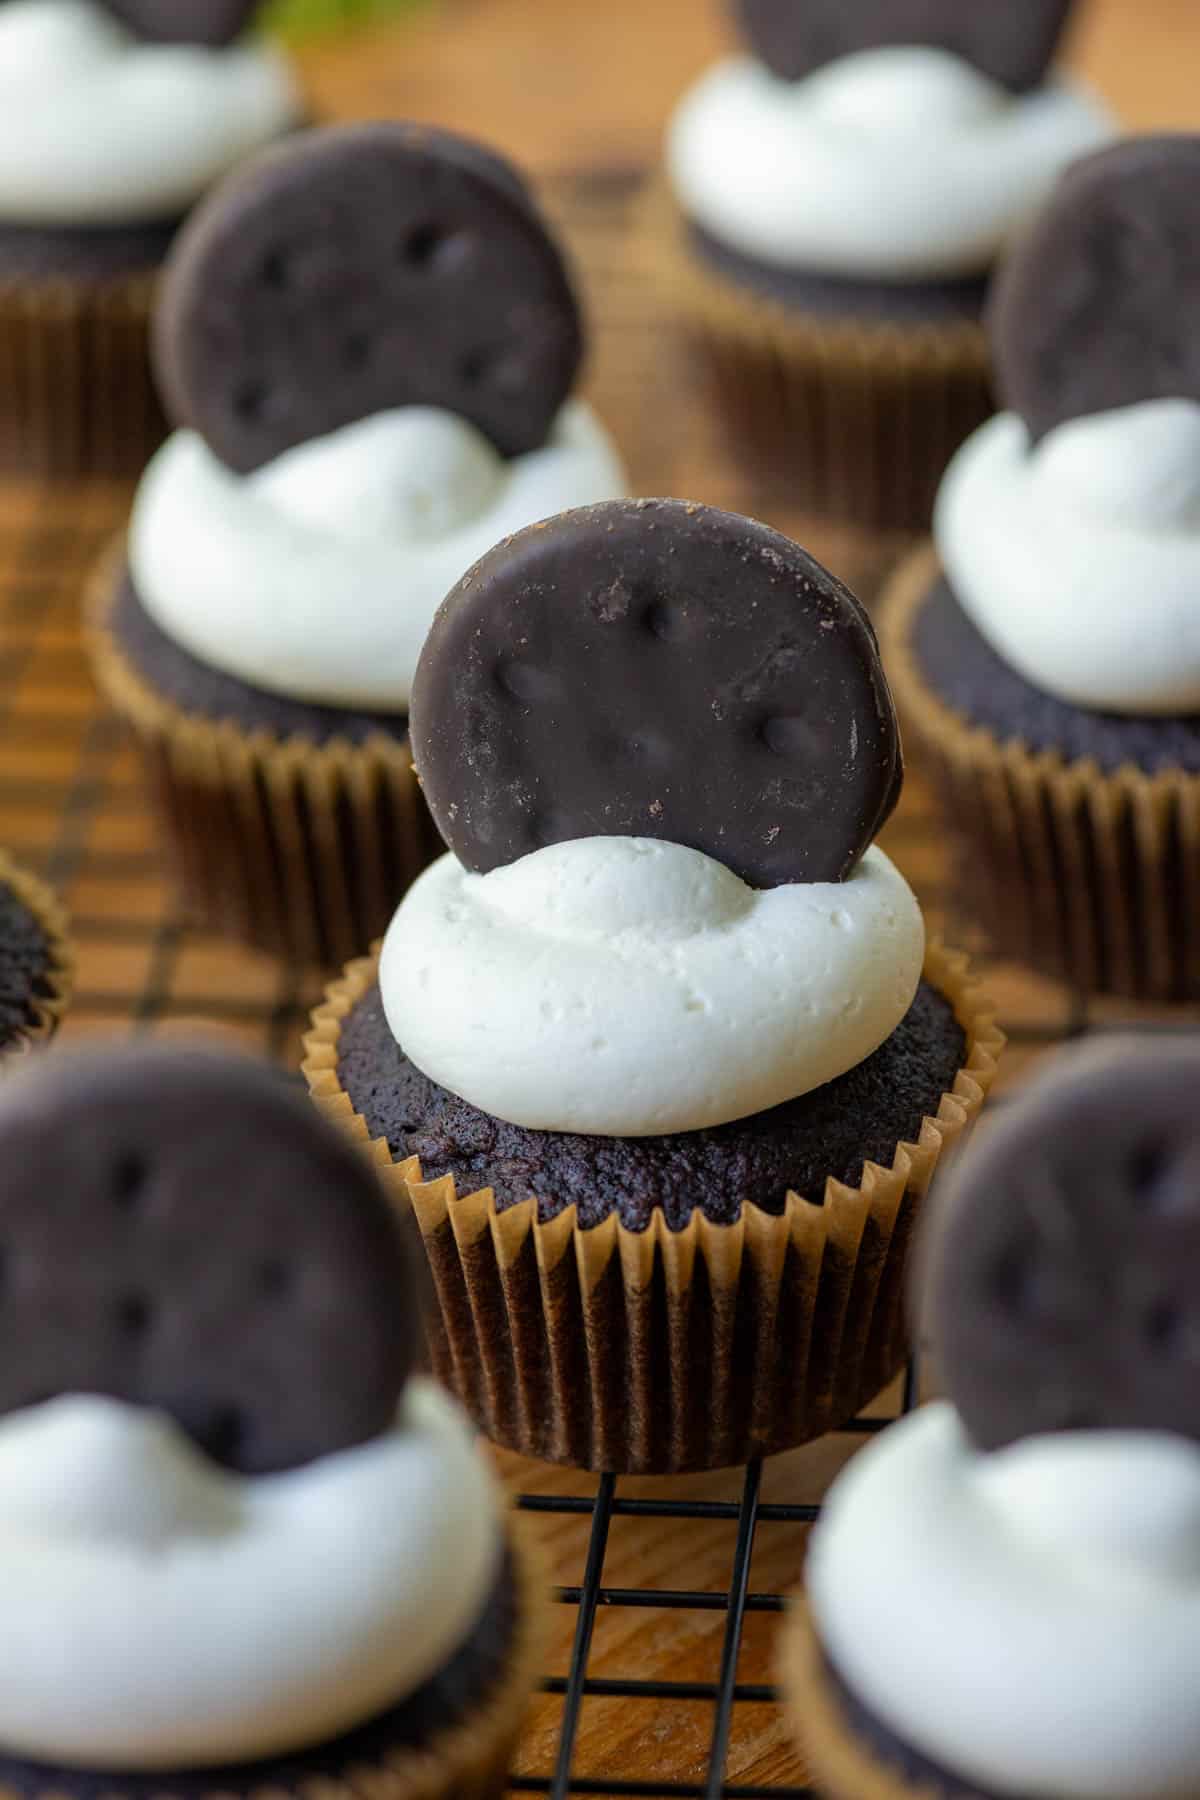
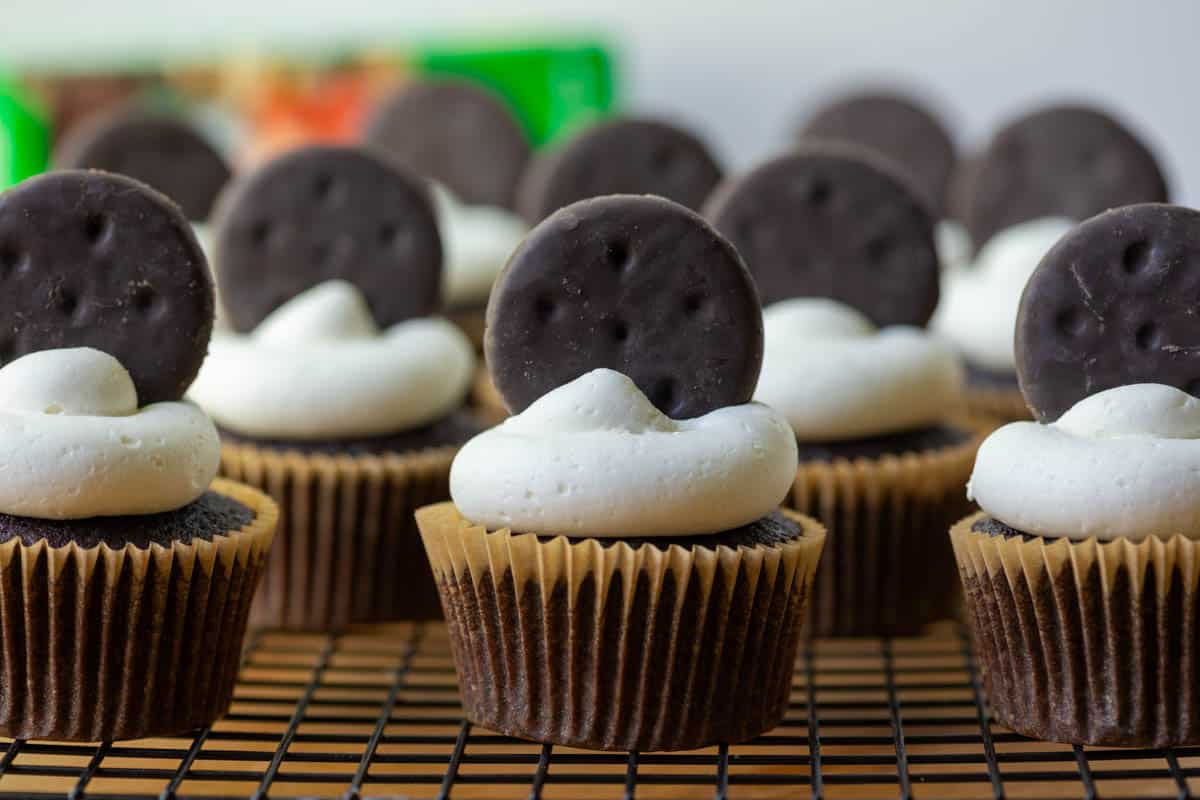
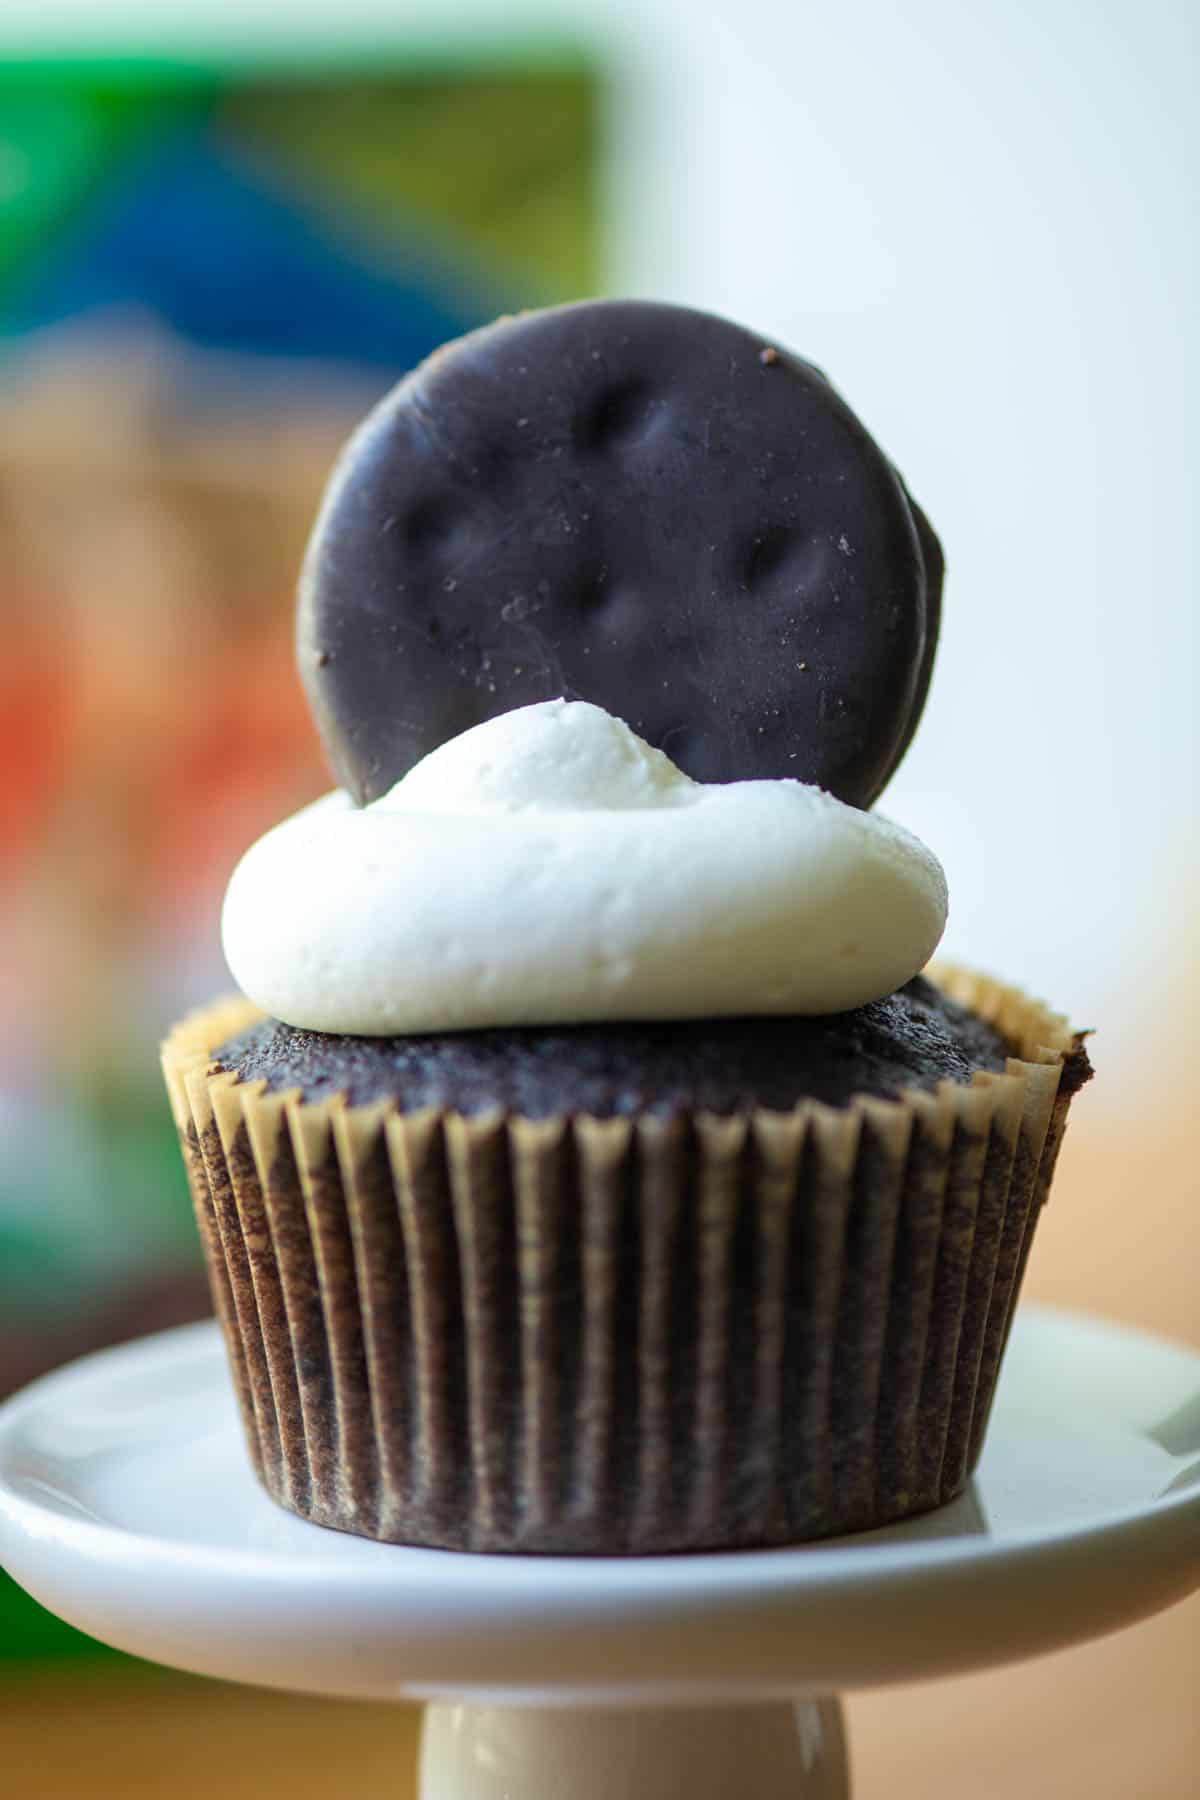
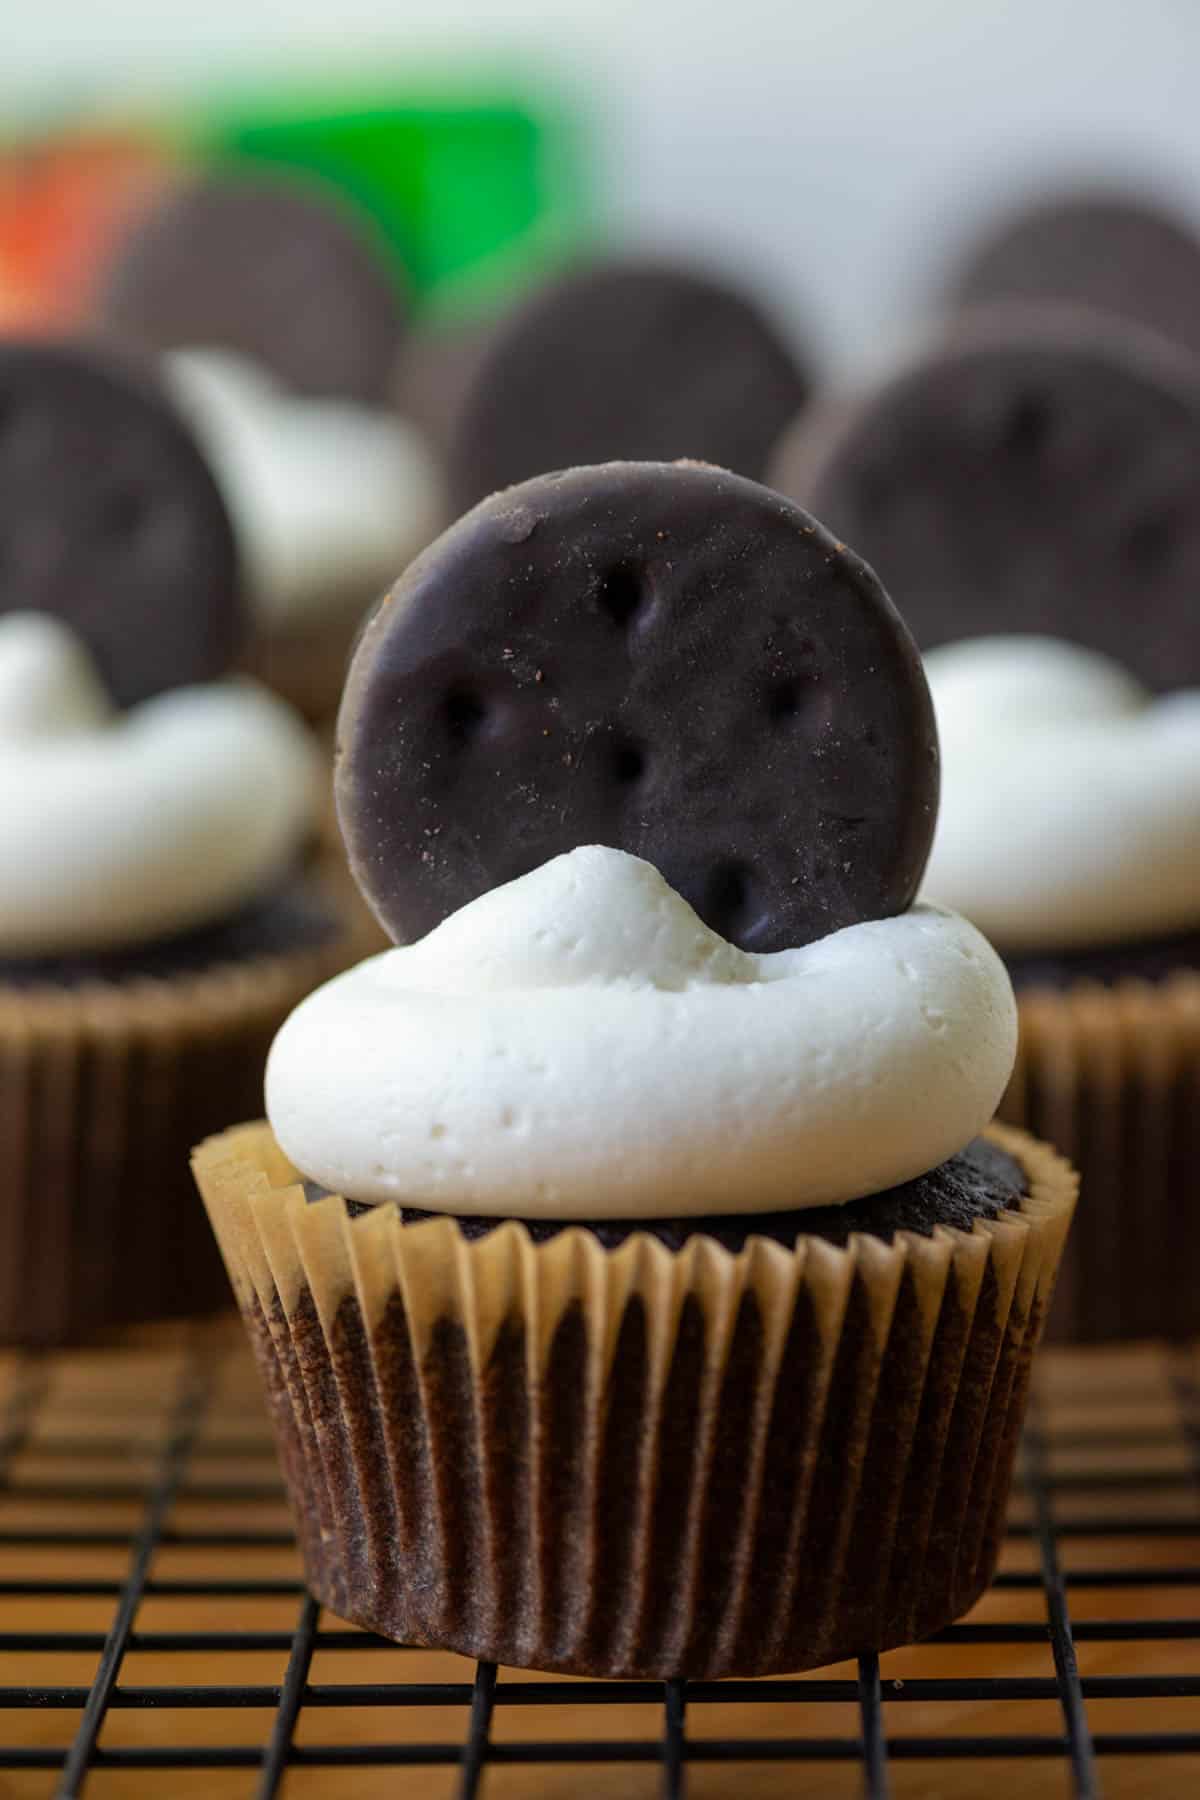
  • Photo of many Thin Mints Cupcakes on a cooling rack with a box of Thin Mints cookies in the background
    Thin Mints Cupcakes
Top view of charcuterie board with cheddar cheese, manchego cheese, assorted crackers, salami, prosciutto, strawberries, green grapesand red grapes

How to Make a Cheap Charcuterie Board

Tracy @ Next Level Baker
Making a charcuterie board can be easy and cheap if you follow some simple steps and shop at a discount store like Trader Joe's or Aldi.
Print Recipe Pin Recipe
Prep Time 20 minutes mins
Total Time 20 minutes mins
Course Appetizer
Cuisine American
Servings 12

Ingredients
  

  • 2 or more different types of cheeses (different colors and textures work best)
  • 2 or more different types of crackers
  • 2 or more different types of meats
  • 2 or more different fruits

Instructions
 

  • Start with the crackers. Lay them on the board in an S shape so that the whole board has crackers from end to end. Use some from each type of cracker.
  • Next, place the fruit in groups near the crackers. For fruits that may bleed or juice, place them in a small bowl on the board. For grapes, cut them into small groups of 3 or 4 before placing them in clusters on the board.
  • After the fruit, place the meats on the board near the fruit. If you're using a long thin meat like prosciutto, roll it so that it's smaller. If you're using large pieces of salami, you can fold them in half and then fold them in half again and then cluster them on the board like flowers.
  • Lastly, fill in the rest of the board with sliced, cubed or chunks of different cheeses.

Would you like to save this?

We'll email this post to you, so you can come back to it later!

Don't worry! We won't spam you!

Keyword Charcuterie Board
Tried this recipe?Let us know how it was!
Side view of a charcuterie board with cheeses, meats, fruits and crackers with another full charcuterie board in the background

Berry Yogurt Parfait

February 28, 2025 by Tracy @ Next Level Baker Leave a Comment

Berry yogurt parfait is a yummy layered dish that's perfect for breakfast, meal prep or a snack. It's beautifully layered with berries, walnuts and Greek yogurt. This berry yogurt bowl has lots of protein with no added sugar which makes for a perfect breakfast, meal prep or snack.

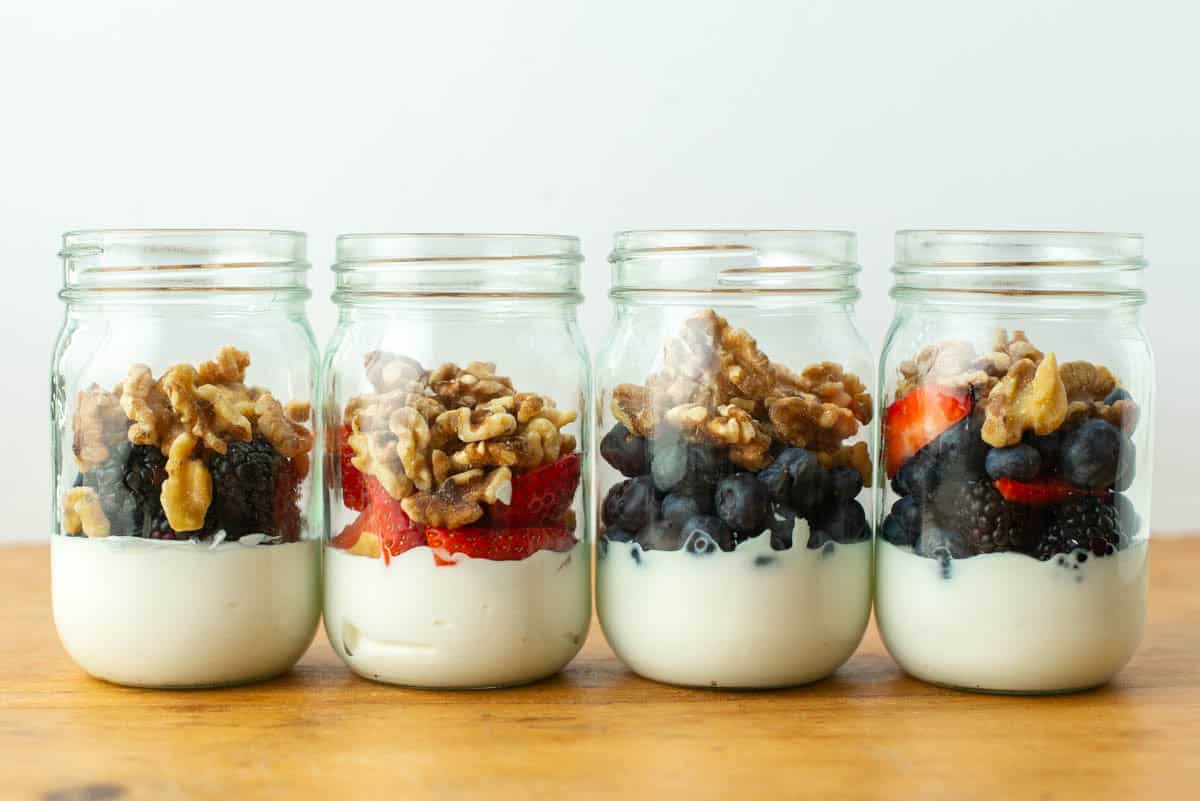
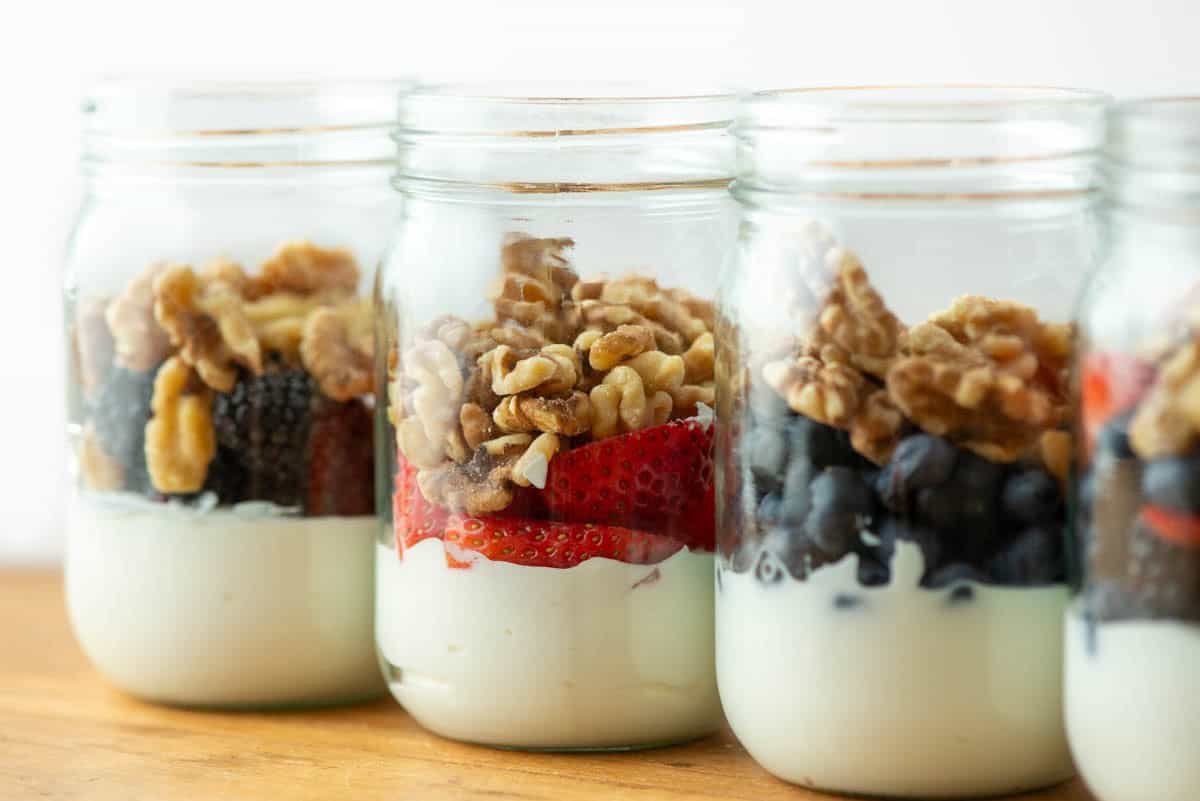
Side view of four jars of berry yogurt parfaits

Friends, I eat this berry yogurt bowl for breakfast almost every day. Except for the occasional scrambled eggs or breakfast out, I do literally eat this berry yogurt parfait for breakfast every day. For years now! Typically, I just dump it in a bowl each morning. It's not as pretty as using jars, but it works and it's just as yummy. A lot of the time, I even use frozen blueberries and just microwave them for a minute first. I also use unsweetened high protein yogurt, as the berries are a natural sweetener. Plus, for the crunch, I use nuts instead of granola. So no sugar added either! And, because this berry yogurt parfait has lots of protein, it keeps you satisfied for much longer. It's super easy to meal prep too!

[feast_advanced_jump_to]

Ingredients

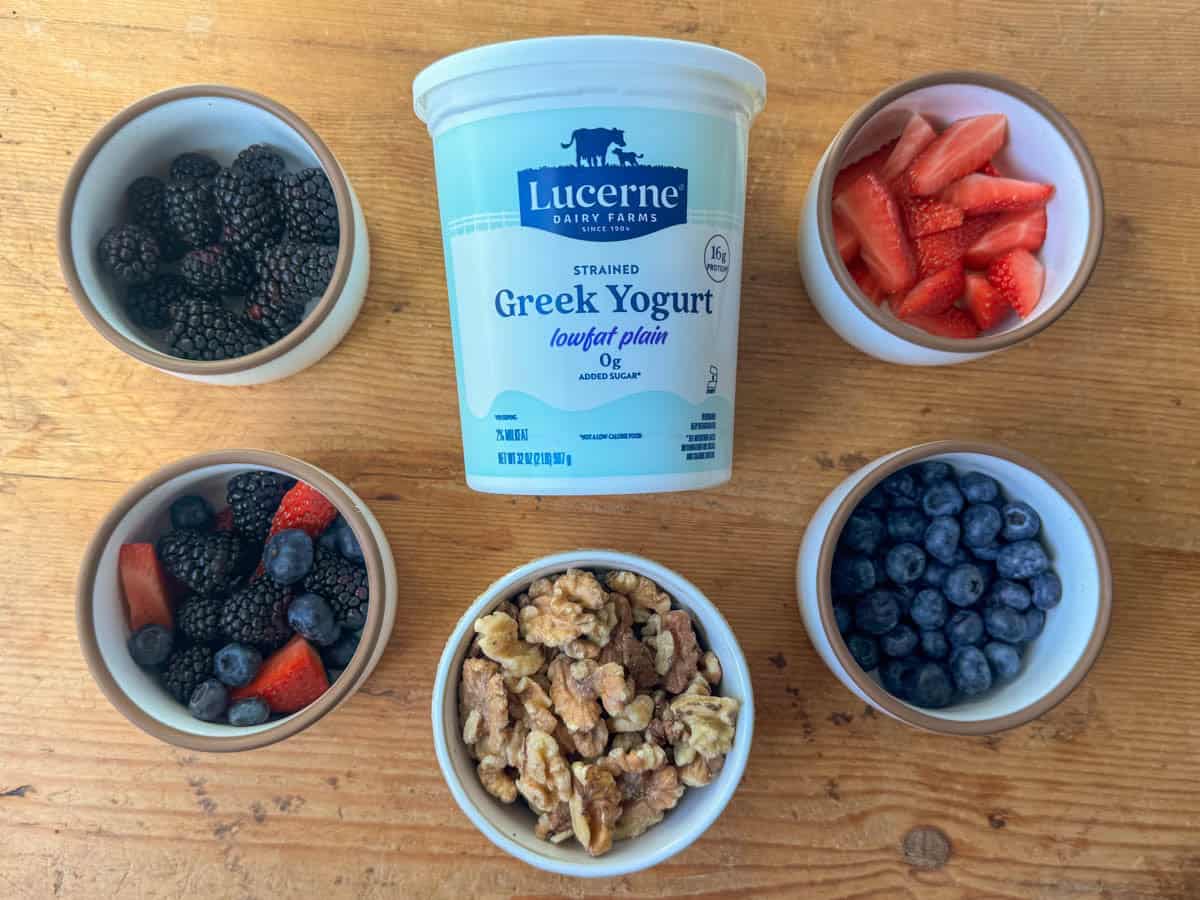
Ingredients needed to make yogurt berry parfaits: blueberries, blackberries, strawberries, walnuts and greek yogurt
  • Greek yogurt
  • Berries of choice
  • Walnuts (or nuts of choice)

See recipe card for quantities.

Substitutions

  • Vegan - for vegan berry yogurt parfait, I highly recommend Forager Project's Organic Unsweetened Plain or Unsweetened Vanilla. The protein content is much less than Greek yogurt, but you could also add chia seeds, hemp hearts or a vegan protein powder to get more protein.
  • Gluten free - this recipe is naturally gluten free, so no substitutions are needed!

Variations

  • Fruit - I typically use blueberries, but you can use any berry or combination of berries that you wish. You can even use a different type of fruit. I've made yogurt parfaits with mangos, jackfruit and bananas.
  • Nuts - I buy walnuts by the bag at Costco. They sell both organic and regular walnuts. If you don't like walnuts, use your favorite nut. I do recommend unsalted nuts if you use a different nut or a mixed nut combination though.
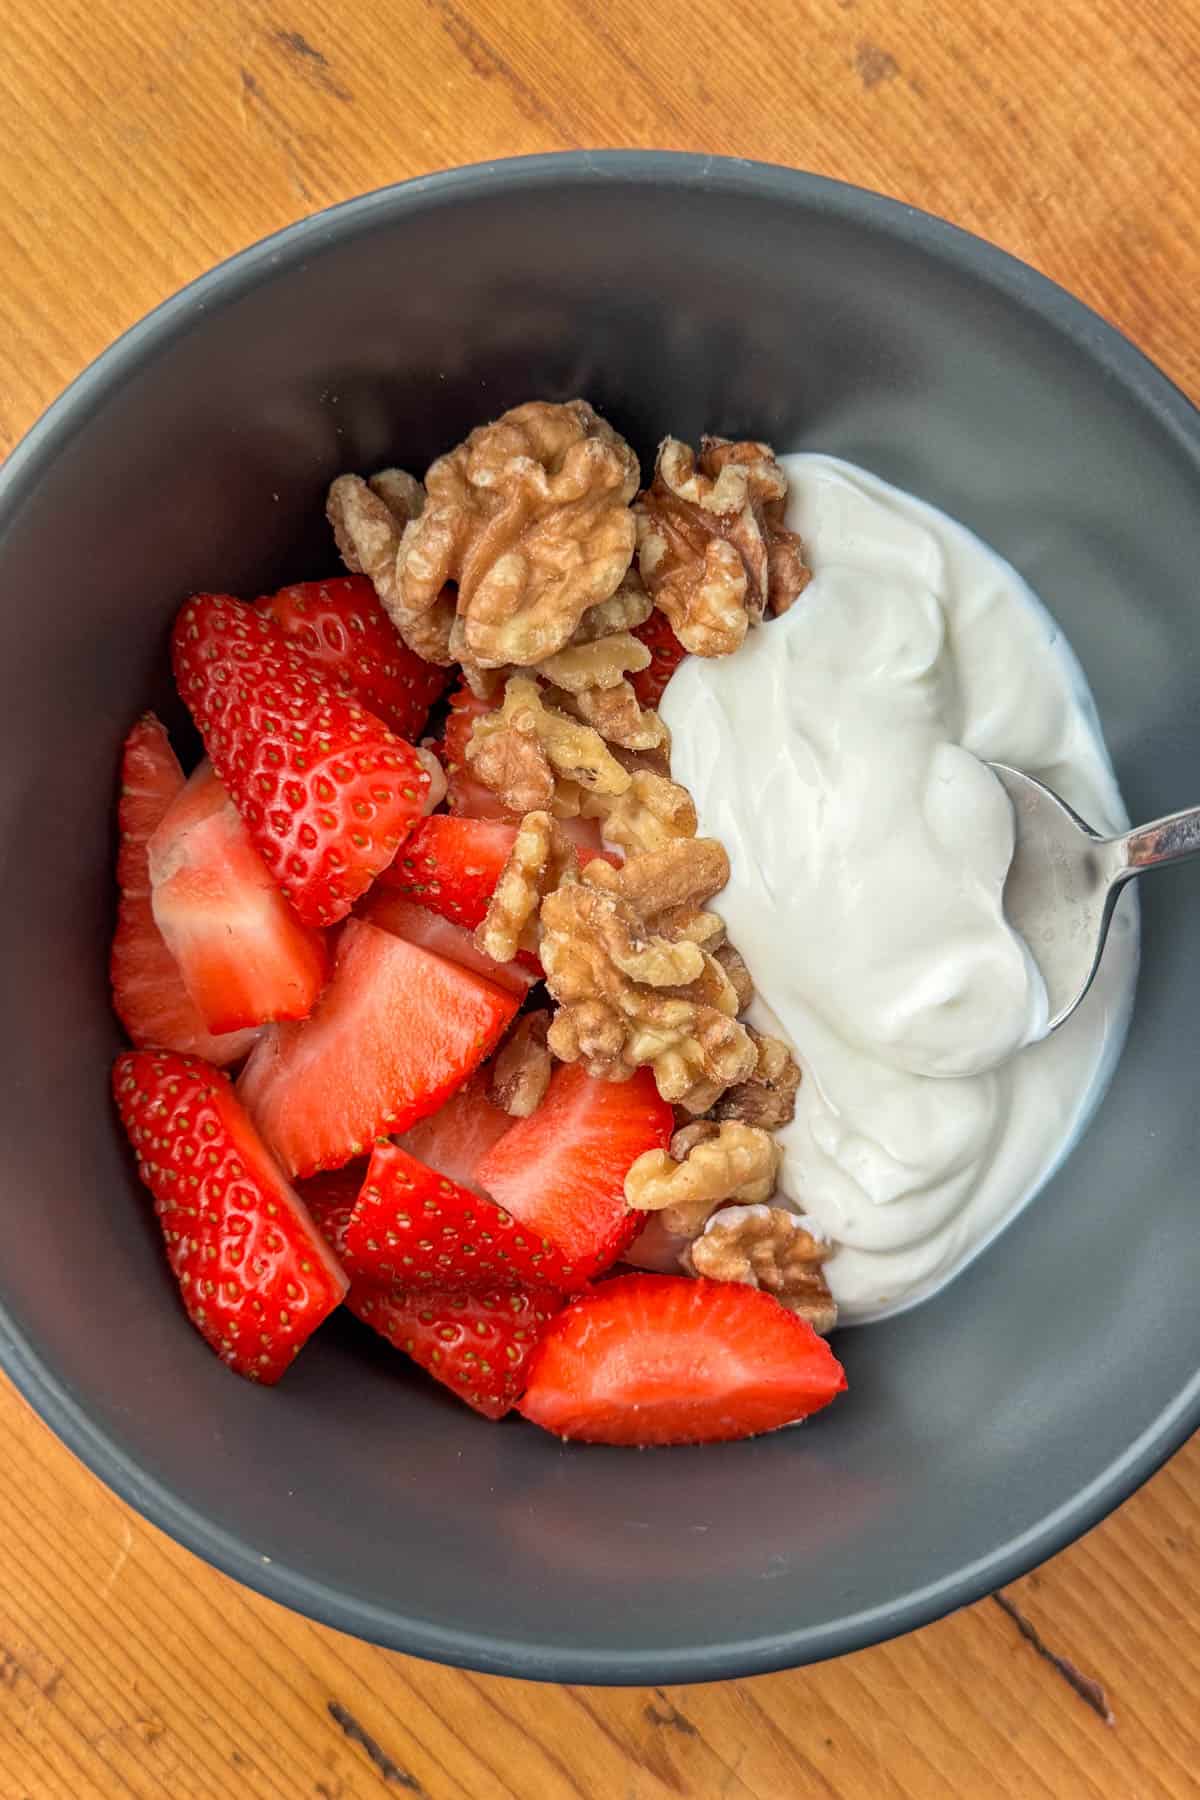
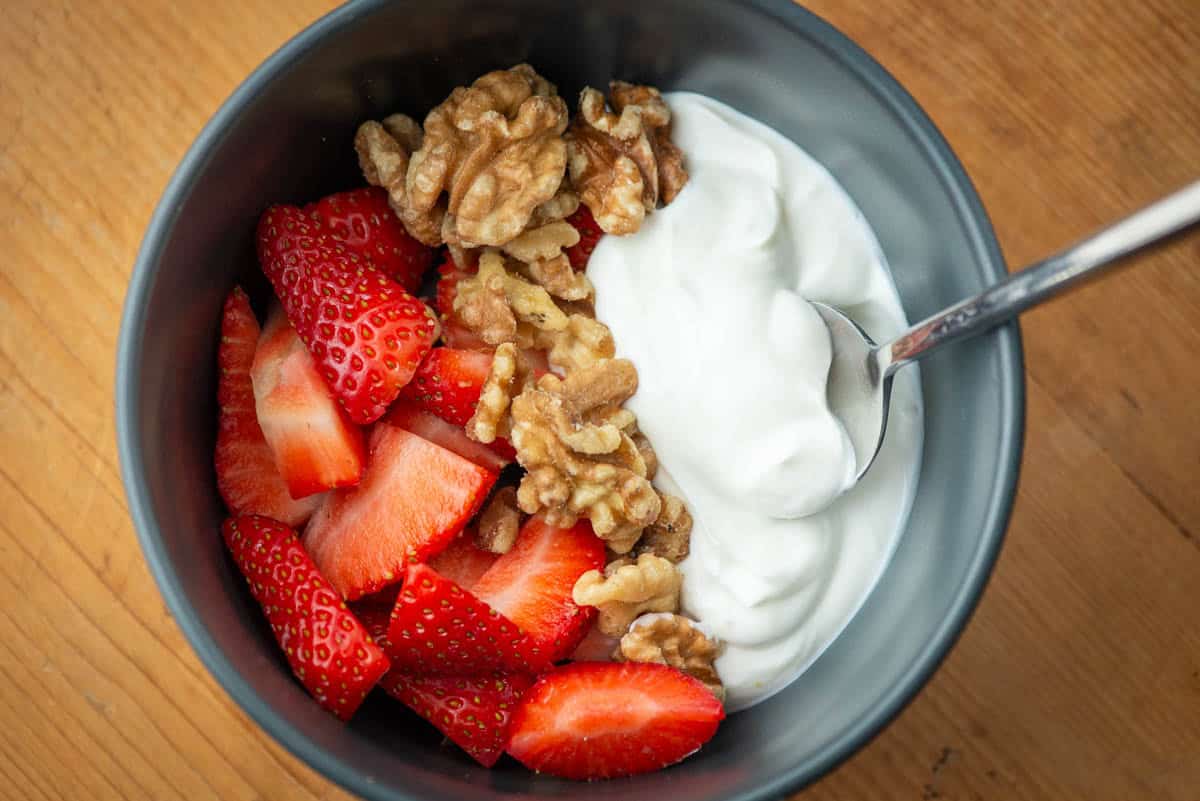
Overhead view of a strawberry, walnuts and greek yogurt bowl

Protein

Greek yogurt is typically much higher in protein compared to other yogurt. The brand I used for this recipe has 16 grams of protein per serving. Walnuts have about 5 grams per serving. To add even more protein, you could add 2 tablespoons of chia seeds (4-5 grams of protein) or hemp hearts (6-7 grams of protein) to the yogurt part of the parfait. You could also mix in your favorite protein powder for extra protein as well.

Storage

Store in an airtight container in the refrigerator up to 5 days.

Next Level Tips

  • Some of the healthiest meals and snacks are the simplest. Never be afraid to keep it simple! Simple doesn't have to mean boring or flavorless. I love the flavor combination of yogurt, berries and nuts. There's no need for any added sugar. Skip the granola!
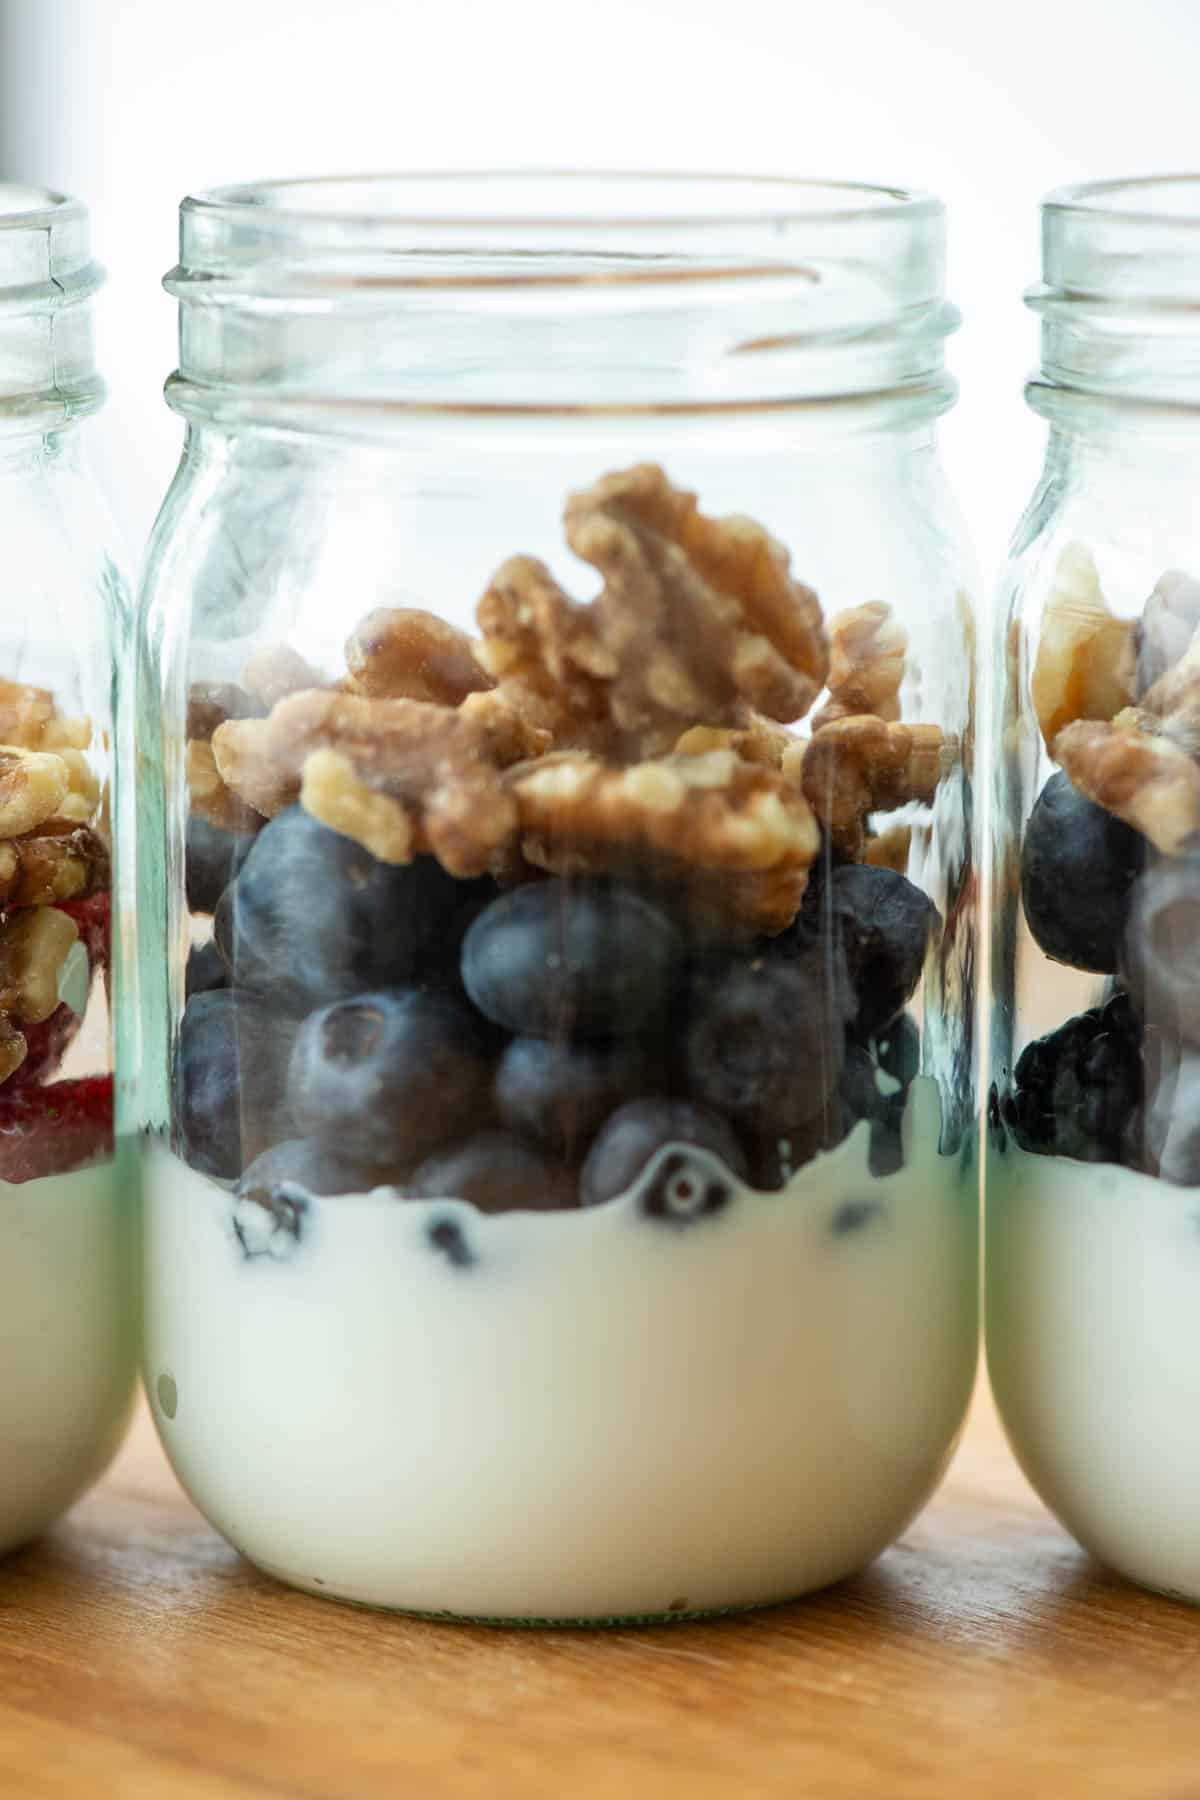
Side view of mason jar filled with greek yogurt, blueberries and walnuts next to two other jars filled with berry yogurt parfait partially visible

FAQ

Can I meal prep this recipe?

Absolutely! You can make up to 5 days worth ahead of time. Preparing berry yogurt parfaits ahead of time works out perfectly for anyone that needs a grab and go breakfast or snack.

Related

Looking for other recipes like this? Try these:

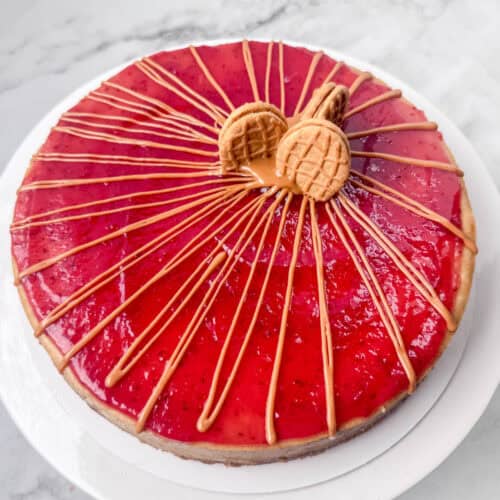
  • Overhead photo of a peanut butter and jelly cheesecake decorated with peanut butter drizzle and some Nutter Butter cookies
    Peanut Butter and Jelly Cheesecake
  • Overhead view of a partial plate of Thai Basil Chicken over a bed of white rice with Thai Basil in the background
    Thai Basil Chicken
  • Overhead view of no bake peanut butter balls on a plate
    No Bake Peanut Butter Oatmeal Balls
  • Overhead image of a stacked chocolate protein powder balls on a plate
    Chocolate Protein Powder Bites
Overhead view of a strawberry, walnuts and greek yogurt bowl

Berry Yogurt Parfait

Tracy @ Next Level Baker
Berry yogurt parfait is a deliciously layered dish. It's perfect for breakfast, meal prep, or a snack. Packed with berries, walnuts, and Greek yogurt, it's high in protein with no added sugar-just pure goodness!
Print Recipe Pin Recipe
Prep Time 5 minutes mins
Total Time 5 minutes mins
Course Breakfast, Snack
Cuisine American
Servings 1

Ingredients
  

For each individual serving

  • ¾ cup Greek yogurt
  • ½ cup berries of choice
  • ¼ cup walnuts

Instructions
 

  • Layer the yogurt, berries and walnuts in a jar or bowl. For meal prep, layer it so that the yogurt and walnuts are not touching. Stir together just before eating.

Would you like to save this?

We'll email this post to you, so you can come back to it later!

Don't worry! We won't spam you!

Keyword Berry yogurt parfait
Tried this recipe?Let us know how it was!
Side view of three and a half jars of berry yogurt parfaits at an angle

Kimchi Slaw

February 27, 2025 by Tracy @ Next Level Baker 2 Comments

Kimchi slaw is a fusion of traditional coleslaw with Korean kimchi flavors. It is a bold, tangy and spicy twist on a classic slaw. You get all the amazing flavor of kimchi with the crunch of a coleslaw. It's quick and easy too!

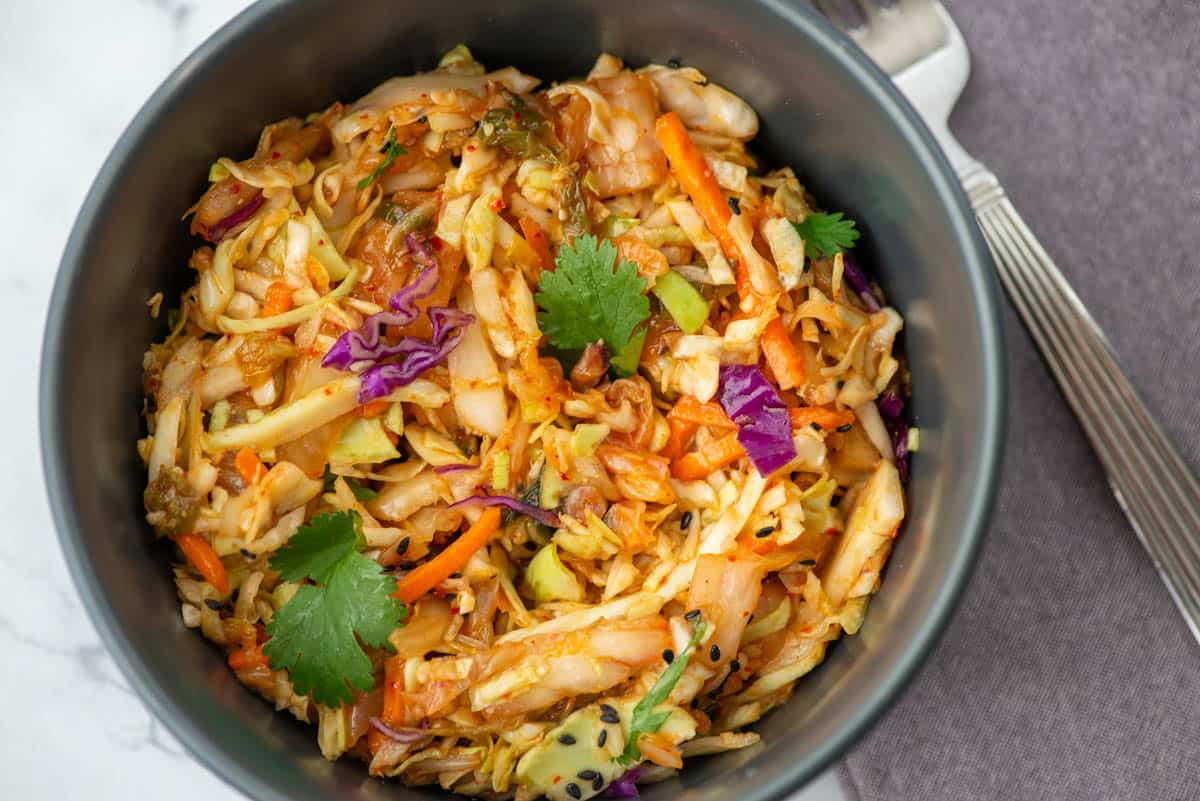
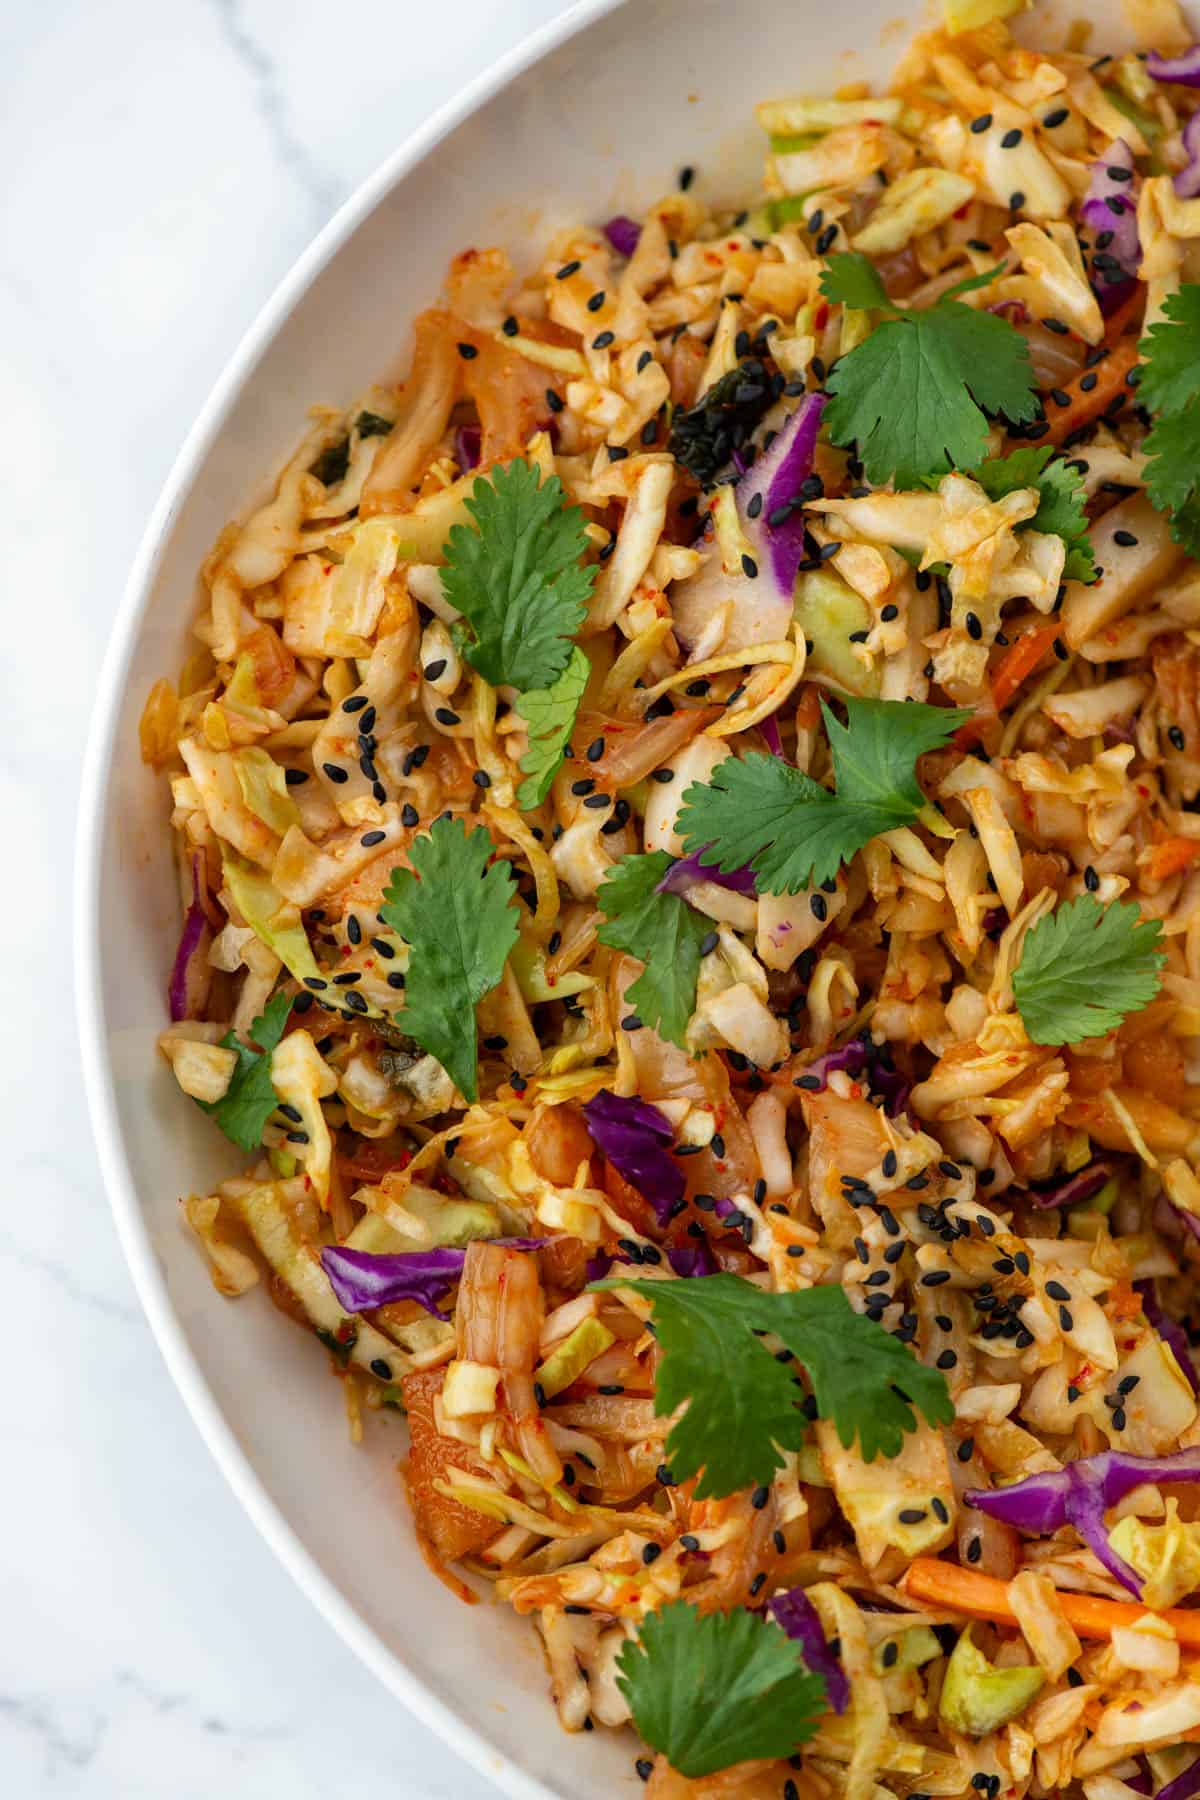
Overhead view of kimchi slaw in a bowl next to a fork and napkin

When we travel, I loving trying street food and going to street markets. When we were in South Korea, you could get kimchi made from all different kinds of vegetables and in lots of different flavors. The fresh kimchi sold in the street markets was incredible. Where I live, we don't have a lot of choices for kimchi. However, most grocery stores carry at least a couple of options in the refrigerated section of the produce department. For convenience, I buy the Jongga brand from Costco. It's a medium spicy kimchi, tastes really good and, of course, you can't beat Costco prices. Jongga is a well known brand in South Korea too. The ingredients for this kimchi slaw make it an easy fusion of cabbage kimchi with crunchy cabbage coleslaw.

[feast_advanced_jump_to]

Kimchi Slaw Ingredients

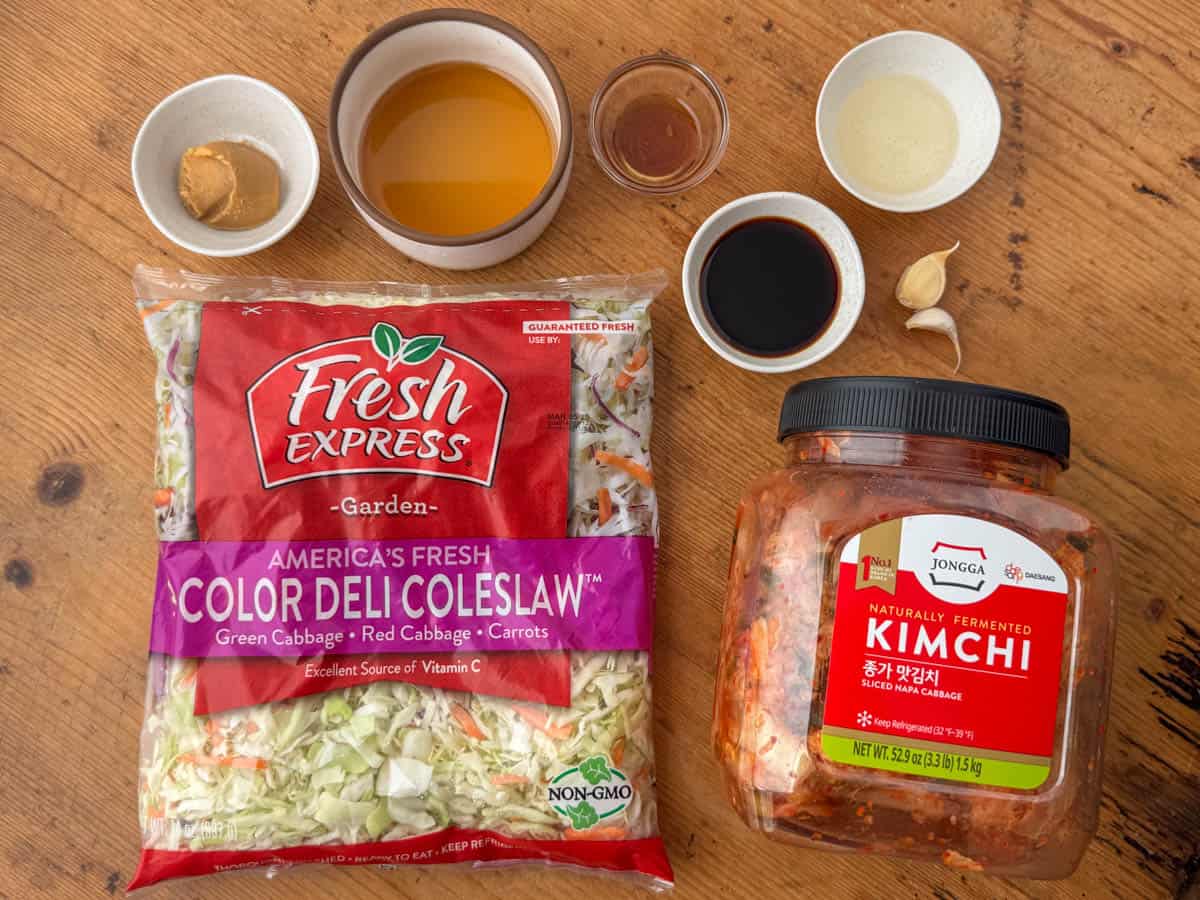
Ingredients needed to make kimchi slaw: prepackaged coleslaw cabbage, kimchi, sesame oil, soy sauce, rice vinegar, white miso, garlic and maple syrup
  • Coleslaw mix
  • Kimchi
  • Sesame oil
  • Rice vinegar
  • Soy sauce or tamari
  • Garlic
  • Miso paste
  • Maple syrup

See recipe card for quantities.

What is Kimchi?

Kimchi is a traditional Korean fermented vegetable dish, most commonly made with cabbage as the main vegetable. It is seasoned with ingredients like garlic, onions, ginger, red pepper, fish sauce and fermented shrimp and then left to ferment. Fermented foods develop probiotics which are good bacteria. The probiotics give kimchi that tangy, slightly sour flavor and can also help with gut health and digestion. I'm always trying to find new ways to eat more probiotics.

How to Make the Sesame Dressing

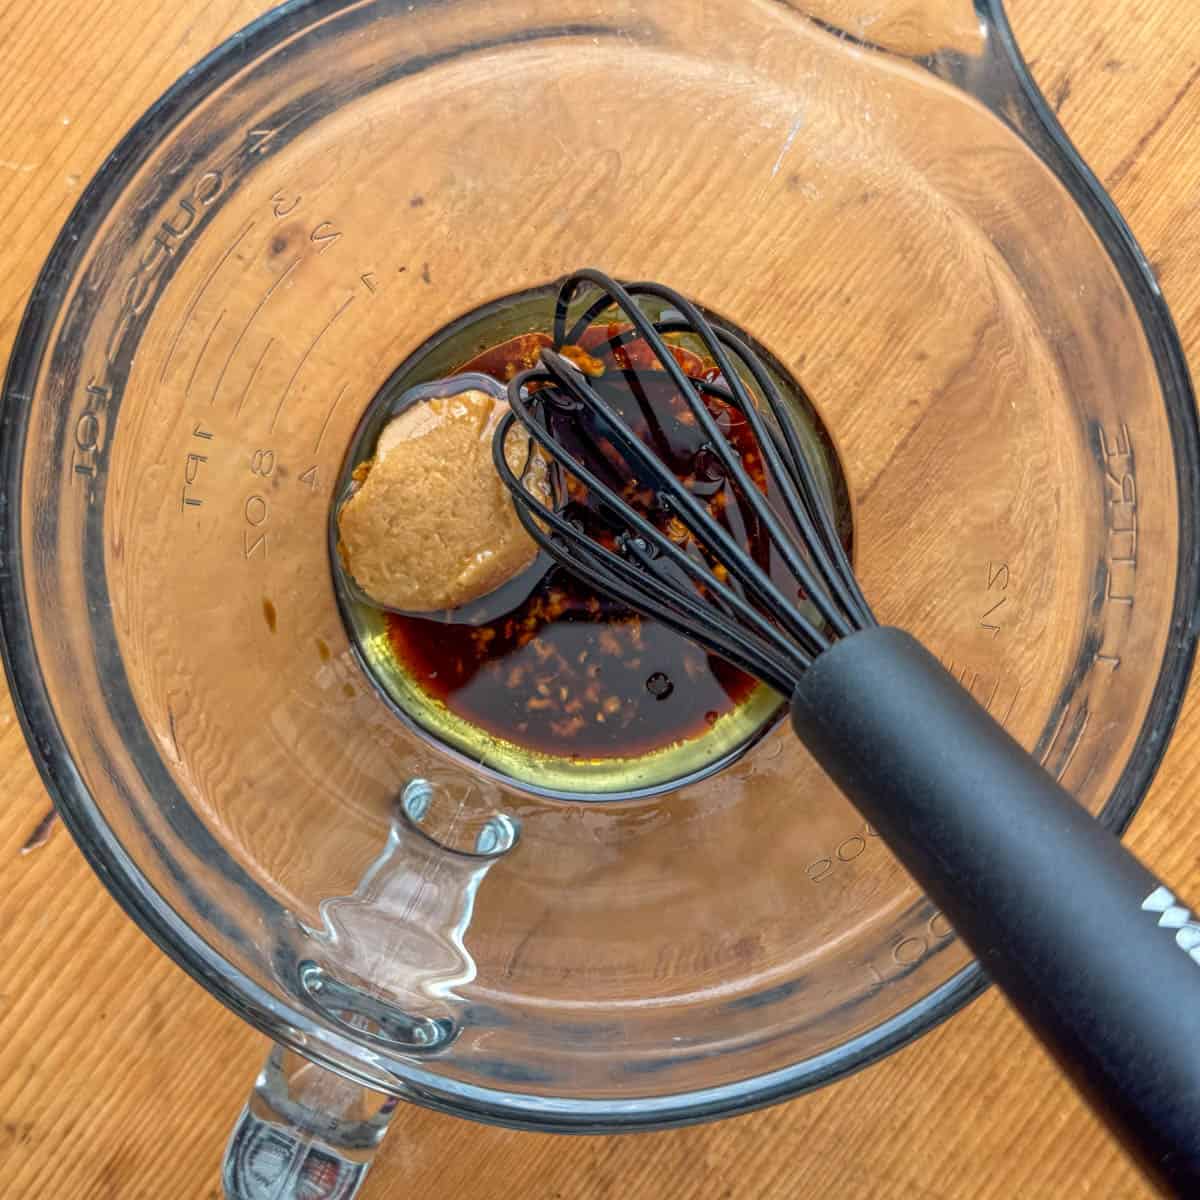
Step 1 of making kimchi slaw: add sesame dressing ingredients to a small bowl

Step 1: Combine all the sesame dressing ingredients into a small bowl.

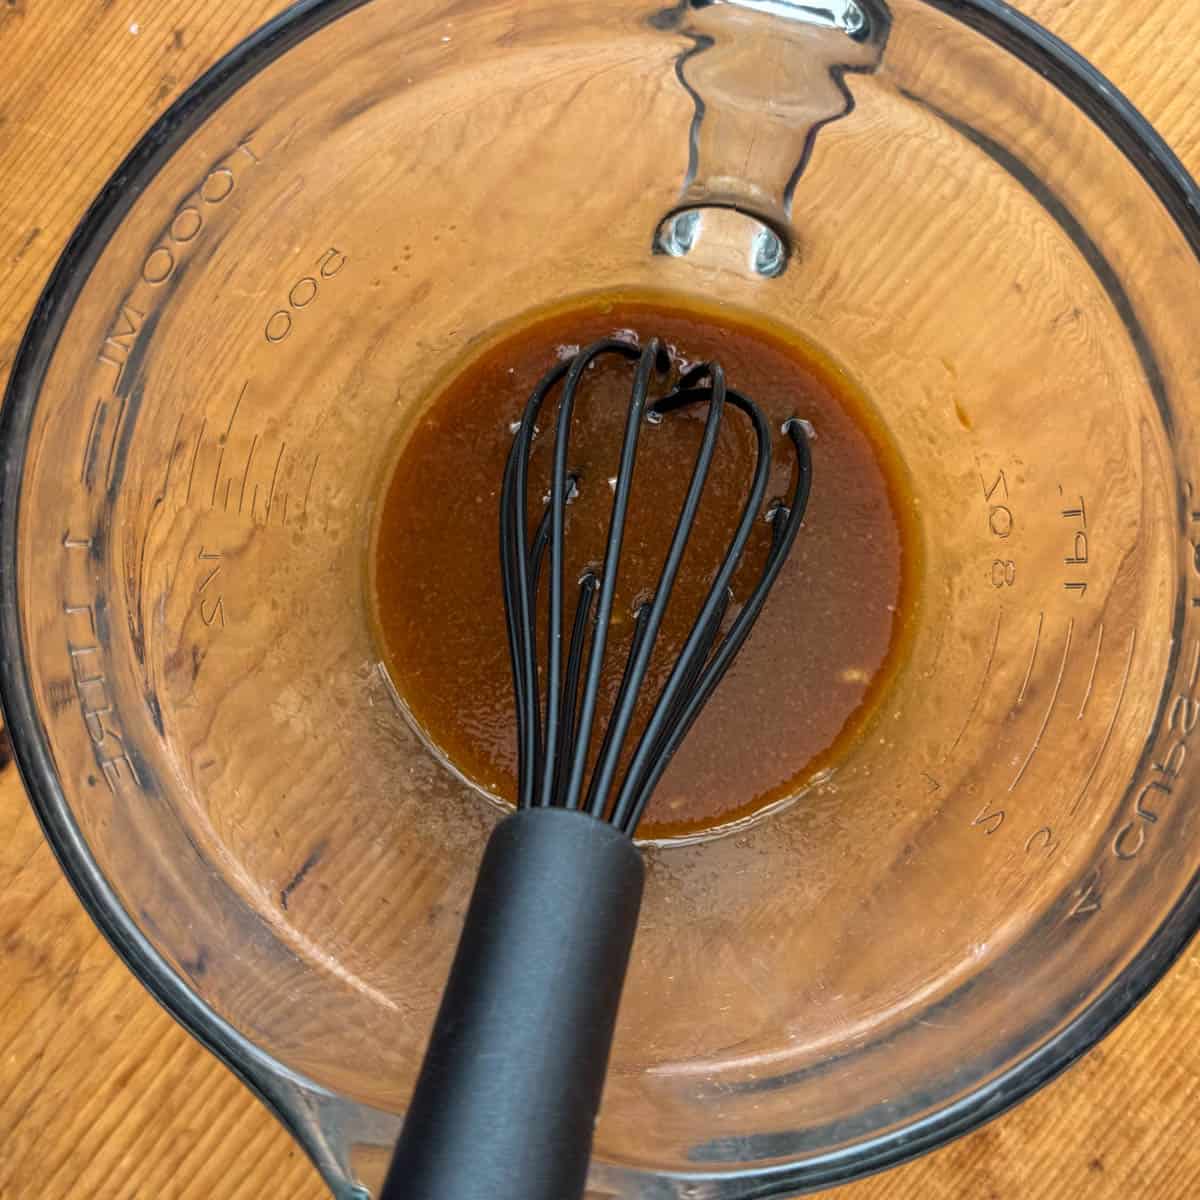
Step 2 of making kimchi slaw: whisk sesame dressing until all ingredients are combined

Step 2: Whisk until all the sesame dressing ingredients are incorporated.

How to slice the Kimchi

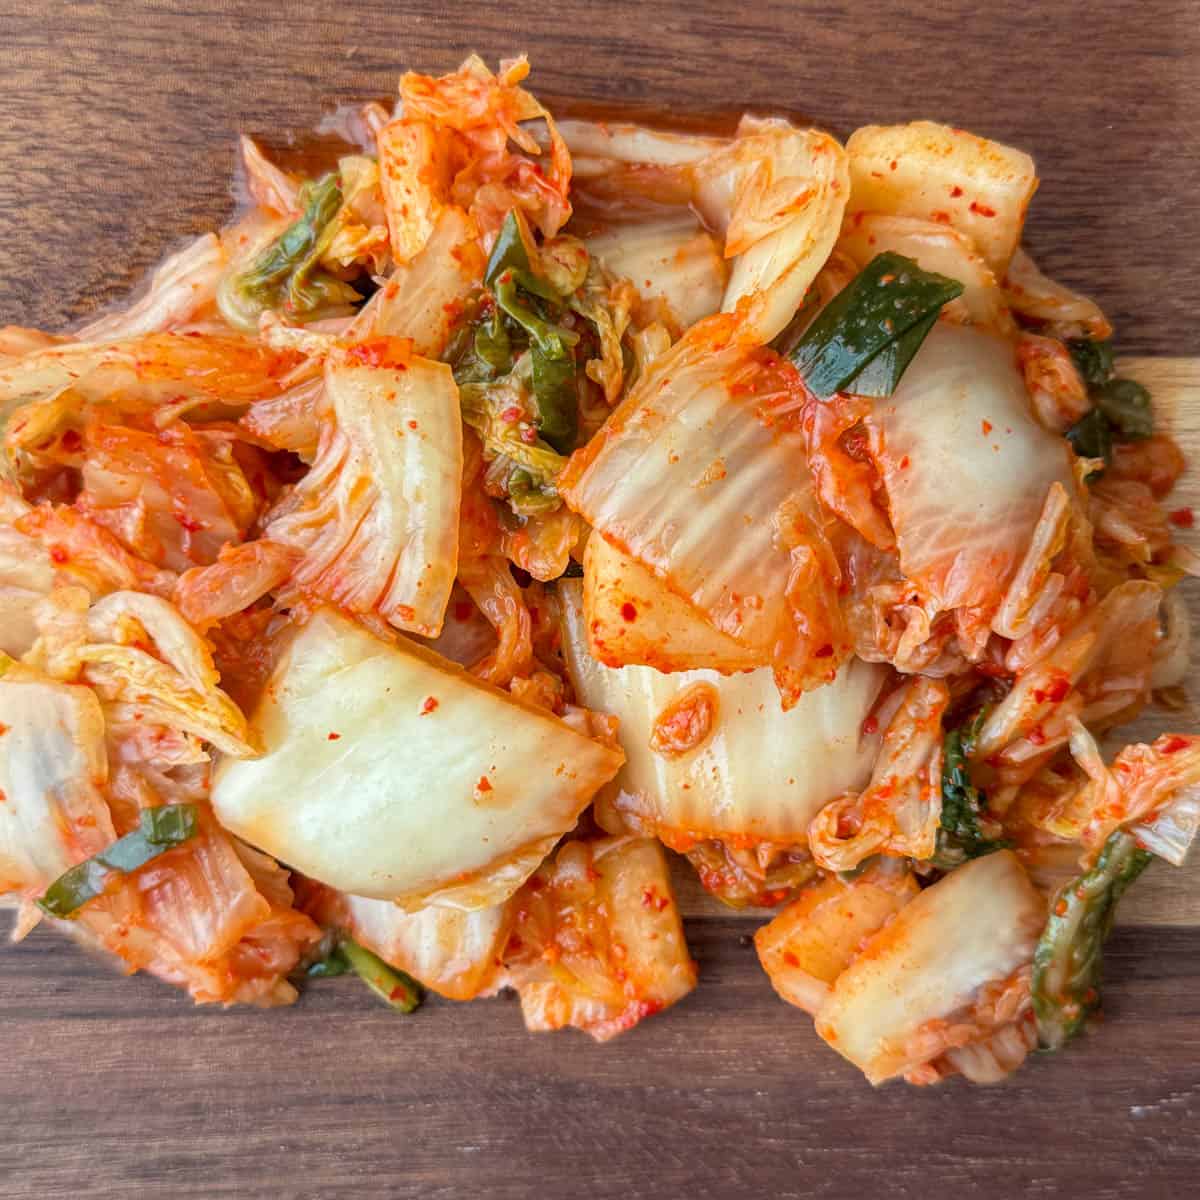
Step 3 of making kimchi slaw: place kimchi on cutting board

Step 1: Using a slotted spoon, place the kimchi on a cutting board.

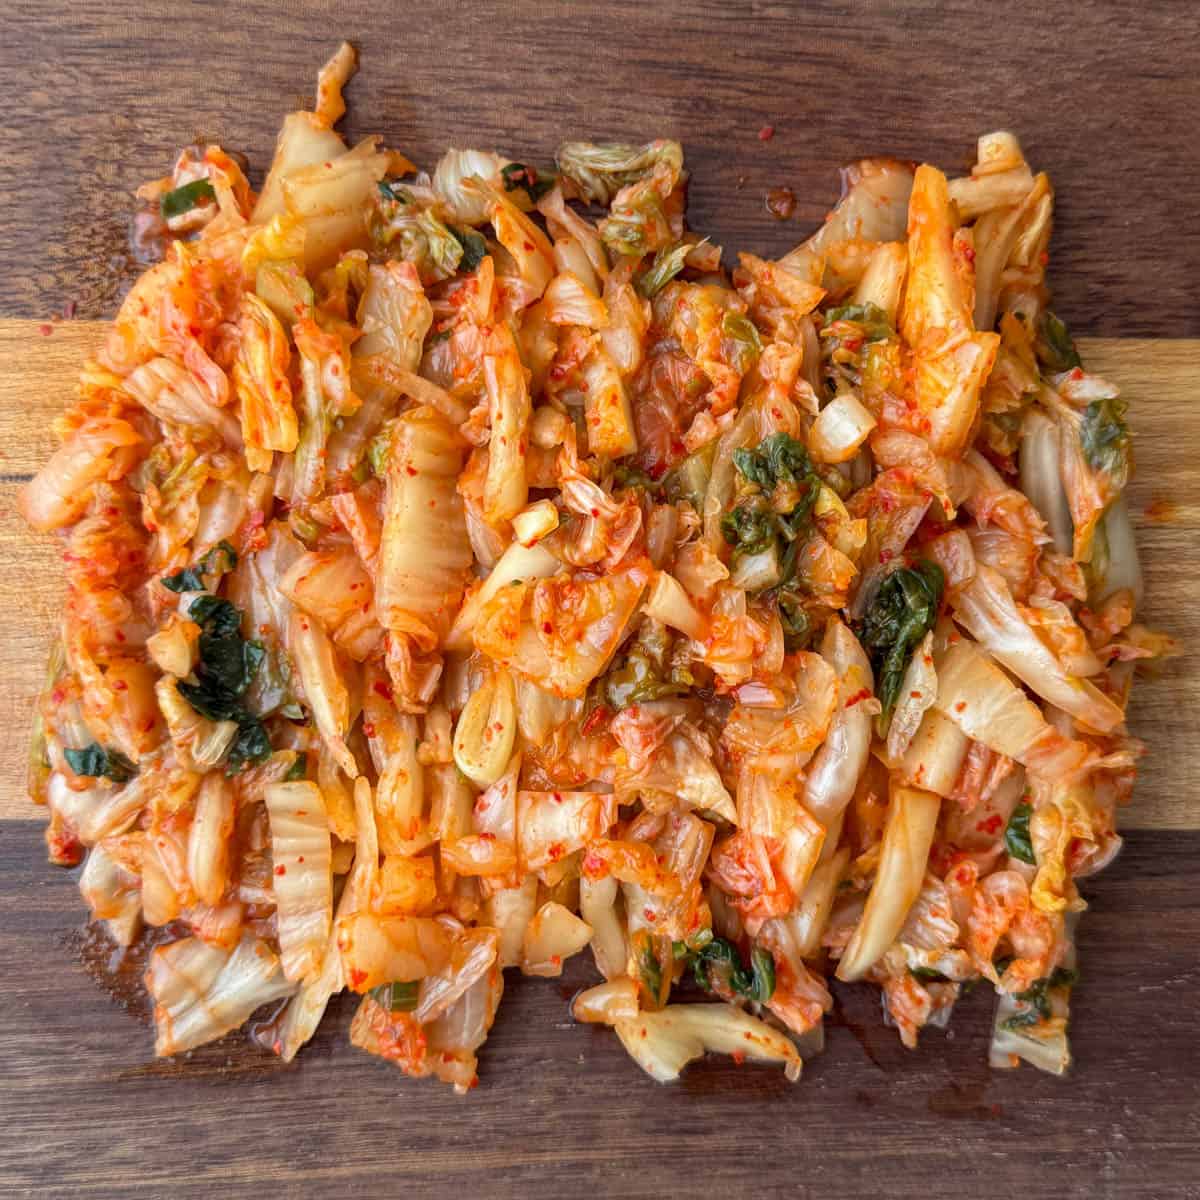
Step 4 of making kimchi slaw: slice kimchi until pieces more like coleslaw pieces

Step 2: Cut the kimchi into pieces similar in size to the coleslaw mix.

Substitutions

  • Vegan - kimchi is not typically vegan. If you want to make this kimchi slaw vegan, make sure you buy special kimchi that is labeled vegan.
  • Gluten free - use tamari sauce instead of regular soy sauce. They are both made from soy, but they are processed differently. Tamari sauce is almost always gluten free, but check the label.
  • Broccoli slaw - you can easily substitute a broccoli slaw mix for the coleslaw mix.
  • Mayo - you can substitute flavored mayo for the sesame dressing. I would recommend a Korean (or Japanese) mayonnaise as they usually have vinegar and other seasonings added.

Variations

  • Spicy - I usually go with a medium spicy kimchi. If you want the kimchi slaw to be spicy, you can use a spicy kimchi or you can mix in some gochujang or sriracha into the dressing to make it spicier.
Kimchi slaw in a bowl with light rays shining on the bowl

Storage

Store kimchi slaw in an airtight container in the refrigerator for up to 3 days.

Next Level Tips

  • I almost always have red cabbage on hand for my everyday salad, so I add more red cabbage for some color pop. There's never enough red cabbage in the premade bag of coleslaw!
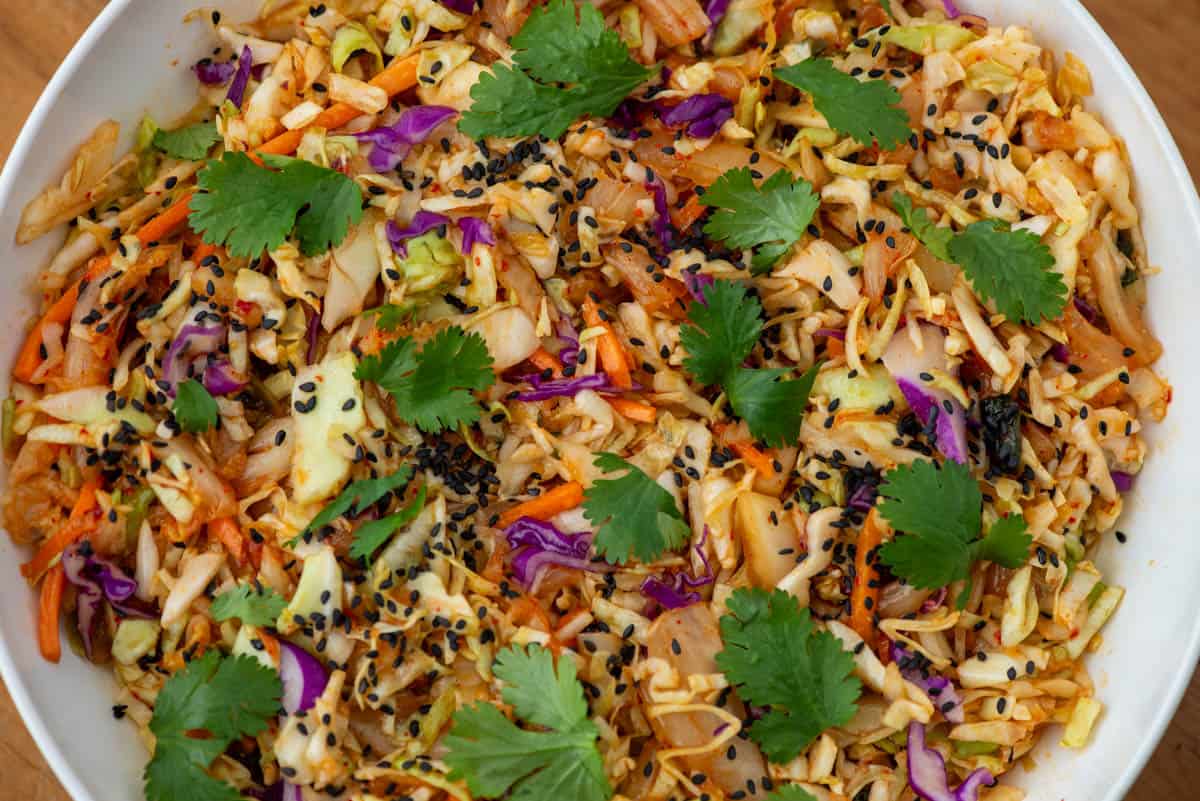
  • I also like to add cilantro and black sesame seeds as garnish. Both are completely optional but add another layer of flavor to the kimchi slaw.

FAQ

Can I make my own coleslaw mix?

Absolutely! Thinly slice enough green cabbage, red cabbage and carrots to fill 8 cups. You can add as much or as little of each ingredient to fill the 8 cups. I rarely ever buy premade salad mixes, but for this recipe I do. The main flavor of kimchi slaw comes from the kimchi and the sesame dressing. The coleslaw mix is for crunch. So you can certainly make your own coleslaw mix, you could also make it easy and buy the premade coleslaw mix for this recipe. I won't tell. It will be cheaper too.

I don't have miso paste or doenjang. What else can I use?

You can use peanut butter or almond butter in place of the miso paste or doenjang. They don't have the same flavor, but both can add thickness to the dressing and another layer of flavor just like the miso paste or doenjang does.

Partial bowl of kimchi slaw garnished with black sesame seeds and cilantro

Related

Looking for other recipes like this? Try these:

  • Overhead view of plate of Thai beef salad over a bed of red leaf lettuce with another partial plate, cilantro stems, a napkin and a fork surrounding the plate
    Thai Beef Salad
  • Overhead view of a Chicken BLT Salad with ranch dressing in the middle and a fork, knife and napkin on the side with loose grape tomatoes and croutons in the background
    Chicken BLT Salad
  • Overhead view of pesto orzo pasta salad on a plate garnished with sliced basil and parmesan cheese
    Pesto Orzo Pasta Salad
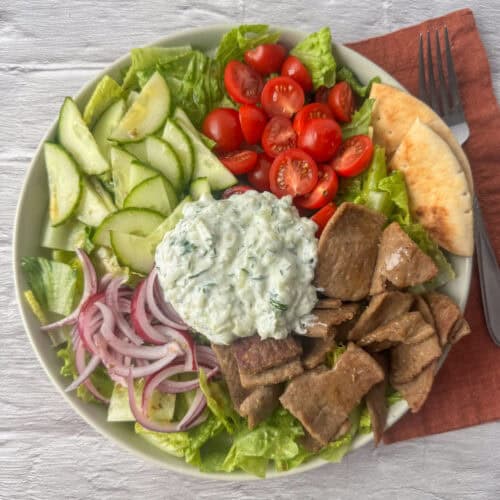
  • Overhead view of gyro salad made with romaine lettuce, gyro meat, cherry tomatoes, cucumbers, red onion, a light Greek dressing and a helping of tzatziki sauce on a plate next to a napkin and fork
    Easy Greek Gyro Salad
Overhead view of a partial bowl of kimchi slaw in a bowl

Kimchi Slaw

Tracy @ Next Level Baker
Kimchi slaw is a fusion of kimchi and coleslaw. It combines the tangy and spicy flavor of kimchi with the crunch of a coleslaw. Best of both worlds!
5 from 1 vote
Print Recipe Pin Recipe
Prep Time 20 minutes mins
Total Time 20 minutes mins
Course Side Dish
Cuisine American, Korean
Servings 8

Ingredients
  

Dressing

  • ¼ cup sesame oil
  • 1 tablespoon rice vinegar
  • 2 tablespoons soy sauce or tamari for gluten free
  • 1 garlic clove minced
  • 1 tablespoon miso paste or doenjang
  • 1 teaspoon maple syrup

Slaw Mix

  • 8 cups coleslaw mix*
  • 2 cups kimchi chopped
  • salt to taste optional
  • extra red cabbage or carrots for color optional
  • black sesame seeds or garnish optional
  • cilantro leaves or microgreens for garnish optional

Instructions
 

Make the dressing

  • Add all the dressing ingredients to a small bowl and whisk until incorporated. Set aside.
  • Add the coleslaw mix to a large bowl.
  • Scoop the kimchi out of its container with a slotted spoon. Chop the kimchi into similar sized pieces as the coleslaw mix. Add to the coleslaw mix and mix well.
  • Mix the dressing into the kimchi and coleslaw mixture.
  • Optional: salt to taste. I don't typically add salt as the soy sauce and kimchi usually adds enough salt.
  • Optional: garnish with black sesame seeds, cilantro or cilantro micro greens.

Notes

* An 14-16 ounce premade bag of coleslaw contains roughly 8 cups. You can also make your own coleslaw mix by thinly slicing 8 cups worth of green cabbage, red cabbage and carrots. 

Would you like to save this?

We'll email this post to you, so you can come back to it later!

Don't worry! We won't spam you!

Keyword Kimchi Slaw
Tried this recipe?Let us know how it was!
Overhead view of partial bowl of kimchi slaw garnished with black sesame seeds and cilantro

Small Batch Cinnamon Rolls

February 21, 2025 by Tracy @ Next Level Baker Leave a Comment

Small batch cinnamon rolls are perfect for when you're craving fresh baked cinnamon rolls but don't want to make a whole pan. You get the same soft and fluffy cinnamon rolls but in a more manageable batch of 4 rolls. Enough that you could share. Yet not too many that you couldn't keep them all for yourself either.

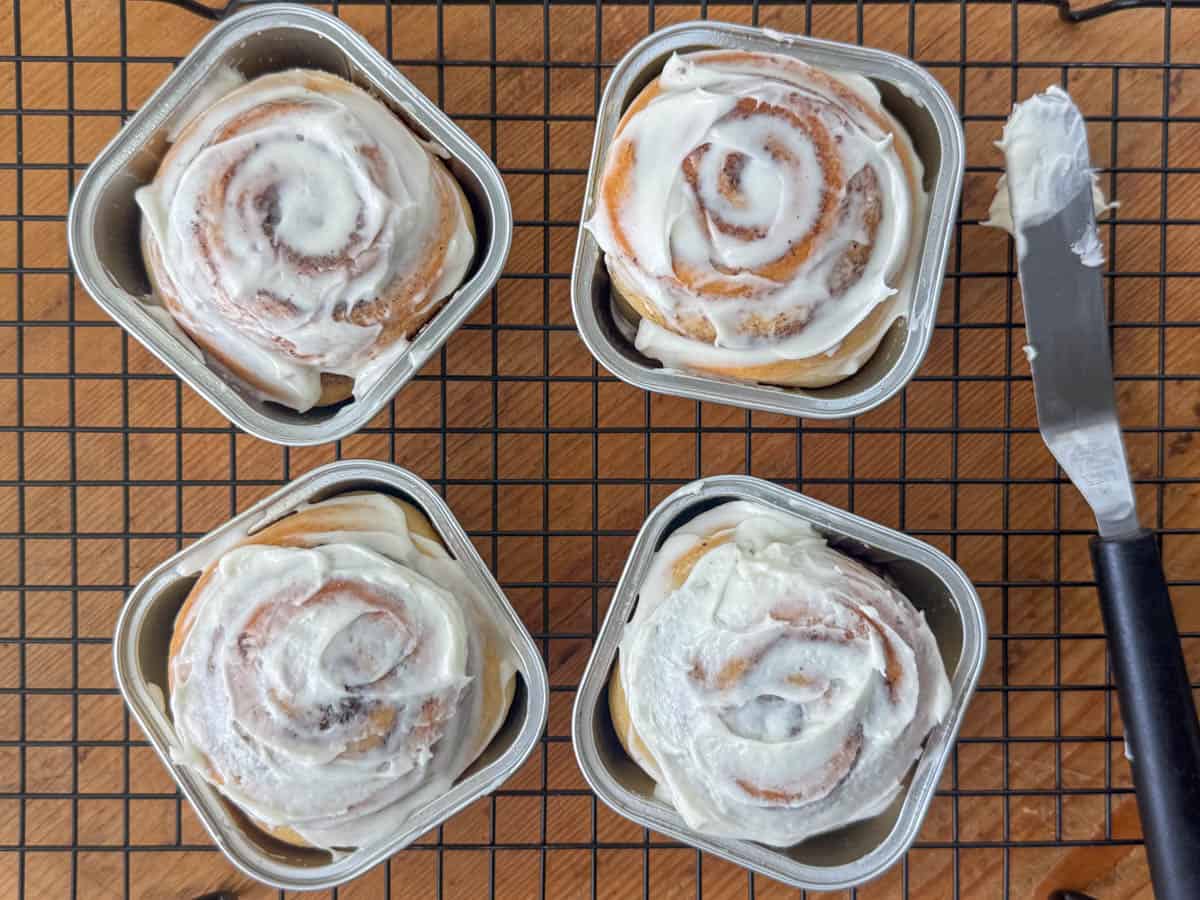
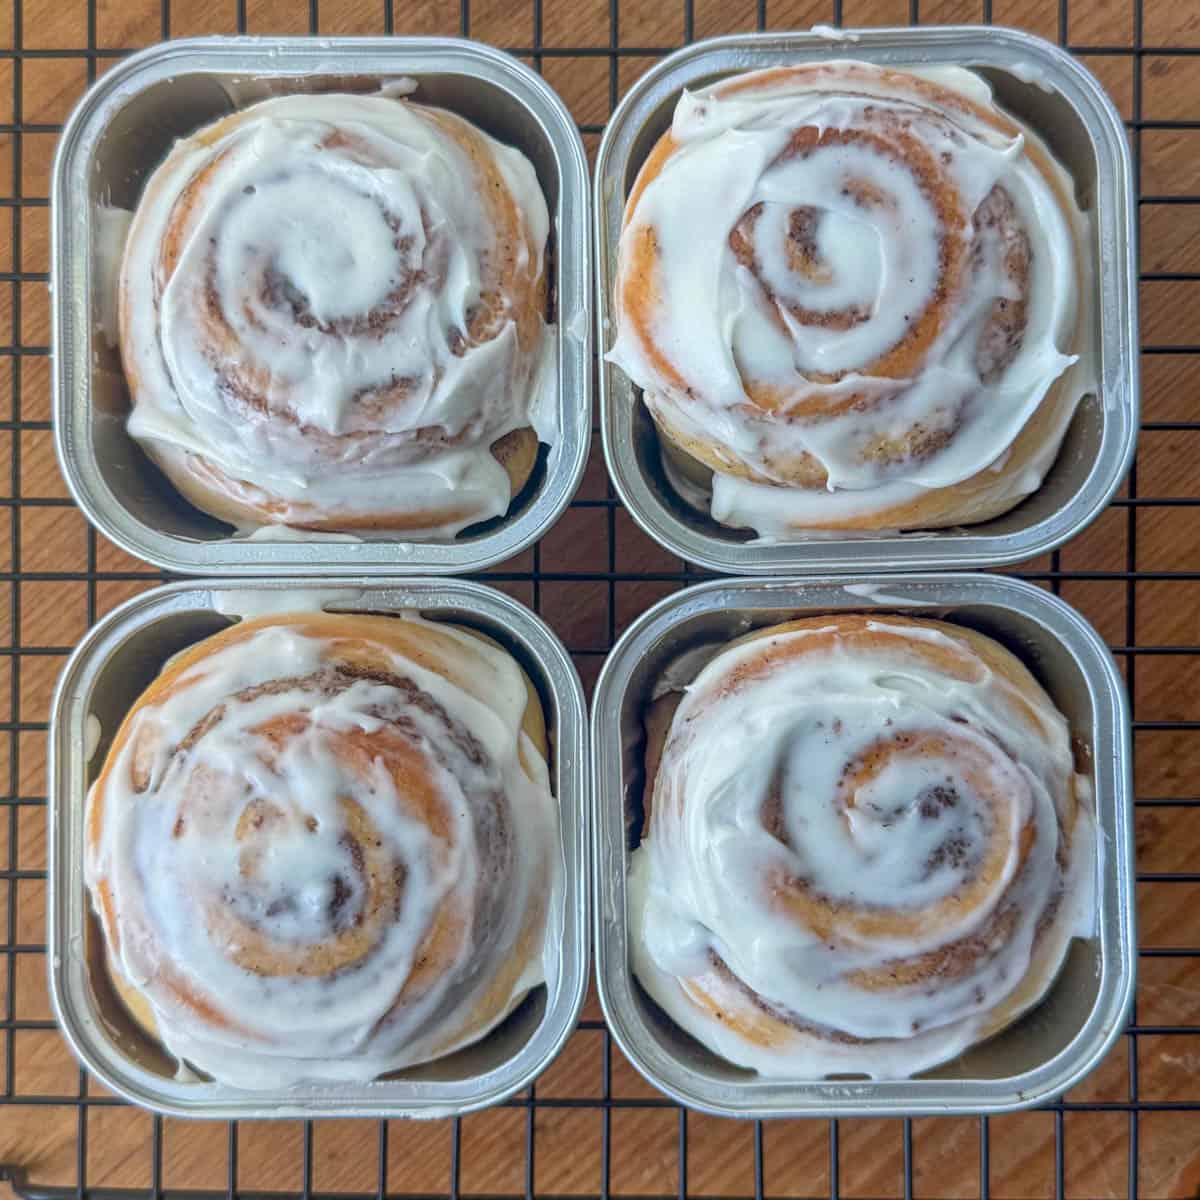
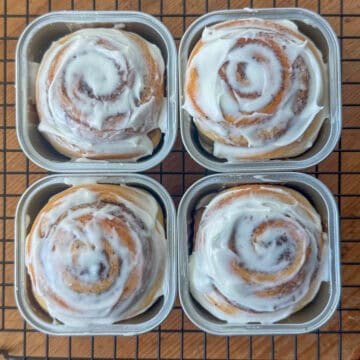
Overhead view of four cinnamon rolls in mini square baking cups next to an icing spatula with cream cheese frosting on it on top of a cooling rack.

I love cinnamon rolls. I mean I really, really, really love them. They are one of my very favorite breakfast pastries. I usually take my overnight cinnamon rolls for brunch potlucks when there's a big group. But, sometimes, I don't need a whole pan. Sometimes, I just need a small batch. This recipe is perfect for the times when you need rolls for a smaller group, or just yourself, without having too many extras.

[feast_advanced_jump_to]

Ingredients

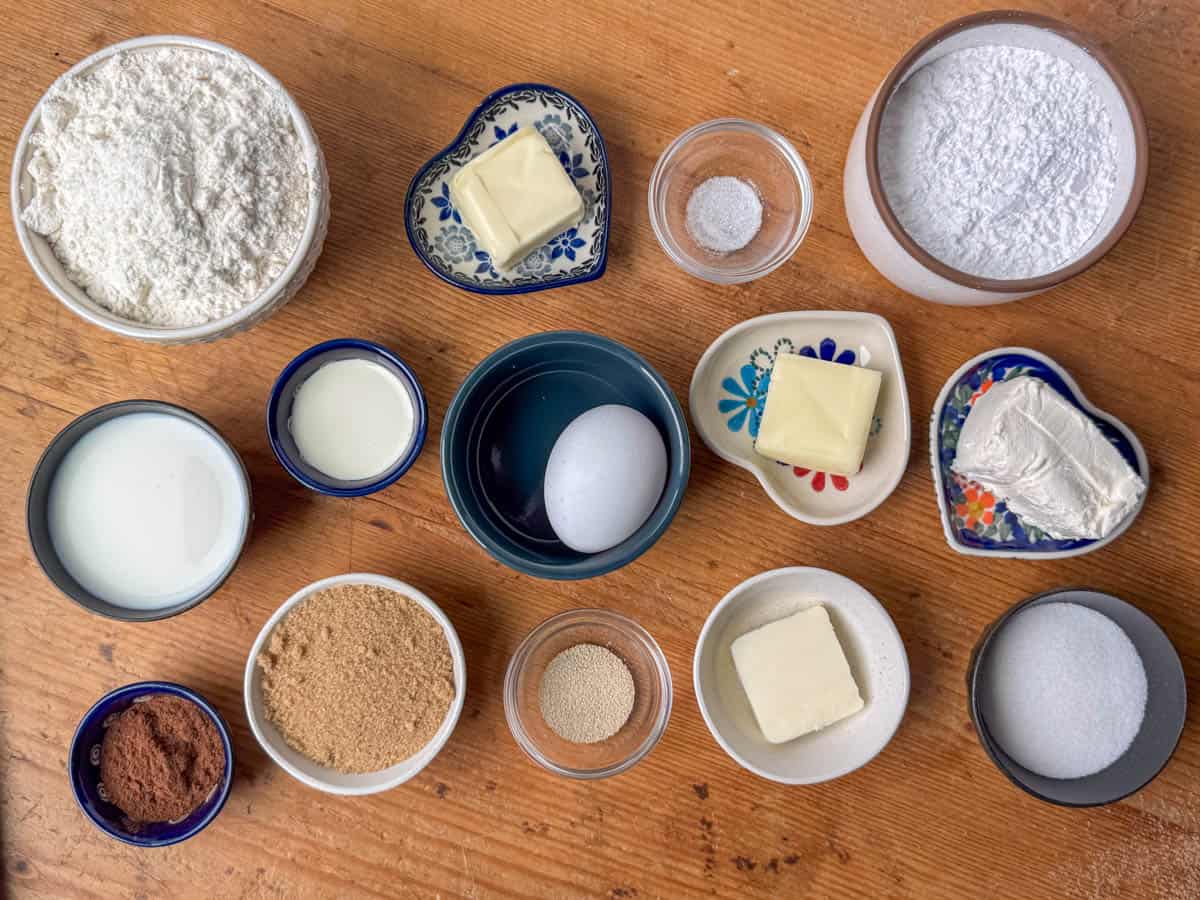
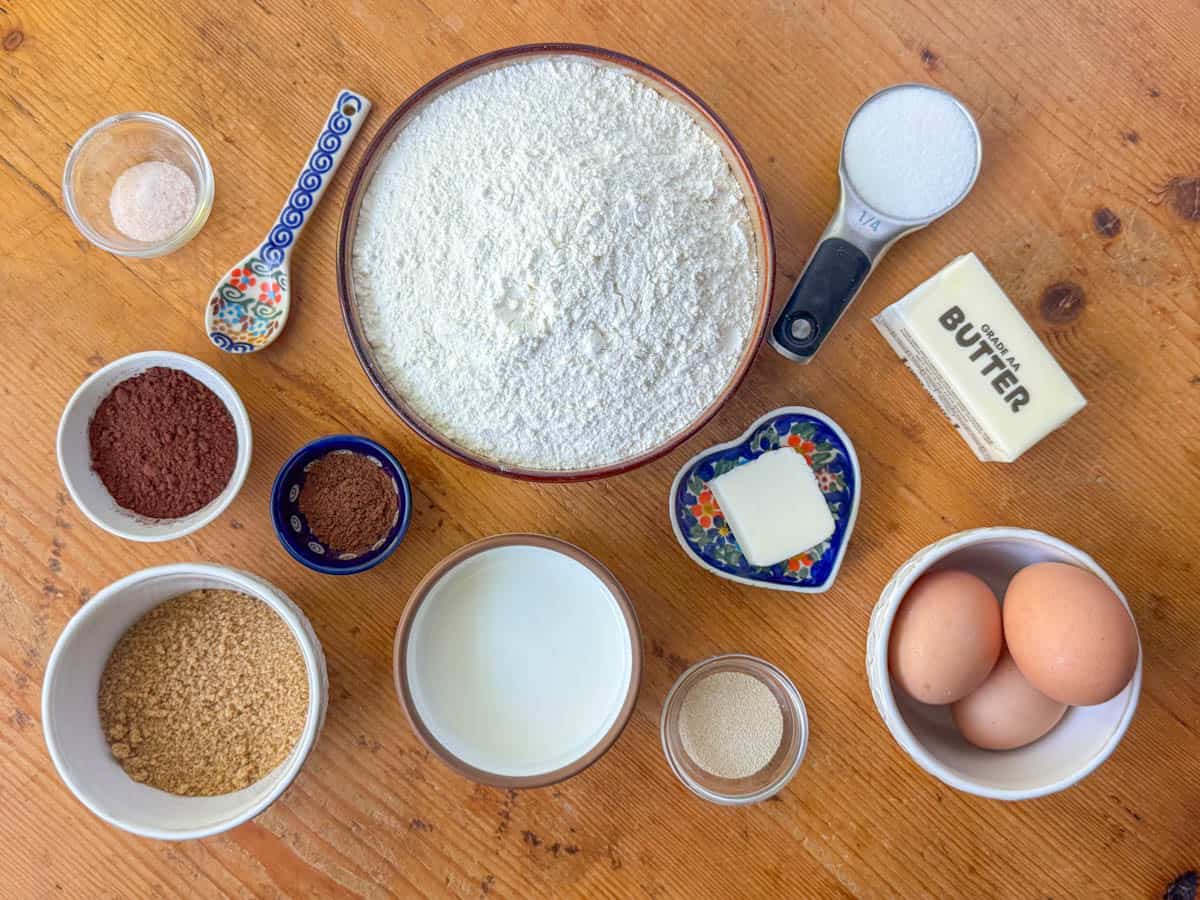
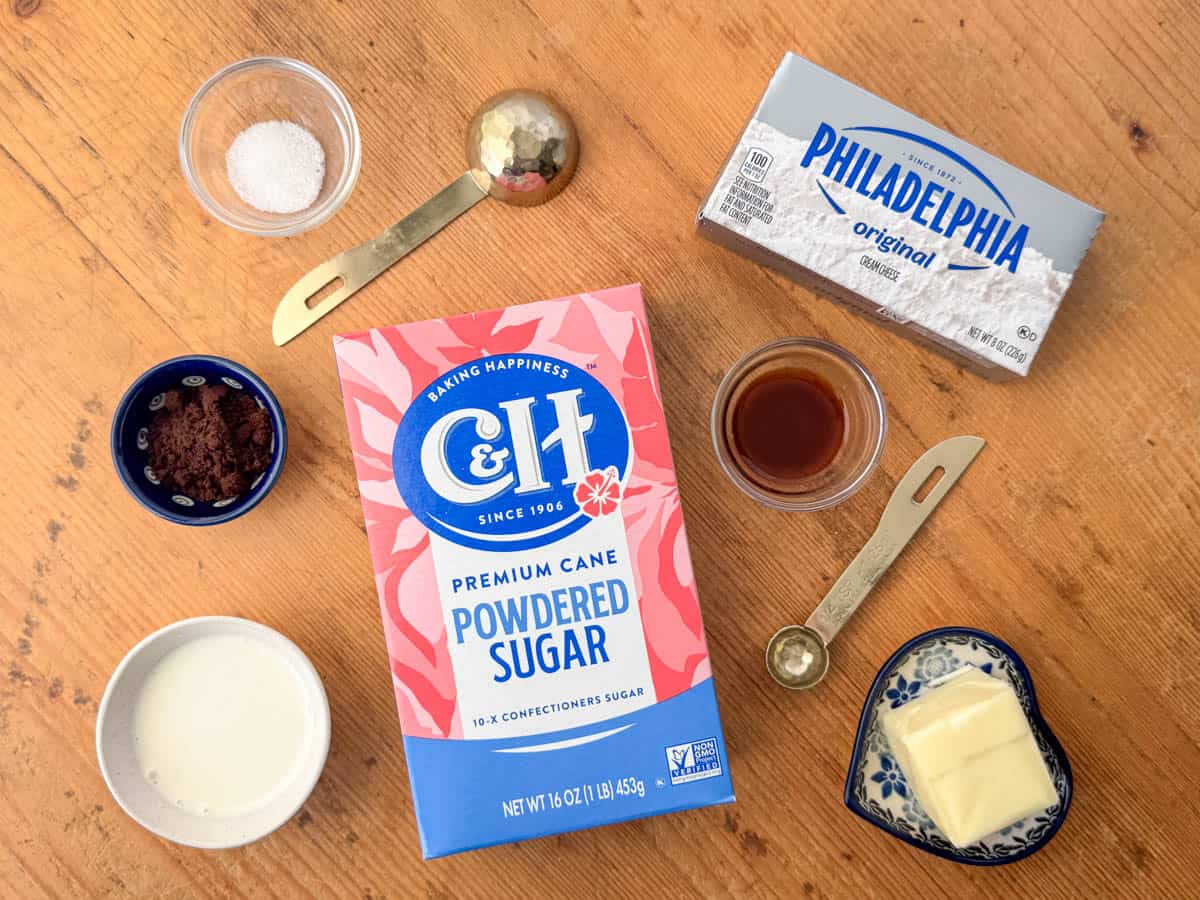
Ingredients needed to make small batch cinnamon rolls: all purpose flour, white sugar, milk, egg, slated butter, active dry yeast, salt, brown sugar, cinnamon, cream cheese, powdered sugar, and heavy whipping cream.
  • All purpose flour
  • White sugar
  • Whole milk
  • Salted butter
  • Egg
  • Active dry yeast
  • Salt
  • Brown sugar
  • Cinnamon
  • Cream cheese
  • Powdered sugar
  • Heavy cream

See recipe card for quantities.

Best way to cut small batch cinnamon rolls

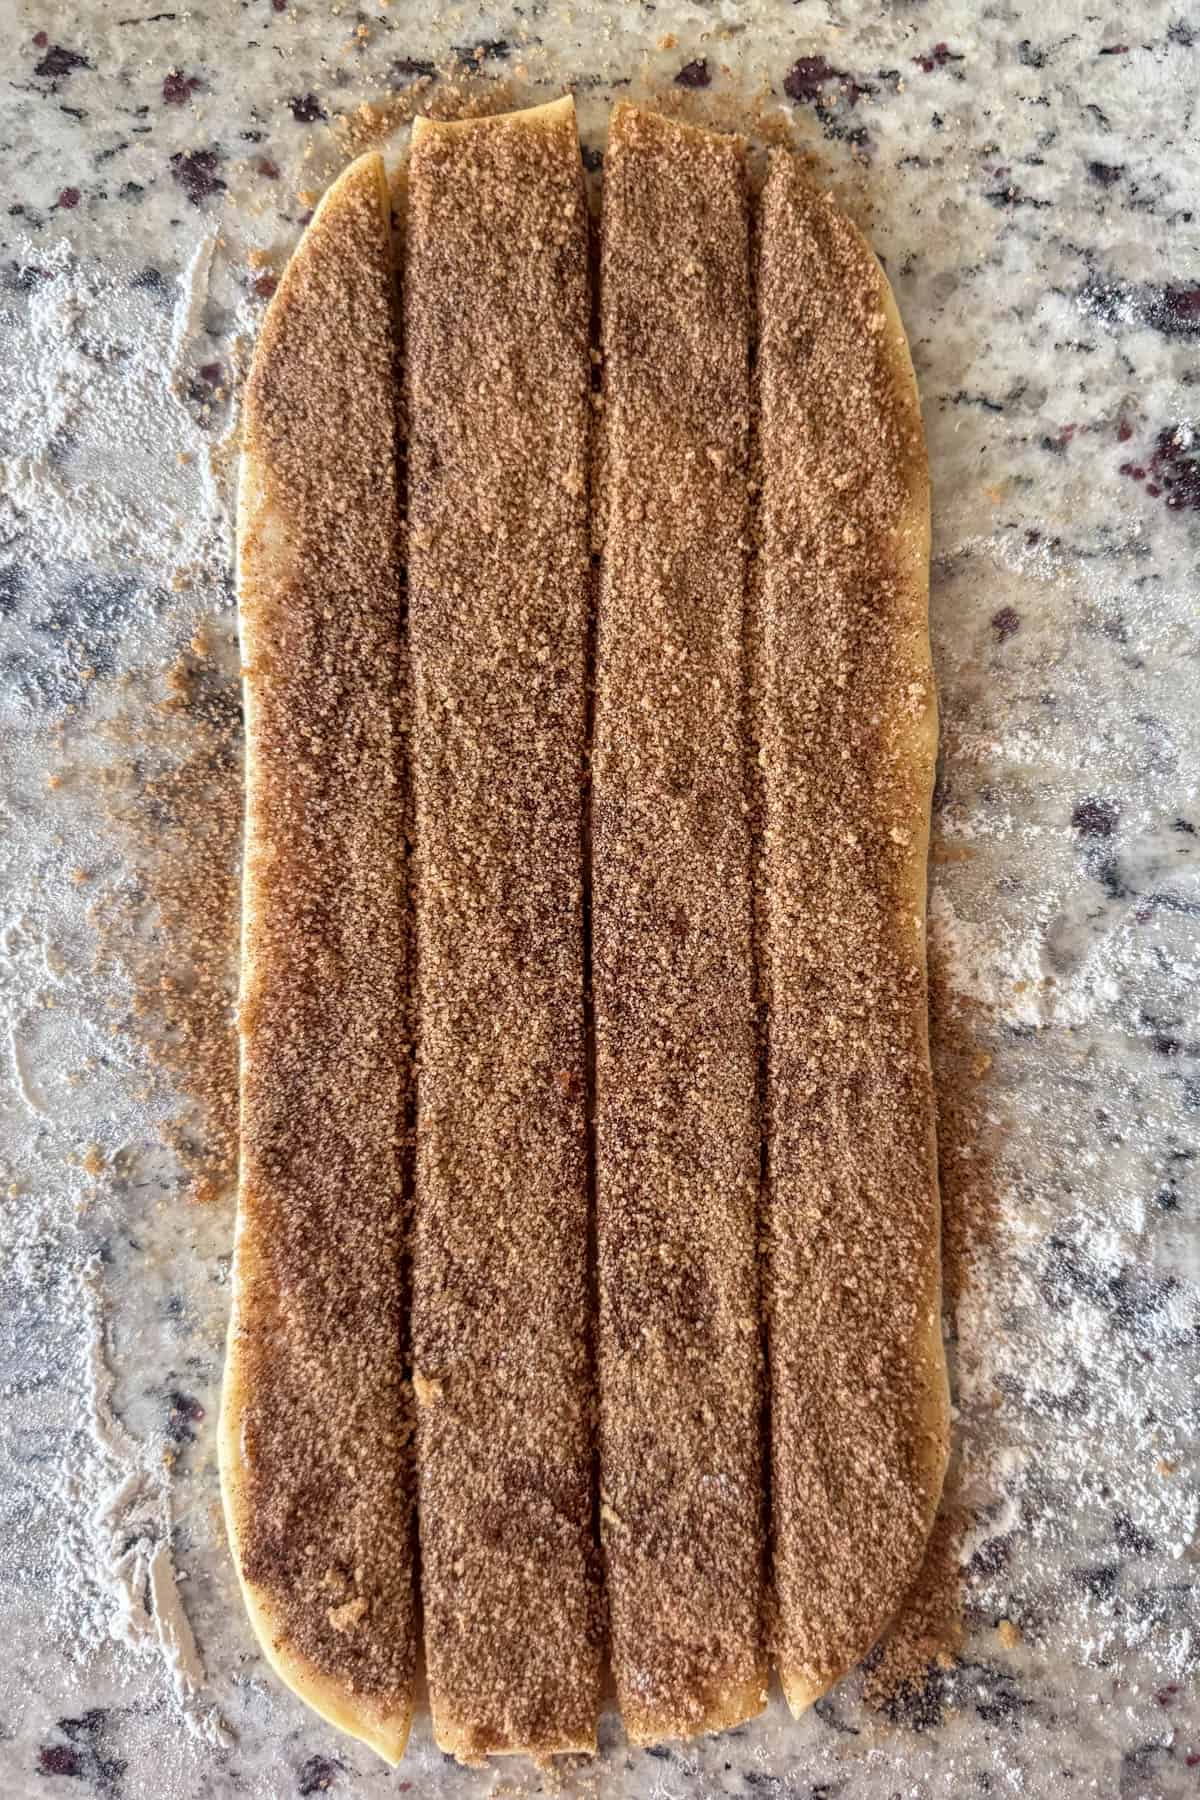
For small batch cinnamon rolls, we roll the dough into a smaller rectangle of 4 inches by 10-12 inches and then top with the filling. Instead of rolling the dough into a log, use a pizza cutter and cut the dough into 4 strips. Roll each strip individually and tightly and place them into a small baking pan or individual baking cups. Since we have only 4 rolls, this makes cutting the rolls a lot easier. This method works for regular batch cinnamon rolls too, but it's super helpful for small batches.

Cinnamon roll dough rolled out into rectangle topped with softened butter, brown sugar and cinnamon and cut into 4 strips ready to be rolled.

Substitutions

  • Vegan - You can make these small batch cinnamon rolls as vegan sweet rolls. To replace the egg, you can make a flax egg or use an egg replacer like Bob Mill's. [For one flax egg, mix one tablespoon of flaxseed meal and three tablespoons of water and let sit for 10 minutes]. For the butter, substitute your favorite plant based butter. My current favorite is Miyoko's Plant Milk Butter, but it's not always easy to find. Most grocery stores now carry some version of plant based butter like Earth Balance or Country Crock brands. For the milk, substitute your favorite plant based milk. I recommend oat milk for a neutral milk when baking. For the heavy cream, you can substitute plant based heavy cream (Trader Joe's is the best I've tried so far), or use a little less of a plant based milk. And, of course, use vegan sugar.

Variation

You can also make my other flavored sweet rolls in smaller batches. Try the Lemon Raspberry Sweet Rolls or the Chocolate Rolls with Espresso Frosting.

Equipment

A hand mixer, or small stand mixer, is helpful in making small batch cinnamon rolls.

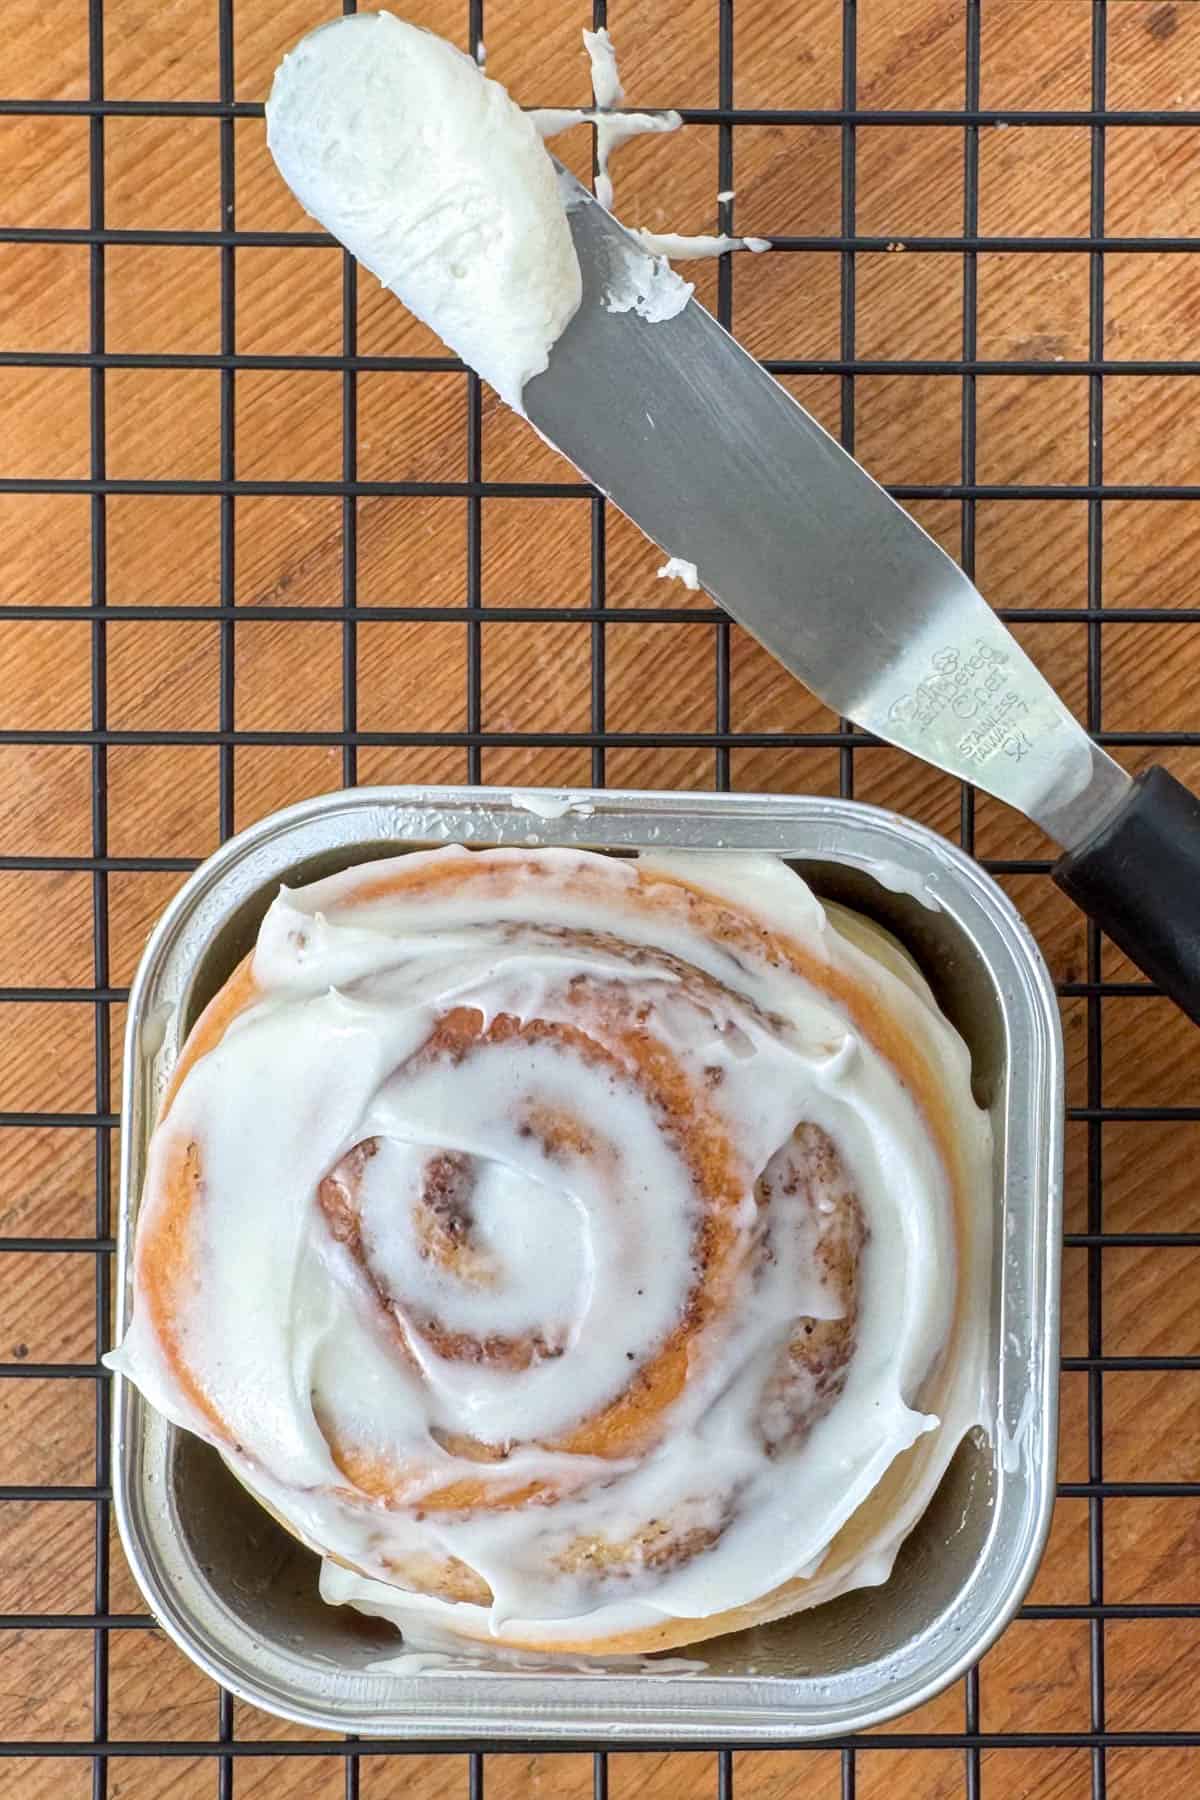
Overhead close up photo of a cinnamon roll in a mini square baking cup next to an icing spatula with cream cheese frosting on it.

Storage

Store in an airtight container at room temperature for 1-2 days or in the refrigerator for 5-7 days. To warm up cinnamon rolls on day 2 or thereafter, just microwave them for 15-20 seconds. Not long, just enough to warm them up!

Next Level Tips

  • Use a high quality cinnamon. There are different types of cinnamon and a good cinnamon can take your sweet rolls to a whole other level! Try a single source organic brand. I'm currently in love with Ceylon cinnamon from Indonesia. Think of cinnamon like coffee and chocolate. Where it's made and how it made make a difference!
  • You can bake this 4 cinnamon roll small batch in a small baking pan, ramekins or you can little aluminum baking cups like shown in the photos. For the baking cups, I suggest using the 5 ounce square or round baking cups. Cinnamon rolls expand out and up when baking. If you use a cup that's too small around, then the sweet rolls have no where to go but up. If that happens, you can lightly press them down a bit, but it's best to give the sweet rolls enough room to rise when baking.
Overhead view of four cinnamon rolls in mini square baking cups on top of a cooling rack.

FAQ

Can I make these ahead of time?

Definitely! To make these ahead of time, follow the instructions up through the Making the Filling instruction #6. Immediately after cutting the sweet rolls and placing them in the baking pan or baking cups, cover the pan/cups and place them in the refrigerator. The following day, take them out and let them sit covered on the counter to come to room temperature, approximately thirty minutes. Remove the cover and continue with the baking instructions.

Related

Looking for other recipes like this? Try these:

  • 9 Cinnamon Rolls in Cast Iron Pan
    Overnight Cinnamon Rolls
  • Chocolate sweet roll with espresso frosting on plate
    Chocolate Sweet Rolls with Espresso Frosting
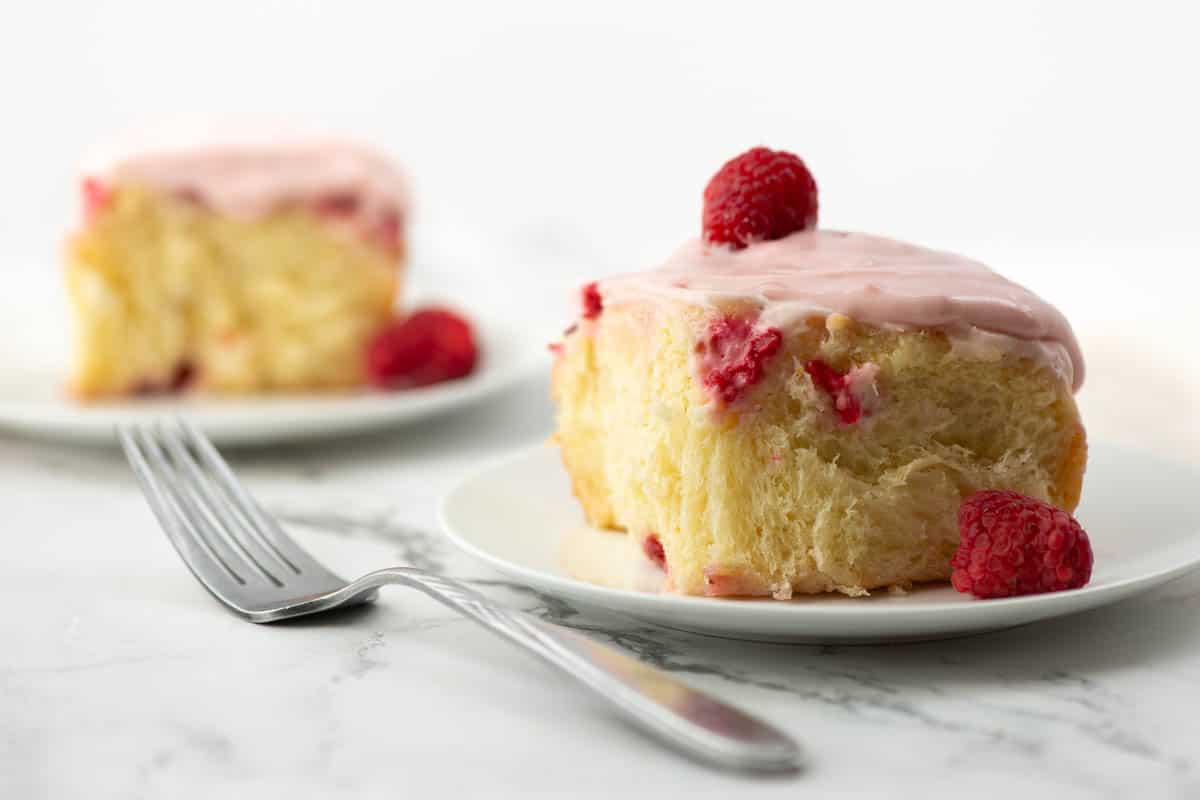
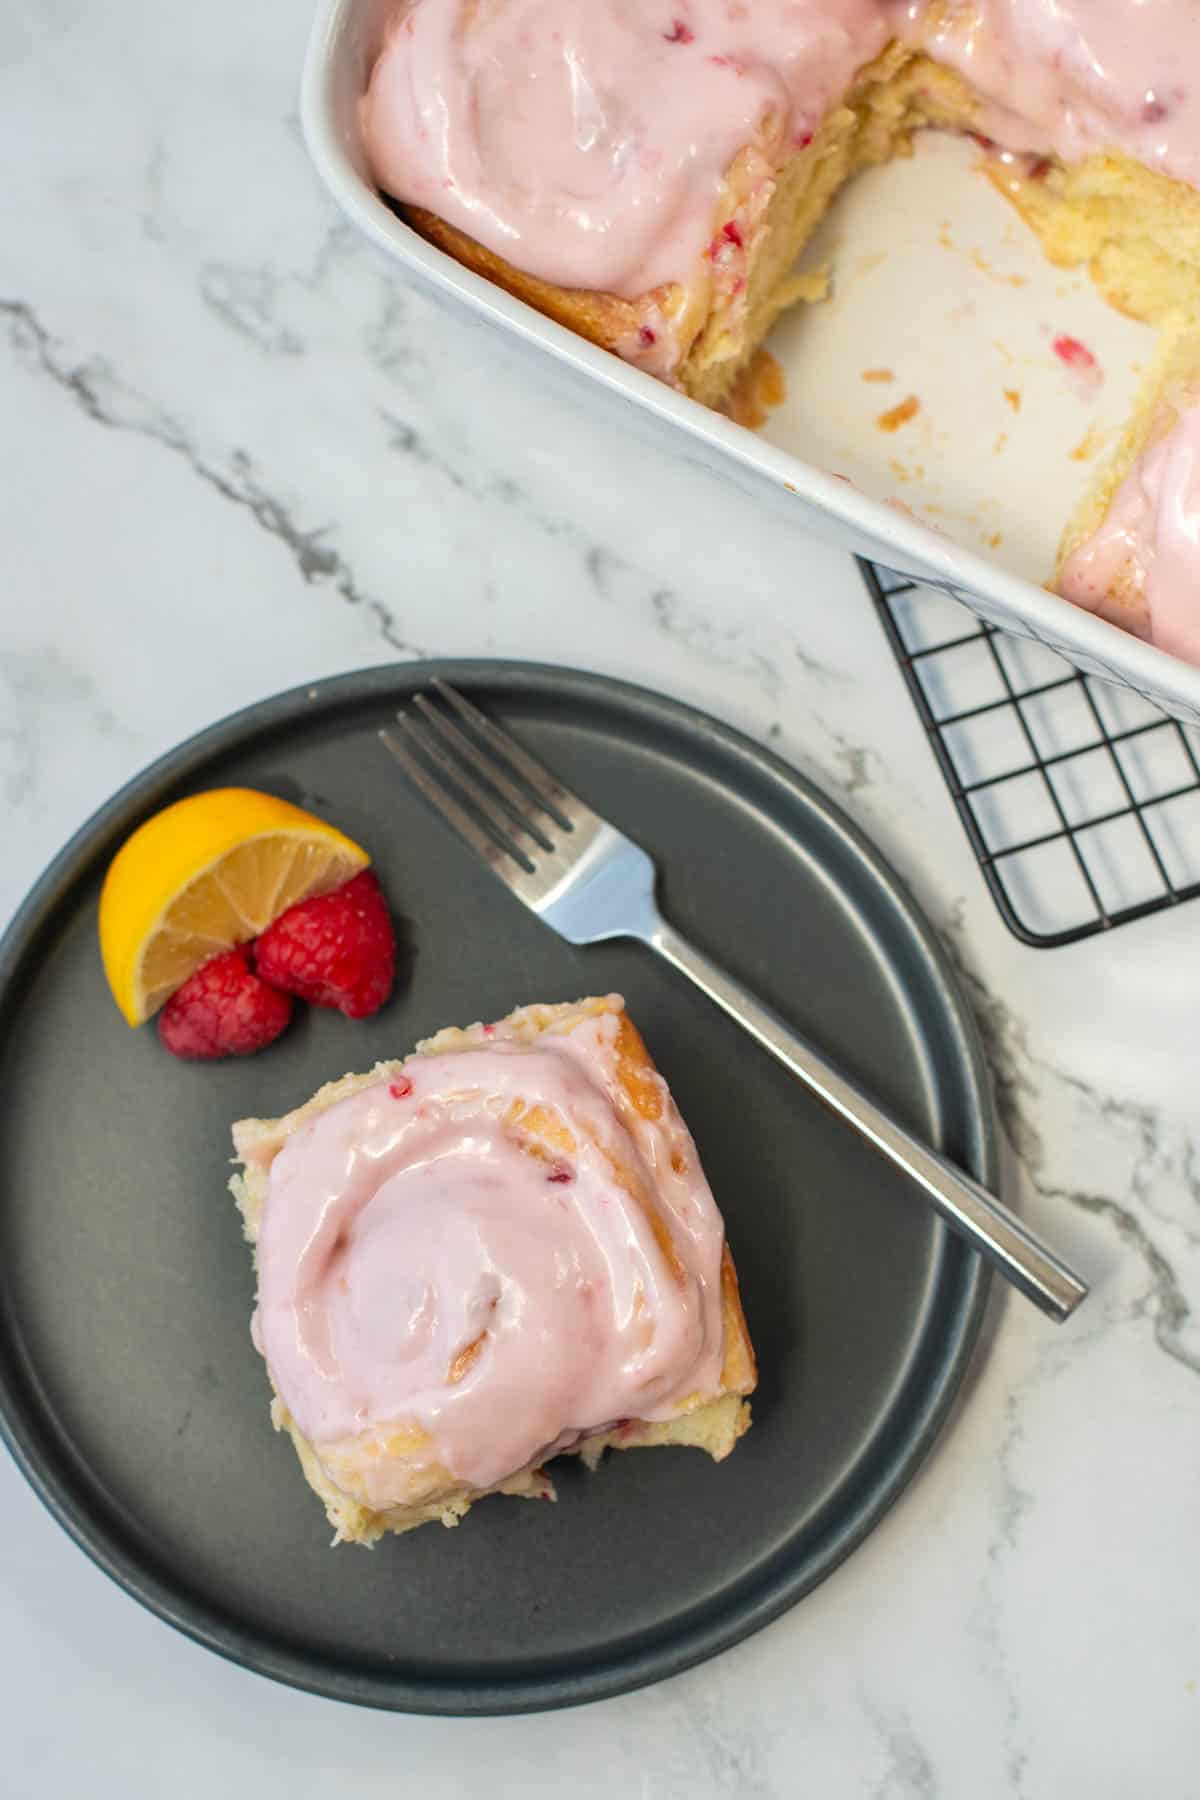
  • Top view of lemon raspberry sweet roll on a plate
    Lemon Raspberry Sweet Rolls
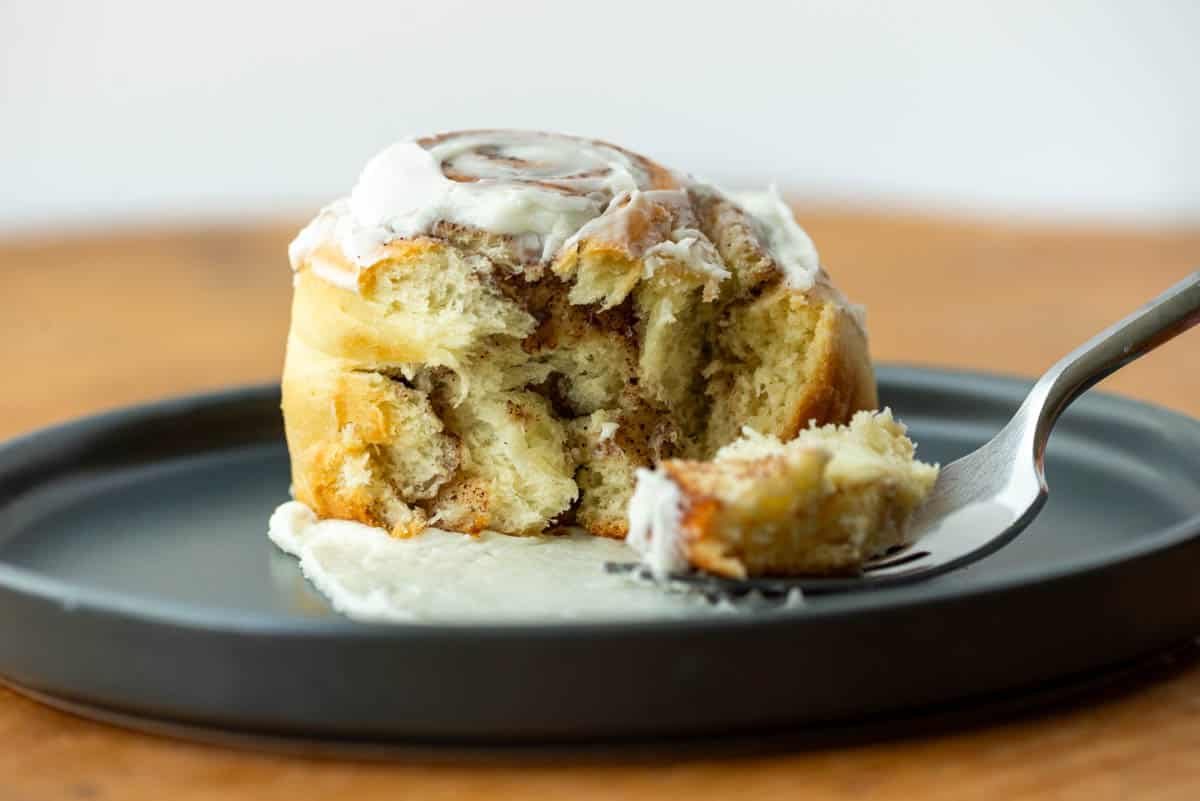
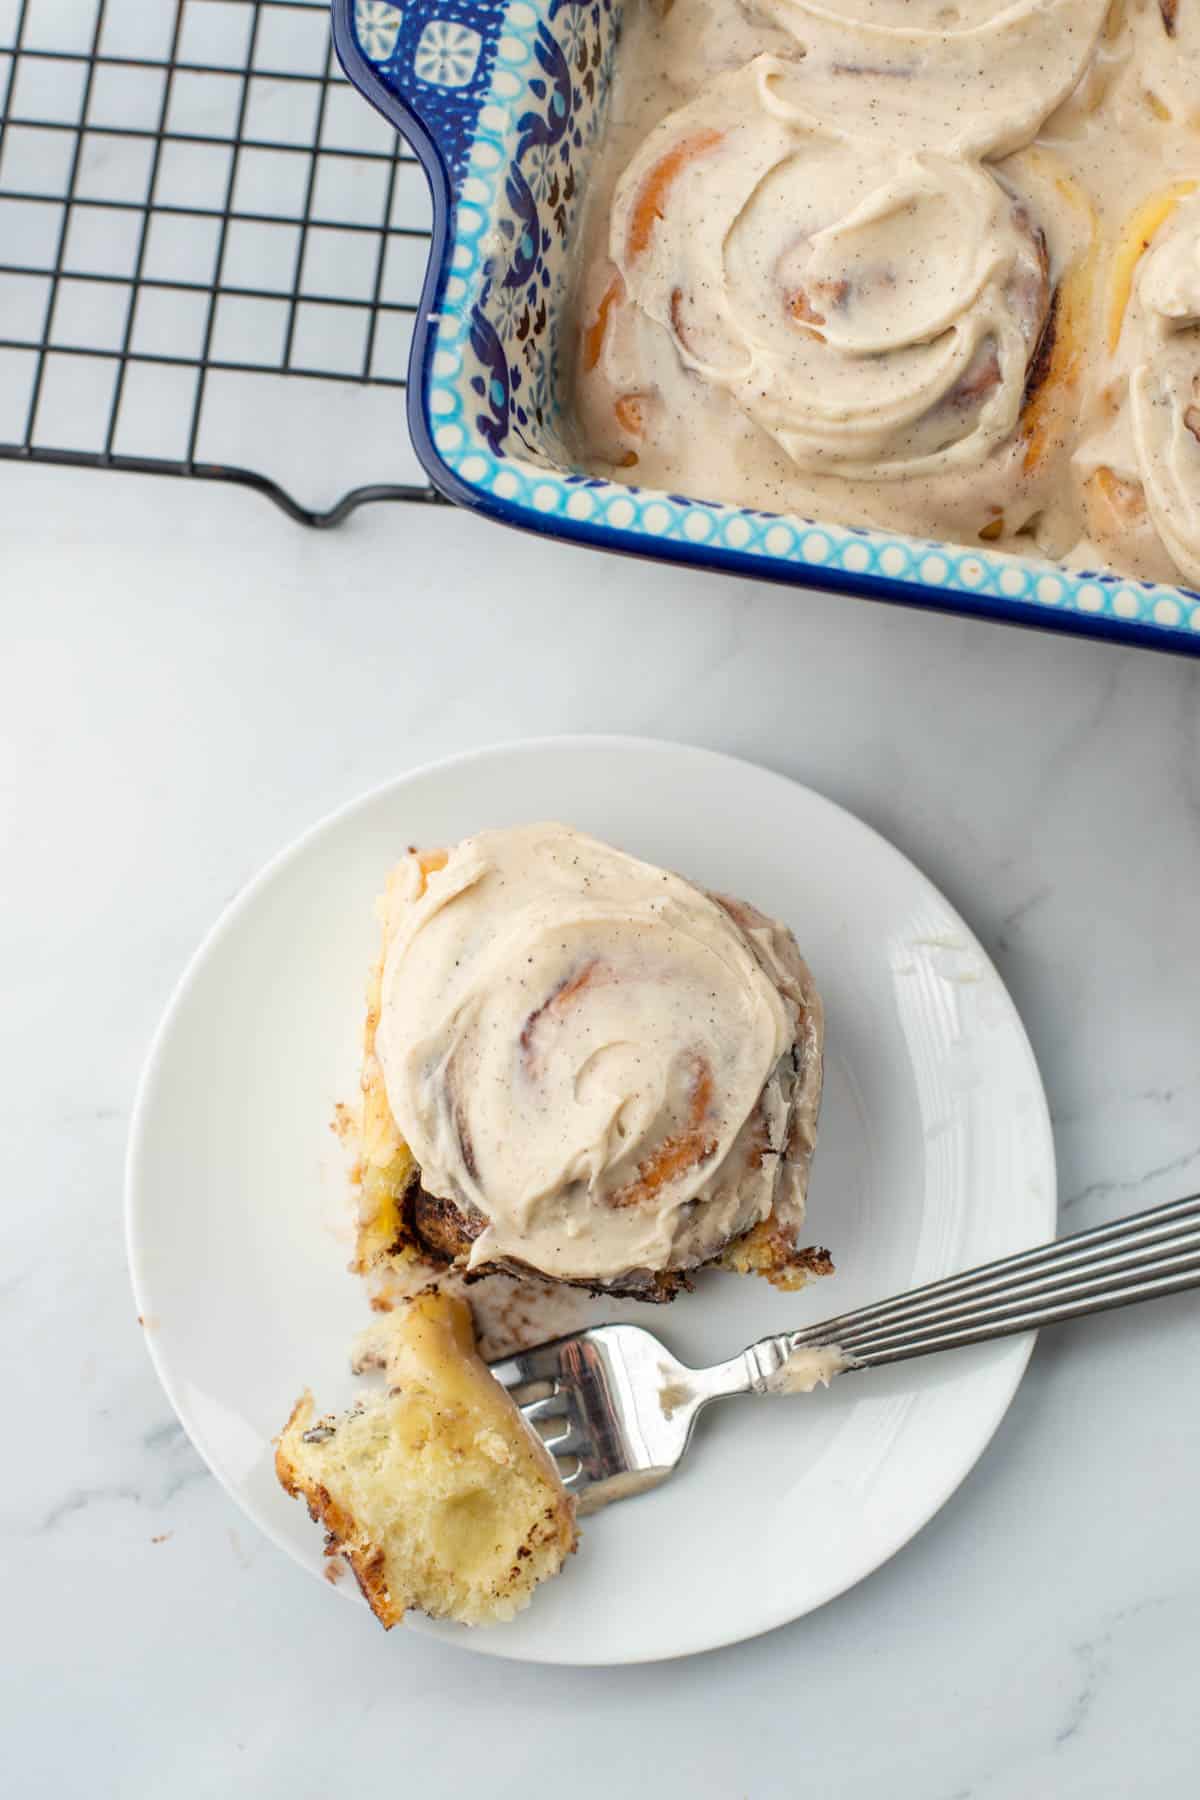
Side view of cinnamon roll on plate with a bite on a fork.
Overhead view of four cinnamon rolls in mini square baking cups on top of a cooling rack.

Small Batch Cinnamon Rolls

Tracy @ Next Level Baker
Small batch cinnamon rolls are perfect when you want all the gooey, cinnamon-y deliciousness of a homemade cinnamon roll but don't want to make a whole pan. This small batch makes 4 rolls.
Print Recipe Pin Recipe
Prep Time 15 minutes mins
Cook Time 15 minutes mins
Rise Time 3 hours hrs
Total Time 3 hours hrs 30 minutes mins
Course Breakfast
Cuisine American
Servings 4

Ingredients
  

Dough

  • ¼ cup whole milk
  • ¾ teaspoon active dry yeast
  • 2 tablespoons white sugar
  • 3 tablespoons salted butter room temperature
  • 1 egg
  • 1 ½ cups all-purpose flour
  • ¼ teaspoon salt

Filling

  • 2 teaspoons salted butter*
  • 3 tablespoons brown sugar
  • 2 teaspoon cinnamon

Cream cheese frosting

  • 2 ounces cream cheese
  • 1 tablespoon salted butter
  • 1 cup powdered sugar
  • 1 tablespoon heavy whipping cream

Instructions
 

Making the dough

  • Take out the 3 tablespoons of butter and the egg to bring them to room temperature.
  • Heat the milk in the microwave until warm 105℉ - 110℉. [It's best to use a kitchen thermometer if you have one.] Add the warm milk, yeast and a little of the white sugar to the mixing bowl. Let sit for 5-10 minutes.
  • Add the rest of the sugar, the softened butter and the egg to the mixing bowl. Mix on low speed until the eggs are incorporated. The butter will not incorporate at this stage, which is normal.
  • Add the flour and salt to the mixing bowl and mix on low until the flour has been incorporated.
  • Switch to the dough hook on the mixer and mix on low, or knead by hand, for 5 minutes.
  • Spray a small bowl (or reuse the mixing bowl) with cooking spray. The dough is sticky and that's normal. Let the dough rise in a covered bowl for a total of two hours. After one hour, knead the dough using the stretch and fold method. If you're familiar with this method, do it in the bowl. If this is your first time, take the dough out of the bowl and set on a floured surface. Take a hold of a large piece of dough at the 12 position, stretch it away from your body, and then fold it back toward the middle of the dough ball. Rotate the ball ⅛ to ¼ of a turn and repeat the stretch out and fold back motions. Keep repeating until you have gone around 2 times and the dough becomes less stretchy. You DO NOT have to do this, BUT it does make the rolls more fluffy and soft. Put the dough back in the bowl to rise for another hour. So, the total rise time is two hours with the optional stretch and fold after one hour.

Making the filling

  • Spray the baking pan or baking cups with cooking spray.
  • After the dough has risen for the two hours, put it on a floured surface and roll it out into a 4 x 10 inch rectangle. [If the dough is ever resistant, let it rest for 10 minutes. Don't overwork the dough trying to roll it out. It should roll out easily.
  • Brush less than one tablespoon of very soft butter on to the dough with a pastry or silicone brush. You want to use very soft but not melted butter. Think of the butter as the glue that will hold the brown sugar and cinnamon to the dough. You can also use your fingers or a knife to spread the butter.
  • Mix the brown sugar and cinnamon together in a small bowl until the cinnamon is incorporated into the sugar. Sprinkle the mixture evenly over the buttered dough and lightly press it in.
  • Cut the dough into 4 long strips using a pizza cutter.
  • Add the cut sweet rolls to your sprayed pan or cups of choice and cover with aluminum foil.
  • Allow the sweet rolls to rise in the pan for one hour.
  • While the sweet rolls are rising, preheat the oven to 350 ℉.
  • If you are using individual baking cups, place the baking cups on a baking sheet.
  • Bake the sweet rolls for 15-20 minutes. Check at 15 minutes. The sweet rolls are done when they are lightly golden brown on top. Don't overtake them.

Making the frosting

  • When the cinnamon rolls are close to being done, start the frosting.
  • Put the softened cream cheese and softened butter in to a mixing bowl and mix on medium until thoroughly combined and fluffy.
  • Add the powdered sugar and the heavy whipping cream and mix on medium until light and fluffy. It will take 2-3 minutes.
  • While the cinnamon rolls are still hot, spread a very thin layer of frosting on every part of the outer layer of the cinnamon rolls. It will melt, and that's perfect. It softens the outer layer of the lightly browned rolls.
  • Once the sweet rolls have cooled for at least 15 minutes, spread the rest of the frosting on the sweet rolls. If you are not serving them warm, wait until they have completely cooled to frost them.

Notes

  • You need less than one tablespoon of butter for the filling. Just eyeball it when you're cutting the stick of butter since the hash lines are in one tablespoon increments. 

Would you like to save this?

We'll email this post to you, so you can come back to it later!

Don't worry! We won't spam you!
Keyword Small batch cinnamon rolls
Tried this recipe?Let us know how it was!
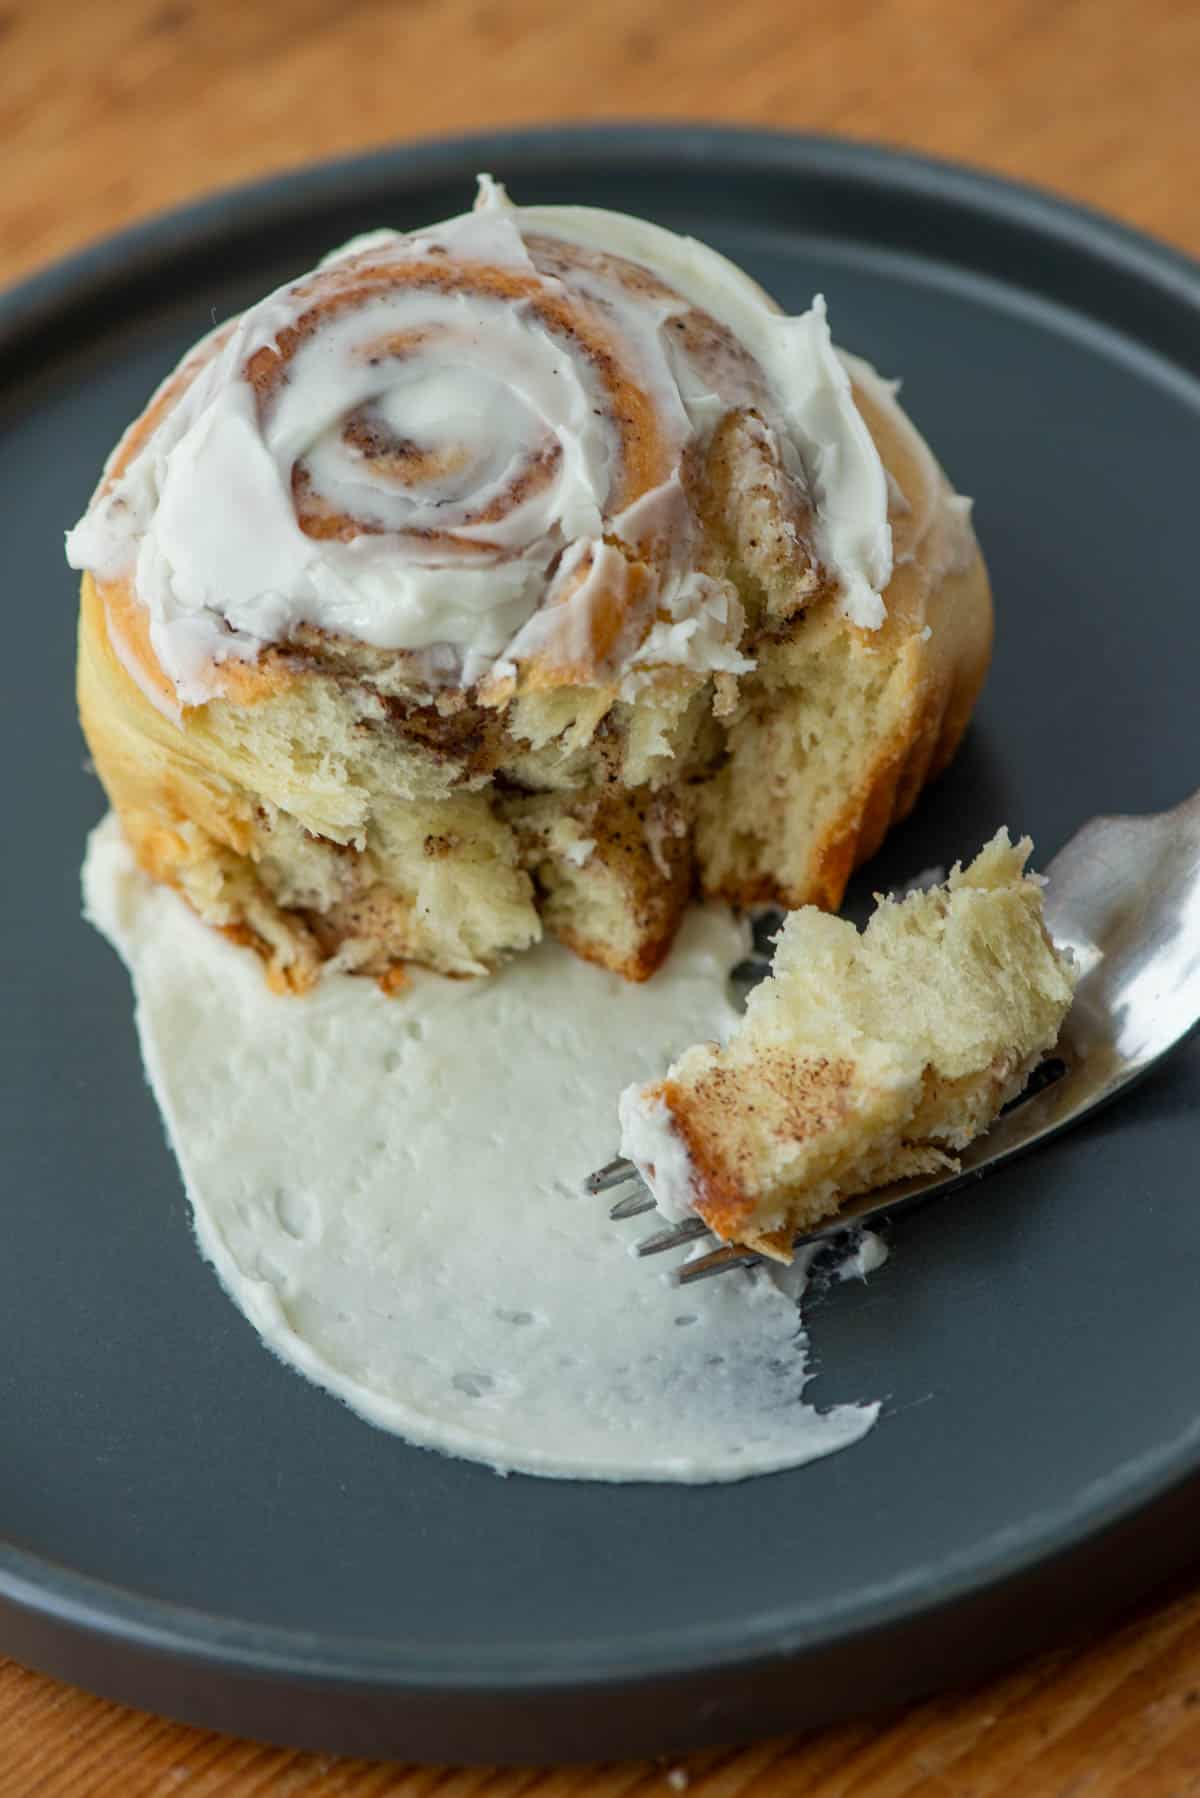
Top view of cinnamon roll on plate with a bite on a fork.

Easy Chocolate Zucchini Cake

February 20, 2025 by Tracy @ Next Level Baker Leave a Comment

Single layer chocolate zucchini cake is easy, chocolatey and delicious. The zucchini makes this cake moist, but you'll never taste the zucchini. It's the perfect way to use up extra zucchini and sneak in some vegetables.

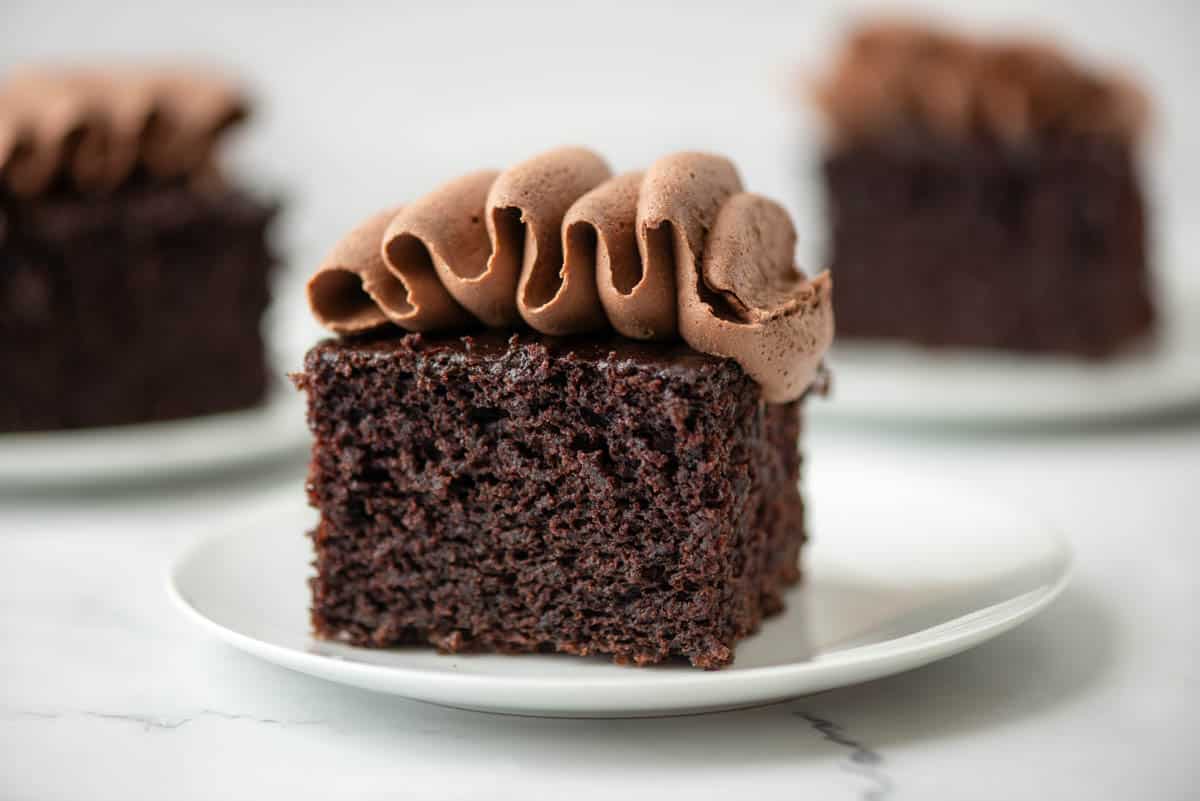
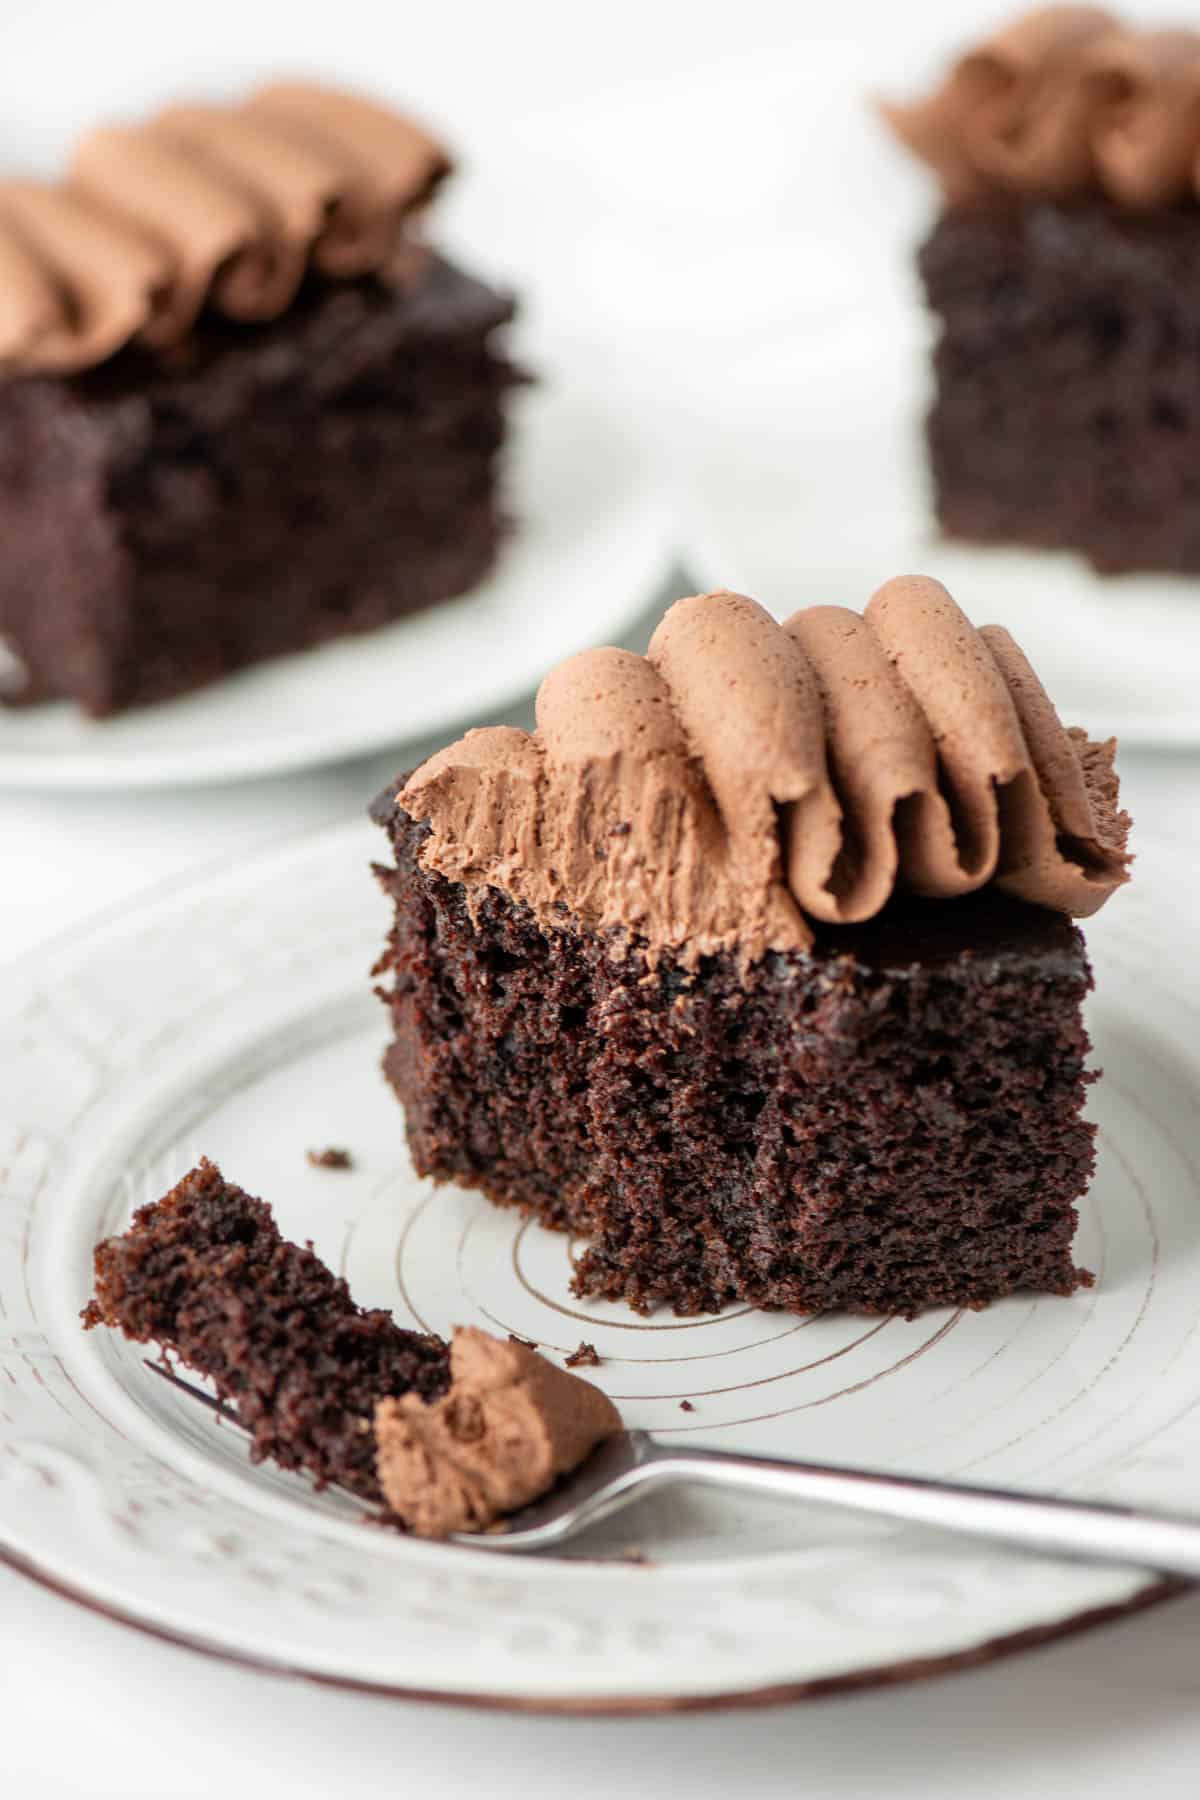
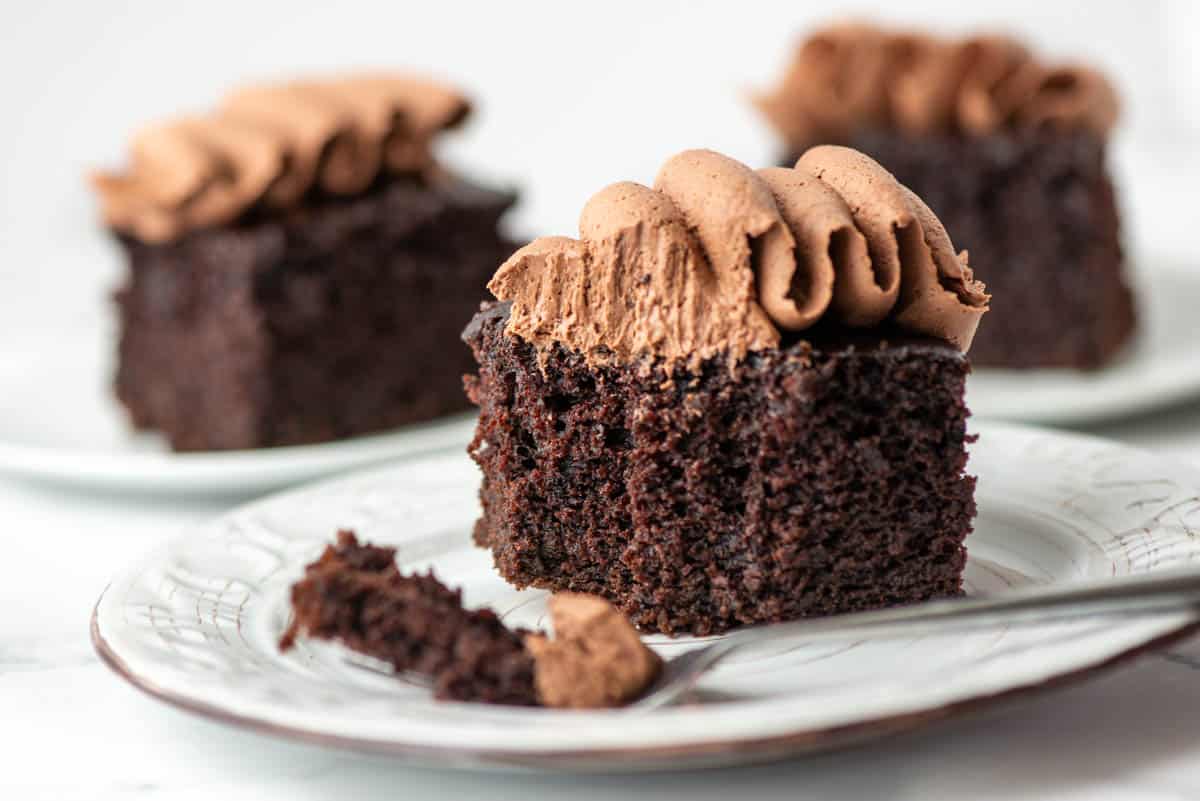
Close up photo of a slice of chocolate zucchini cake with chocolate buttercream frosting. Two additional slices of cake with frosting in the background.

Chocolate zucchini cake is one of my very favorite chocolate cakes. It's moist, sweet and contains vegetables! It's a win-win-win cake. I often just serve this cake naked (plain) or with a dusting of powdered sugar for a little flair. But if you want to top it with frosting, I will also include an easy chocolate buttercream frosting. The chocolate buttercream frosting takes this moist and delicious cake to something wickedly decadent. You choose! Either way you top it, the cake still has zucchini and some extra nutrients that you don't normally get in chocolate cake.

[feast_advanced_jump_to]

Chocolate Zucchini Cake Ingredients

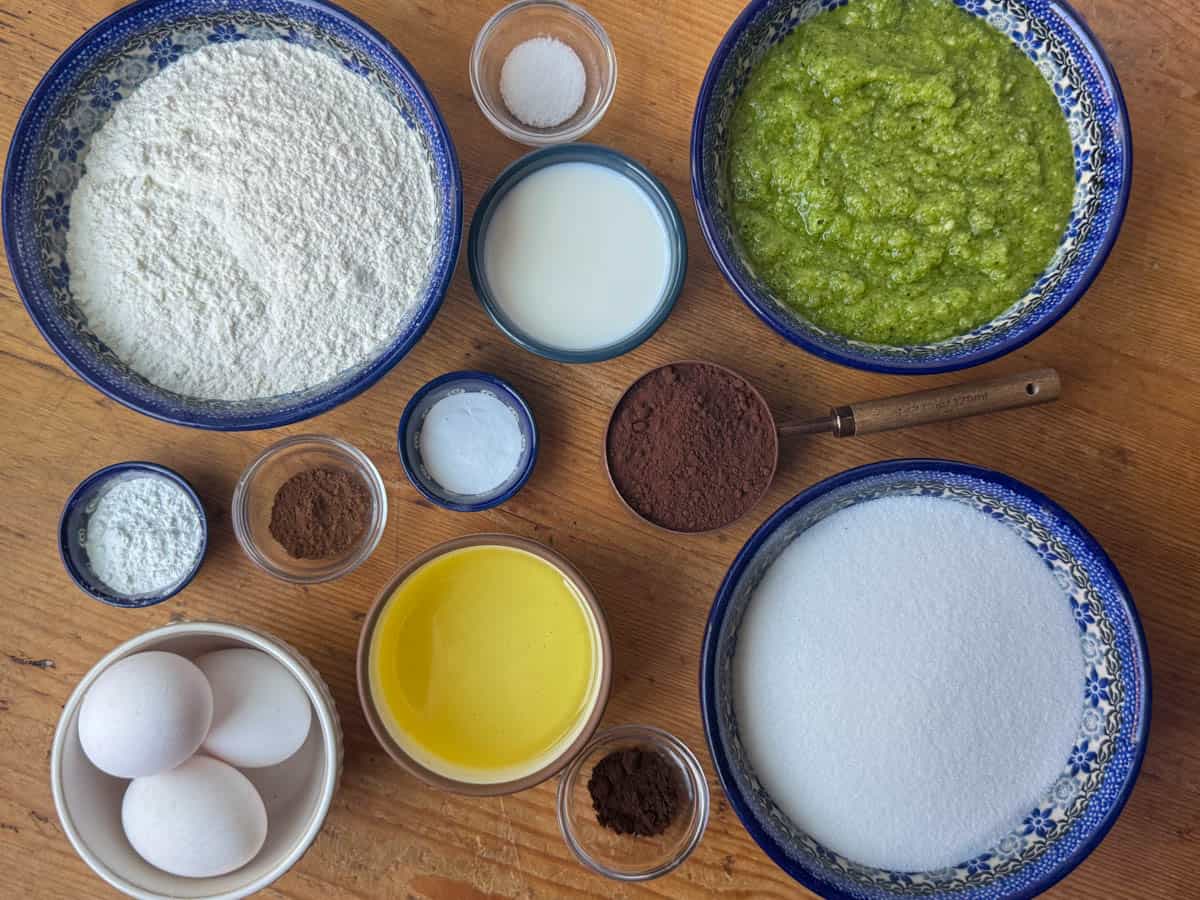
Ingredients for chocolate zucchini cake: all purpose flour, liquified zucchini, white sugar, vegetable oil, eggs, cocoa powder, milk, cinnamon, espresso powder, baking powder, baking soda, salt.
  • Cocoa powder
  • All purpose flour
  • Espresso powder
  • Baking powder
  • Baking soda
  • Cinnamon
  • Salt
  • Vegetable oil
  • White sugar
  • Eggs
  • Liquified zucchini
  • Milk

See recipe card for quantities.

Chocolate Buttercream Ingredients

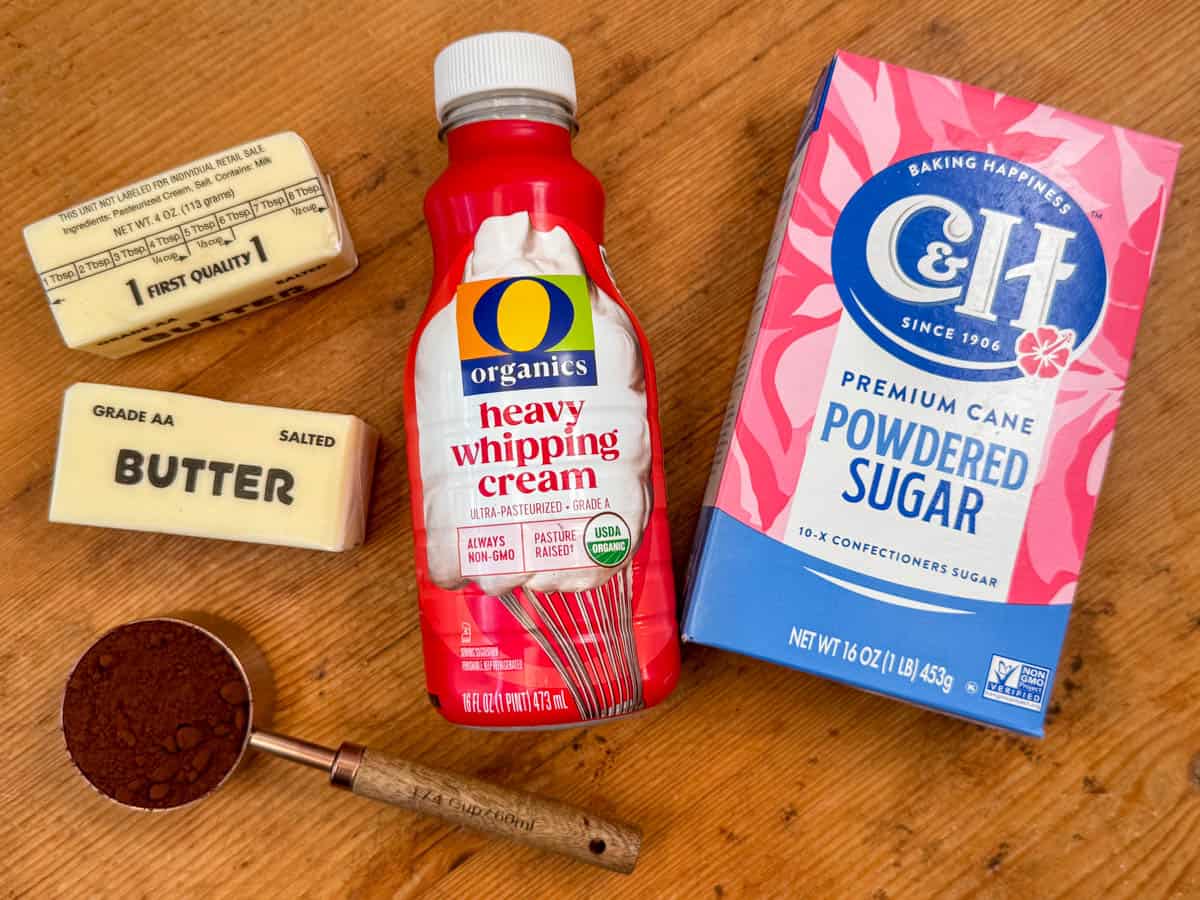
Ingredients needed for chocolate buttercream frosting: salted butter, powdered sugar, heavy whipping cream, cocoa powder
  • Cocoa powder
  • Salted butter
  • Powdered sugar
  • Heavy whipping cream

See recipe card for quantities.

Variations

  • Add-ins - this chocolate zucchini cake can support 1 cup of finely crushed nuts or 1 cup of chocolate chips. Just stir them in until they're evenly distributed.
  • Vegan - you can make this chocolate zucchini cake vegan by replacing the milk, butter and heavy cream with plant based equivalents. (I like oat milk for baking, Miyoko's plant based butters and Trader Joe's vegan heavy cream.) For the eggs, you can substitute an egg replacer (like Bob's Red Mill brand) or you can use flax eggs. To replace the 3 eggs used in this recipe, mix 3 tablespoons of ground flaxseed with 9 tablespoons of water. Let the mixture sit for 10 minutes before adding it in place of the eggs.

Equipment

A food process or blender is needed to liquify the zucchini. A hand mixer or stand mixer is needed to make the chocolate buttercream frosting. However, a mixer is not necessary to make the chocolate zucchini cake itself.

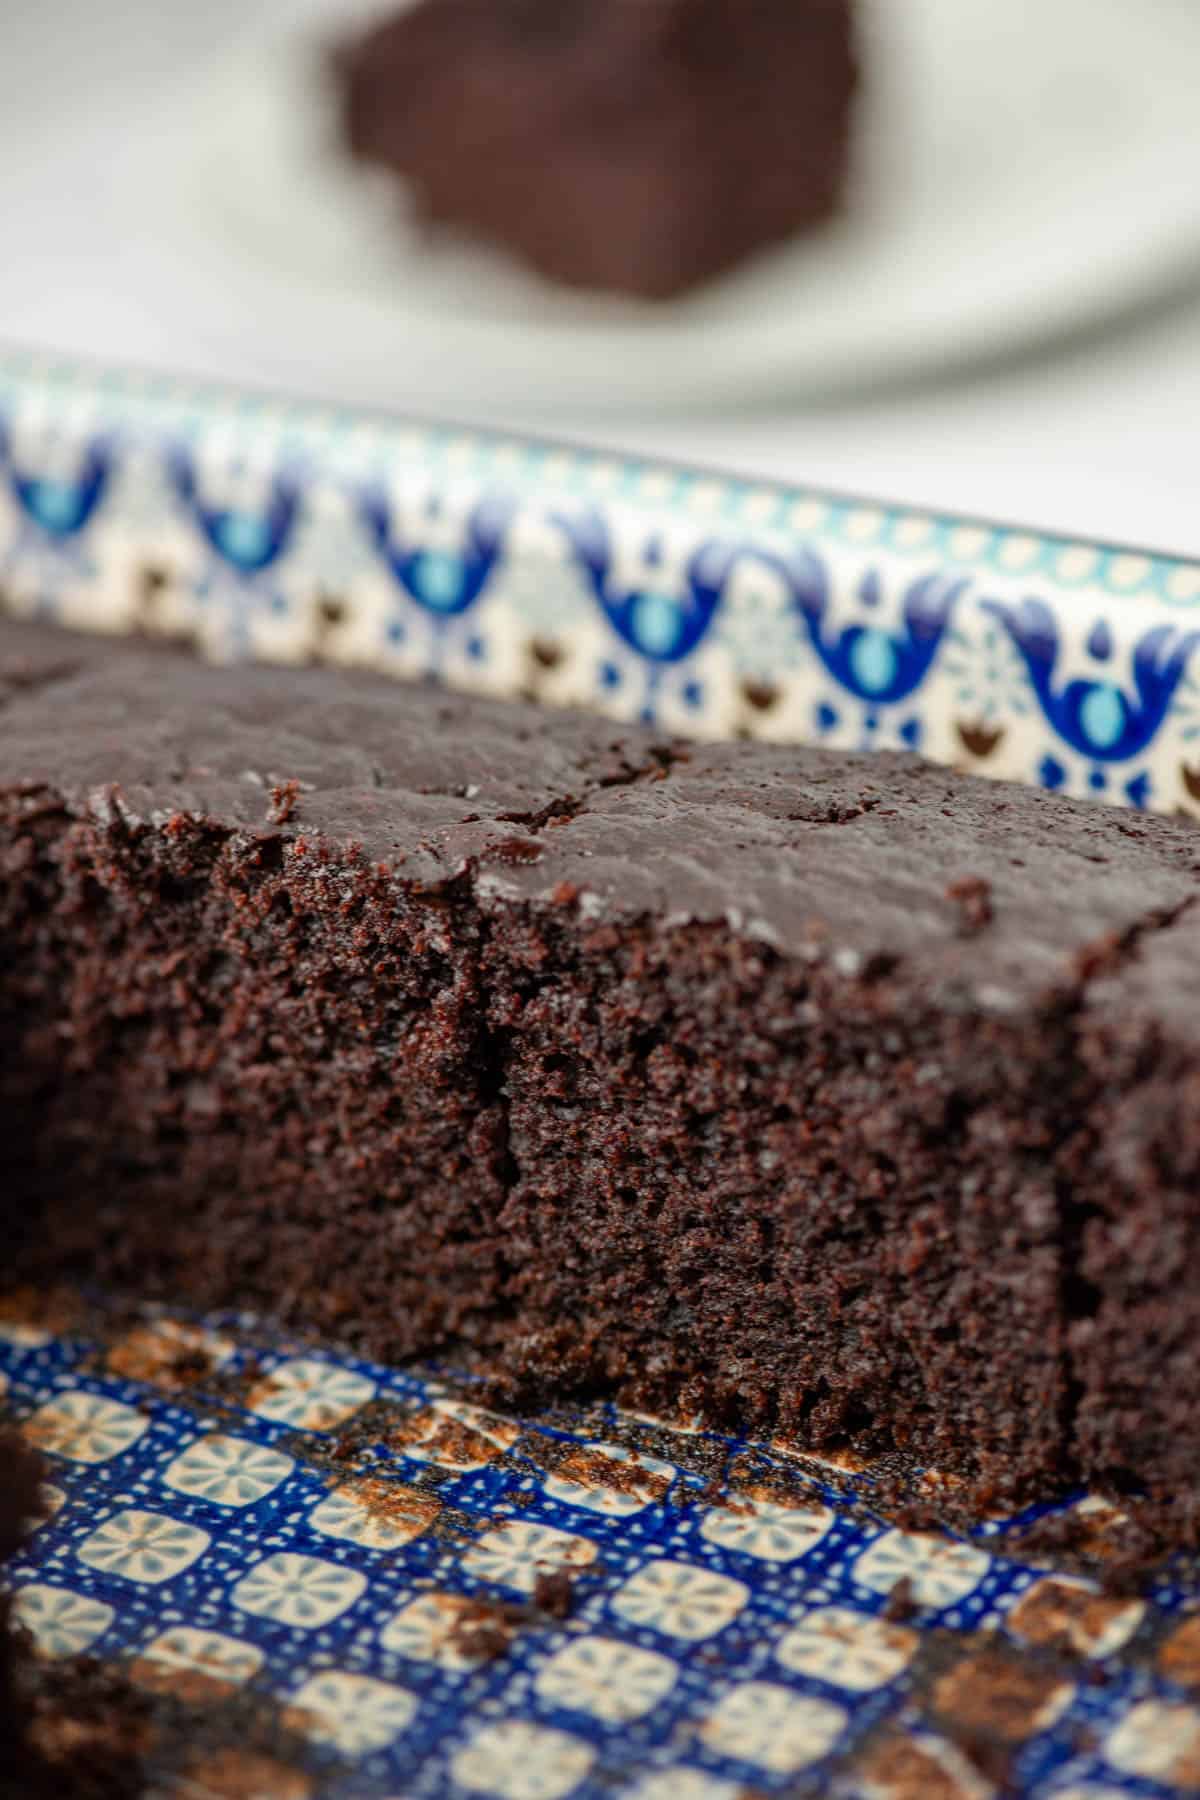
Side view of row of chocolate zucchini cake in the baking pan

Storage

Store in an airtight container in the refrigerator for 5-7 days.

Next Level Tips

  • I love using espresso powder to enhance the flavor of chocolate. You can easily substitute instant coffee for the espresso powder. Or if you don't have espresso powder or instant coffee, you could also use 2 teaspoons of vanilla.
  • I usually serve this easy chocolate zucchini cake naked (plain) without any decorative additions. The cake is sweet and moist enough without any frosting. Sometimes, I sprinkle powdered sugar on top for fun. But when I really want to take this cake to the next level, I add a chocolate buttercream frosting. I'll add the chocolate buttercream recipe here as optional.

FAQ

How do I liquify zucchini?

Zucchini will easily liquify in a food processor or a blend. First, chop the zucchini in to large chunks to fit them in the food processor or blender, and then blend until the zucchini becomes a chunky liquid. It usually takes under a minute.

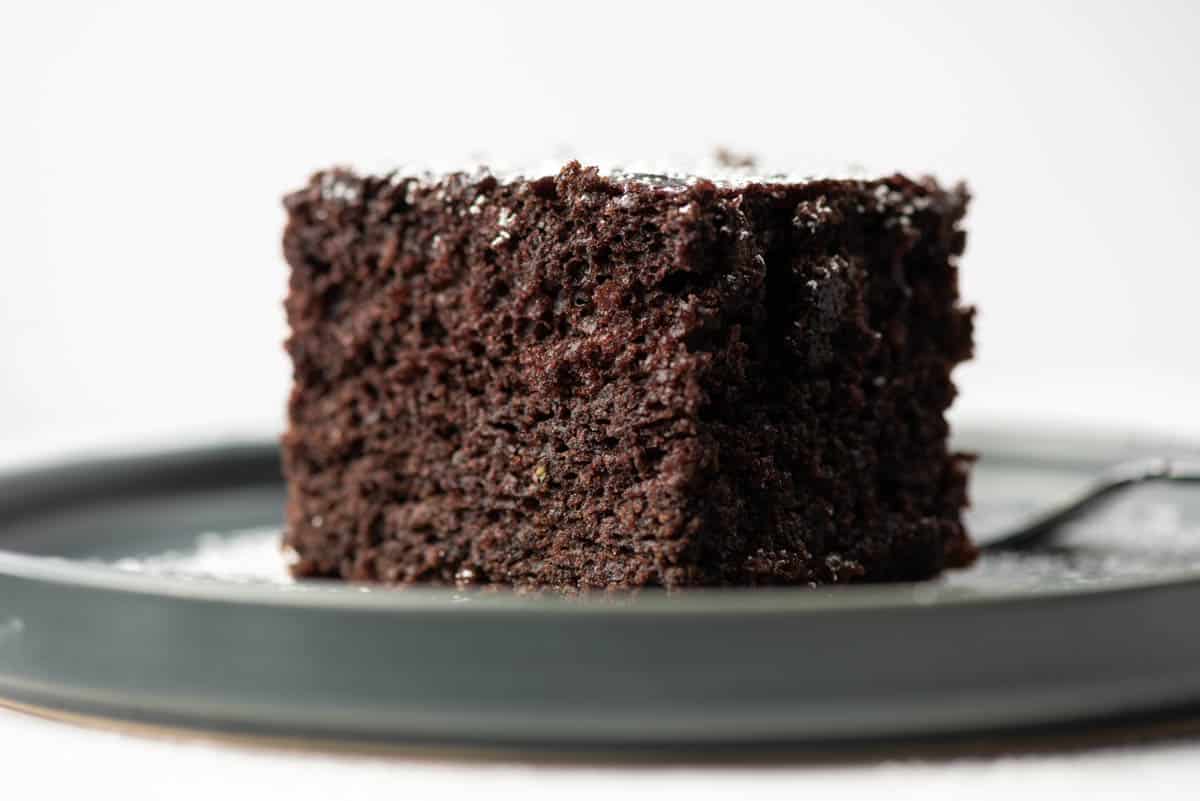
Side view of slice of chocolate zucchini cake topped with powdered sugar on a plate

Related

Looking for other recipes like this? Try these:

  • Top view of a chocolate bundt cake topped with powdered sugar
    Chocolate Bundt Cake
  • Close up of Samoas cupcakes on a plate with toasted coconut and a box of Samoas cookies blurred in the background
    Samoas Cupcakes
  • Photo of many Thin Mints Cupcakes on a cooling rack with a box of Thin Mints cookies in the background
    Thin Mints Cupcakes
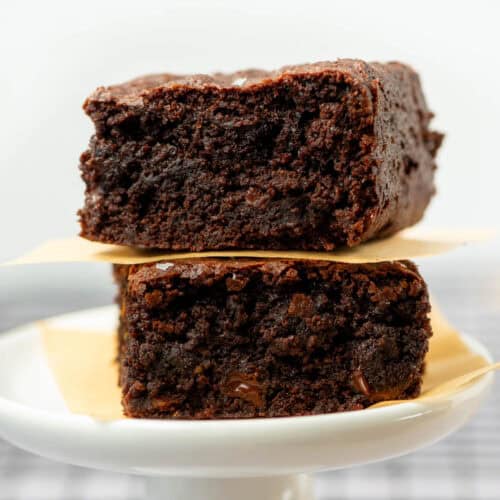
  • Close up shot of two stacked Gluten Free Sweet Potato Brownies
    Gluten Free Sweet Potato Brownies
Close up photo of a slice of chocolate zucchini cake with chocolate buttercream frosting.

Easy Chocolate Zucchini Cake

Tracy @ Next Level Baker
Chocolate zucchini cake is a decadent, super moist dessert where chocolate meets the subtle magic of liquified zucchini. It's super easy to make too!
Print Recipe Pin Recipe
Prep Time 10 minutes mins
Cook Time 50 minutes mins
Frosting 20 minutes mins
Total Time 1 hour hr 20 minutes mins
Course Dessert
Cuisine American
Servings 15

Equipment

  • 1 food processor or blender
  • 1 hand or stand mixer or whisk

Ingredients
  

Chocolate Zucchini Cake

  • 2 ½ cups all purpose flour
  • ½ cup cocoa powder
  • 1 teaspoon cinnamon
  • ½ teaspoon espresso powder
  • 2 ½ teaspoons baking powder
  • 1 ½ teaspoons baking soda
  • 1 teaspoon salt
  • ¾ cup neutral vegetable oil
  • 2 cups white sugar
  • 3 eggs
  • 2 cups liquified zucchini (approx. 3 medium zucchinis)
  • ½ cup milk

Chocolate Buttercream Frosting (optional)

  • 2 sticks salted butter* room temperature
  • ¼ cup cocoa powder
  • 4 cups powdered sugar
  • 2-4 tablespoons heavy whipping cream

Instructions
 

Chocolate zuccini cake

  • Preheat the oven to 350 ℉. Lightly spray a 9x13 baking pan.
  • Combine the flour, cocoa powder, cinnamon, espresso powder, baking powder, baking soda, and salt in a small bowl and set aside.
  • Add the sugar and vegetable oil to a mixing bowl and mix until combined
  • Add the eggs to the mixing bowl and mix until combined.
  • Liquify the zucchini in a food processor or blender until it's a chunky liquid. Then add it to the mixing bowl and mix until combined.
  • Alternate adding the dry ingredients and the milk. Mix until combined.
  • Pour the batter into a 9x13 baking pan. Bake at 350 ℉ for 50-55 minutes. Check at 50 minutes. The edges should be slightly pulling away and the center of the cake should spring back. Allow the cake to cool completely before adding any powdered sugar or frosting.

Chocolate buttercream frosting

  • Add the salted butter and the cocoa powder to a mixing bowl. Mix on medium speed until all the cocoa powder has been incorporated into the butter and the mixture is light and fluffy. Scrape down the sides once or twice.
  • Then add the powdered sugar and two tablespoons of the heavy whipping cream to the mixing bowl. Mix on medium high until light and fluffy, scraping down the sides several times, about 5-6 minutes. [Depending on the temperature of the butter and the humidity of the kitchen, you may need to add more heavy cream if the frosting is too heavy/thick. Add additional heavy cream one tablespoon at a time, mix on medium high and check for fluffiness.]
  • Frost the cake by using an icing (offset) spatula, a regular knife or by piping it on.

Notes

*If using unsalted butter, add ¼ teaspoon of salt. The salt balances the sweetness of the sugar in the frosting. 

Would you like to save this?

We'll email this post to you, so you can come back to it later!

Don't worry! We won't spam you!

Keyword Chocolate Zucchini Cake
Tried this recipe?Let us know how it was!

Chocolate Bundt Cake

February 11, 2025 by Tracy @ Next Level Baker Leave a Comment

Rich, moist and easy chocolate chocolate chip bundt cake that starts with a boxed cake mix and pudding mix. Simple. Elegant. Delicious.

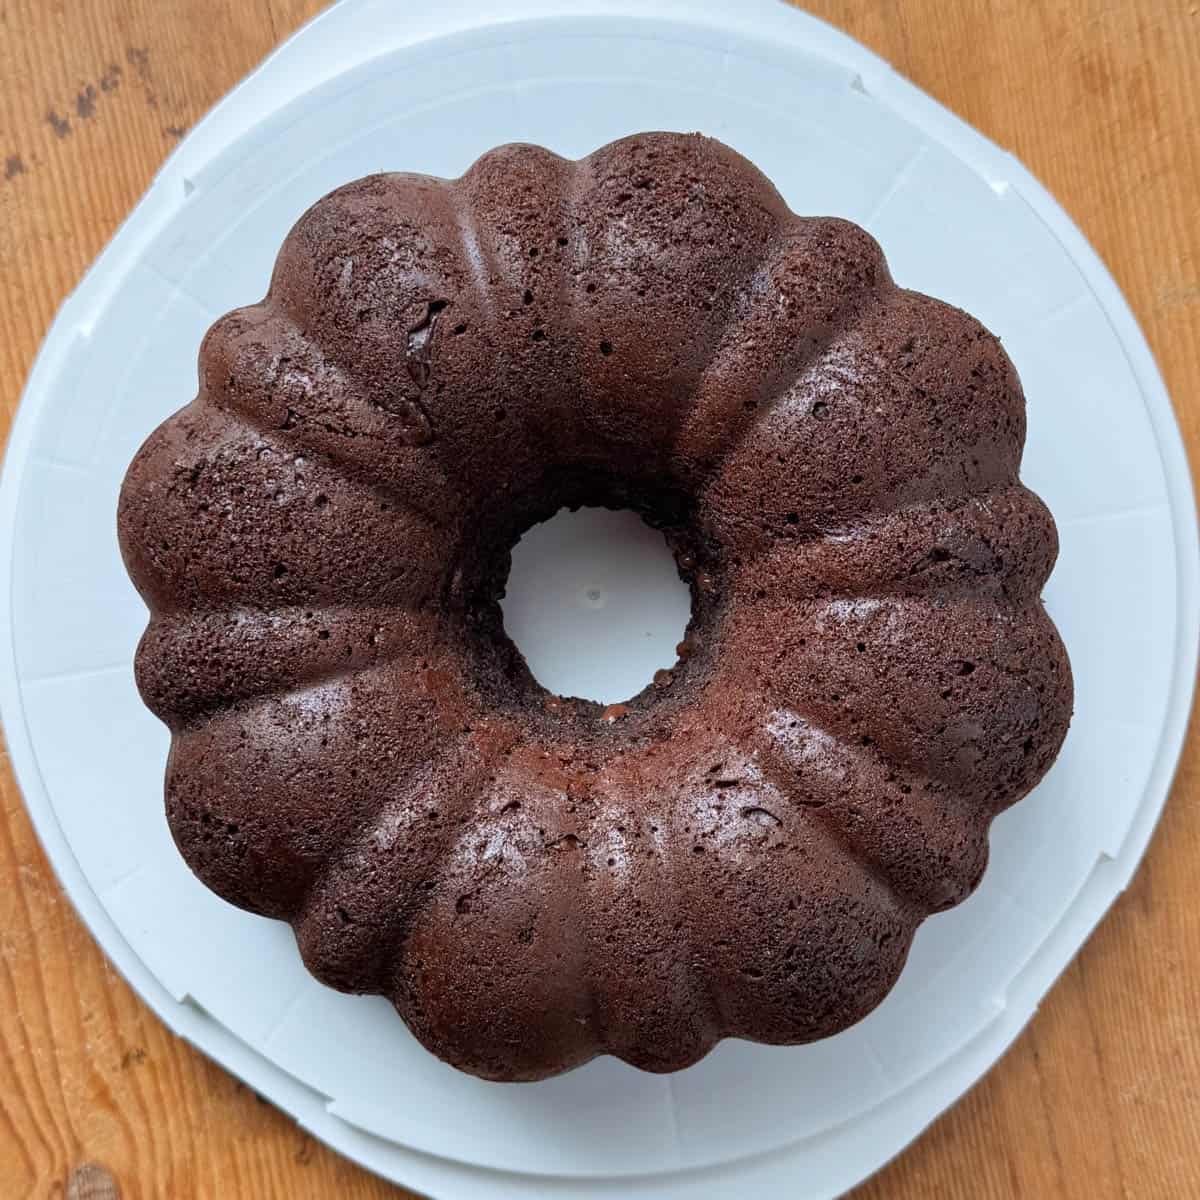
Top view of chocolate bundt cake with no frosting or decorations

This Chocolate Bundt cake recipe has been a family favorite for over 15 years. It's the one my son always requested for his birthday. 15 years ago, I only made a handful of cakes from scratch. It was a time when jazzed up boxed cake mixes were very popular. In fact, this recipe was inspired by and adapted from the Darn Good Chocolate Cake recipe from Anne Byron's The Cake Mix Doctor cookbook. This great cookbook was first published in 1999, which means it was published before Nothing Bundt Cake existed. I have no idea what inspired Nothing Bundt Cakes' Chocolate Chocolate Chip bundt cake recipe, but I wouldn't be surprised if they were inspired by Anne Byron as well. It's just that good. In fact, I would argue that this recipe is even better than Nothing Bundt Cakes' Chocolate Chocolate Chip bundt cake.

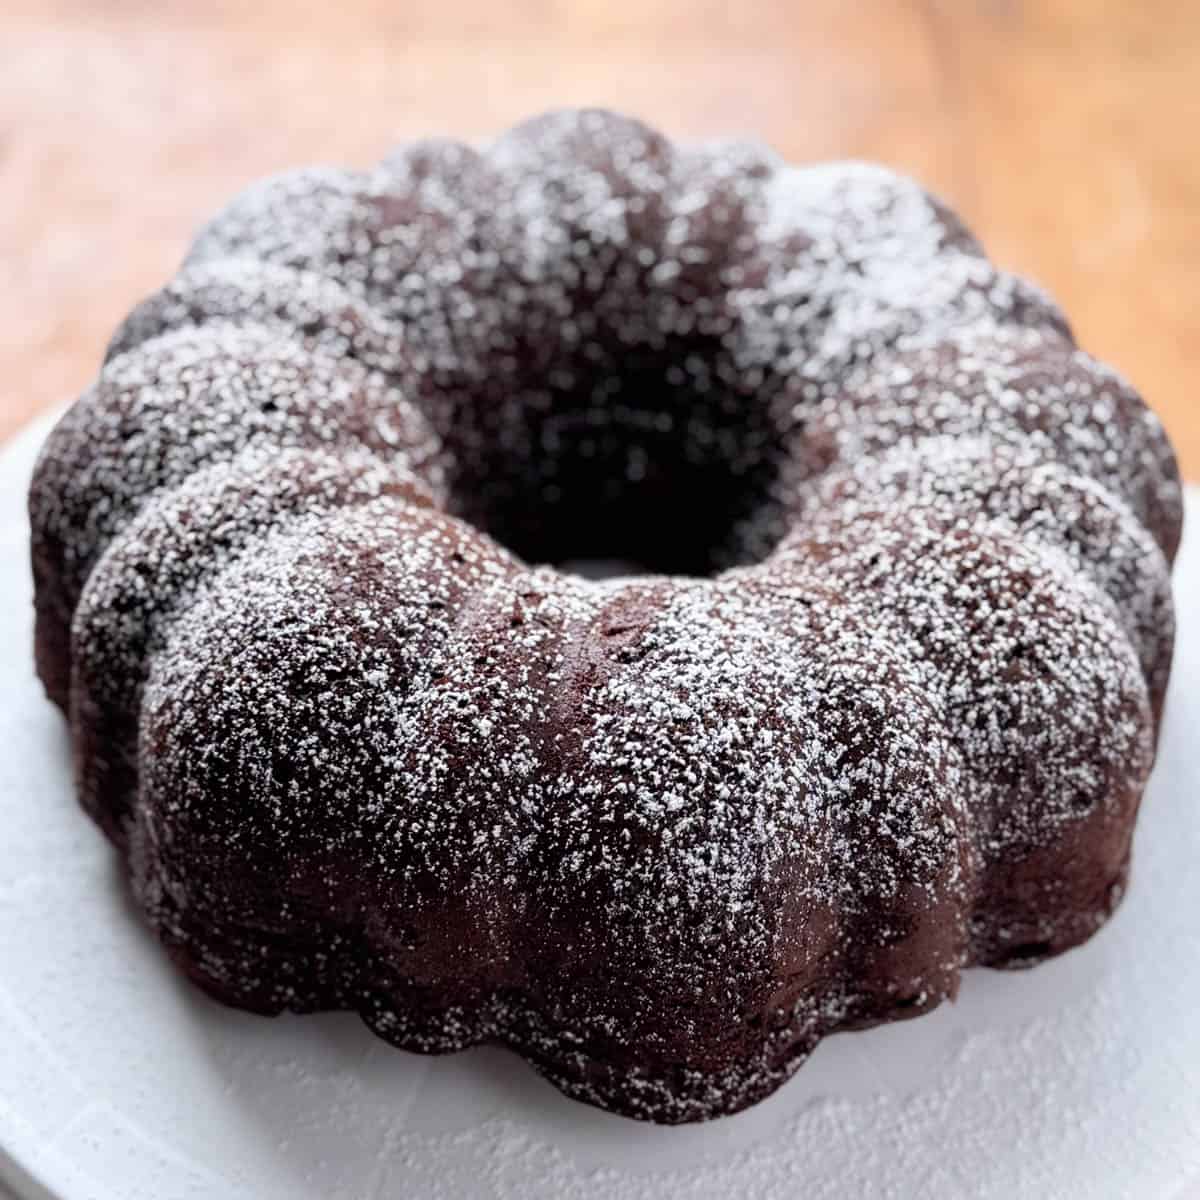
Top view of a chocolate bundt cake topped with powdered sugar

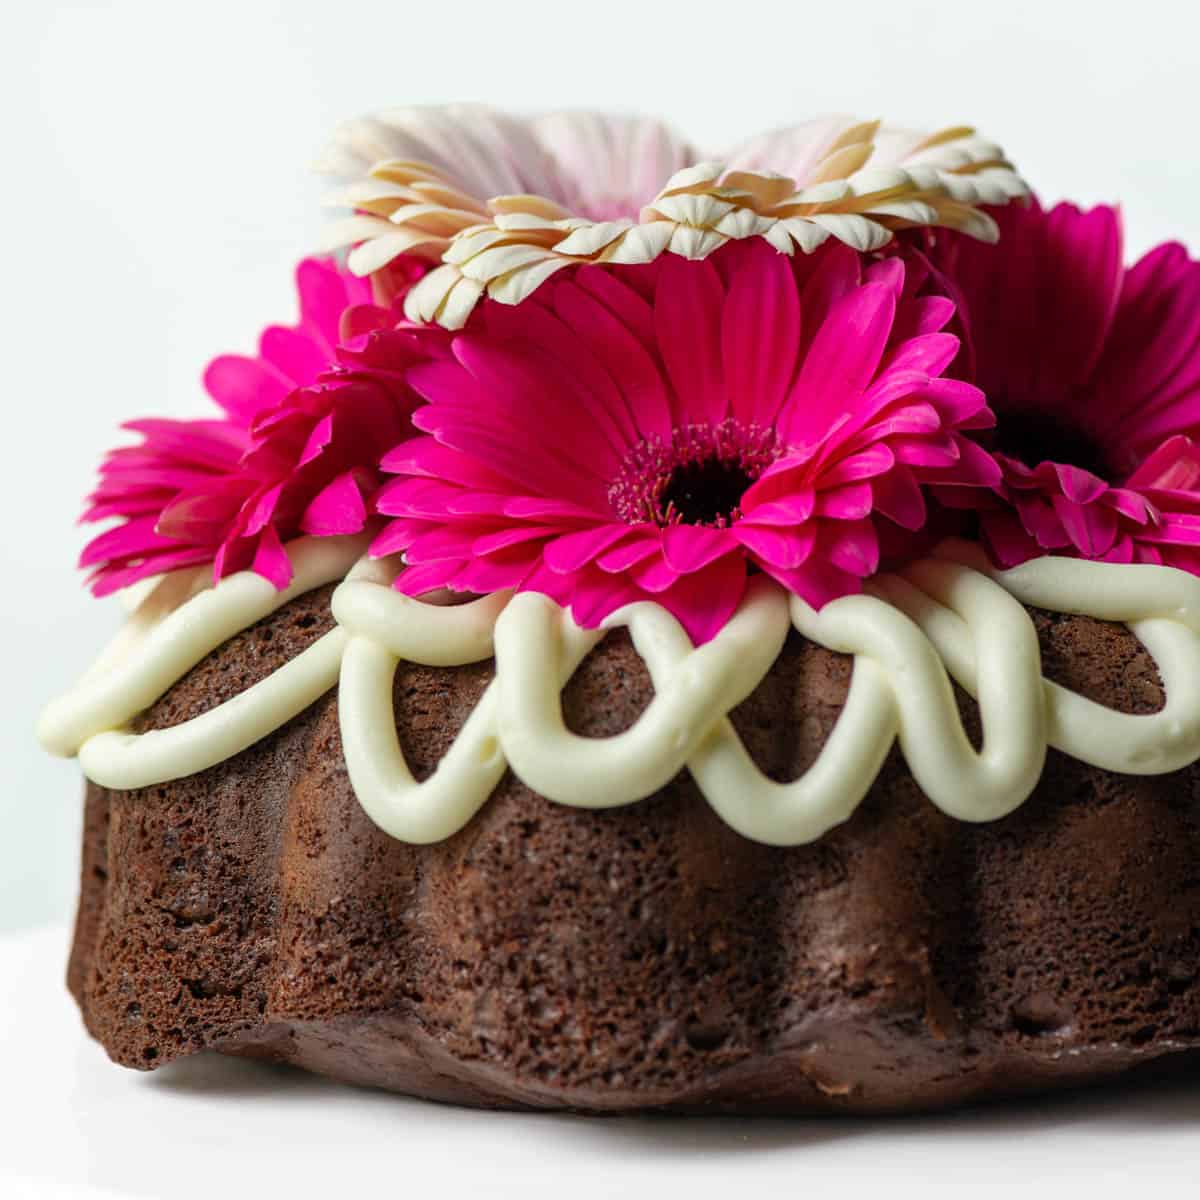
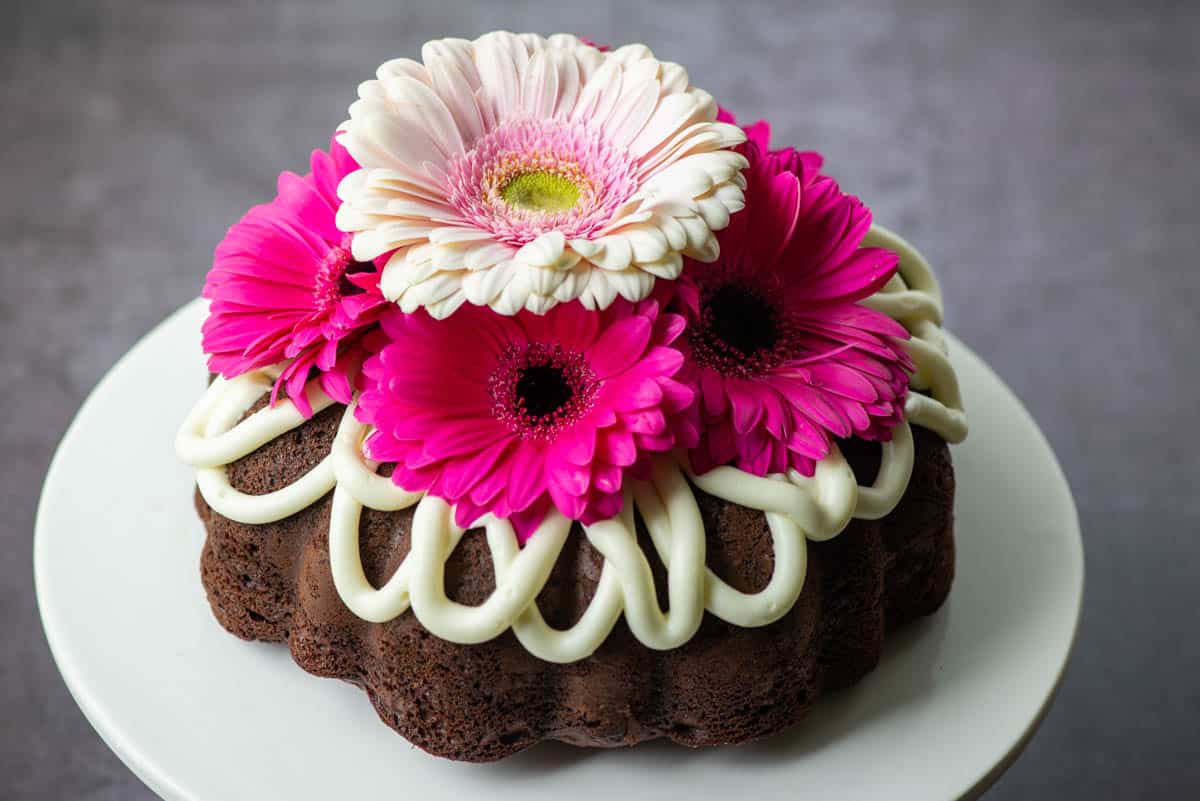
And as for the frosting, the original recipe by Anne Byron had no frosting or glaze. The cake is sweet and rich and moist and really needs no frosting or glaze. But I always used a powdered sugar shaker to shake on some powdered sugar to make it a little prettier. Until Nothing Bundt Cake came out with their frosting drips and fancy cake toppers. So now whenever I really want to add some extra flair to this cake, I will do a cream cheese frosting droop design and add some fresh flowers. This is where you can add your own favorite frosting design or cake topper too!

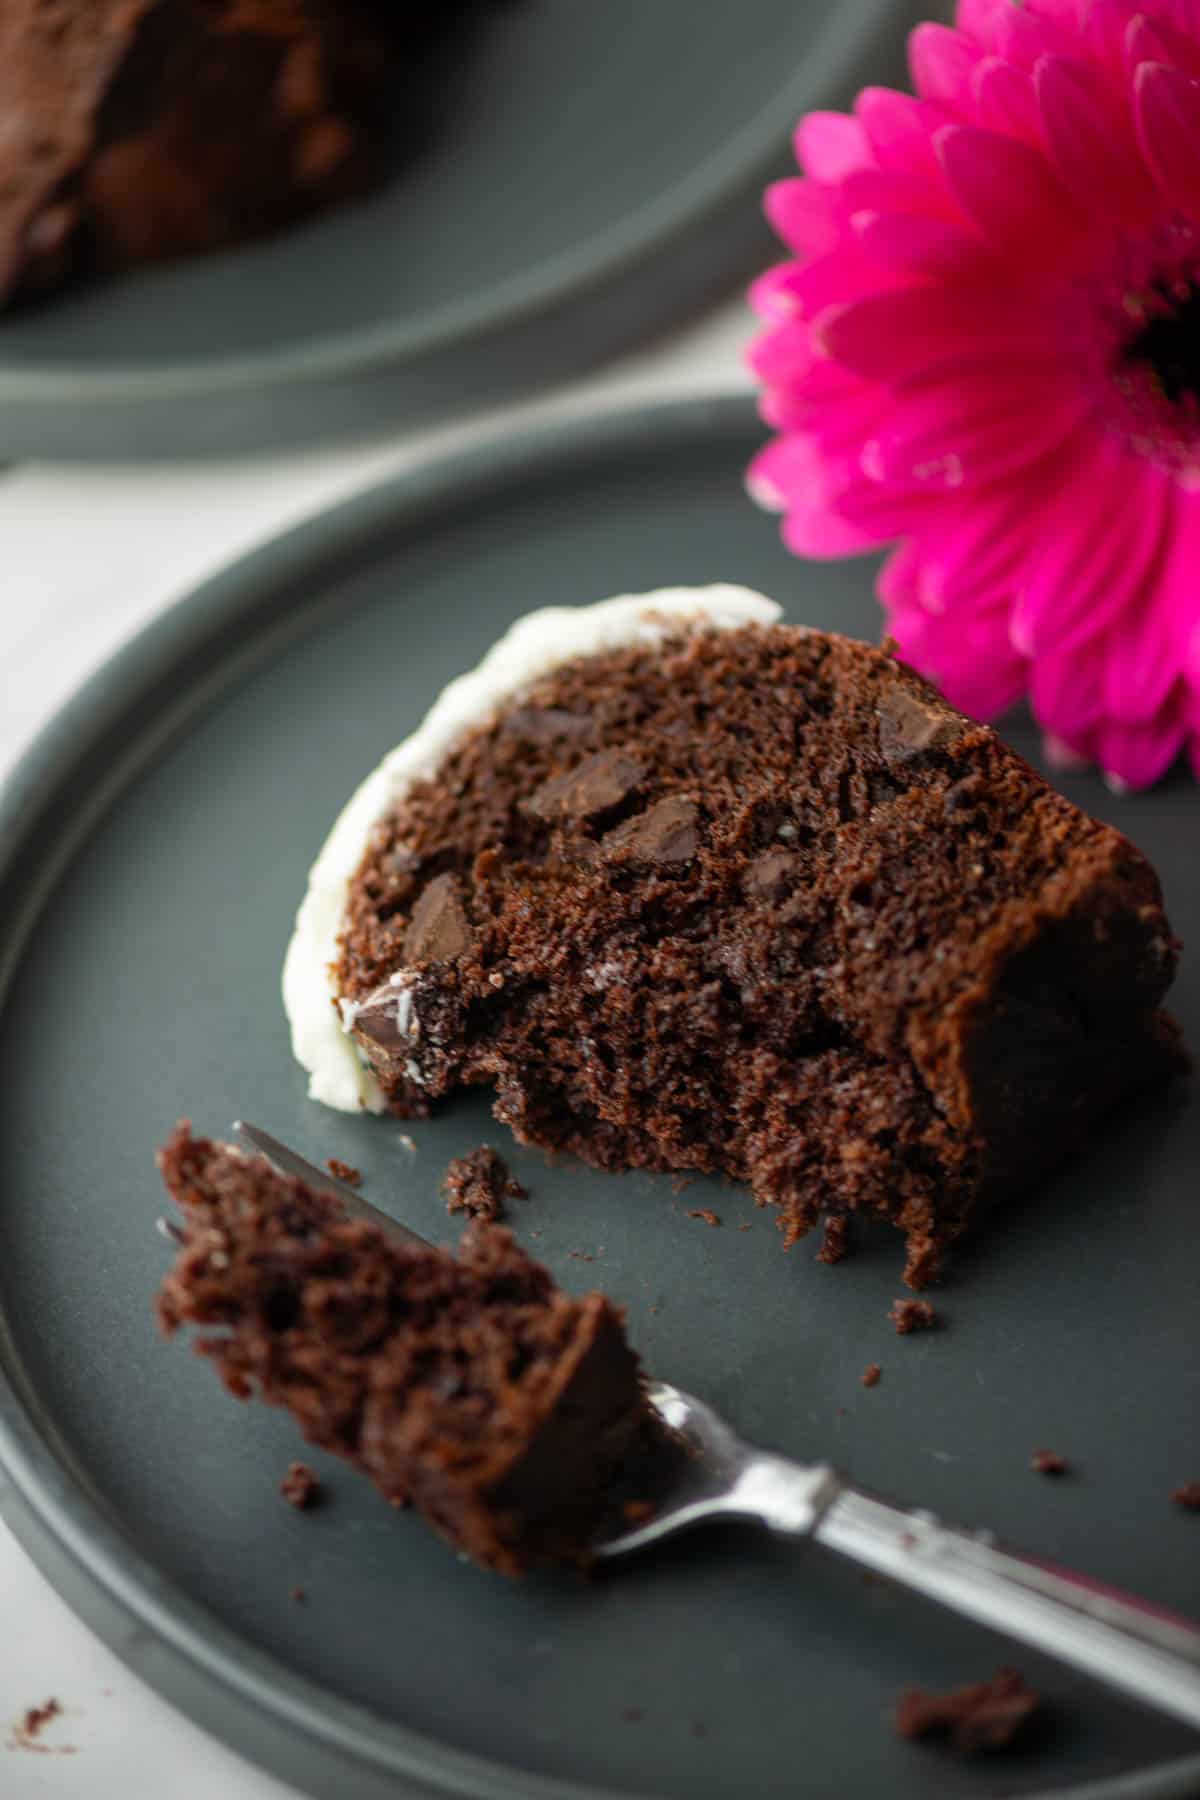
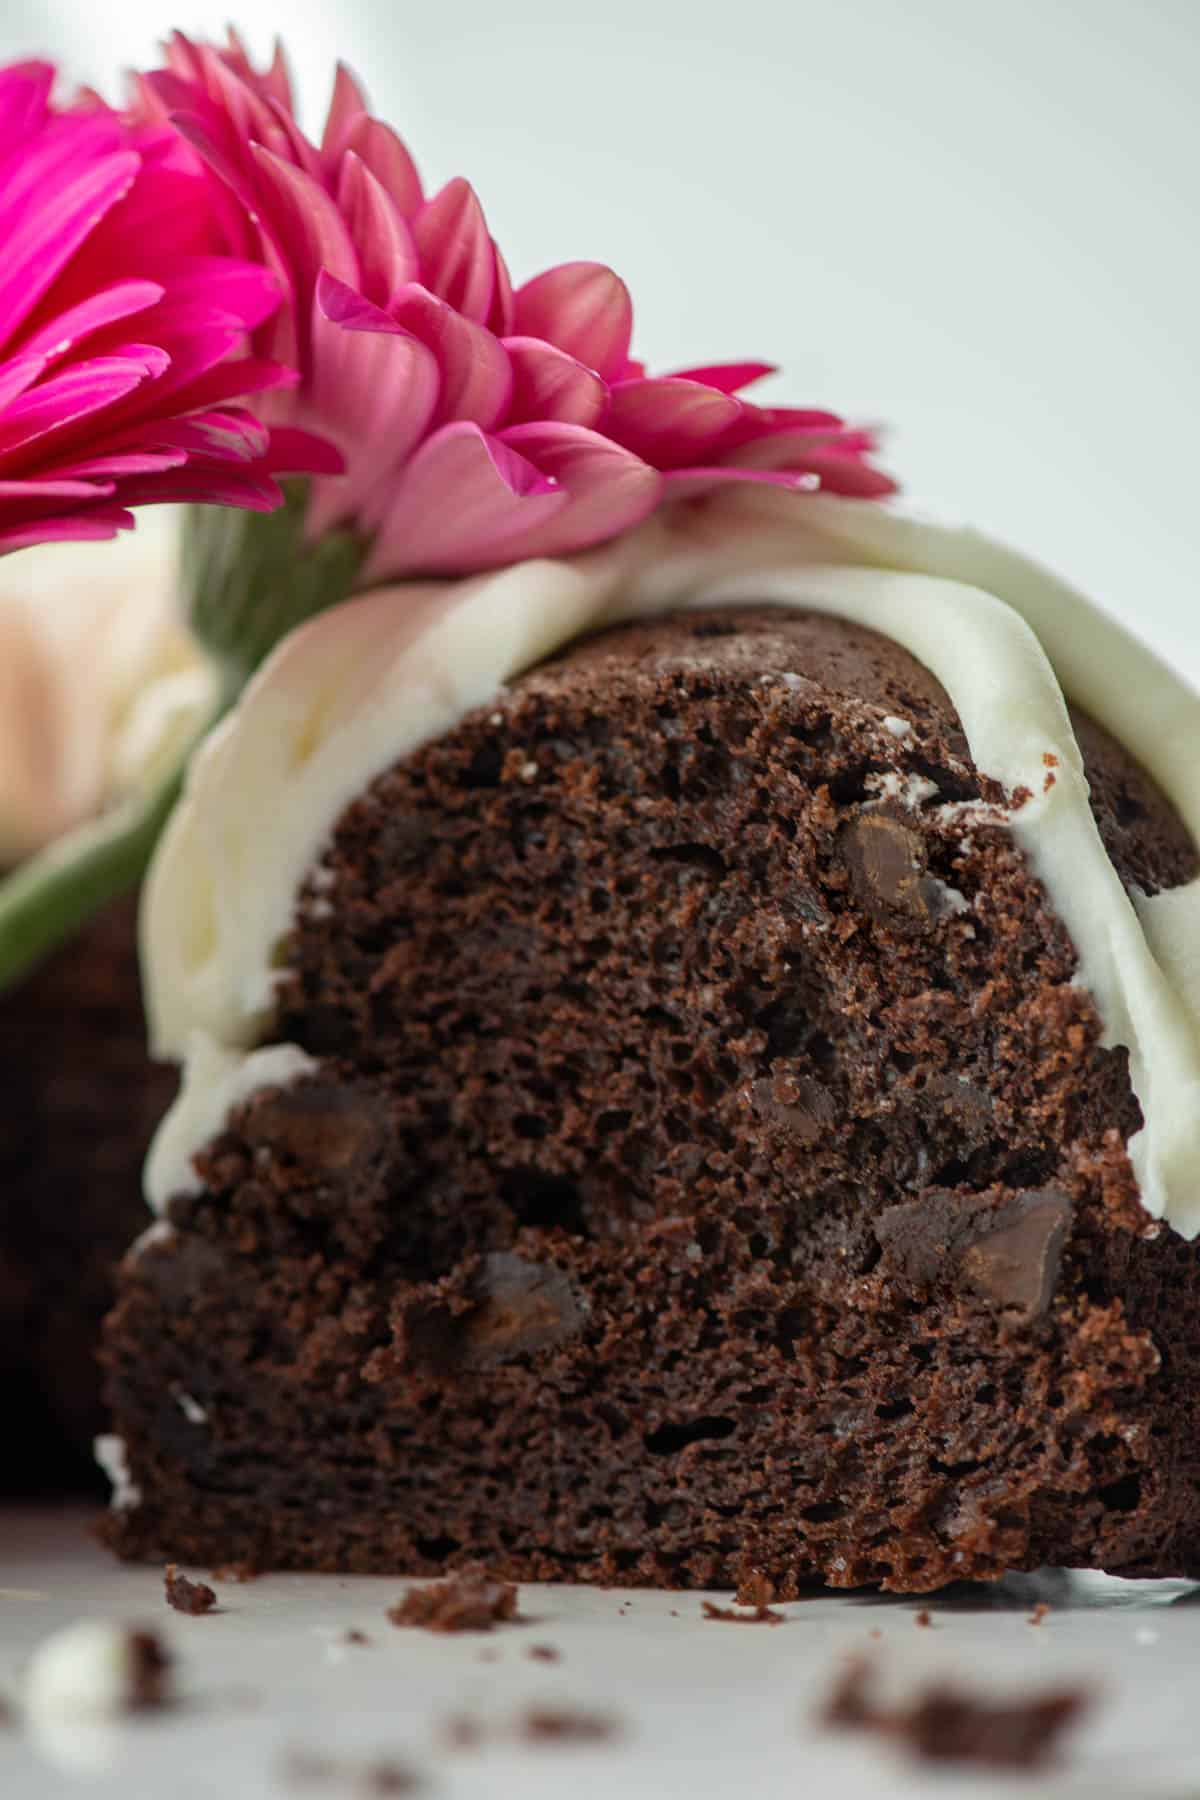
Close up of chocolate bundt cake with frosting and a pink floral topper
[feast_advanced_jump_to]

Cake Ingredients

Ingredients for chocolate bundt cake: Devils' food cake mix, vanilla pudding, cocoa powder, espresso powder, water, vegetable oil, sour cream and eggs
  • Devil's Food cake mix
  • Small vanilla instant pudding mix
  • Cocoa powder
  • Espresso powder
  • Sour cream
  • Vegetable oil
  • Warm water
  • Eggs
  • Semi sweet chocolate chips

See recipe card for quantities.

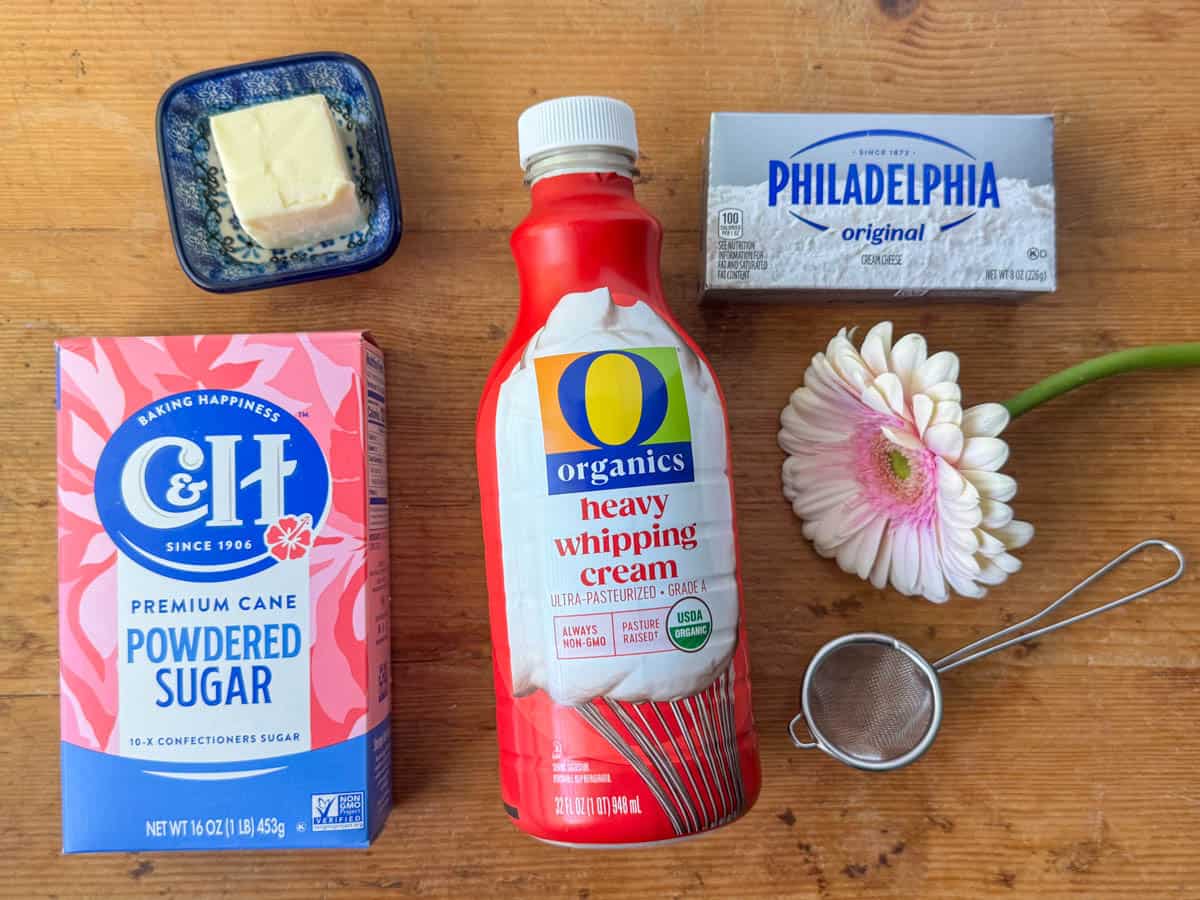
Frosting Ingredients

  • Powdered sugar
  • Cream cheese
  • Salted butter
  • Heavy whipping cream

See recipe card for quantities.

Substitutions

  • Pudding mix - you can use chocolate pudding mix in place of the vanilla pudding mix + cocoa powder. The original recipe called for chocolate pudding mix, but I have a cocoa powder that I truly love. So I always use vanilla pudding mix + my favorite cocoa powder.
  • Espresso powder - you can grind your own favorite coffee bean into a fine grind or even substitute instant coffee powder for the espresso powder. However, if the instant coffee granules are large and not a fine grind like used for espresso, dissolve them in the warm water.

Variations

  • Cupcakes - you can turn use this recipe for cupcakes as well. Bake those at 350 degrees for 18-20 minutes.

Storage

Store the chocolate bundt cake in an airtight container for up to 7 days. Non-frosted cake may be stored at room temperature, but frosted cake should be stored in the refrigerator.

Next Level Tips

  • I love making desserts from scratch. But I'm not going to lie, this is one of my go-to cakes for when I need an easy, last-minute fool-proof dessert. There are big opinions on both sides about using boxed cake mix. My opinion is that if bakeries can do it (some just buy the mix by the 50 pound bag instead) and professional bakers can do it, then so can I on occasion. And I do, without any guilty feelings. This cake is just that good!
  • The espresso powder is optional, but espresso powder enhances the chocolate flavor. Try it! Even if you have to use instant coffee instead of espresso powder, it's worth it.
  • If you find frosting too sweet, add â…› to ¼ teaspoon of salt to the frosting. Salt balances out the sweetness. And by using a small amount, you don't taste saltiness.
  • I love topping this cake with fresh flowers. Just make sure the flowers you choose are non-poisonous and safe to be touching food.
Side view of cut chocolate chocolate chip bundt cake

FAQ

Can I make my own cake topper?

Absolutely! You can make a light tissue paper flower or use real flowers. To use real flowers, you can wrap the stems in plastic wrap to make a centerpiece to fit in the hole of the bundt cake. Or, sometimes, I'll just use one or two flowers and stick them directly into the cake. Just make sure to use non-poisonous flowers.

What piping tip was used in the photos?

The Ateco round tip #12 was used for the chocolate bundt cake in the photos.

Related

Looking for other recipes like this? Try these:

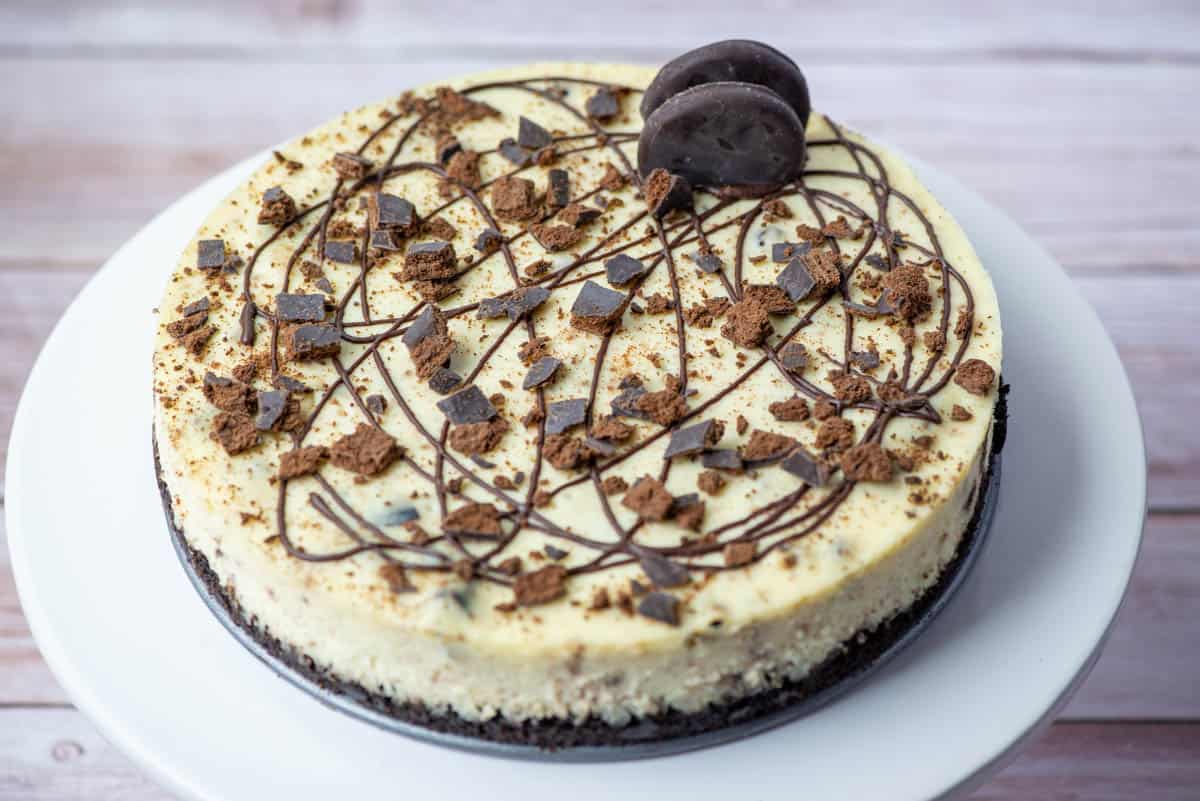
  • Close up photo of Thin Mints cheesecake topped with chocolate drizzle, crumbled Thin Mints and two full Thin Mints
    Thin Mints Cheesecake
  • Close up of Samoas cupcakes on a plate with toasted coconut and a box of Samoas cookies blurred in the background
    Samoas Cupcakes
  • Three stacked Chopped White Chocolate Macadamia Nut Bars
    White Chocolate Macadamia Nut Bars
  • Close up shot of two stacked Gluten Free Sweet Potato Brownies
    Gluten Free Sweet Potato Brownies
Top view of a chocolate bundt cake topped with powdered sugar

Chocolate Bundt Cake

Tracy @ Next Level Baker
Chocolate bundt cake with chocolate chips is rich, moist and dense with pockets of yummy chocolate chips. And because the base is a boxed cake mix, it's super easy.
Print Recipe Pin Recipe
Prep Time 15 minutes mins
Cook Time 50 minutes mins
Frosting time 30 minutes mins
Total Time 1 hour hr 35 minutes mins
Course Dessert
Cuisine American
Servings 16

Equipment

  • 1 Hand or stand mixer

Ingredients
  

Cake Base

  • 1 box of Devil's Food cake mix
  • 1 small box of vanilla pudding mix
  • 2 tablespoons cocoa powder
  • 1 teaspoon espresso powder optional
  • 1 cup sour cream
  • ½ cup vegetable oil
  • ½ cup warm water
  • 4 eggs
  • 10 ounces semisweet chocolate chips

Frosting (optional)

  • 8 ounces cream cheese room temperature
  • 4 tablespoons salted butter room temperature
  • 4 cups powdered sugar
  • 2-3 tablespoons heavy whipping cream

Instructions
 

Making the cake

  • Preheat the oven to 350 ℉. Spray a 9 inch bundt pan with cooking spray.
  • Place the cake mix, pudding mix, cocoa powder and espresso powder in a mixing bowl and mix until the dry ingredients are combined.
  • Add the water, oil, sour cream and eggs to the dry ingredients in the mixing bowl. Mix on low for one minute. Scrap down the sides and mix an additional minute or just until all the ingredients are combined.
  • Stir in the chocolate chips until they are evenly distributed.
  • Pour the batter in to the sprayed bundt pan. The batter will be thick. Smooth out the batter with a spatula.
  • Bake for 45-50 minutes until the cake starts pulling away from sides and also springs back when touched.
  • Remove the cake from the oven and cool on a cooling rack for at least 20 minutes.
  • Invert the cake on to a cakeboard or a serving plate. Allow the cake to completely cool before frosting or finishing with powdered sugar.

Frosting the cake (optional)

  • Add the room temperature cream cheese and butter to a mixing bowl and mix on medium speed until creamy with no lumps, about 2 minutes.
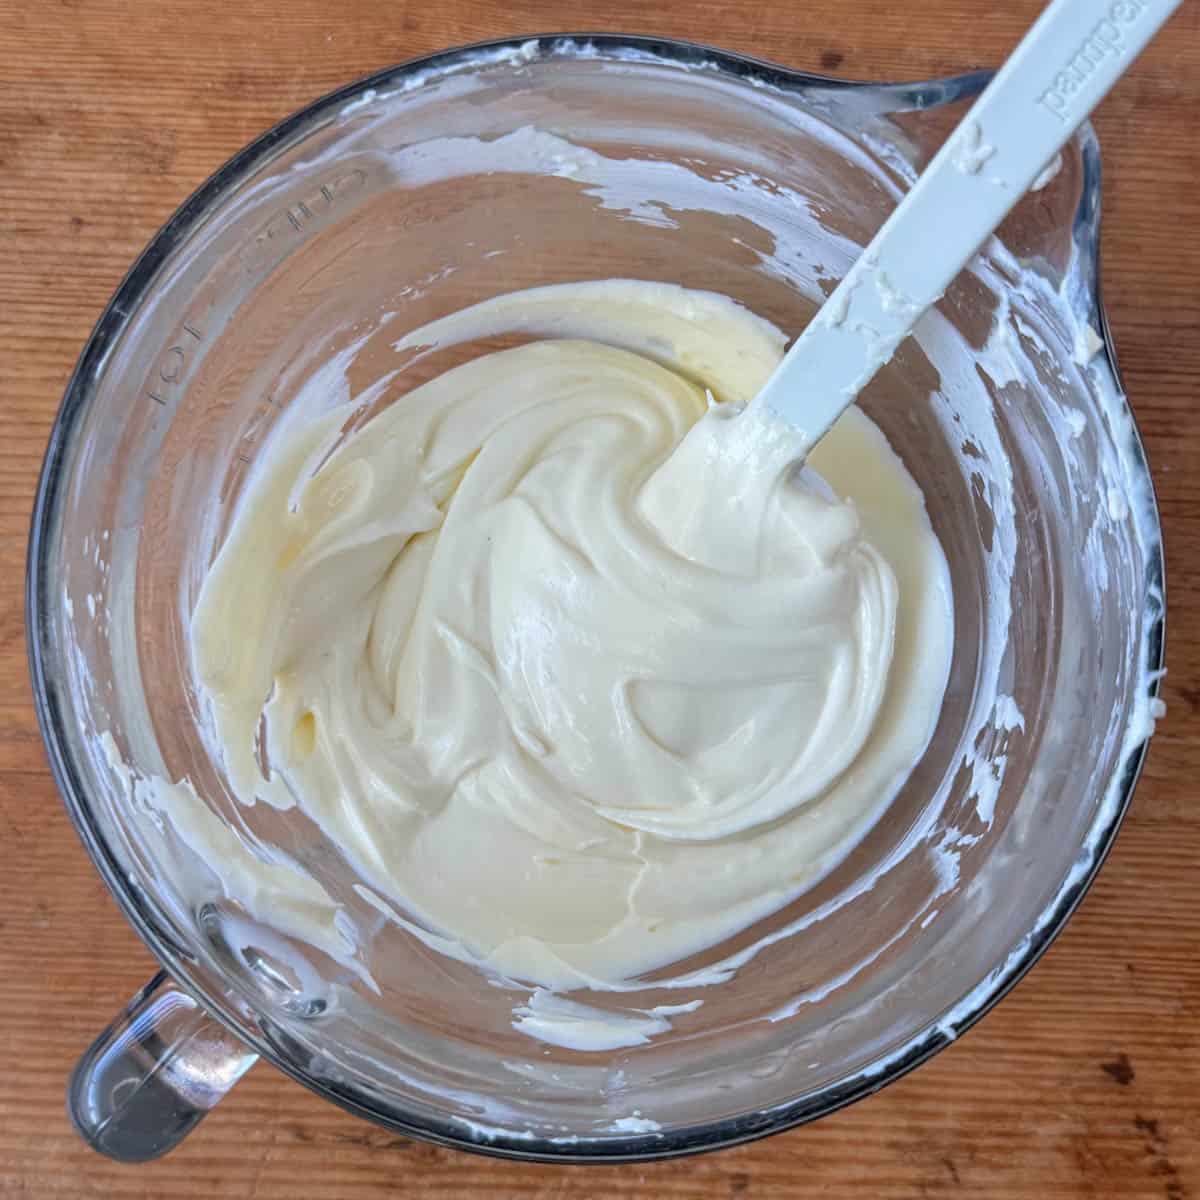
  • Add the powdered sugar and 2 tablespoons of heavy whipping cream to the mixing bowl. Mix on medium high until light and fluffy, scraping down the sides several times, about 5-6 minutes. [Depending on the temperature of the cream cheese and butter and the humidity of the kitchen, you may need to add more heavy shipping cream if the frosting is too heavy/thick. Add additional heavy whipping cream one tablespoon at a time, mix on medium high and check for fluffiness.]
  • Add the frosting to a piping bag and pipe on the frosting. Or use a knife or icing offset spatula to spread the frosting on the cake.

Would you like to save this?

We'll email this post to you, so you can come back to it later!

Don't worry! We won't spam you!

Keyword Chocolate Bundt Cake
Tried this recipe?Let us know how it was!
Overhead view of entire chocolate chocolate chip bundt cake with frosting drips and a floral cake topper

Everything Bagel Cheeseball

February 6, 2025 by Tracy @ Next Level Baker Leave a Comment

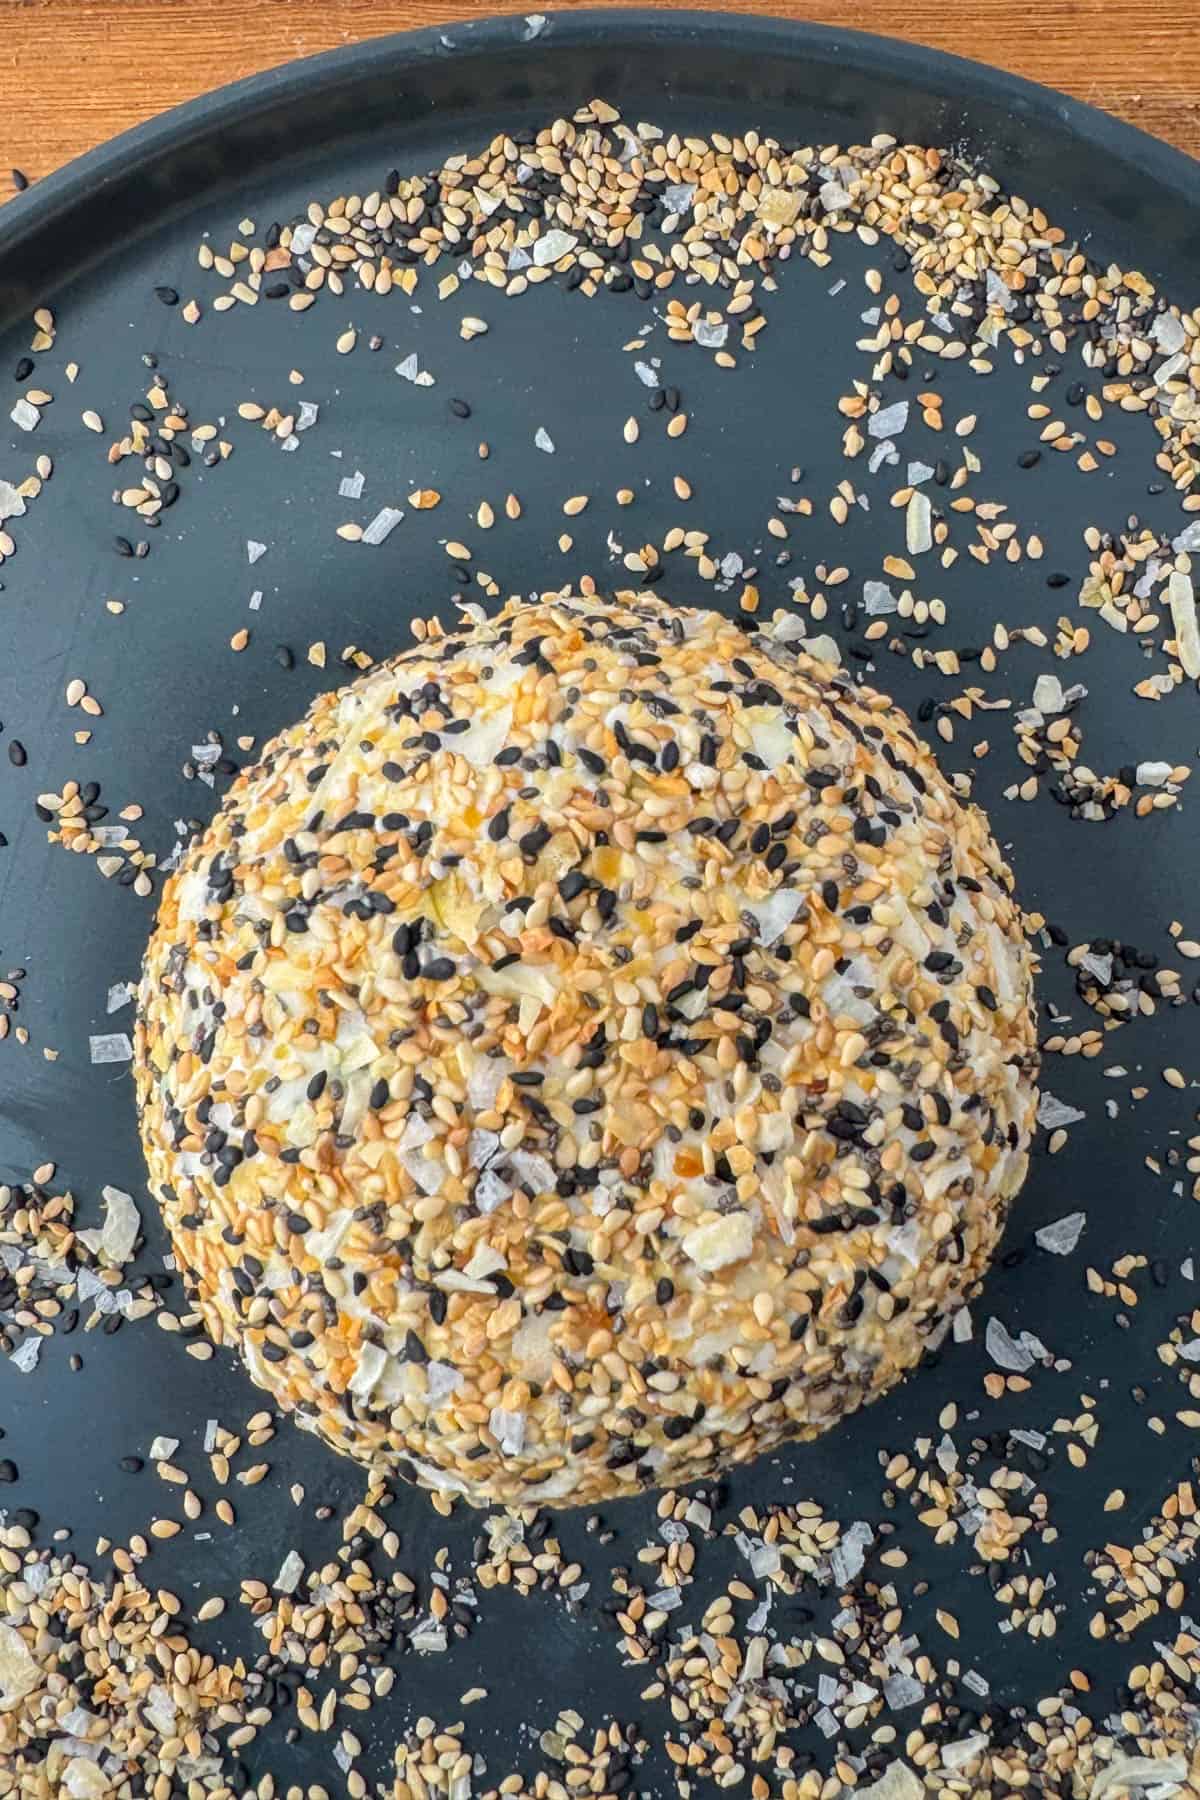
Everything Bagel Cheeseball is everything you love about a classic cheeseball but crusted with everything bagel seasoning! It's crunchy, nutty, garlicky and delivered with a rich, creamy cheese blend for a perfect savory bite. All from 5 simple ingredients!

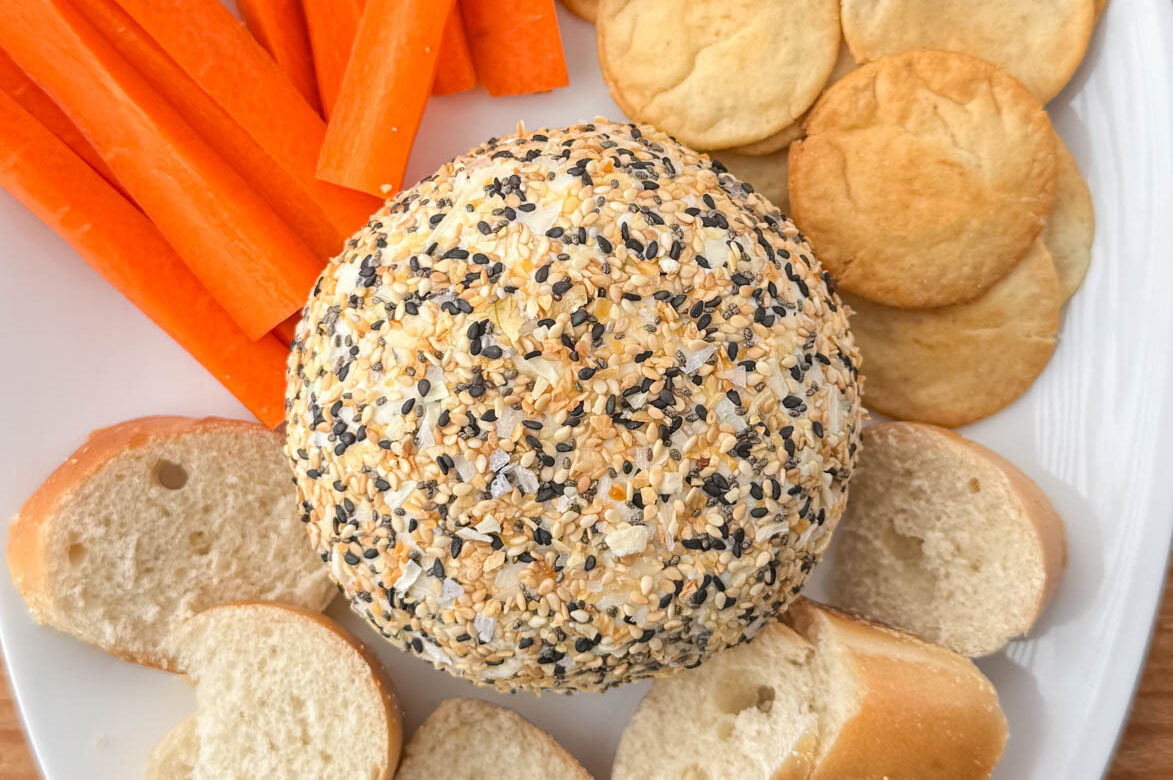
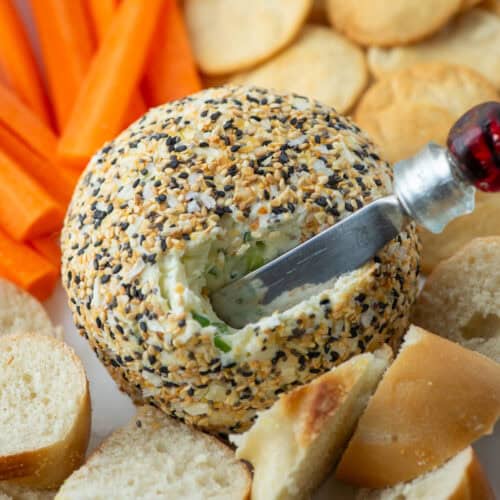
Serving platter with an everything bagel cheeseball surrounded by plain bagel slices, carrots and pita chips

I love everything bagels and everything bagel seasoning. But I actually love everything bagel seasoning best when it's not on the outside of a bagel. I love it best when it's directly on the cheese. Then, you get the full flavor of the spices and the full crunchiness of the texture. And you get to taste the everything bagel seasoning in each creamy cheesy bite and not just on the top half of a bagel. I feel like Trader Joe's made everything bagel seasoning famous, but it's now found in almost every grocery store. Personally, I love to make my own for the freshest flavor. Homemade everything but the bagel seasoning is an easy mix of six spices. Buy it in the store or make your own, but definitely use it to make a cheeseball. So yummy!

[feast_advanced_jump_to]

Ingredients

Photo of ingredients needed to make everything but bagel cheeseball: shredded sharp white cheddar cheese, cream cheese, everything but bagel seasoning and parsley
  • Shredded sharp white cheddar cheese
  • Cream cheese
  • Green onions
  • Everything but the bagel seasoning
  • Parsley

See recipe card for quantities.

Instructions

Cheeseballs are easy to make with a few helpful steps.

Melted cheese step of making an Everything Bagel Cheeseball

Step 1: Add the shredded white cheddar cheese and the cream cheese to a microwavable bowl. Melt and stir in 30 second increments until fully melted and combined. Approximately 90 seconds.

Process shot of forming a cheeseball with plastic wrap inside a cup

Step 2: Stir in the rest of the ingredients to the cheese mixture. Add the cheese mixture to a cup lined with plastic wrap and cinch the top together. Refrigerate in the cup for a minimum of 2 hours but preferably overnight.

Process shot of formed cheeseball still in plastic wrap

Step 3: After chilling, remove the plastic wrapped cheeseball from the cup and finish shaping the cheeseball.

Process shot of rolling a cheeseball in everything but bagel seasoning to cover it in the seasoning

Step 4: Add the rest of the everything bagel seasoning to a plate and roll the cheeseball in the seasoning until the cheeseball is completely coated.

Once the cheeseball is fully covered (I do the bottom too!), place it on a serving plate or charcuterie board and surround with bagel slices, crackers or veggies.

Substitutions

  • Cheese - I love using sharp white cheddar cheese for everything bagel cheeseballs, but you can easily substitute another type of cheese. You can also use a milder cheese and then add 1 ½ teaspoons of Worcestershire sauce or soy sauce for a little umami kick.

Variations

  • Mini cheeseballs - instead of one large cheeseball, you can use this recipe to make tiny, bite-size cheeseballs that are perfect for an appetizer plate or charcuterie boards. Follow all of the instructions until the cheeseball is fully chilled. Once it's fully chilled, you can take pieces of the cheeseball and roll them into smaller balls. If you want them all the same size, use a cookie scoop. You can also add fun little appetizer skewers too.

Storage

Store the everything bagel cheeseball in an airtight container in the refrigerator for up to 7 days.

Close up photo of an everything bagel cheeseball on a serving platter surrounded by plain bagel slices, carrots and pita chips

Next Level Tips

  • Shred your own cheese! It's cheaper to buy cheese in chunks. Also, chunks of cheese don't have the additives and coatings that pre-shredded cheese does. It only takes 2 minutes to shred your own cheese and it tastes so much better!
  • For an umami kick, you can add 1 ½ teaspoons of Worcestershire or soy sauce to this recipe. I love the added flavor, but it does add a brown tint to the cheeseball. I usually only add those sauces with orange cheeses, but the flavor is amazing.
  • For a charcuterie board or as an appetizer, can make make tiny bite-size individual cheeseballs with this same recipe. They're super cute with a fun little appetizer skewer too.

FAQ

Can I make this ahead of time?

Absolutely! I recommend making the cheeseball at least a day ahead of time and then rolling it in the everything but the bagel seasoning the day of serving.

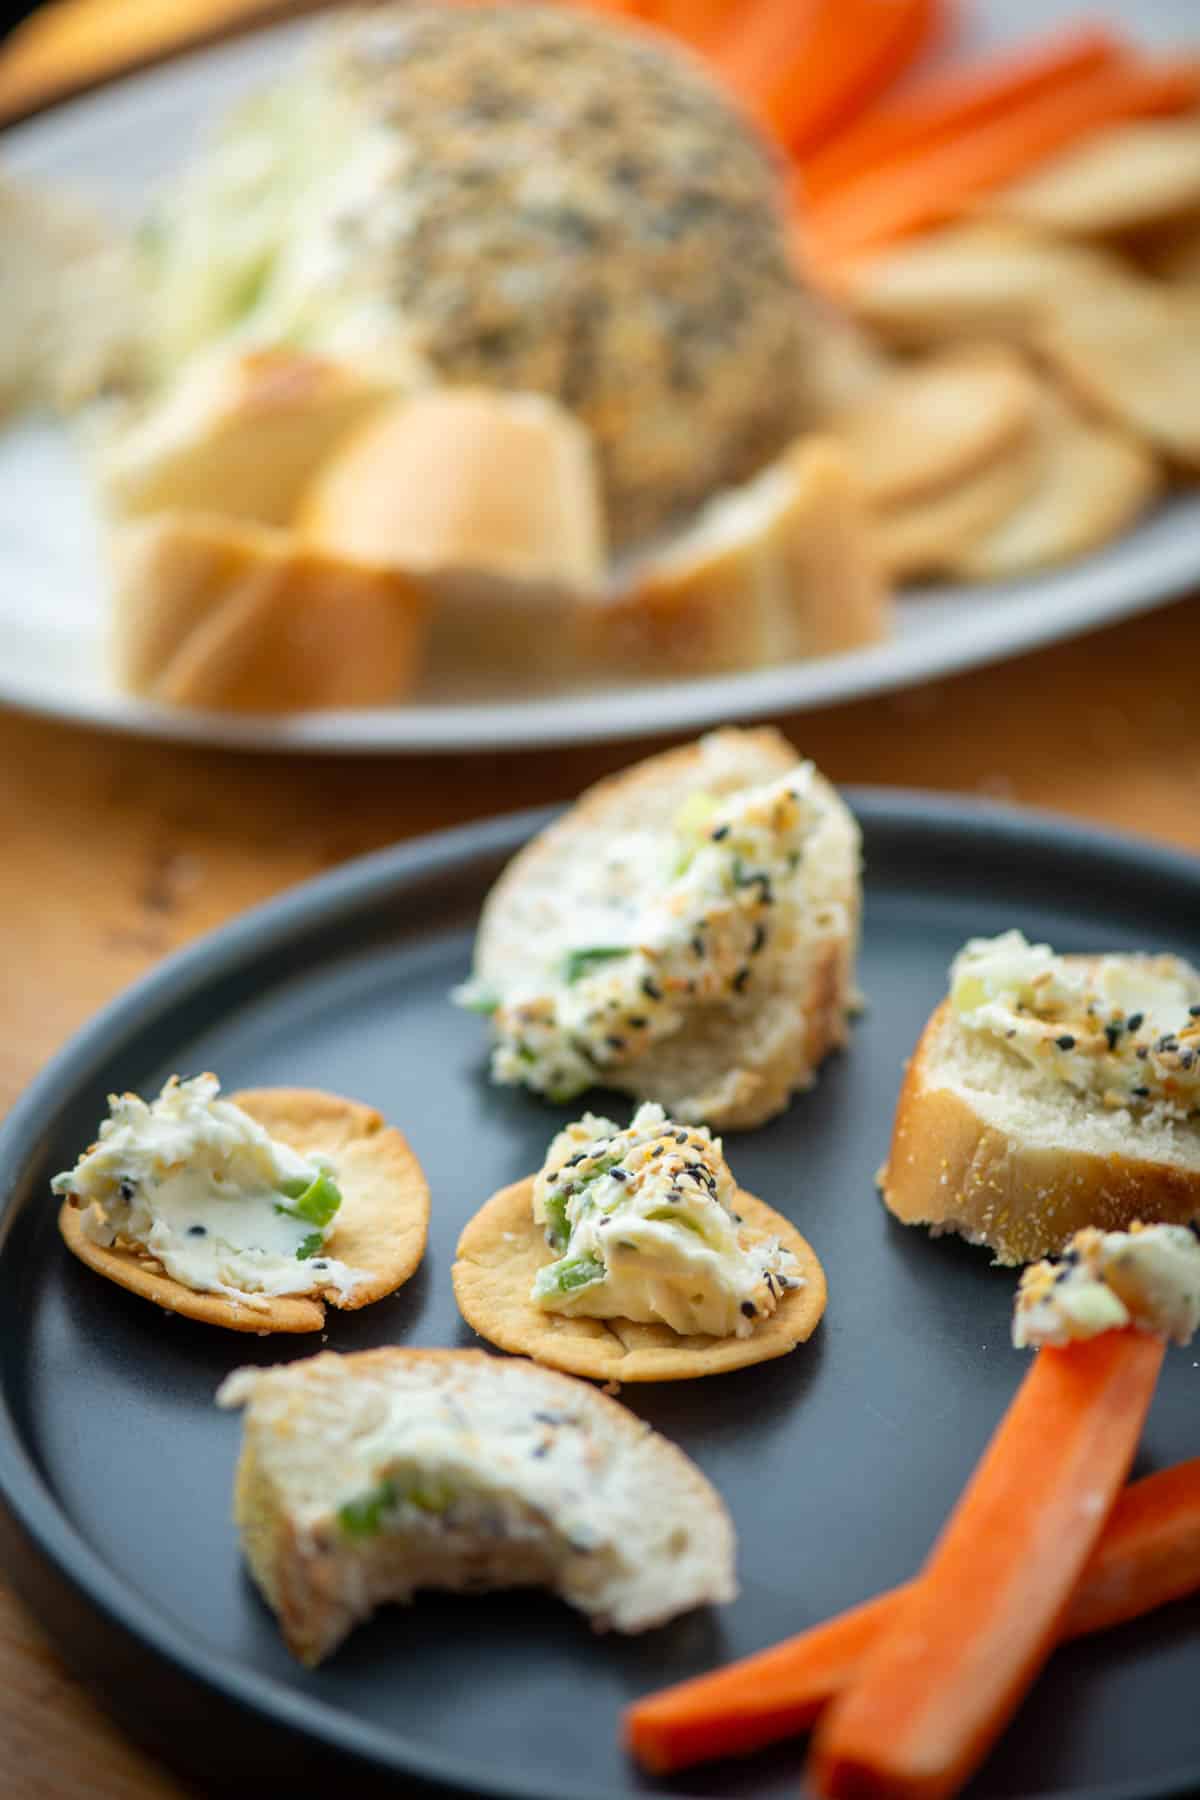
Plate with small bites of sliced bagels, pita chips and carrots with everything but bagel seasoning cheeseball on each bite in front of the serving platter with the everything but bagel seasoning cheeseball and extra bagel slices, pita chips and carrots

Related

Looking for other recipes like this? Try these:

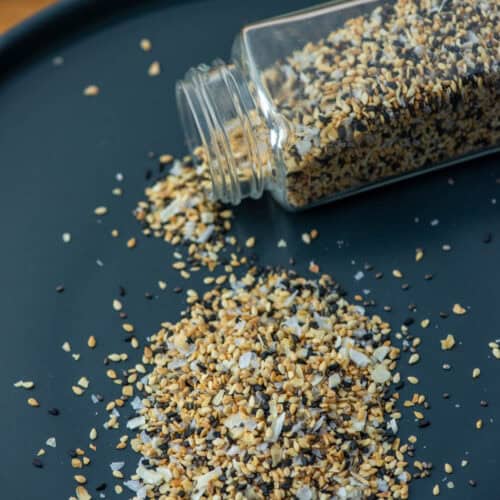
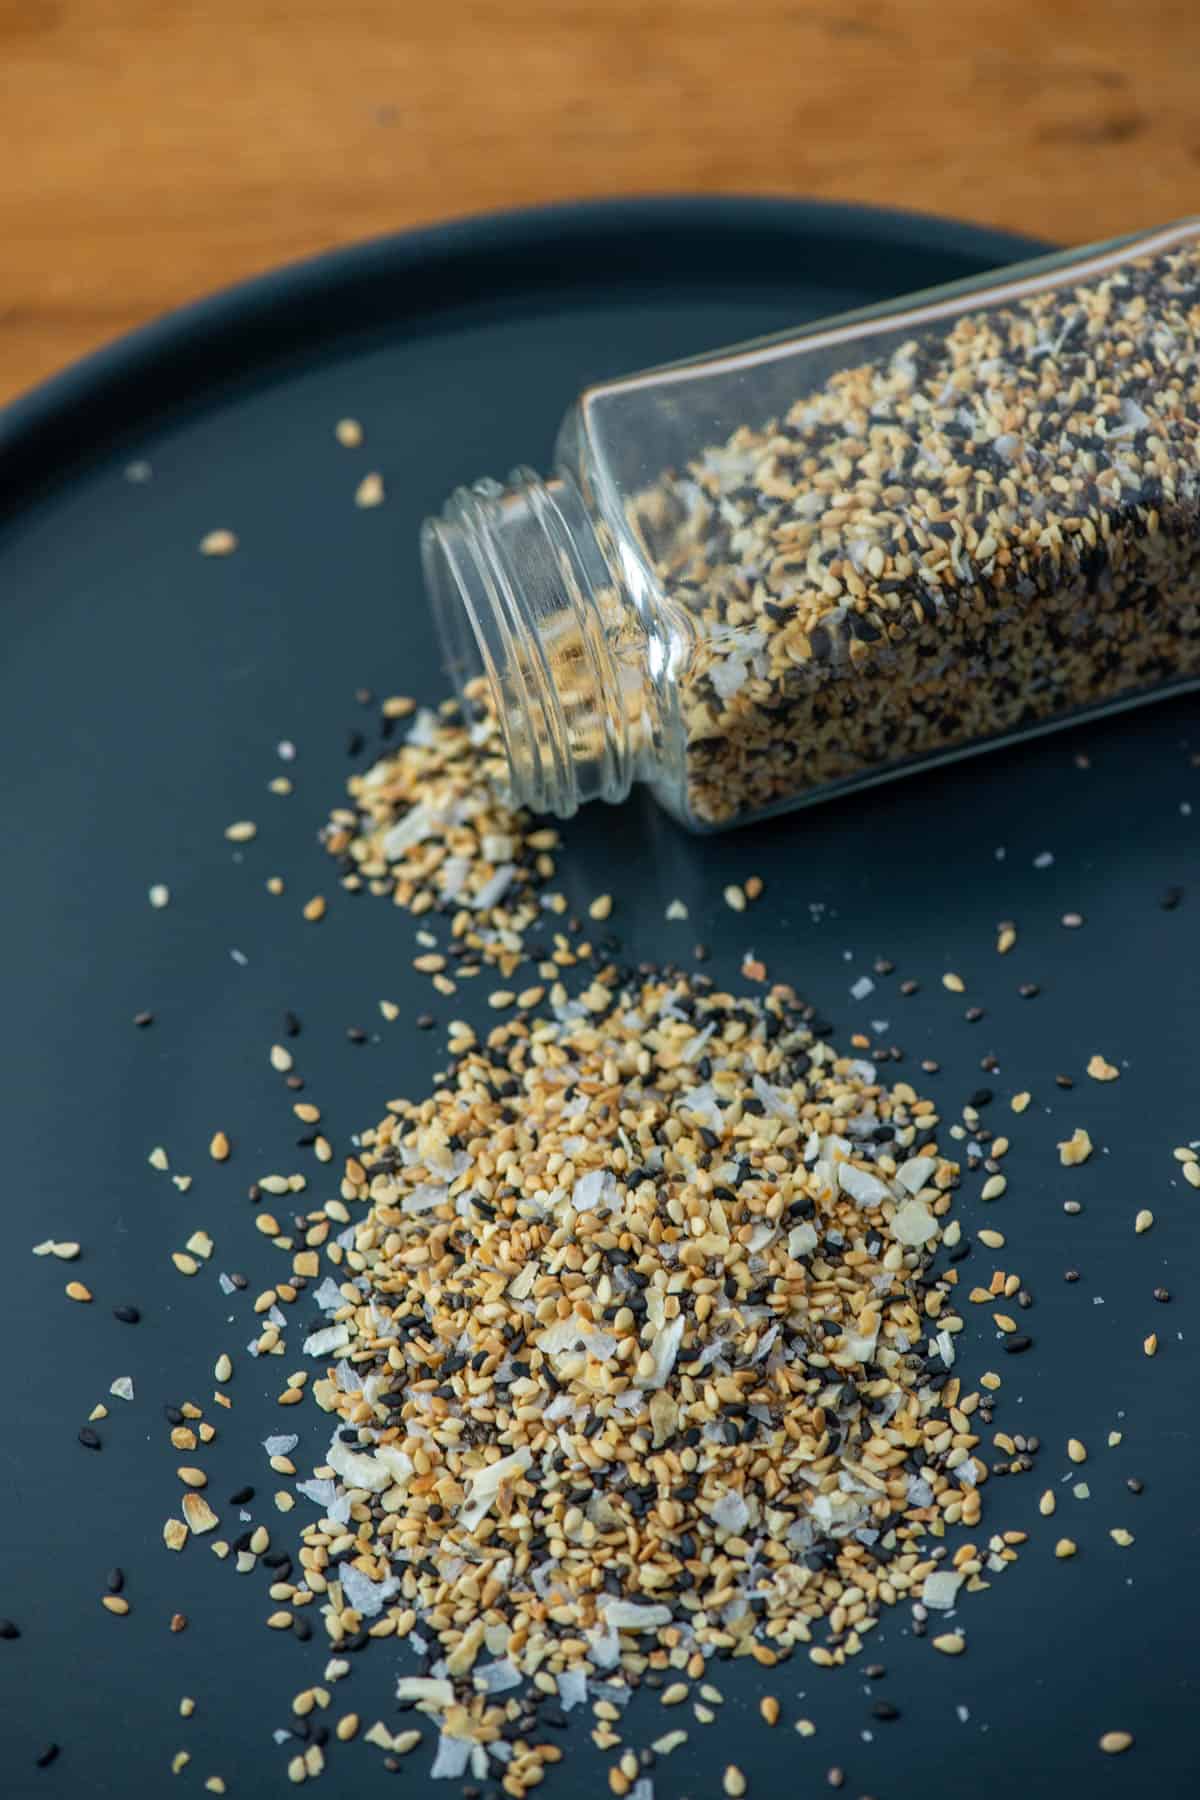
  • Jar of everything bagel seasoning spilling out onto a gray plate
    Everything But The Bagel Seasoning
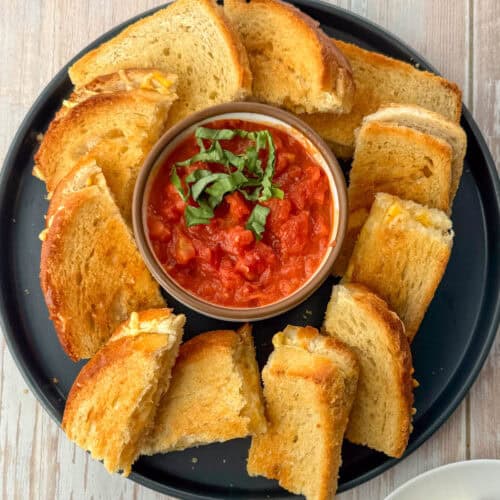
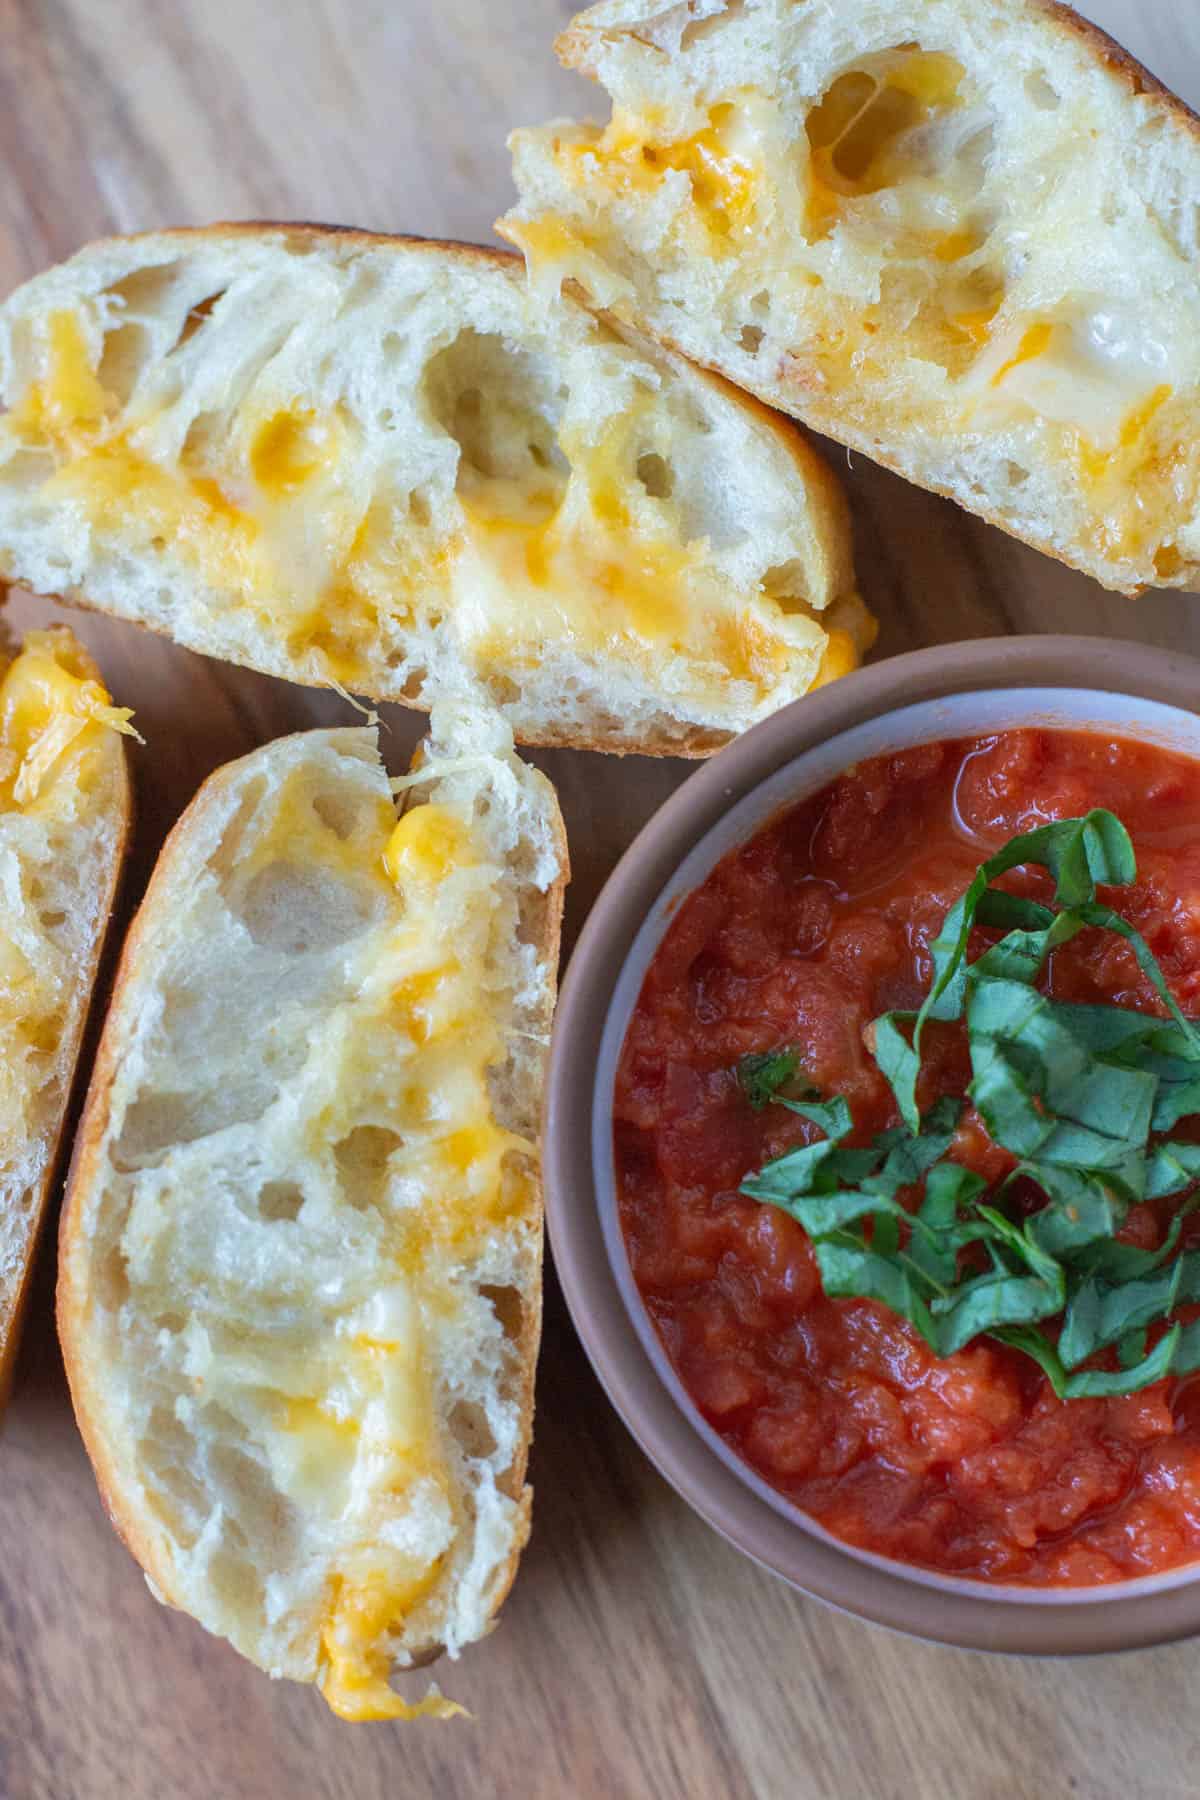
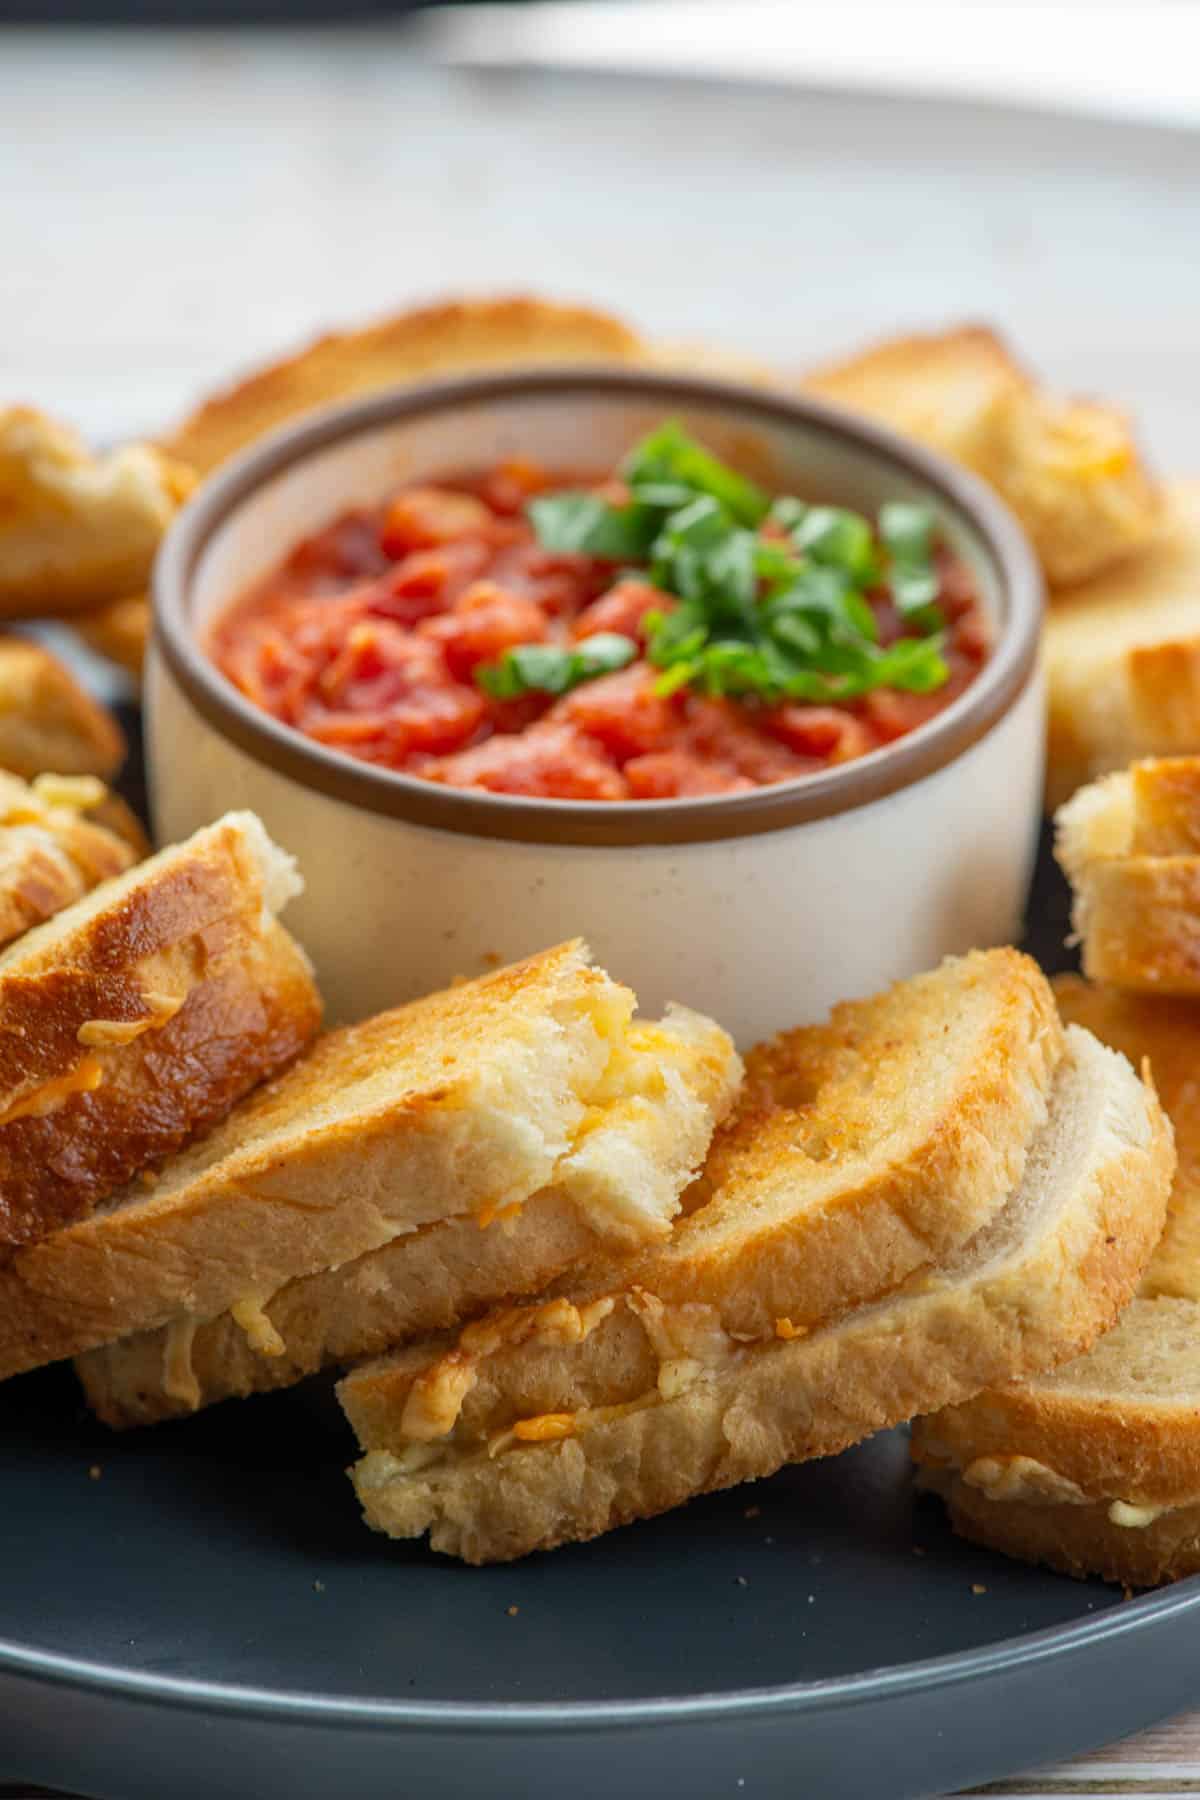
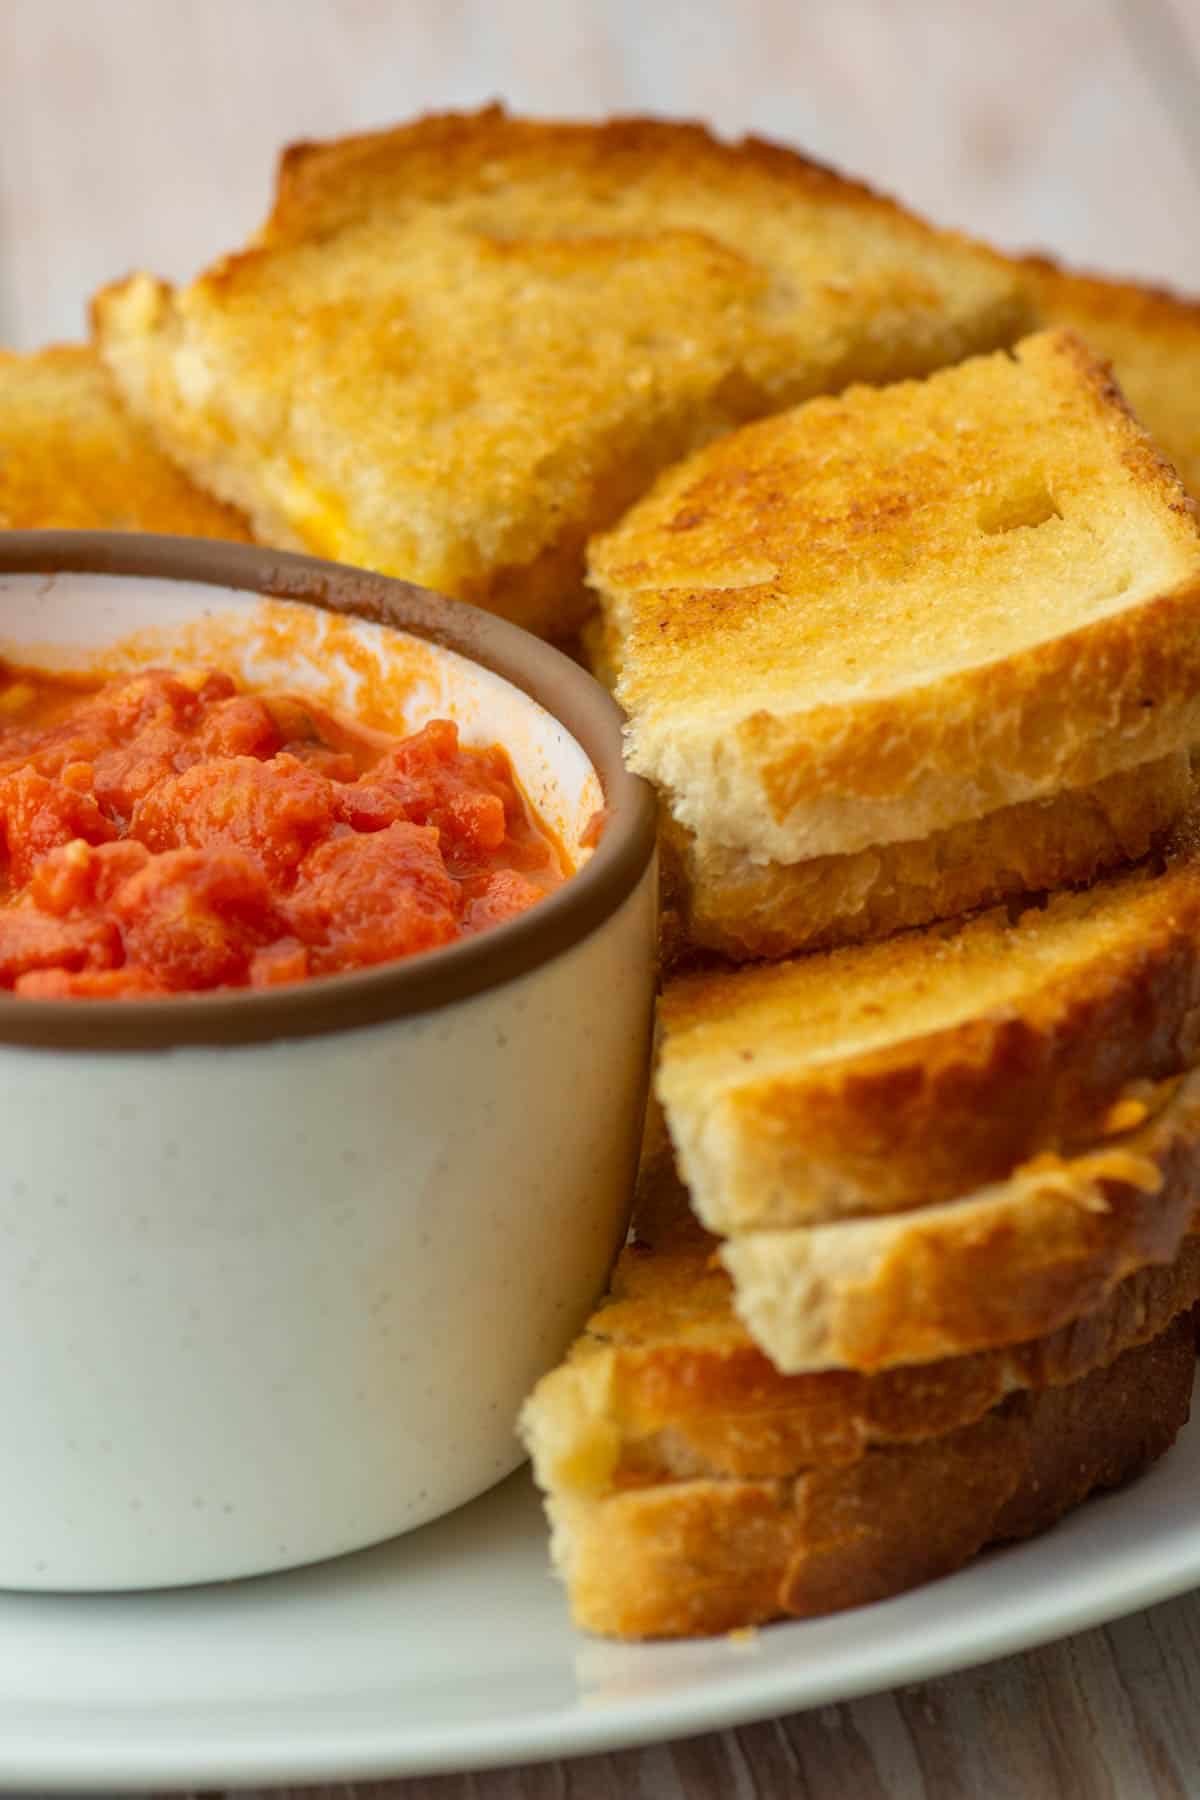
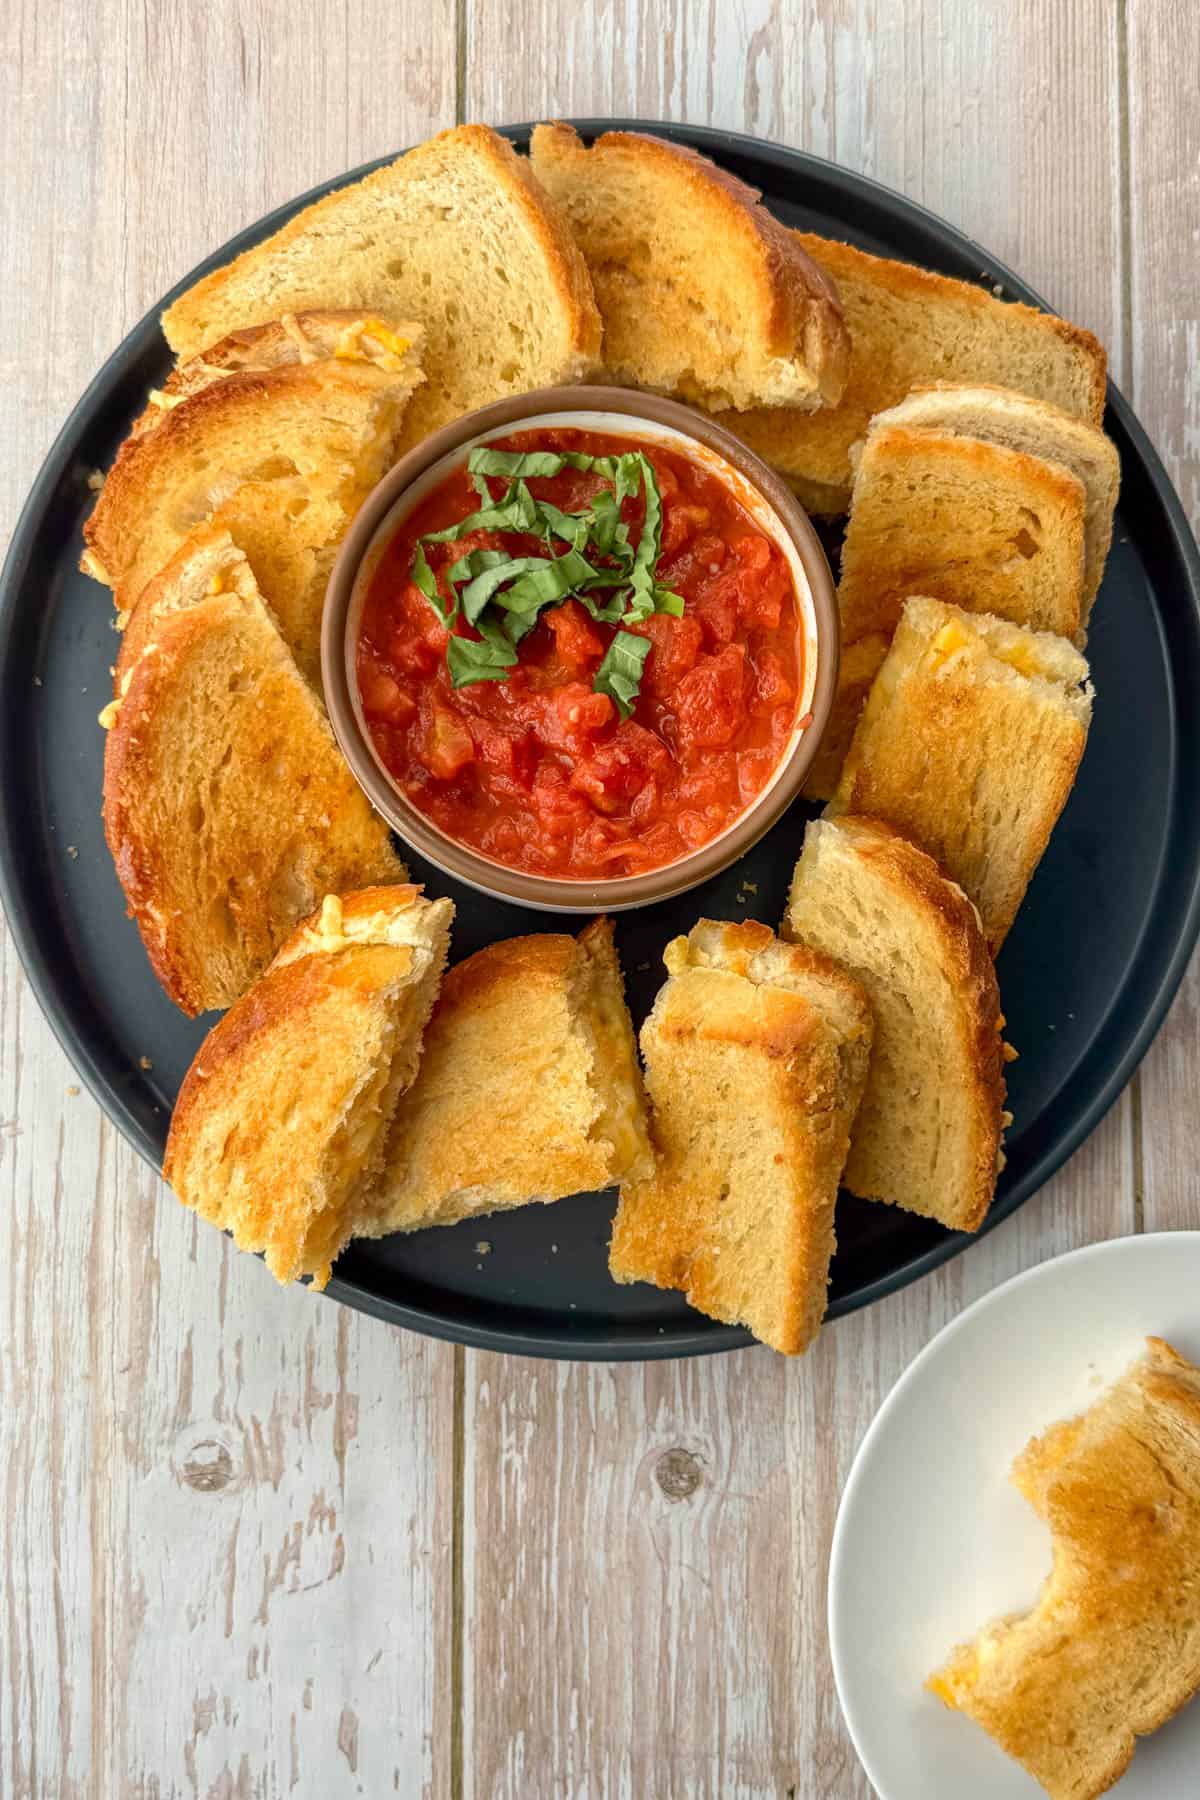
  • Grey plate with appetizer size pieces of baked grilled cheese sandwiches with tomato dipping sauce
    Grilled Cheese Appetizer
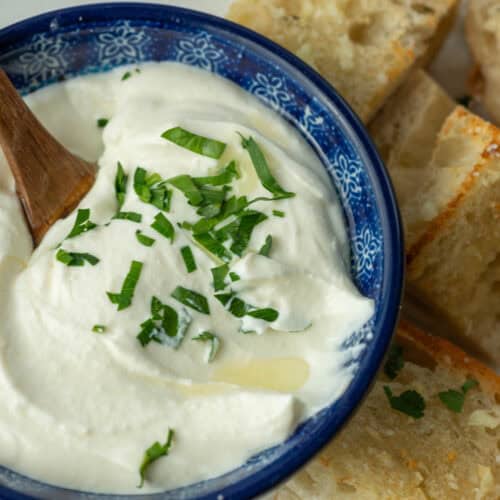
  • Whipped Ricotta Truffle Oil Dip
    White Truffle Garlic Bread with Whipped Ricotta

Everything Bagel Cheeseball

Tracy @ Next Level Baker
Everything bagel cheeseball is the perfect crowd pleaser for any party, holiday or game day celebration. It's easy to make and delivers the richness of a cheeseball topped with a savory crunch.
Print Recipe Pin Recipe
Prep Time 15 minutes mins
Cooling time 2 hours hrs
Total Time 2 hours hrs 15 minutes mins
Course Appetizer
Cuisine American
Servings 12

Ingredients
  

  • 4 ounces sharp white cheddar cheese shredded
  • 8 ounces cream cheese
  • ¼ cup green onions, all parts sliced thinly
  • ¼ cup everything but bagel seasoning
  • 1 teaspoon dried parsley

Instructions
 

  • Gather the ingredients and shred the white cheddar cheese. Thinly slice the green onions using all of the white parts, some light green parts and some green tops and set aside.
  • Line the cup that you will use to shape the cheeseball (short mugs or soup cups work great) with two overlapping pieces of plastic wrap and set aside.
  • Add the shredded cheddar cheese and the cream cheese to a microwavable bowl. Melt and stir in 30 second increments until fully melted and combined. Approximately 90 seconds to two minutes.
  • Stir the the green onions, parsley, and 1 and ½ teaspoons of the everything bagel seasoning in to the cheese mixture.
  • Add the cheese mixture to the plastic lined cup and cinch with a clip.
  • Refrigerate for a minimum of two hours but preferably overnight.
  • Remove the plastic wrapped cheeseball from the refrigerator and the cup. While the cheeseball is still in the plastic, shape the cheeseball as desired.
  • Spread the rest of the everything but the bagel seasoning on a plate. Remove the cheeseball from the plastic and roll in the seasoning until the cheeseball is fully covered in the seasoning.
  • Refrigerate or serve and enjoy!

Would you like to save this?

We'll email this post to you, so you can come back to it later!

Don't worry! We won't spam you!

Keyword Everything Bagel Cheeseball
Tried this recipe?Let us know how it was!

Everything But The Bagel Seasoning

February 5, 2025 by Tracy @ Next Level Baker Leave a Comment

Homemade everything but the bagel seasoning is inspired by the crunchy spices found on an everything bagel. It's a savory, nutty and garlicky blend that can be sprinkled on any dish to take it to the next level.

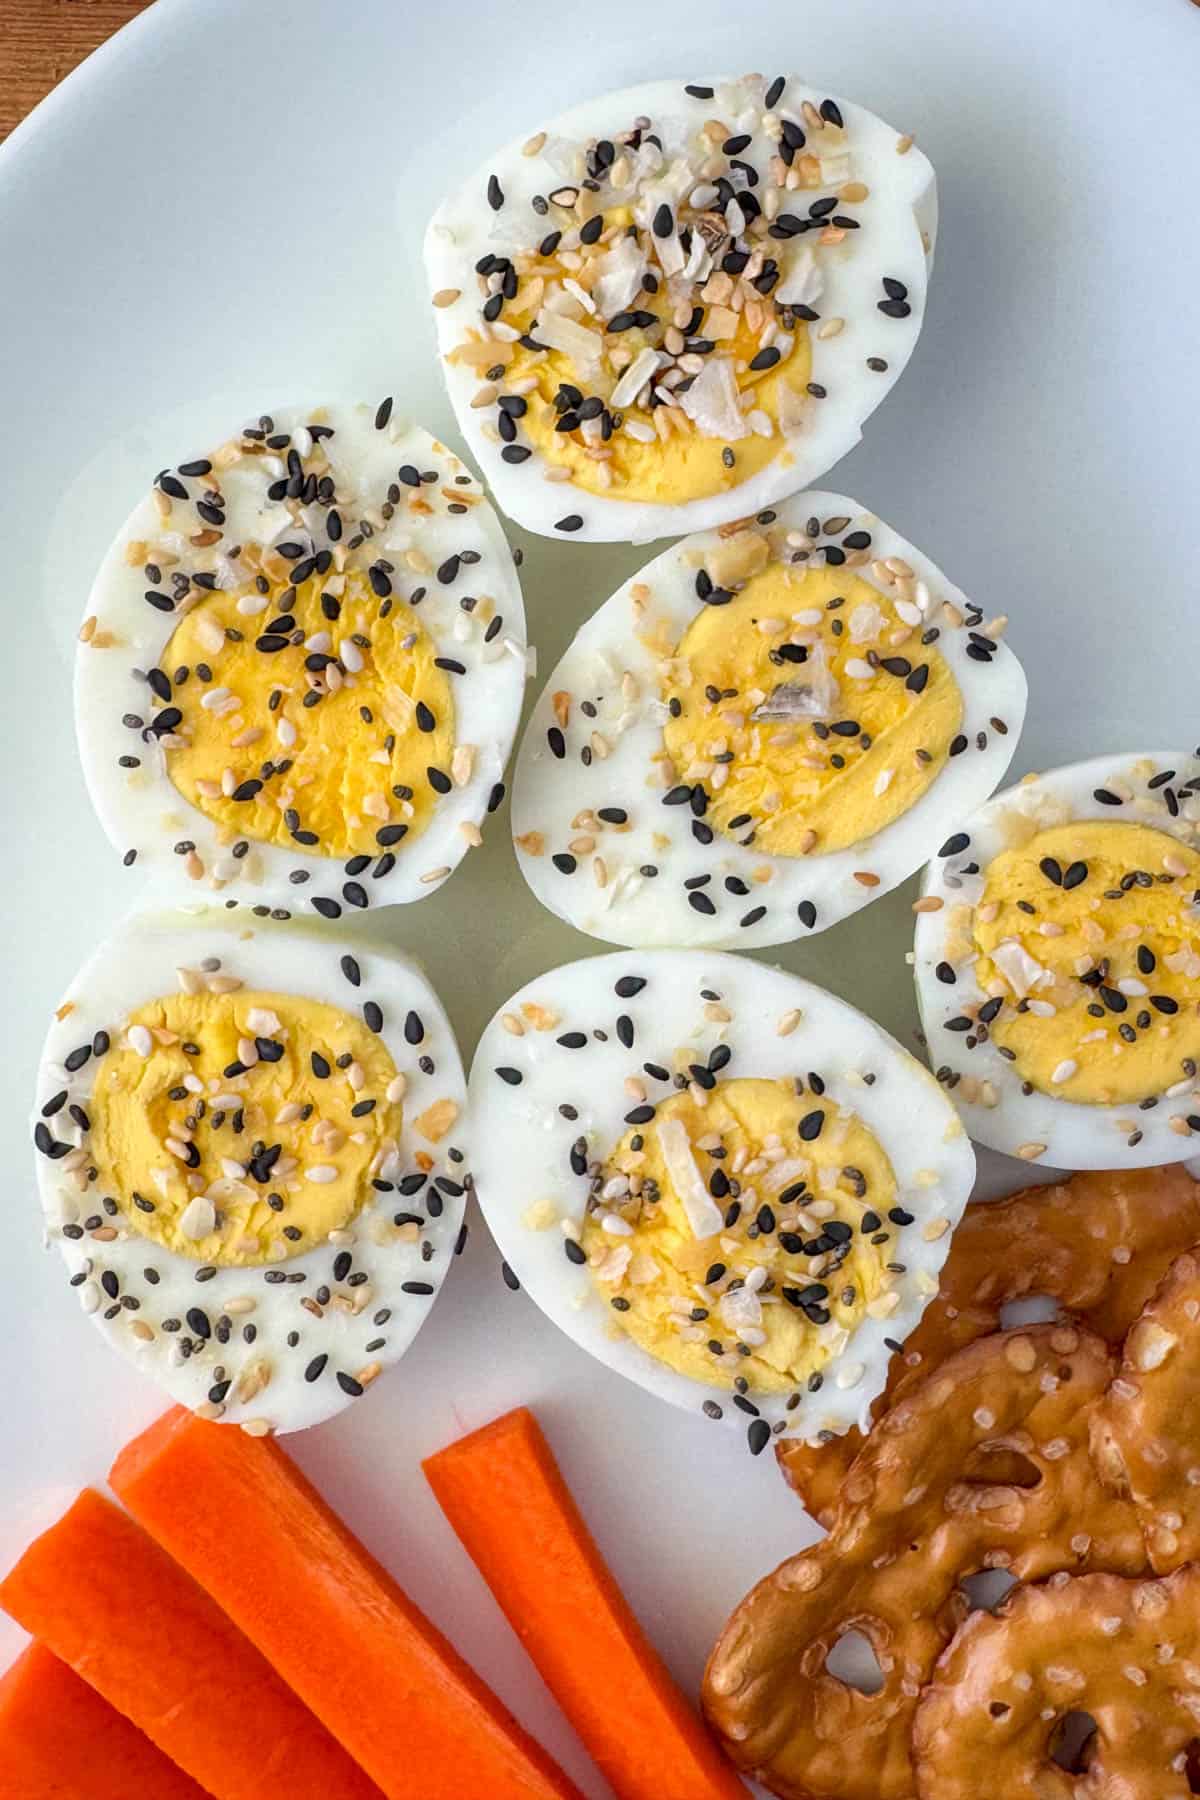
Photo of deviled eggs topping with everything but bagel seasoning plus carrots and pretzels on the side

I'm not sure who invented the everything bagel. Believe it or not, that appears to be a contentious subject. And I'm not even sure who first starting making everything bagel seasoning blends and offering them for sale in grocery stores. But I have to give props to Trader Joe's for the super fun names of their spice blends. So while the spice blend itself has been around for a long time, the name of this spice blend is a little nod to Trader Joe's. And I love Trader Joe's, but I can't always make it out to one. Thankfully, I also love making my own spice blends, so here is my favorite version of everything but the bagel seasoning.

[feast_advanced_jump_to]

Ingredients

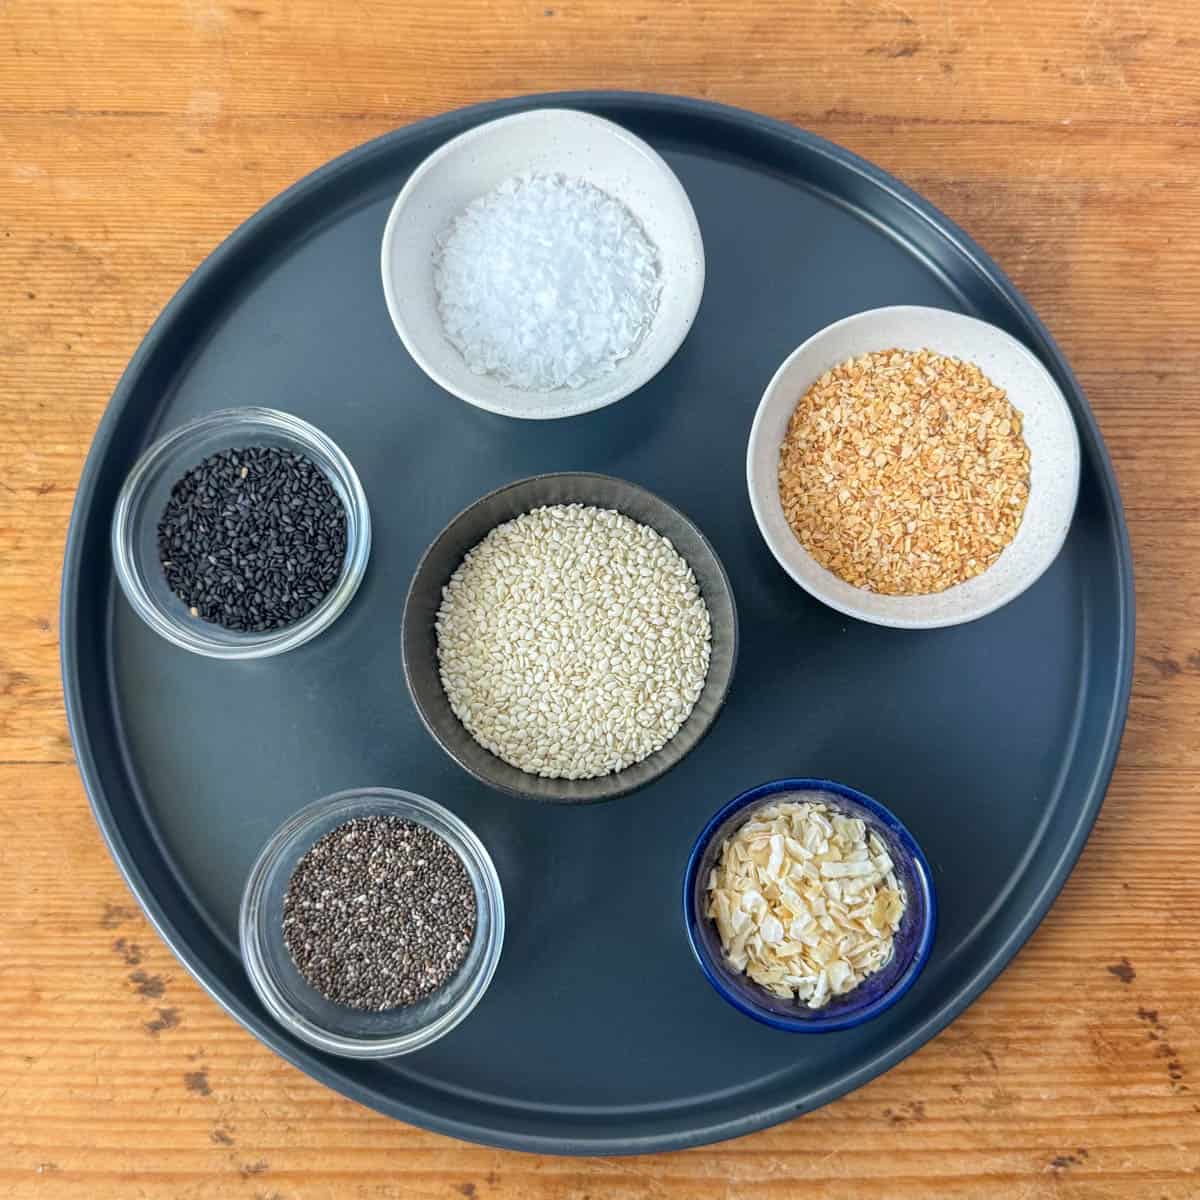
Homemade everything but the bagel seasoning blend consists of 6 spices

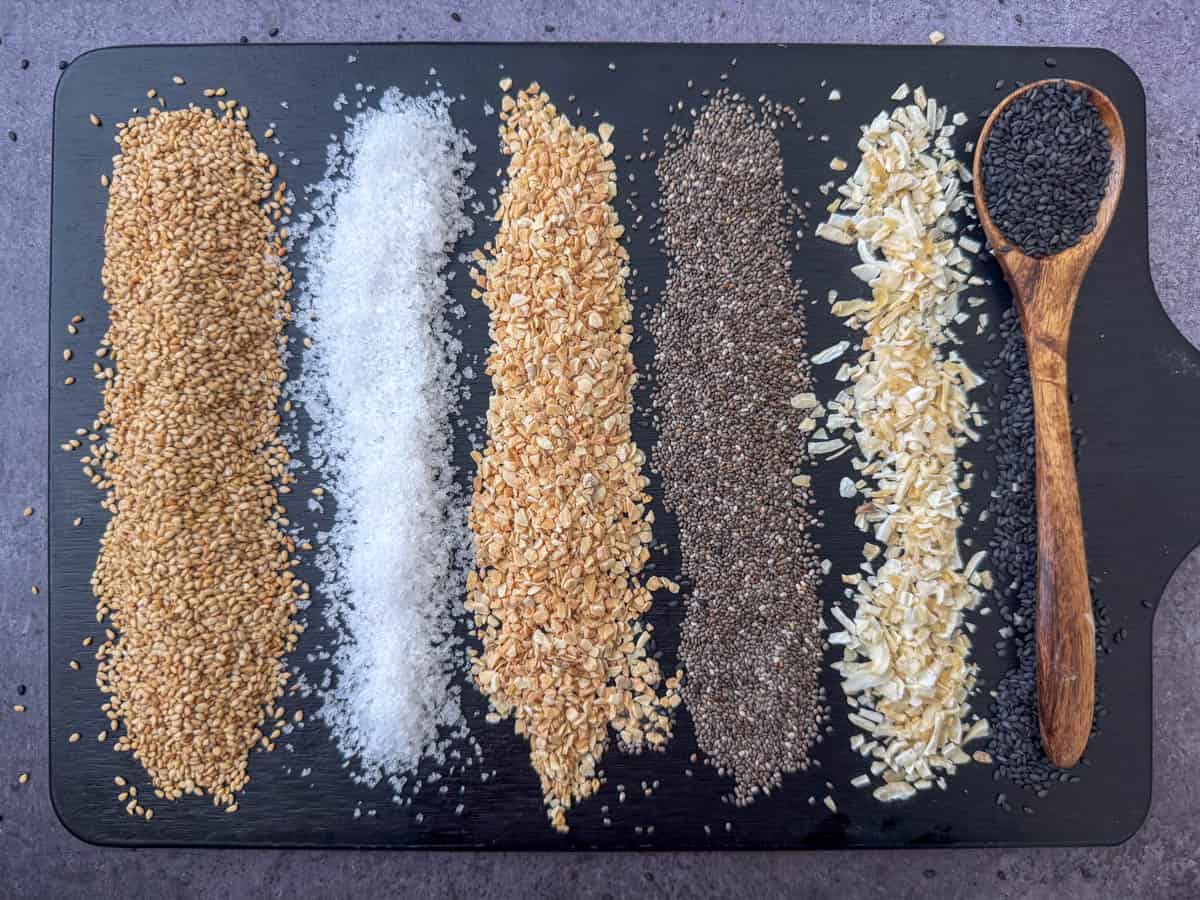
Photo of ingredients needed to make everything but bagel seasoning in tiny bowls: white sesame seeds, flakes salt, dried granulated minced garlic, dried minced onion, black sesame seeds and poppy seeds
  • Toasted white sesame seeds
  • Flaked salt
  • Dried minced garlic
  • Dried minced onion
  • Black sesame seeds
  • Poppy seeds

See recipe card for quantities.

Uses for Everything but the Bagel Seasoning

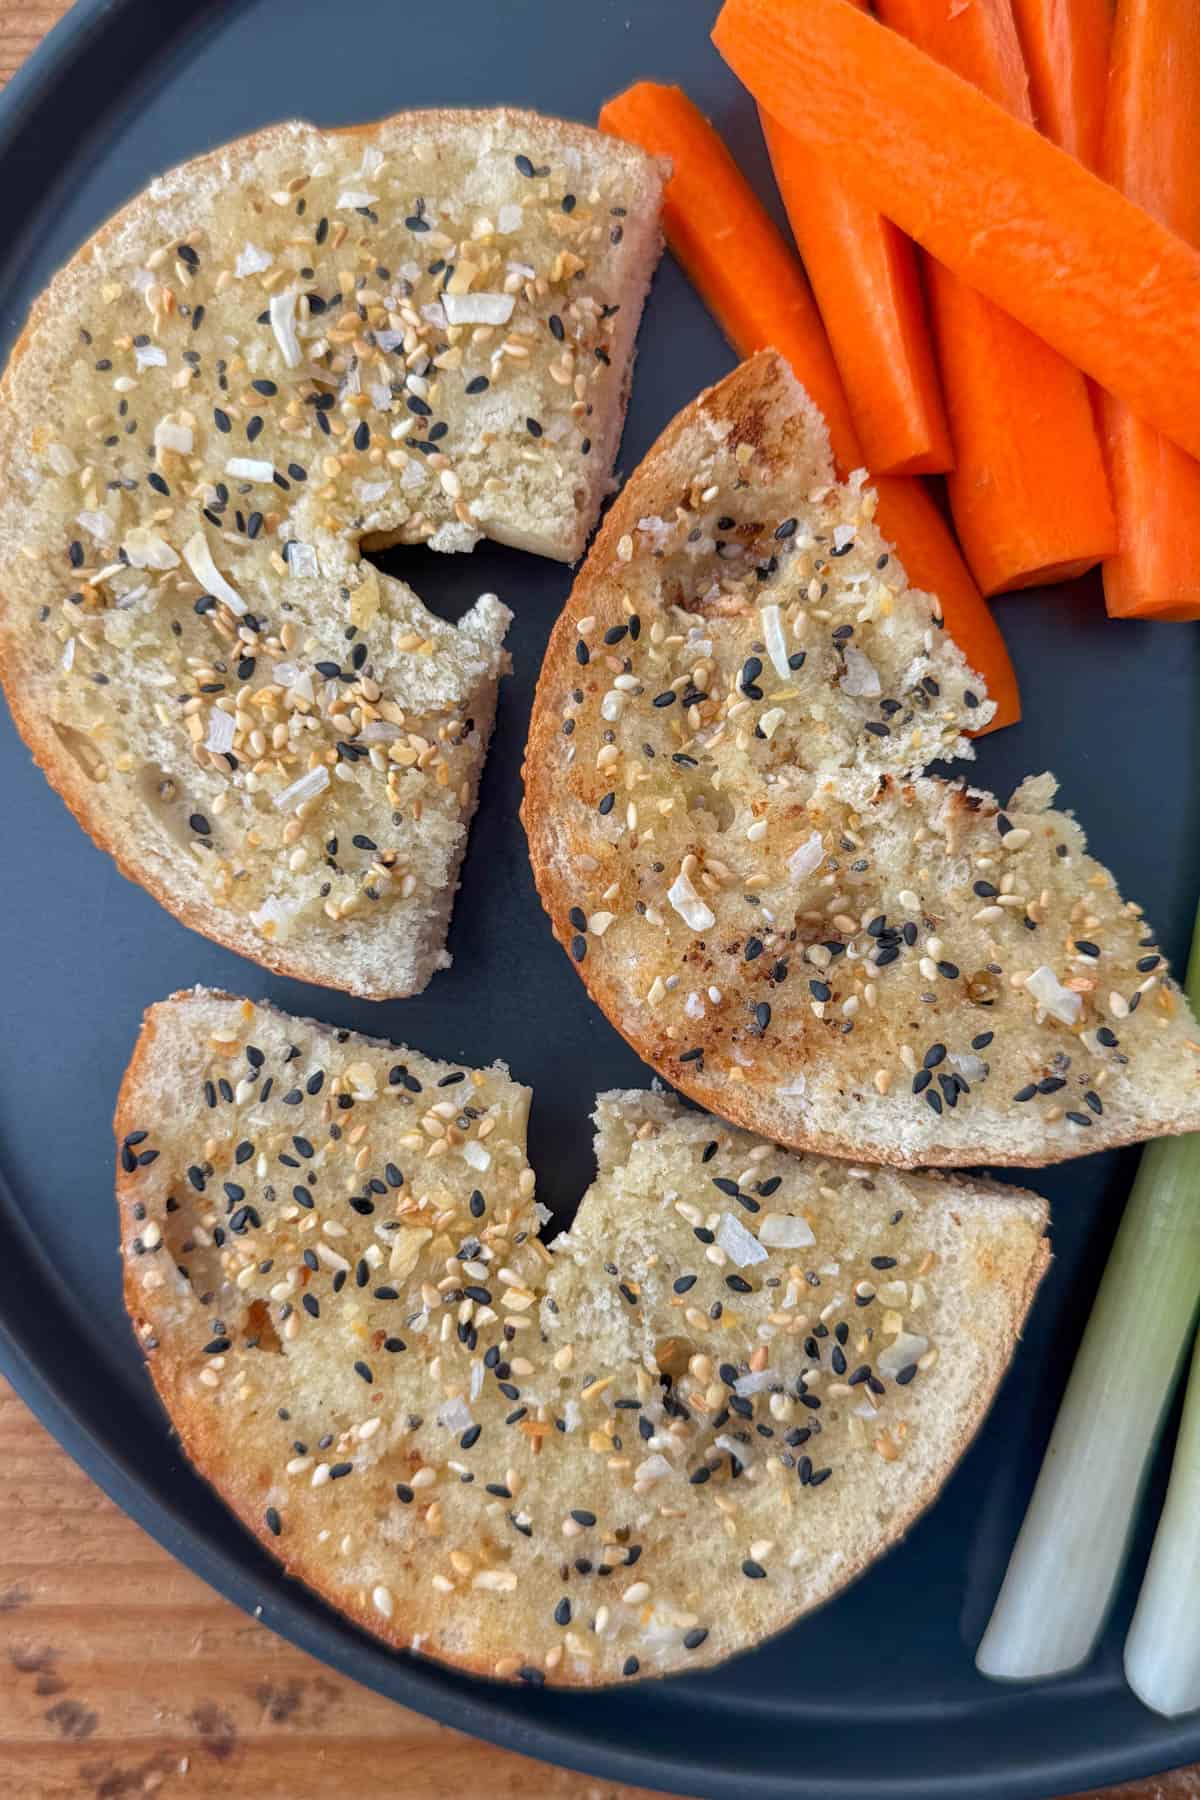
Everything but the bagel seasonings is, of course, awesome on bagels. But, there are so many more ways to use it:

  • Avocado toast
  • English muffins
  • Everything but the bagel cheeseball
  • Deviled eggs
  • Hard boiled eggs
  • Popcorn
  • Roasted veggies
  • Meat rubs

Variations

  • No salt - if you need a no salt seasoning, you can leave the salt out. You can also cut down on the amount of salt in the recipe for a low salt option. You can also substitute a different type of salt, like course salt.

Storage

Store homemade everything but the bagel seasoning in a cool but dry, dark place for 3 to 6 months.

Next Level Tips

  • If you can't find toasted white white sesame seeds, toast your own! Toasting is optional, but don't skip it. Toasted white sesame seeds takes homemade everything but the bagel seasoning to the next level!
  • I highly recommend flaked salt for everything but the bagel seasoning. It's nice and light but won't all sink to the bottom of the jar. However, I also highly recommend that you smash it a hit. Sometimes, there are quite large pieces and no one wants a bite full of salt! So just smash it down a bit first.
  • I love making homemade spice blends. It's cheaper overall and makes me feel better using higher quality spices without any additives. Try my homemade taco seasoning, bread dipping seasoning and ranch seasoning mixes for some other great blends too.
  • Homemade spice blends make great little gifts for friends and neighbors!

FAQ

I can't find toasted sesame seeds, so can I toast my own?

Absolutely! Toasting your own sesame seeds is a cheaper way to go, and it's super easy. It's very similar to toasting coconut. See the section below on toasting sesame seeds.

How to Toast Sesame Seeds

Process shot of toasted white sesame seeds

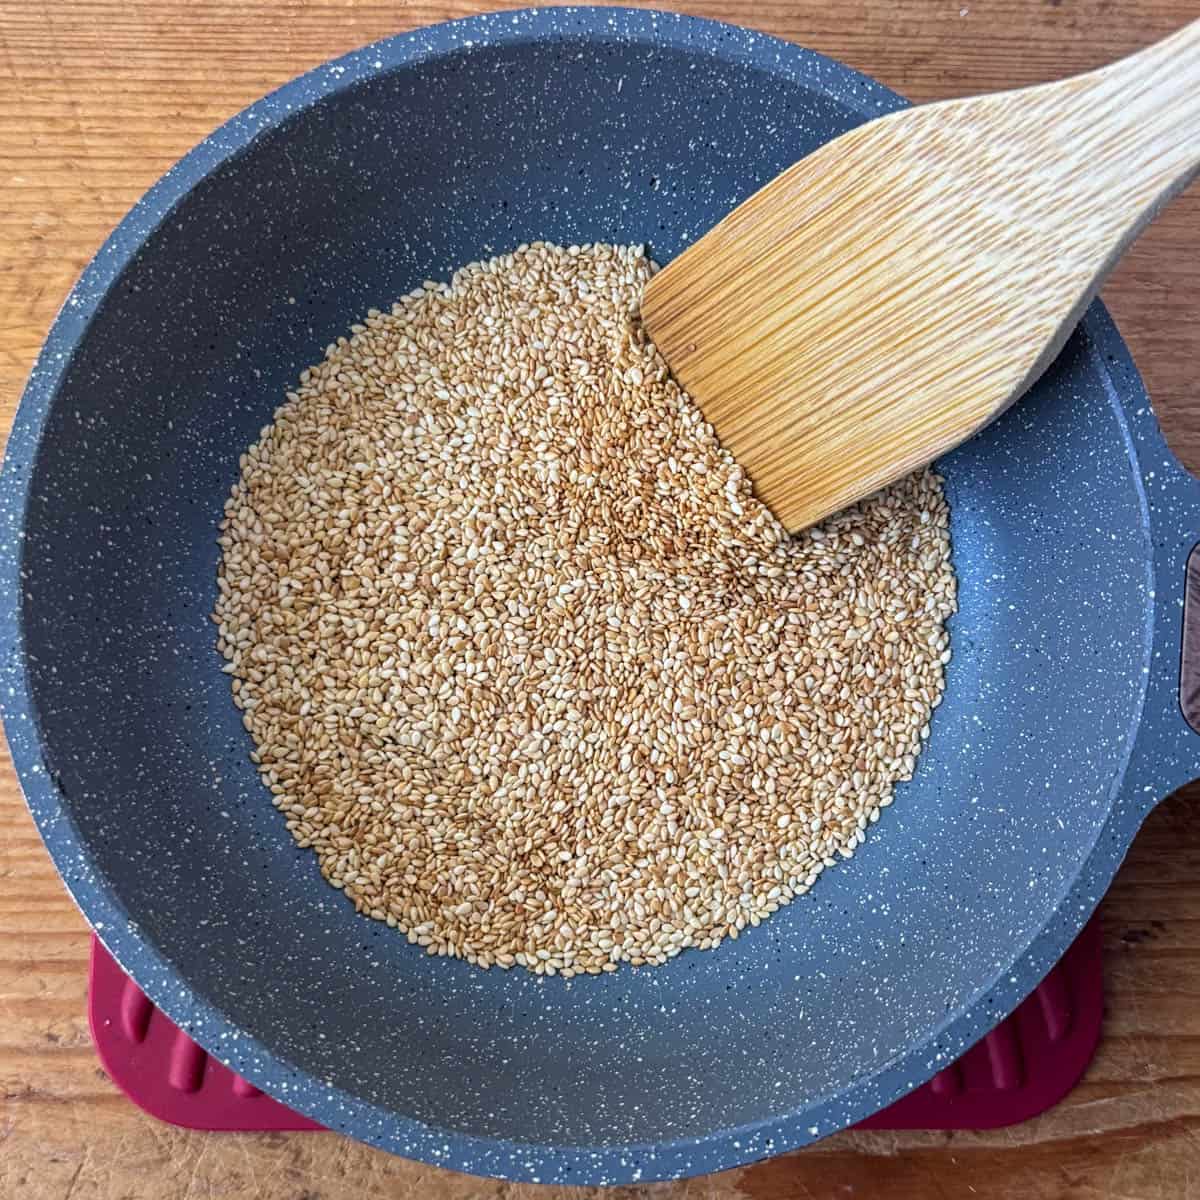
Toasting sesame seeds step: Use a non-stick pan and turn the heat to medium. Do not use any cooking spray, oil or butter. Add the white sesame seeds in mostly a single layer. Stir occasionally until the sesame seeds start to brown and then stir frequently until the sesame seeds are light golden brown and smell nutty, approximately 3-5 minutes. Remove the pan from the heat and transfer the toasted sesame seeds to a plate to cool as they will continue cooking in the hot pan.

Spices needed to make everything but bagel seasoning each lined up on a cutting board: toasted white sesame seeds, flaked salt, minced garlic, poppy seeds, minced onion and black sesame seeds

Related

Looking for other recipes like this? Try these:

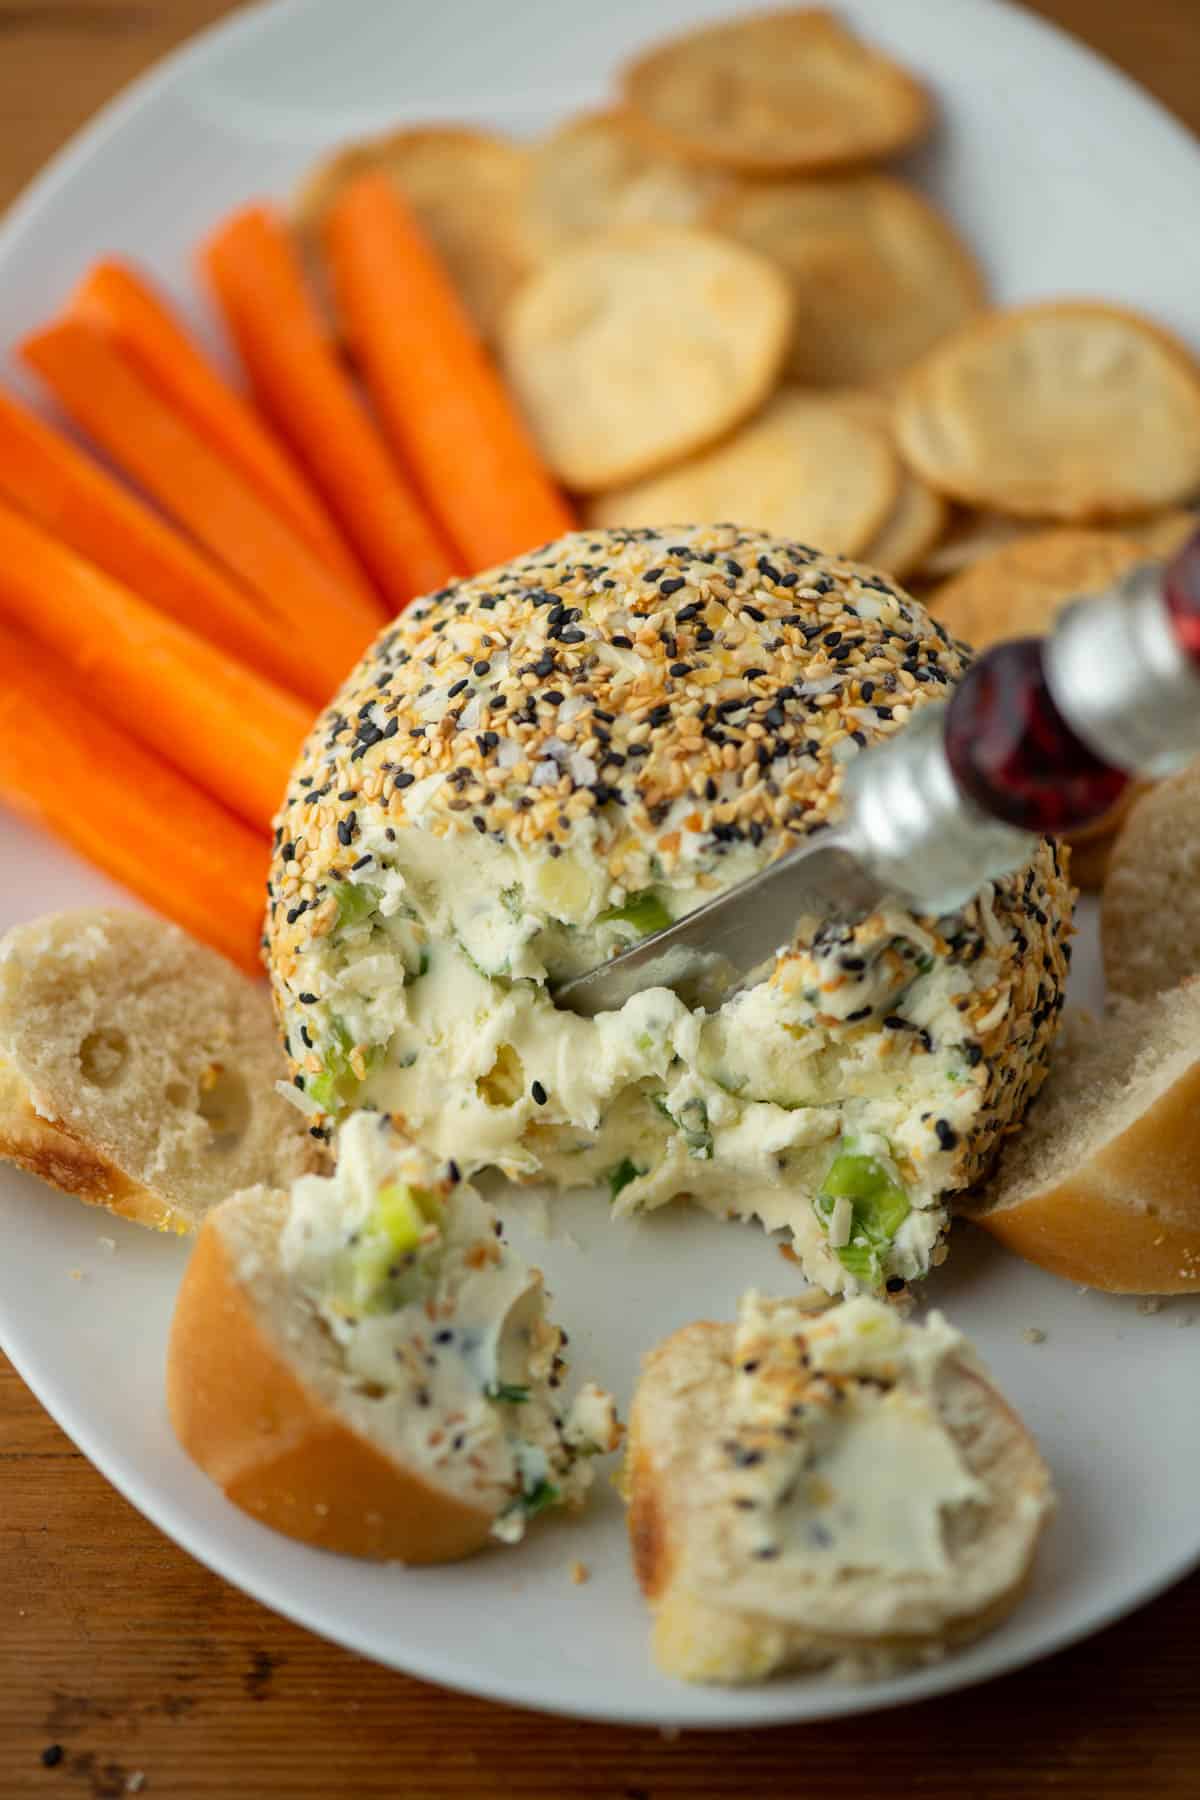
  • Close up photo of Everything Bagel Cheeseball with a cheese knife spreader sticking out of it surround by plain bagel slices, carrots and pita crackers
    Everything Bagel Cheeseball
  • Grey plate with appetizer size pieces of baked grilled cheese sandwiches with tomato dipping sauce
    Grilled Cheese Appetizer
  • Whipped Ricotta Truffle Oil Dip
    White Truffle Garlic Bread with Whipped Ricotta
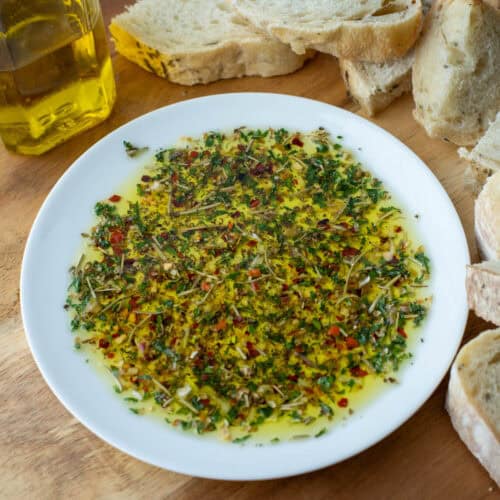
  • Bread dipper seasoning in oil on plate with bread and olive oil in the background
    Bread Dipping Seasoning
Jar of everything bagel seasoning spilling out onto a gray plate

Everything but the Bagel Seasoning

Tracy @ Next Level Baker
Everything but the bagel seasoning is a flavorful spice blend inspired by the toppings of an everything bagel, but without the bagel. It's super versatile and adds a bold flavor to any dish.
Print Recipe Pin Recipe
Prep Time 5 minutes mins
Total Time 5 minutes mins
Course Side Dish
Cuisine American

Ingredients
  

  • 3 tablespoons white sesame seeds toasted
  • 2 tablespoons flaked salt smashed
  • 2 tablespoons dried minced garlic
  • 1 tablespoon dried minced onion
  • 1 tablespoon black sesame seeds
  • 1 tablespoon poppy seeds

Instructions
 

  • Add all ingredients to a spice storage jar and shake well. Yields just over ½ cup.

Would you like to save this?

We'll email this post to you, so you can come back to it later!

Don't worry! We won't spam you!

Keyword Everything but the Bagel Seasoning
Tried this recipe?Let us know how it was!
Jar of everything bagel seasoning spilling out onto a gray plate

Thin Mints Cheesecake

January 31, 2025 by Tracy @ Next Level Baker 2 Comments

Thin Mints cheesecake is a rich, creamy dessert that combines cool mint and rich chocolate with the iconic Girl Scout cookies for the perfect decadent dessert. This is an indulgent yet refreshing dessert and absolutely perfect for Thin Mints lovers!

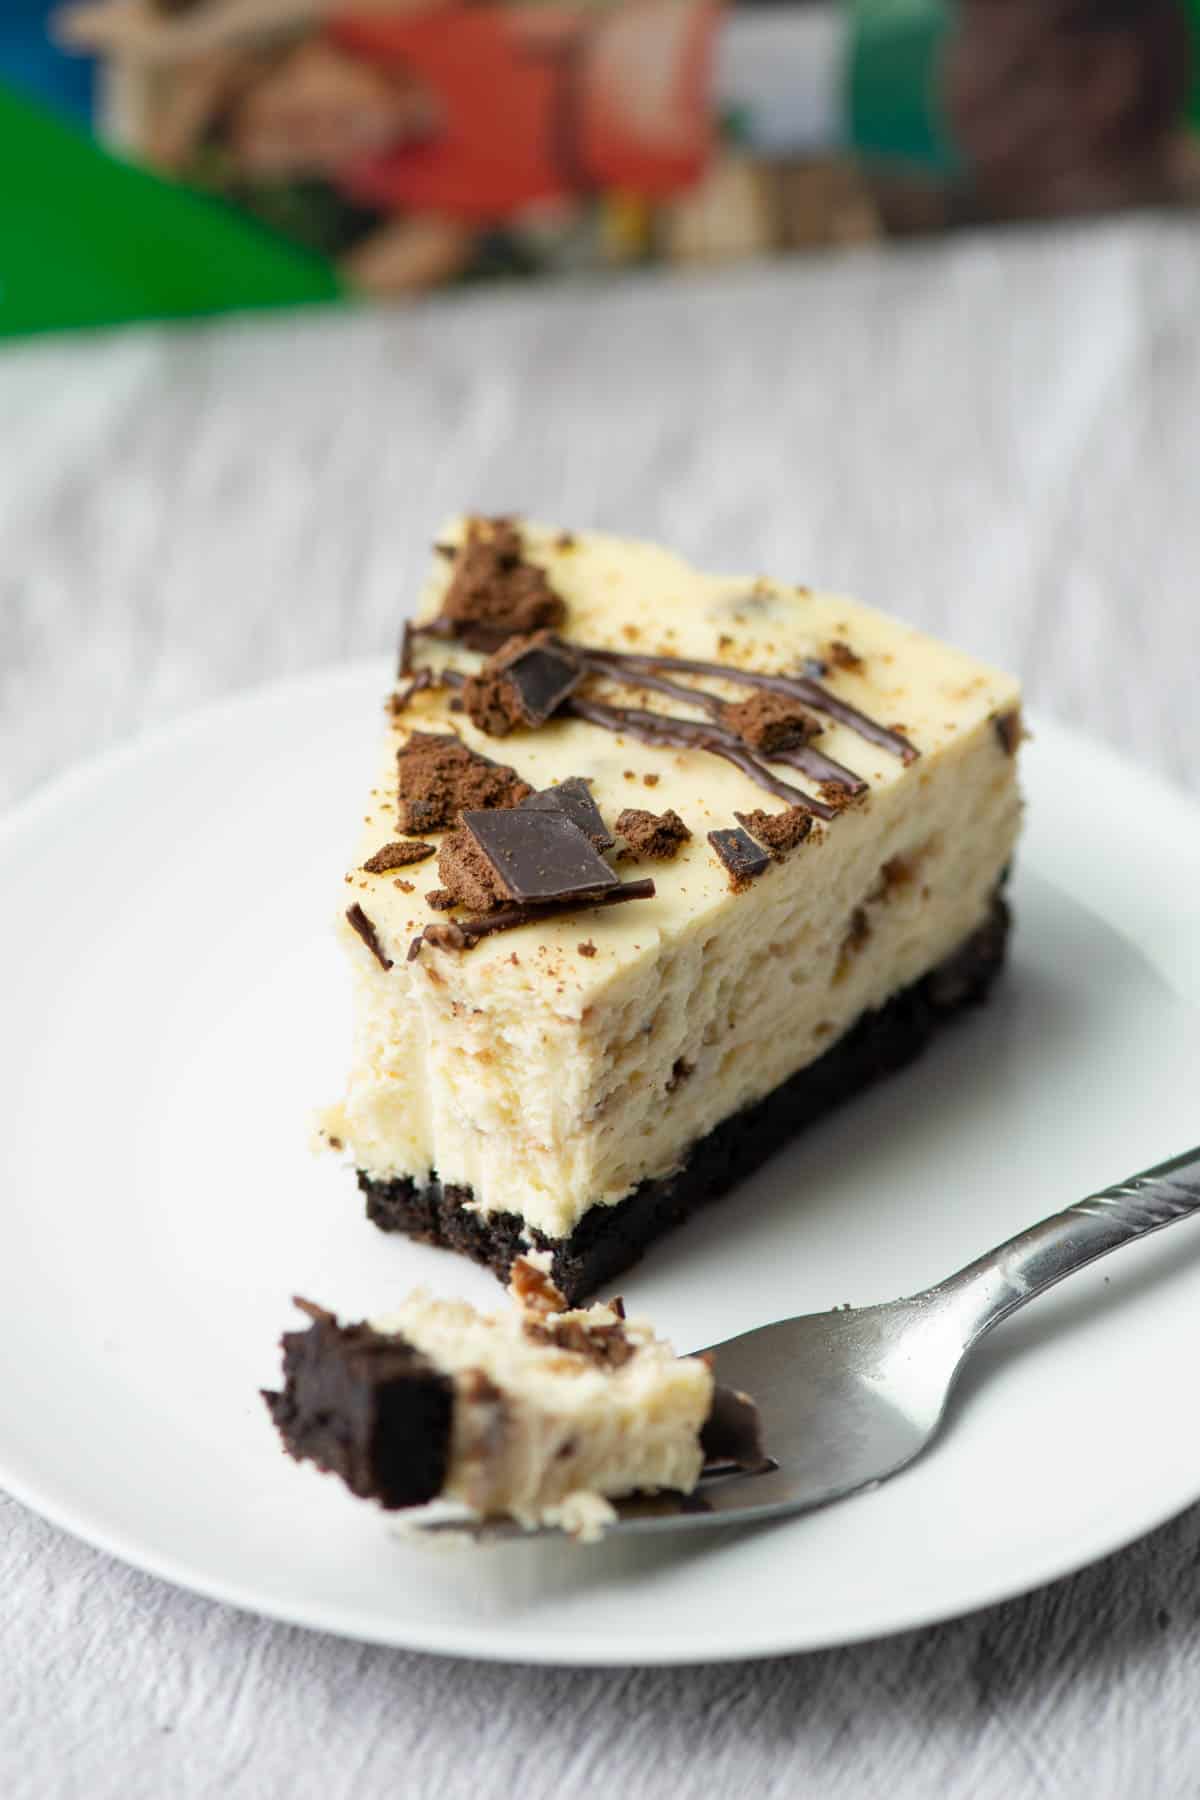
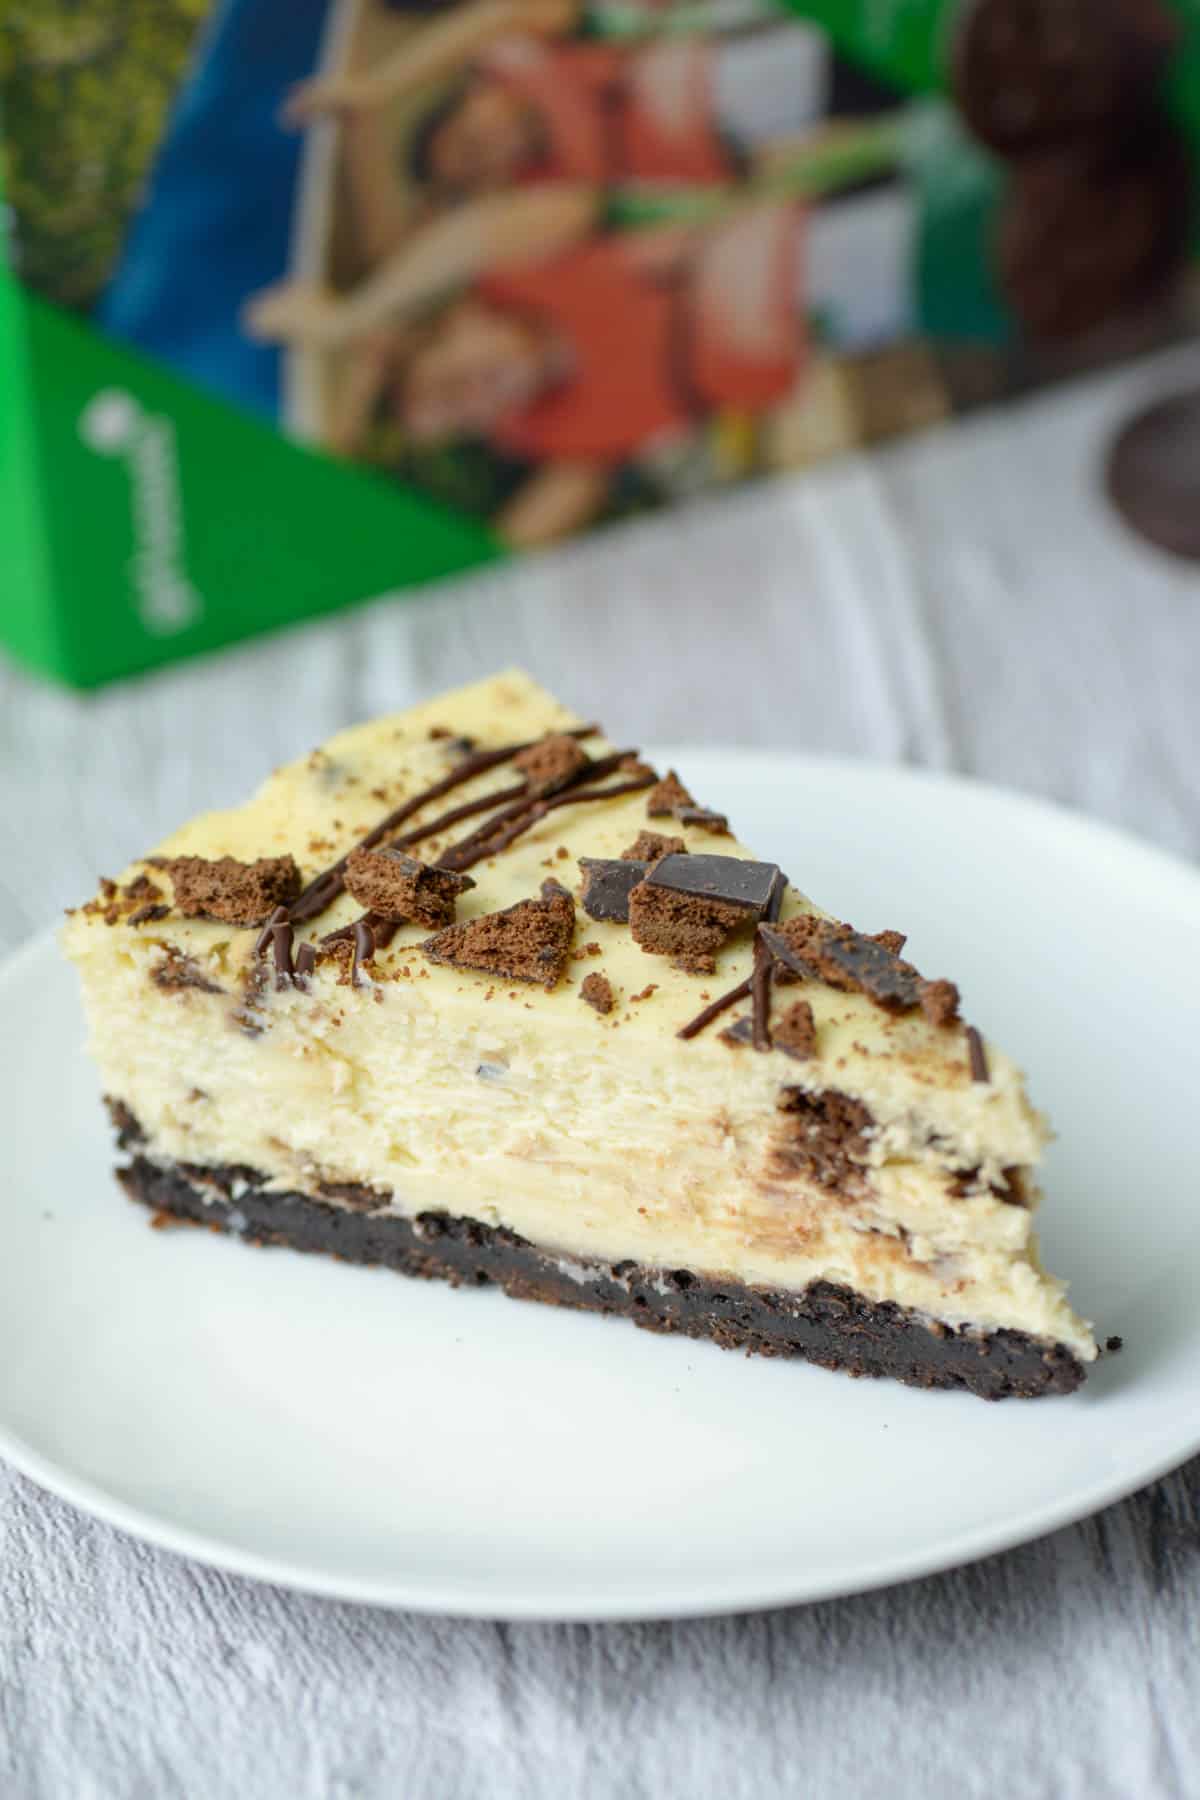
One slice of Thin Mints cheesecake on a plate with a bite on a fork in front with a box of Thin Mints in the background

I always look forward to the end of January, because the end of January means it's Girl Scouts cookie time! I loved Girl Scouts as a kid, as a Girl Scout leader and now as a baker too. As a baker, I love using Girl Scout cookies as an ingredient in other desserts. Thin Mints are dreamy in cupcakes like my Thin Mints Cupcakes recipe, and they're dreamy in cheesecakes too. The nostalgic flavor of Girl Scout cookies just elevates any other dessert. It's that place where the familiar meets the unexpected. Pure dessert bliss!

[feast_advanced_jump_to]

Ingredients

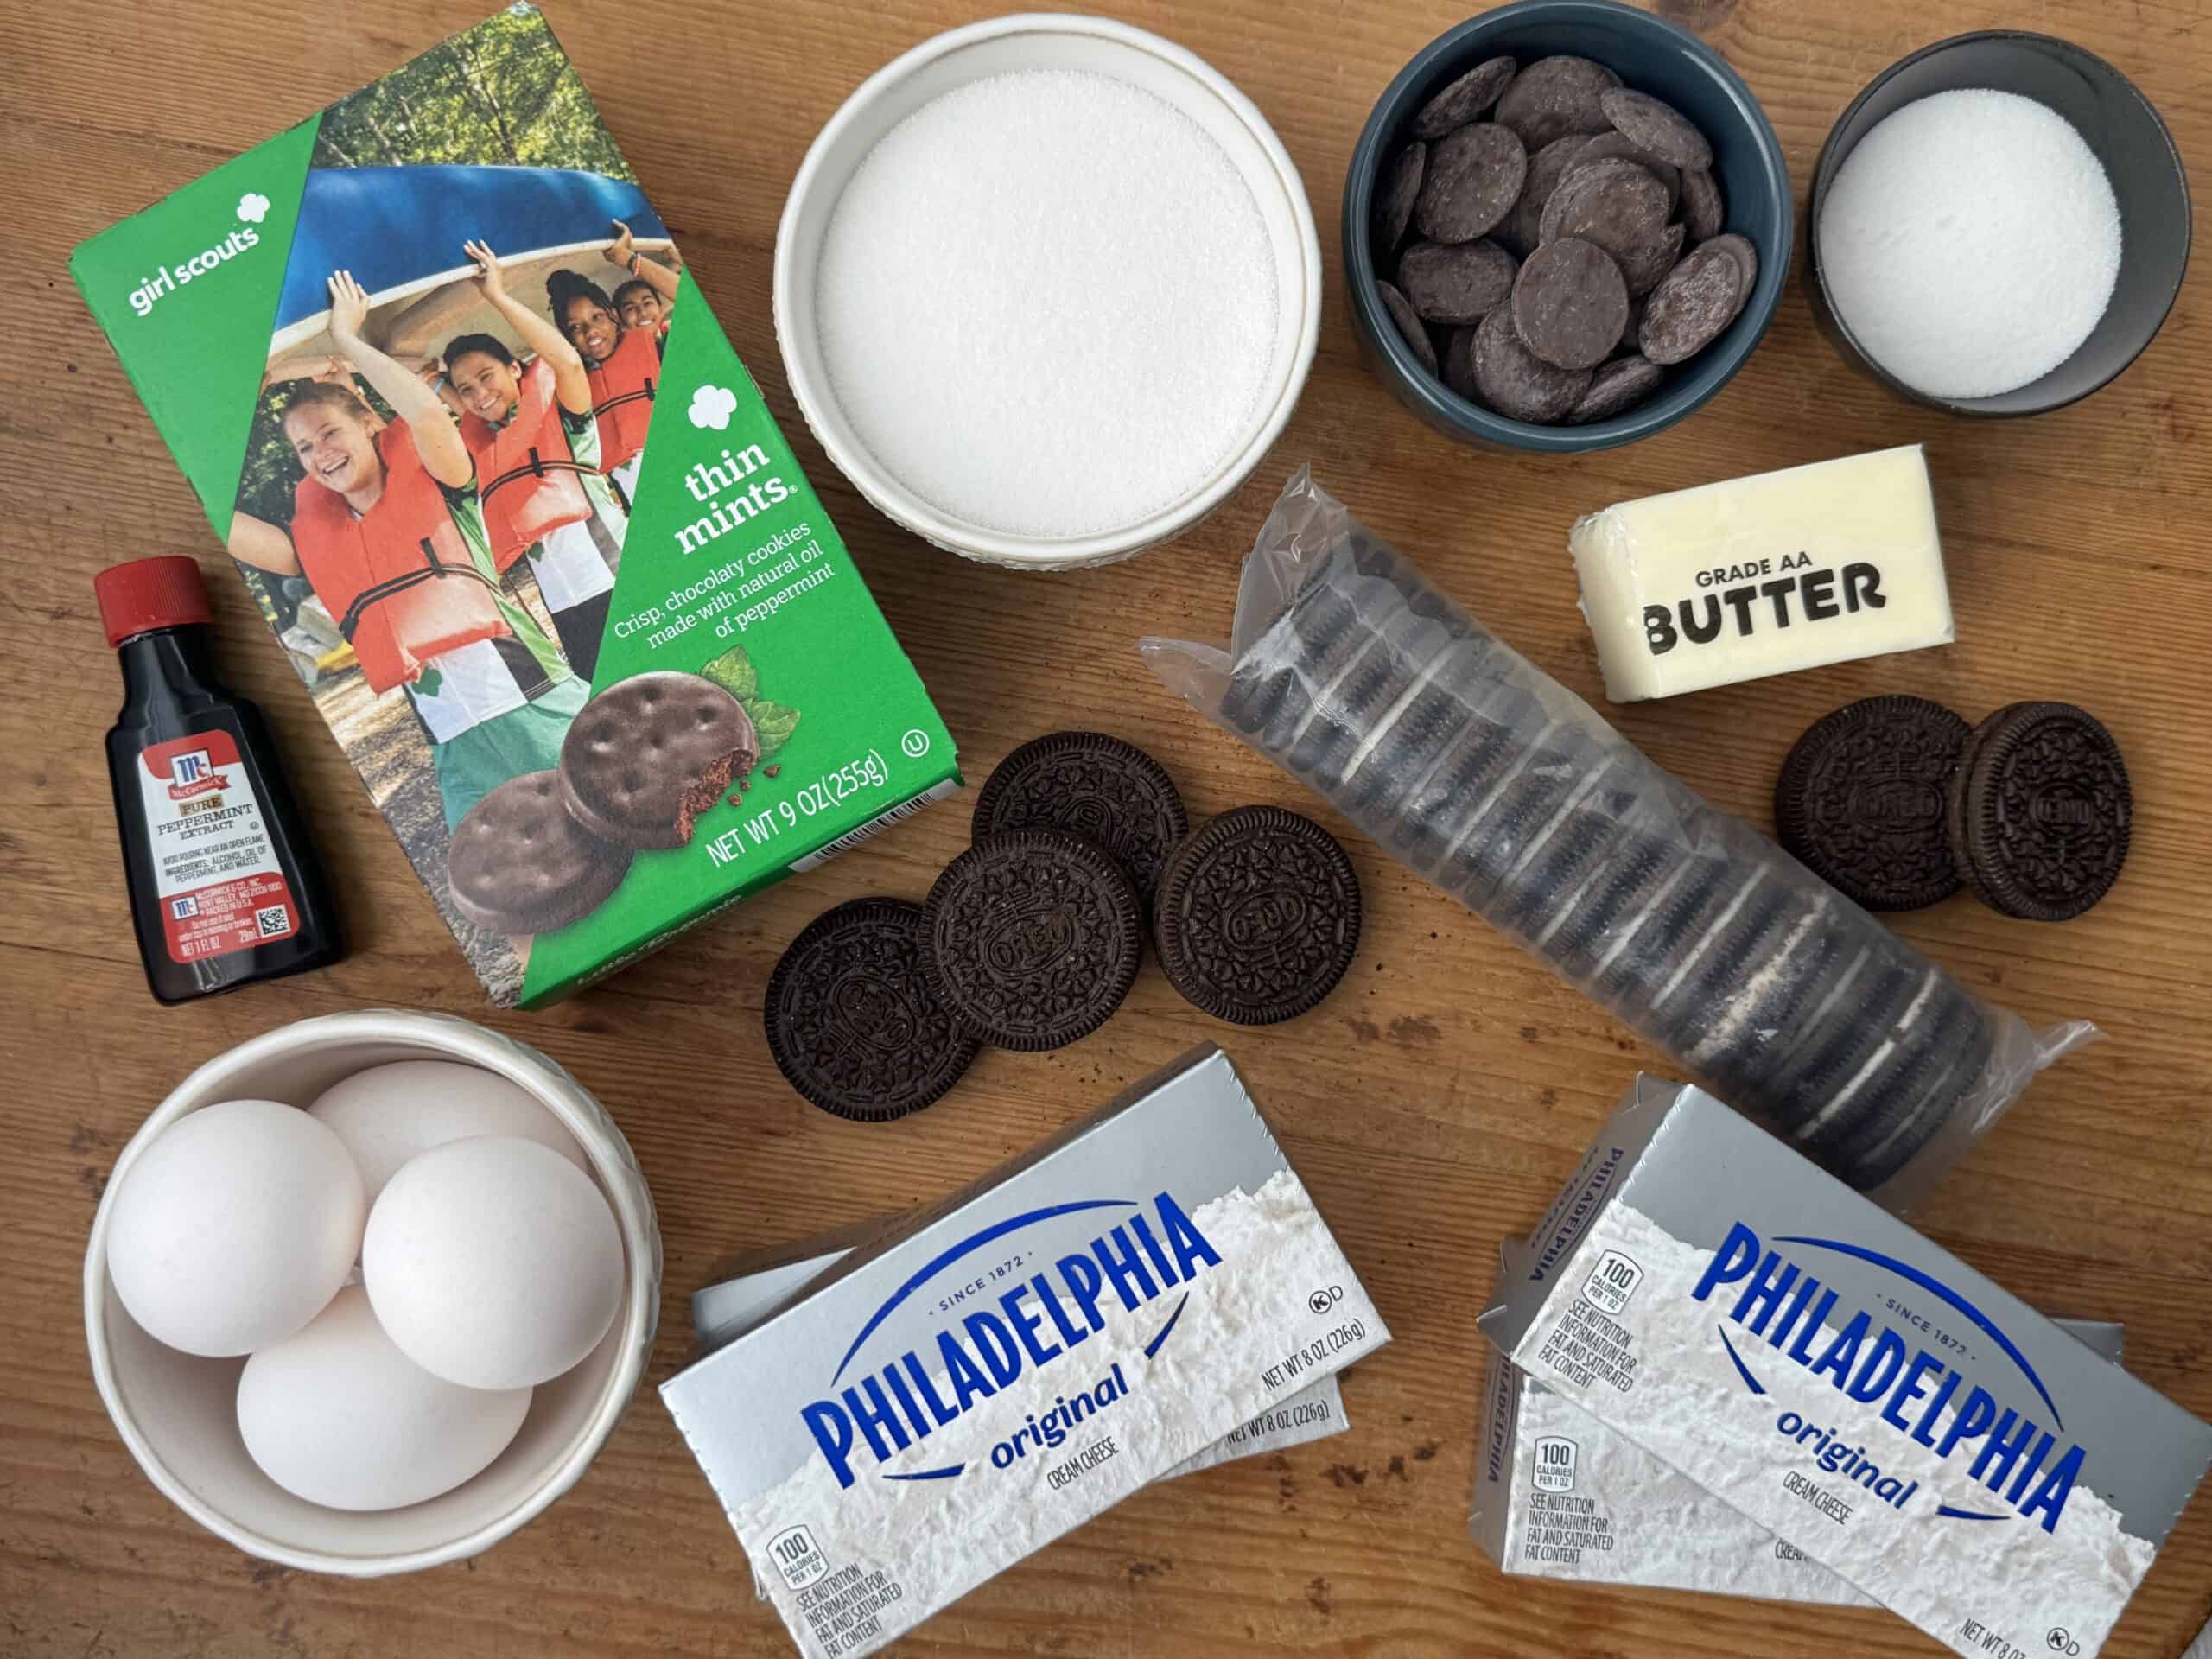
Ingredients needed to make Thin Mints cheesecake: Thin Mints cookies, Oreo cookies, salted butter, white sugar, cream cheese, eggs, peppermint extract, chocolate melting wafers
  • Thin Mints cookies
  • Oreo cookies
  • Salted butter
  • White sugar
  • Cream cheese
  • Eggs
  • Peppermint extract
  • Chocolate melting wafers

See recipe card for quantities.

HOW TO BAKE A CHEESECAKE WITHOUT CRACKS

Okay, let's get to one of the biggest issues with cheesecakes: unsightly cracks. Cracks don't make the cheesecake taste any differently and, of course, they could be covered up. But, there are two main things to know to avoid cracks: baking temperature and water baths.

Bake at a lower temperature

For temperature, cheesecakes turn out best when baked at a lower temperature. For that reason, I bake almost all of my cheesecakes, including this one, at 325 degrees.

Use the moat method for the water bath

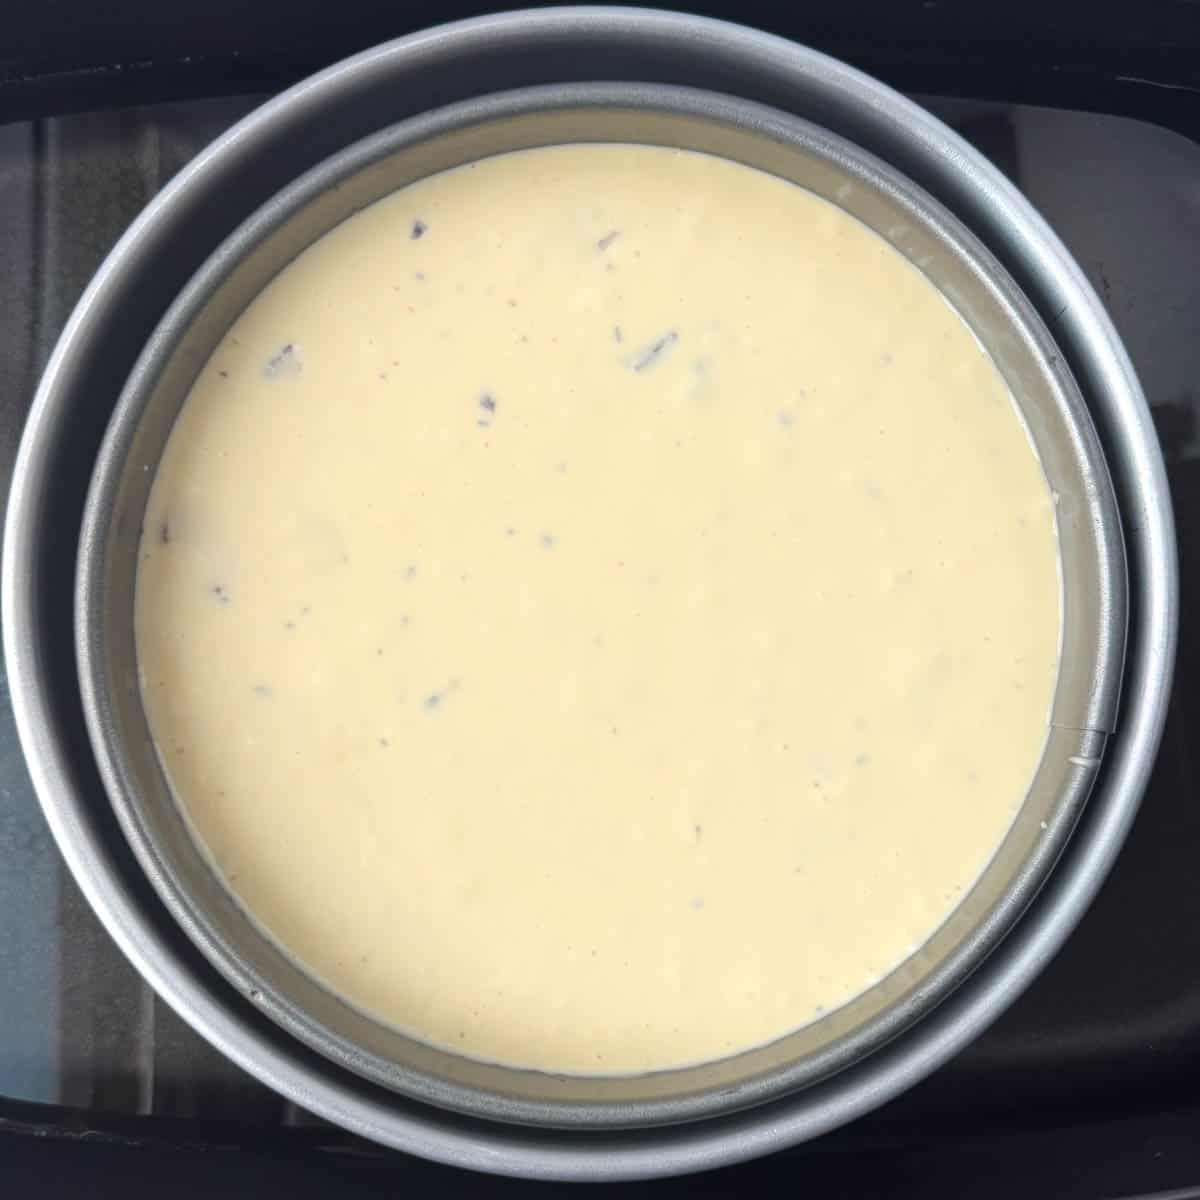
The most basic way to do a water bath is to wrap the springform pan with aluminum foil and place it in a roasting pan with water and then hope it doesn't leak. But, have you ever wrapped it super carefully with the extra wide aluminum foil only to discover that it still leaked? Yes, me too. Instead, I use the moat method. To use the moat method, place your 8 or 9 inch springform pan inside a 10 inch cake pan. Then place the 10 inch cake pan into a larger roasting pan with water. With this moat method, there is no possible way that water gets in to your springform pan. I've never had a cheesecake crack when I've combined a lower baking temperature with the moat method.

Steam baths

Ok, say you don't have a roasting pan big enough to fit your springform pan and cake pan. You can do the steam bath method, which usually works. I will say it's not quite as fool proof as the moat method though. But you can fill a 9x13 pan with one inch of water and place it on the oven rack directly beneath the springform pan. (If you have a cake pan, you can still put the springform pan in a cake pan according to the above moat method.) The water in the pan creates steam and a humid environment in the oven which helps to prevent cracks.

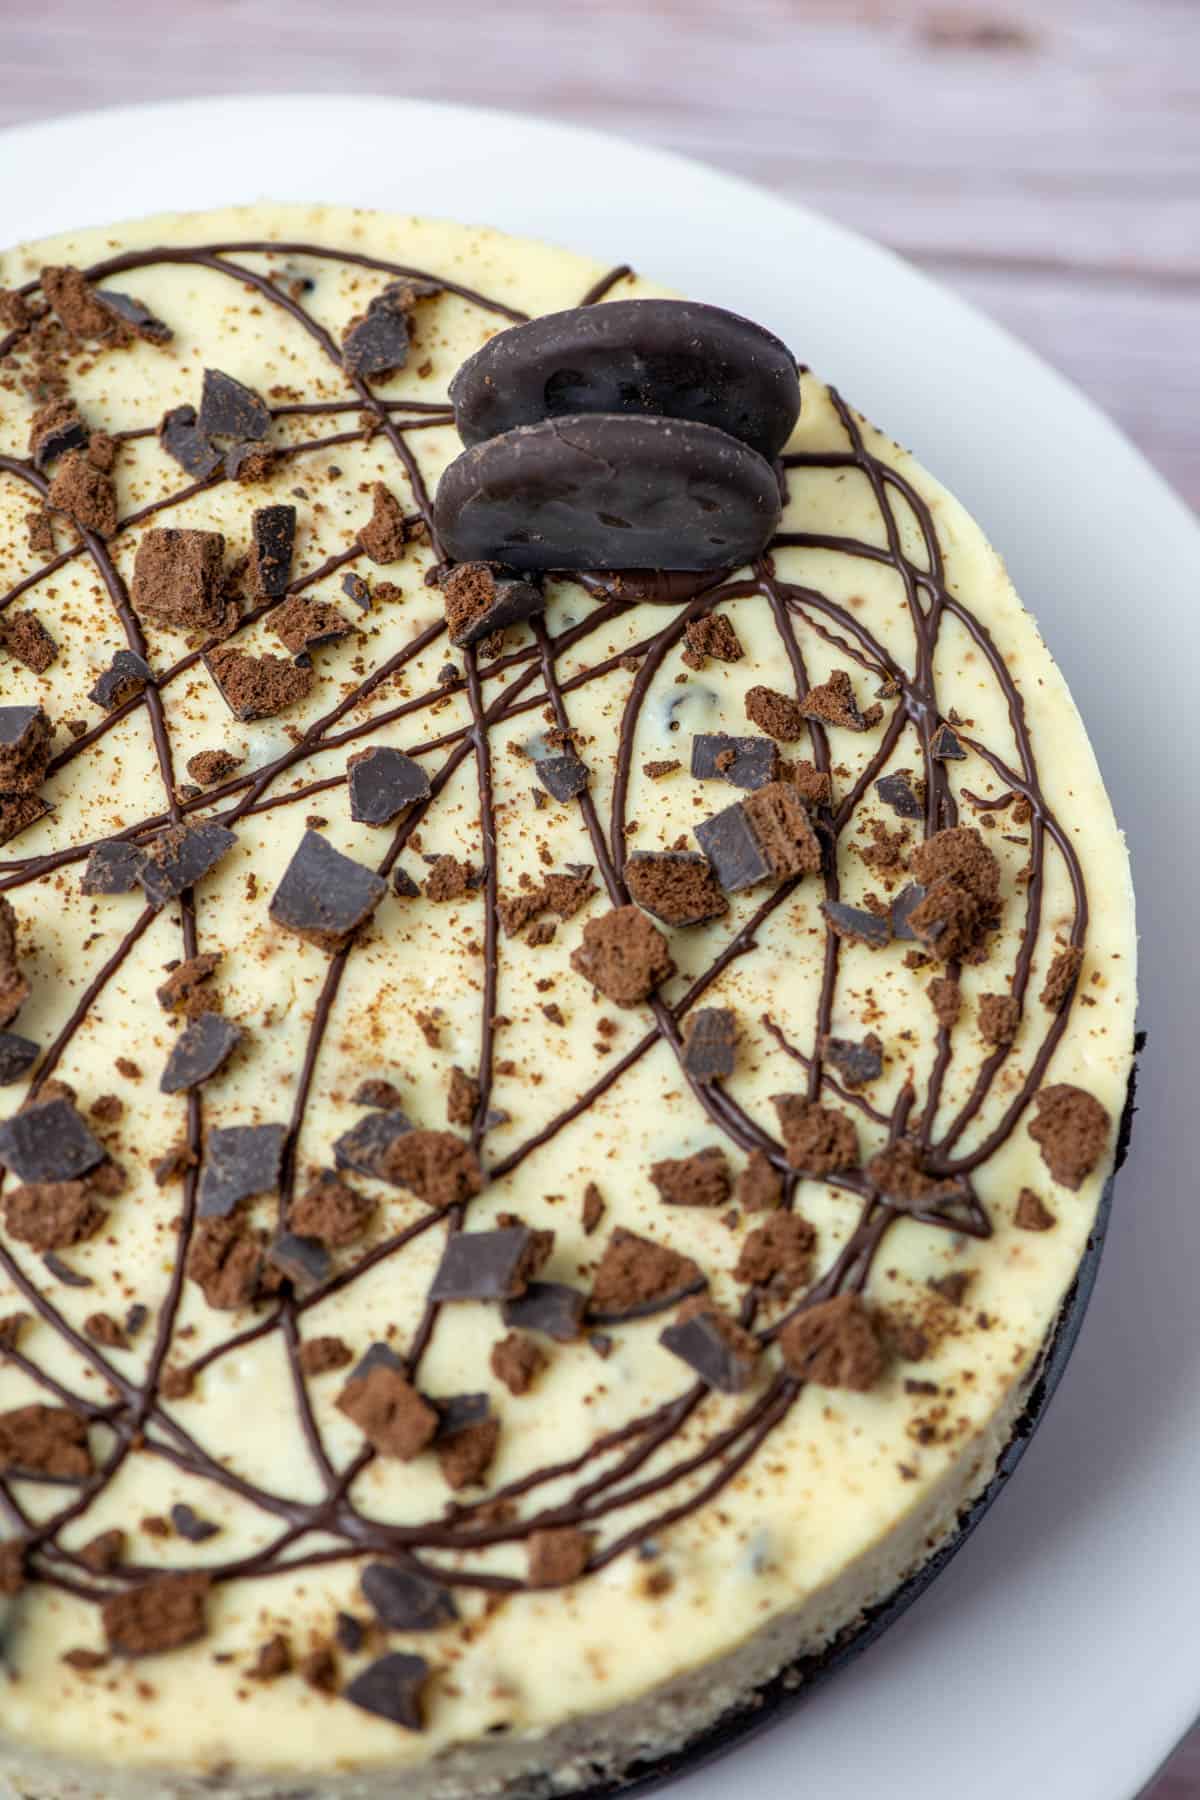
Photo of partial Thin Mints cheesecake topped with chocolate drizzle, crumbled Thin Mints and two full Thin Mints

Variations

  • Decorating - there are many, many ways to decorate a cheesecake. You can use a ganache instead of the melting chocolate for a drizzle with a softer texture. You can do straight lines of drizzle back and forth across the top. You can add a whipped cream topping. Extra full cookies on top. No cookies on top. So many options!
  • Cookies - the reason that this recipe has part Oreos and part Thin Mints is Thin Mints are expensive, so I like to keep my recipes to one box of Thin Mints or less. You need a few leftover to sample after all! I also feel like Thin Mints have a little too much fat to use all Thin Mints in the crust. However, you could easily replace all the Thin Mints with Oreos for a mint Oreo cheesecake though.
  • Food coloring - my personal preference is minimal food coloring, but you could easily add some green food coloring to the cheesecake filling. If you want to add food coloring, add it at the beginning with the cream cheese blocks.

Equipment

To make the best cheesecakes, a stand up mixer or hand held mixer is needed. Also, a springform pan is super helpful if you want to take the cheesecake easily out of the pan. A 10 inch cake pan and roasting pan are needed for the moat method. However, if you don't have a roasting pan big enough, you can fill a 9x13 pan with an inch of water to use the steam bath method instead.

Storage

Store the Thin Mints cheesecake in an airtight container in the refrigerator for up to 5-7 days.

Next Level Tips

  • Always use room temperature cream cheese and room temperature eggs for cheesecakes. 
  • The very best way to avoid cheesecake cracks is to bake at a lower temperature and use the moat method, as described above and in the FAQs. This is where you place your springform pan inside of a cake pan and then put the cake pan in a roasting pan with water. This avoids leaky aluminum foil yet still doesn't allow direct heat on the springform pan.
  • Allow the cheesecake to cool in the oven without touching it for two hours. Then move the springform pan to a cooling rack and allow the cheesecake to come to room temperature before placing it in the refrigerator.
  • Cheesecake needs time to set in the refrigerator after baking. Refrigerate for at least 6 hours; however, overnight is best.
  • I love to use offset or artsy designs on the tops of cheesecakes. If you like a dead-center kind of centerpiece or a ring of whipping cream swirls around the edges, go for it. I've done lots and lots of those. Currently, I go for more of an artsy look. This one was decorated with some random swirls using Ghirardelli dark chocolate flavored melting wafers and chopped Thin Mints. It was done within minutes. It can be that easy!
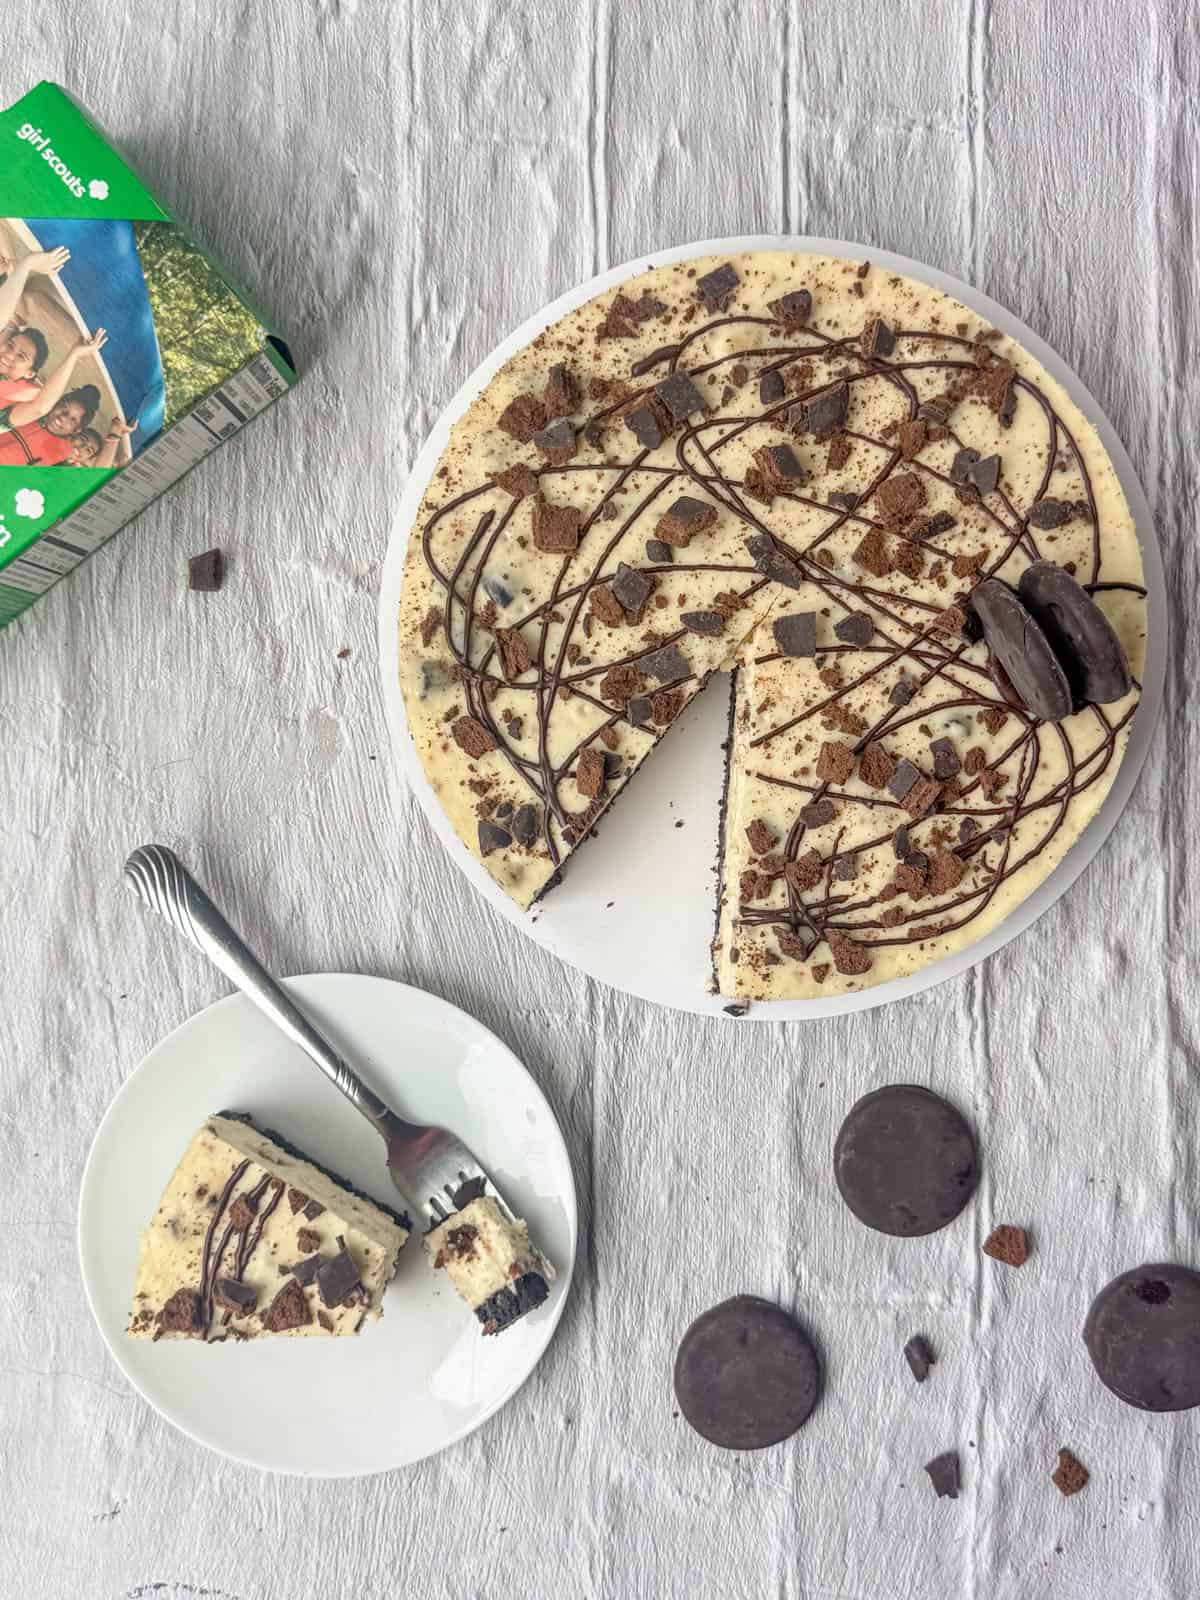
Overhead view of Thin Mints cheesecake on a cakeboard plate with a slice of Thin Mints cheesecake on another plate with three Thin Mints cookies and a box of Thin Mints nearby

FAQ

Do I need to use room temperature cream cheese and eggs?

Yes! However, you can carefully speed up this process if you forgot to set out the cream cheese and eggs. Most microwaves now have a soften option. You can carefully soften the cream cheese in the microwave to room temperature but not melted. For the eggs, you can place them from the refrigerator into a bowl of warm (not hot) water to quicken up the process for the eggs. However, I do recommend letting the cream cheese and eggs come to room temperature naturally on the counter. Unless you're in a pinch, of course. We've all been there!

What's the best way to remove the bottom of a springform pan?

The reason we pack the crust tightly, but not too tightly, into the springform pan is so that we can easily remove the bottom of the springform pan without the crust crumbling. After the rim of the springform pan is off, take a cake lifter (or metal pizza peel or a very large spatula) and gently slide it in between cheesecake crust and bottom of springform pan. Don't lift the cheesecake up in the air. Instead, use the cake lifter to slide the cheesecake sideways off of the springform bottom onto a serving plate or a round cardboard cake board. You can buy a cheap cake lifter on Amazon or at a Hobby Lobby type store in the baking section. If you're using a large metal spatula, run it under the entire outer edge first before using it to gently slide the cheesecake.

What is the moat method?

The moat method creates a barrier between the springform pan and the direct heat of the oven. Kind of like in the olden days when castles used moats to protect the castles from invaders! So, in the moat method, we place the springform pan into a larger cake pan before putting the cake pan into a larger roasting pan with the water bath. There ends up to be a moat (of air) that separates the springform pan from the cake pan and the water bath. I highly recommend doing it this way as it works great.

One slice of Thin Mints cheesecake with a box of Thin Mints in the background

Related

Looking for other recipes like this? Try these:

  • Photo of many Thin Mints Cupcakes on a cooling rack with a box of Thin Mints cookies in the background
    Thin Mints Cupcakes
  • Close up of Samoas cupcakes on a plate with toasted coconut and a box of Samoas cookies blurred in the background
    Samoas Cupcakes
  • Overhead view of partial Samoas cheesecake topped with chocolate, toasted coconut and Samoas cookies
    Samoas Cheesecake
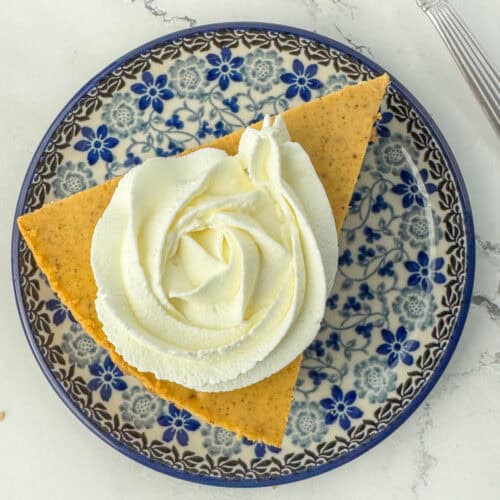
  • Individual slice of pumpkin cheesecake with whipped topping in shape of a rosette
    Pumpkin Spice Cheesecake
Close up photo of Thin Mints cheesecake topped with chocolate drizzle, crumbled Thin Mints and two full Thin Mints

Thin Mints Cheesecake

Tracy @ Next Level Baker
Thin Mints Cheesecake combines the creamy, velvety texture of cheesecake with the flavors of cool mint, rich chocolate and an iconic Girl Scout cookie to create the perfect dessert.
5 from 1 vote
Print Recipe Pin Recipe
Prep Time 20 minutes mins
Cook Time 1 hour hr 6 minutes mins
Chilling and decorating time 8 hours hrs 30 minutes mins
Total Time 9 hours hrs 56 minutes mins
Course Dessert
Cuisine American
Servings 12

Equipment

  • 1 Stand or hand mixer
  • 1 8 or 9 inch springform pan
  • 1 10 inch cake pan optional
  • 1 large roasting pan optional

Ingredients
  

Crust

  • 1½ cups Oreo cookies (approx. 20 cookies) centers removed
  • ½ cup Thin Mints cookies (approx. 5 cookies)
  • 6 tablespoons salted butter melted
  • 2 tablespoons white sugar
  • ½ teaspoon pepermint extract

Cheesecake filling

  • 4 cream cheese blocks (8 ounces each) room temperature
  • 1 cup white sugar
  • 4 eggs room temperature
  • ½ teaspoon peppermint extract
  • ½ cup Thin Mints (approx 5. cookies) chopped

Cheesecake toppings

  • ½ cup melting chocolate wafers melted
  • Thin Mints (approx 2. cookies) chopped
  • Additional Thin Mints for decoration

Instructions
 

Make the crust

  • Preheat oven to 325°. Spray 8 or 9 inch springform pan with cooking spray and set aside.
  • Remove the white centers of the Oreos and discard. Use a food processor to grind the Oreos and Thin Mints into small crumbs. [It's ok to have some bigger pieces of cookies as the grind doesn't need to be too fine.]
  • Mix the cookie crumbs, melted butter, peppermint extract and 2 tablespoons of white sugar together until well combined.
  • Add the crust mixture to the springform pan. Pat down flat with hands or a flat measuring cup with medium pressure. It should be packed firmly but not too hard.
  • Bake the crust for 6 minutes and set aside to cool. [This step is optional but highly recommended for a crisp crust.]

Make the Filling

  • Place the room temperature cream cheese into the mixing bowl and mix on low speed until creamy and all lumps are gone. Scrape down the sides of the mixing bowl.
  • Add the white sugar and peppermint extract to the mixing bowl and mix on low speed until well combined. Scrape down the sides of the mixing bowl.
  • Next, add the eggs one at a time. Mix on low speed just until each egg is combined before adding the next egg. Between eggs, scrape down the sides of the mixing bowl.
  • Gently stir in the chopped Thin Mints cookies until evenly distributed.

Bake and Cool the Cheesecake

  • Add the filling to the crust in the springform pan. Place the springform pan in a larger cake pan (or cover sides of springform pan with aluminum foil). Fill the roasting pan with one inch of water. Carefully add the springform pan in a cake pan (moat method) or with an aluminum foil wrap into the roasting pan with water. [See FAQ or post description on why the moat method is preferred.]
  • Bake at 325° for about 60 minutes until the center is mostly set. Then, turn off the oven and open the oven door to start cooling. Leave alone for two hours. After two hours, remove the cake pan (or wrapped springform pan) from the oven and the water bath and let cool on a cooling rack until room temperature.
  • Before placing in the refrigerator, run a knife around the edges to loosen the cheesecake from the sides. Cover and refrigerate a minimum of 6 hours but preferably overnight.
  • After 6 hours, or preferably the next day, remove the rim. Also, remove the cheesecake from the bottom of the springform pan (see FAQ if needed) if so desired and decorate the cheesecake.

Decorate the cheesecake

  • Melt the melting chocolate wafers in the microwave according to the package instructions. Most melt in less than 60 seconds. Using a decorator squeeze bottle, a piping bag or a spoon, drizzle the chocolate onto the cheesecake. Top with chopped and/or whole Thin Mints cookies.

Would you like to save this?

We'll email this post to you, so you can come back to it later!

Don't worry! We won't spam you!
Keyword Thin Mints Cheesecake
Tried this recipe?Let us know how it was!
Photo of Thin Mints cheesecake topped with chocolate drizzle, crumbled Thin Mints and two full Thin Mints

Samoas Cheesecake

January 28, 2025 by Tracy @ Next Level Baker Leave a Comment

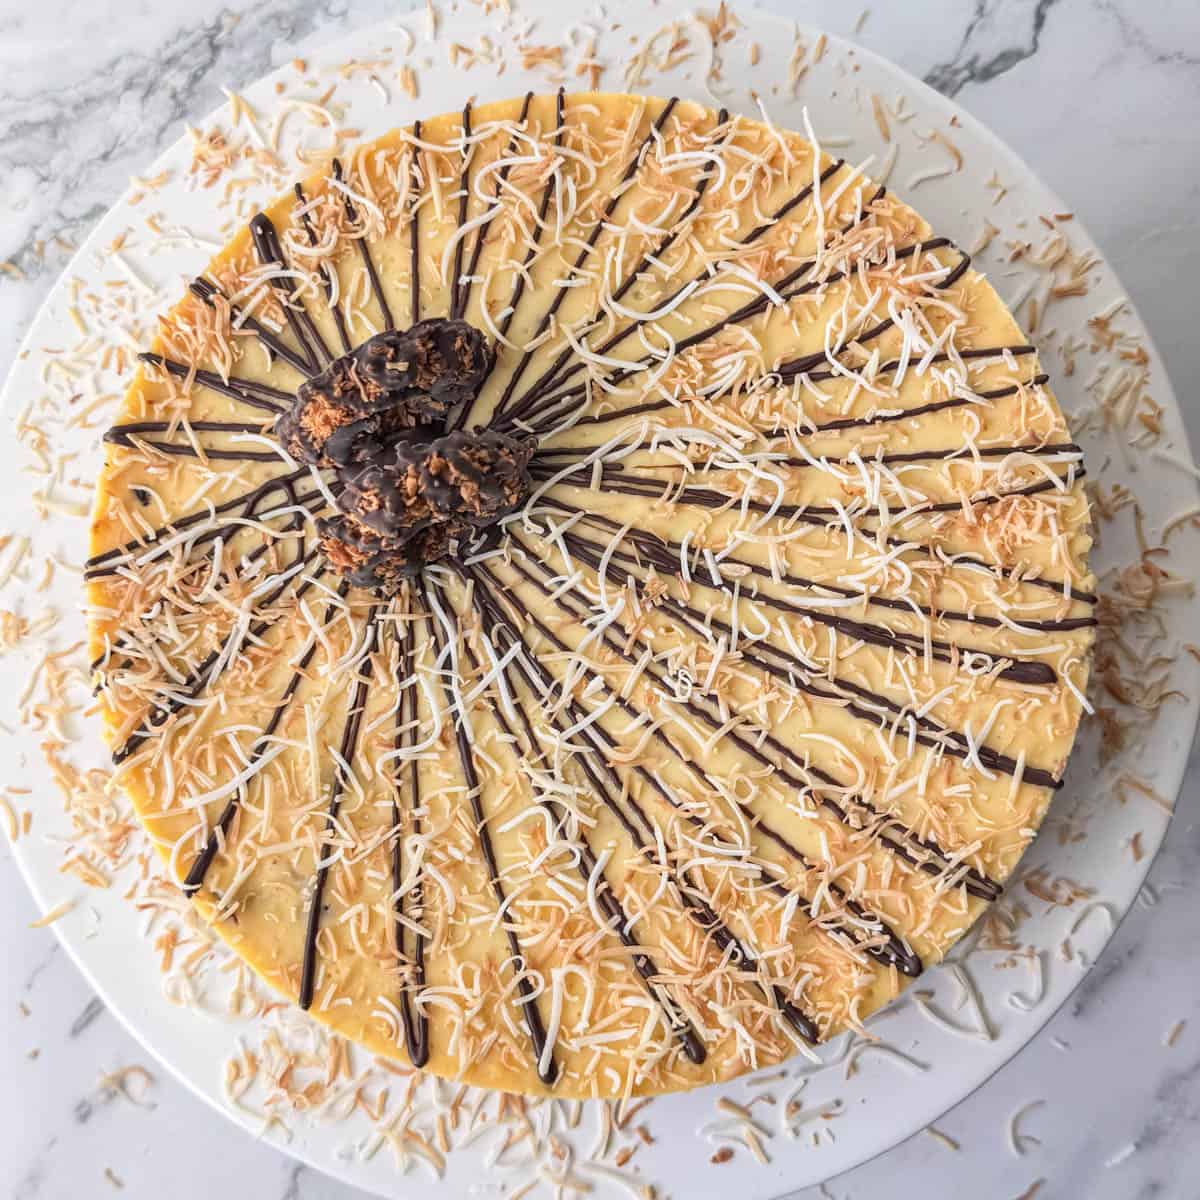
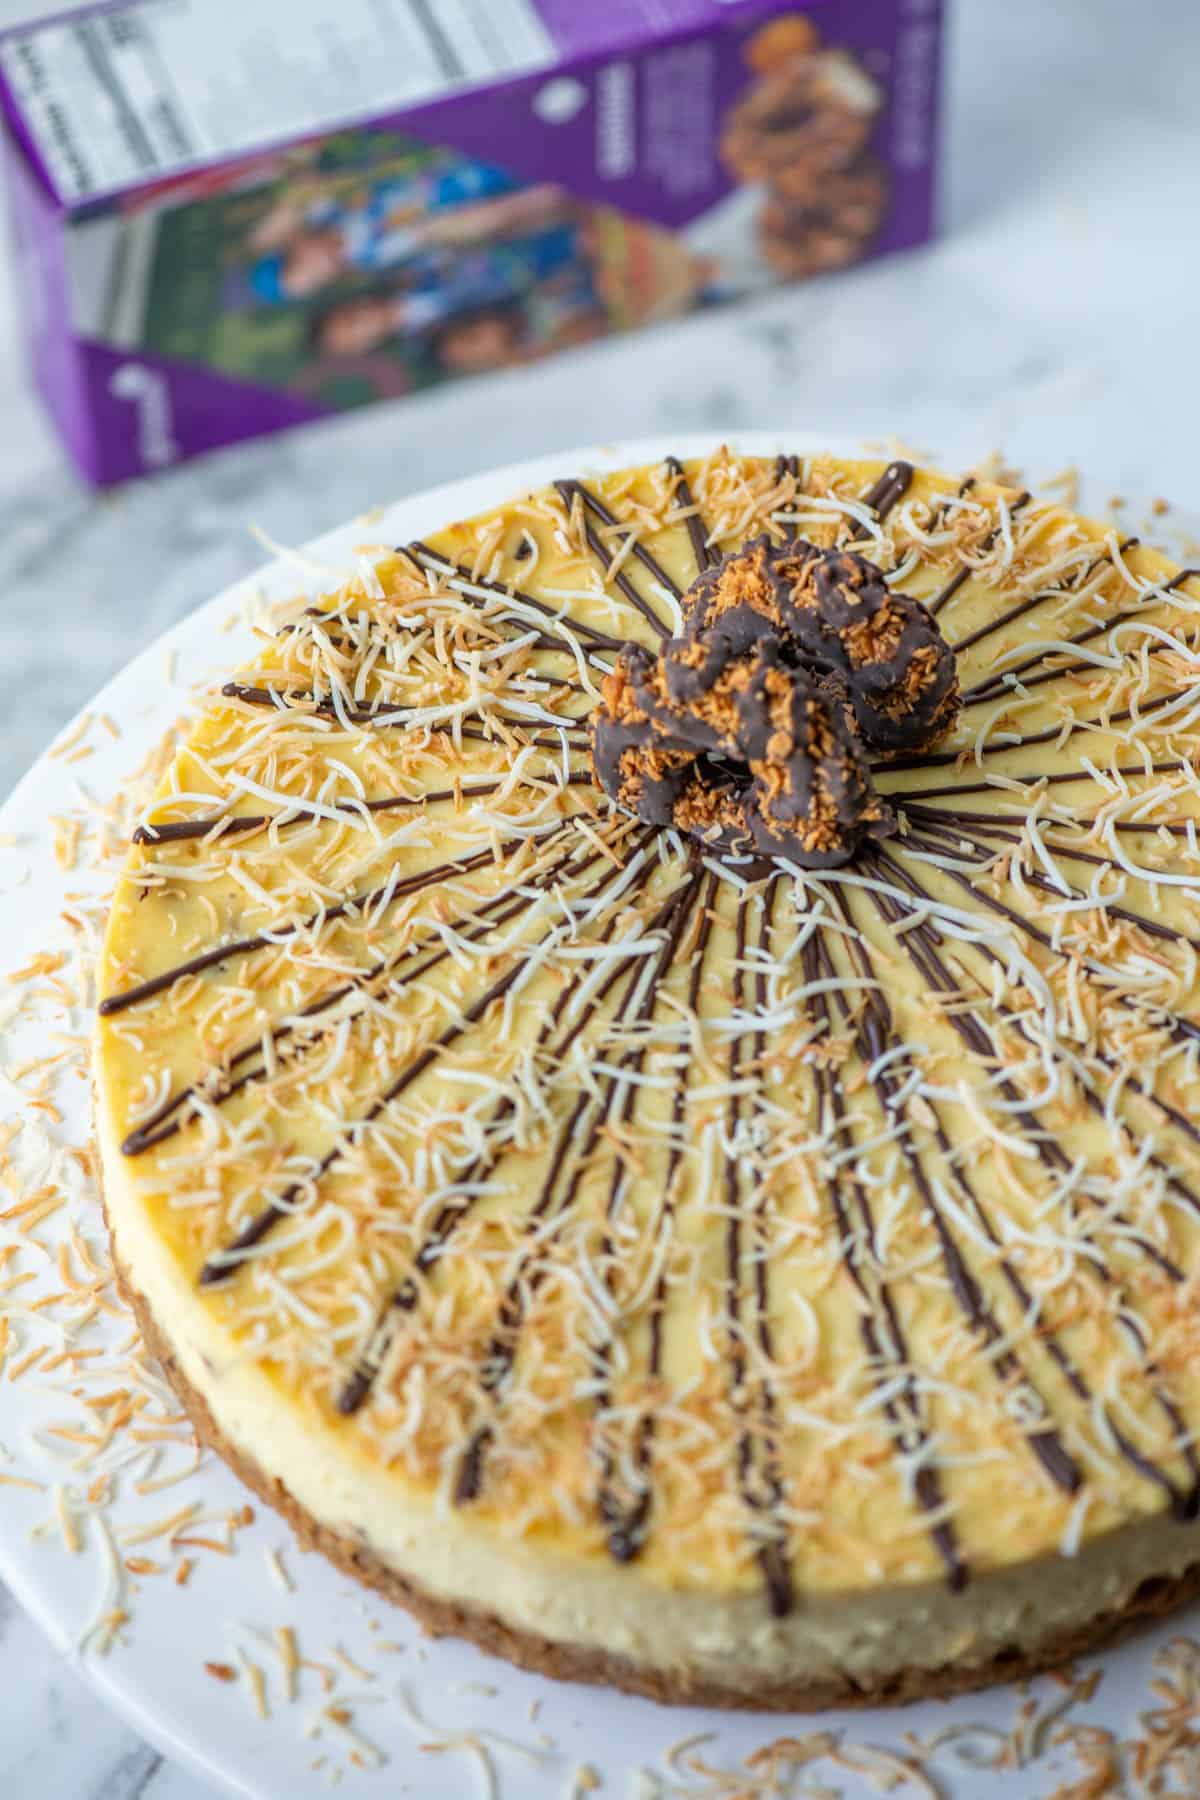
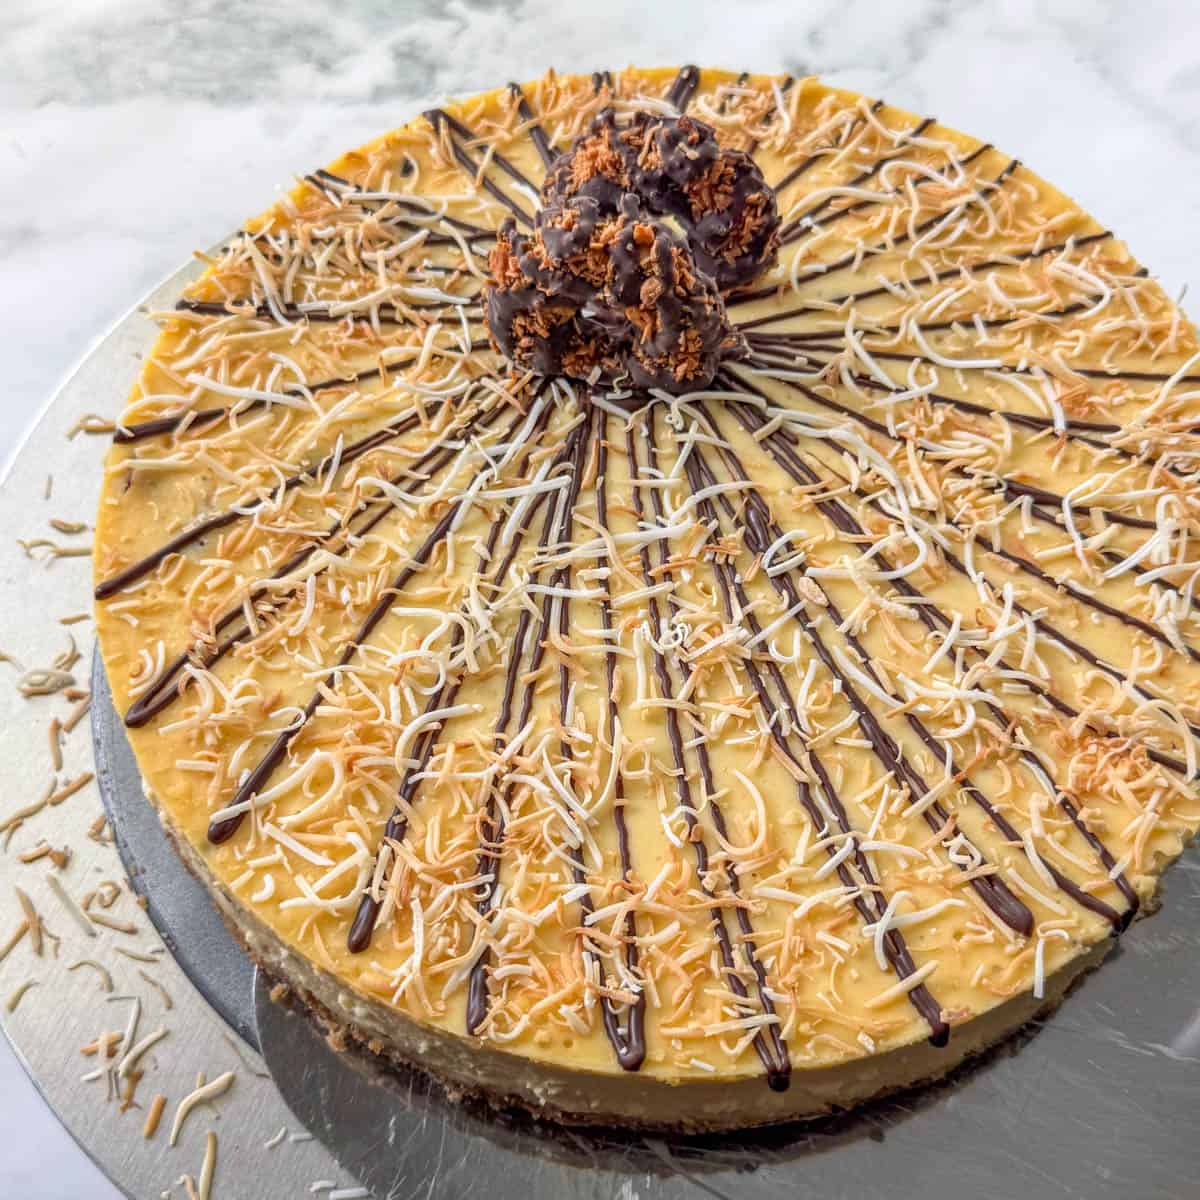
The beloved flavors of caramel, chocolate and toasted coconut meet creamy cheesecake in this indulgent treat. This Samoas cheesecake is a delicious tribute to a classic Girl Scouts cookie.

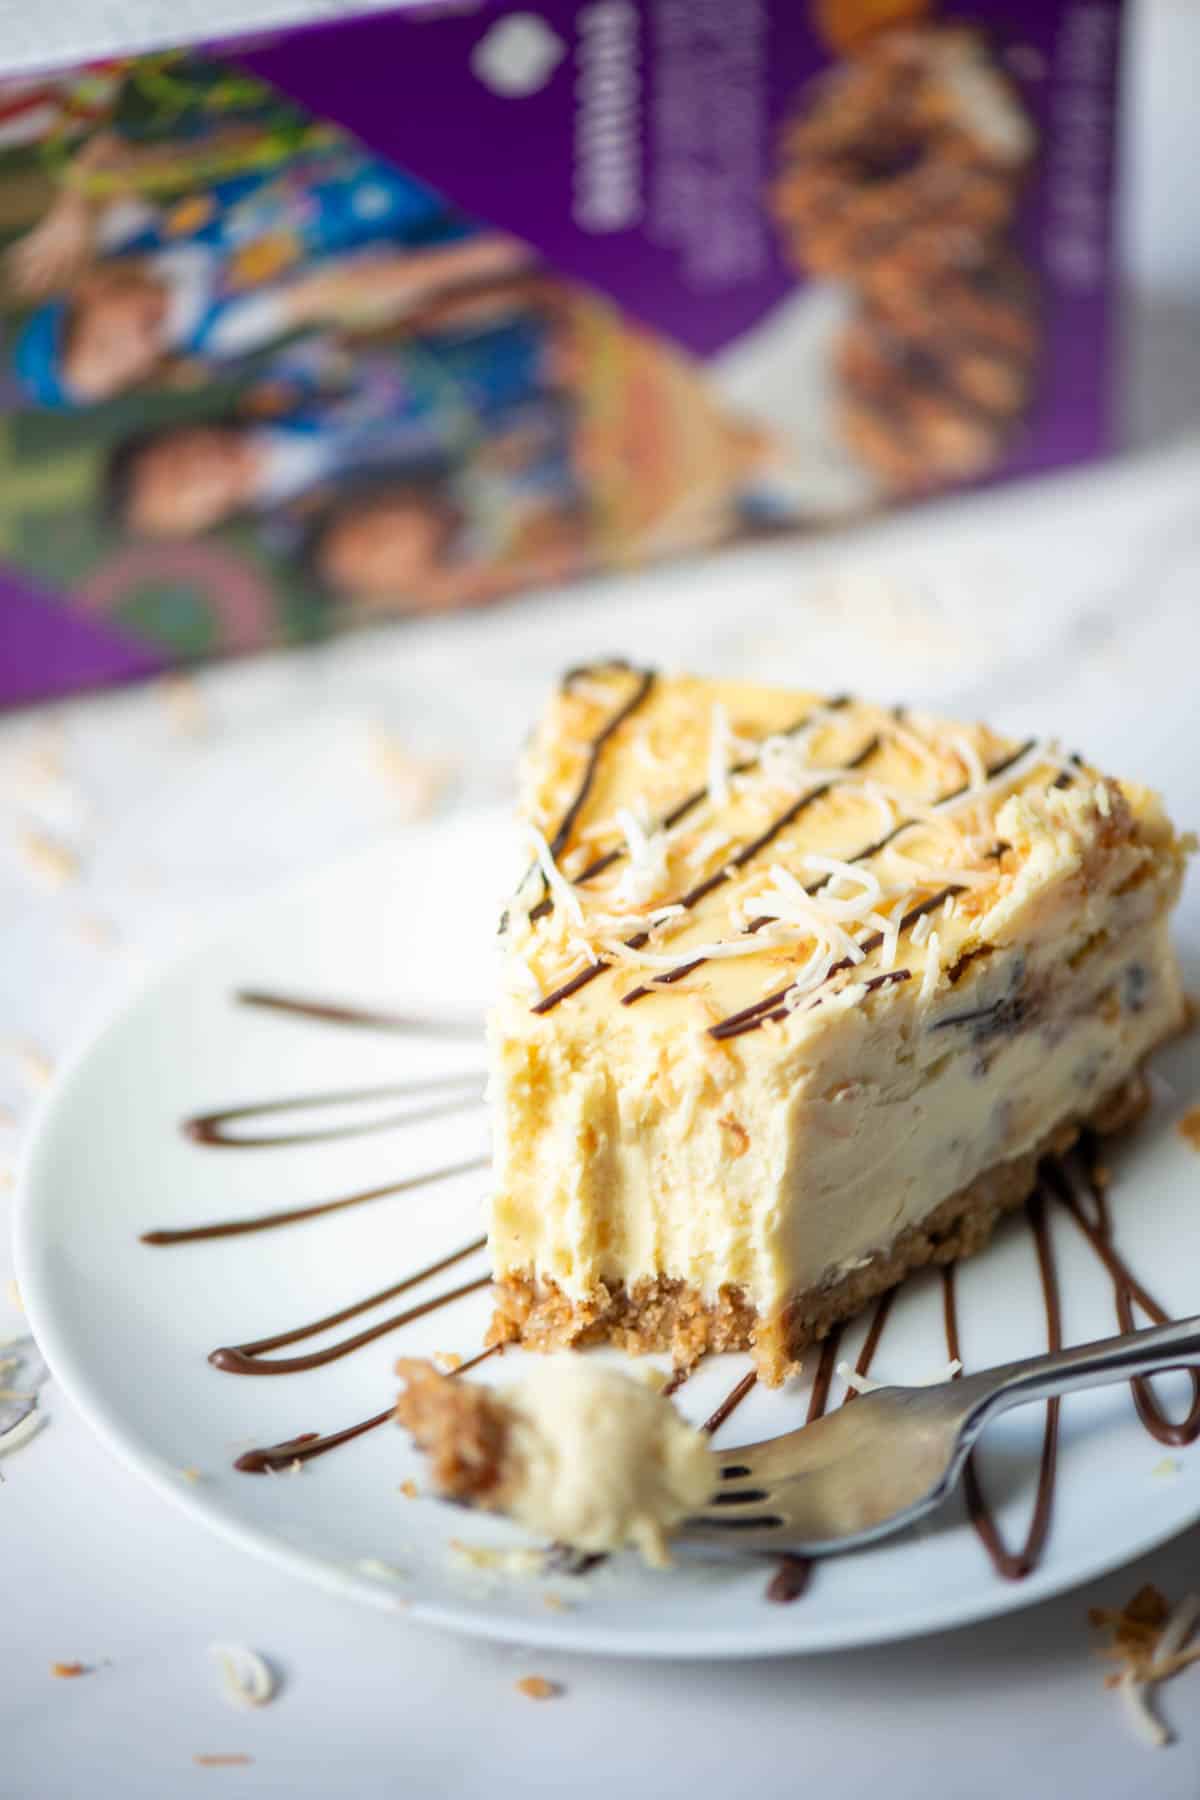
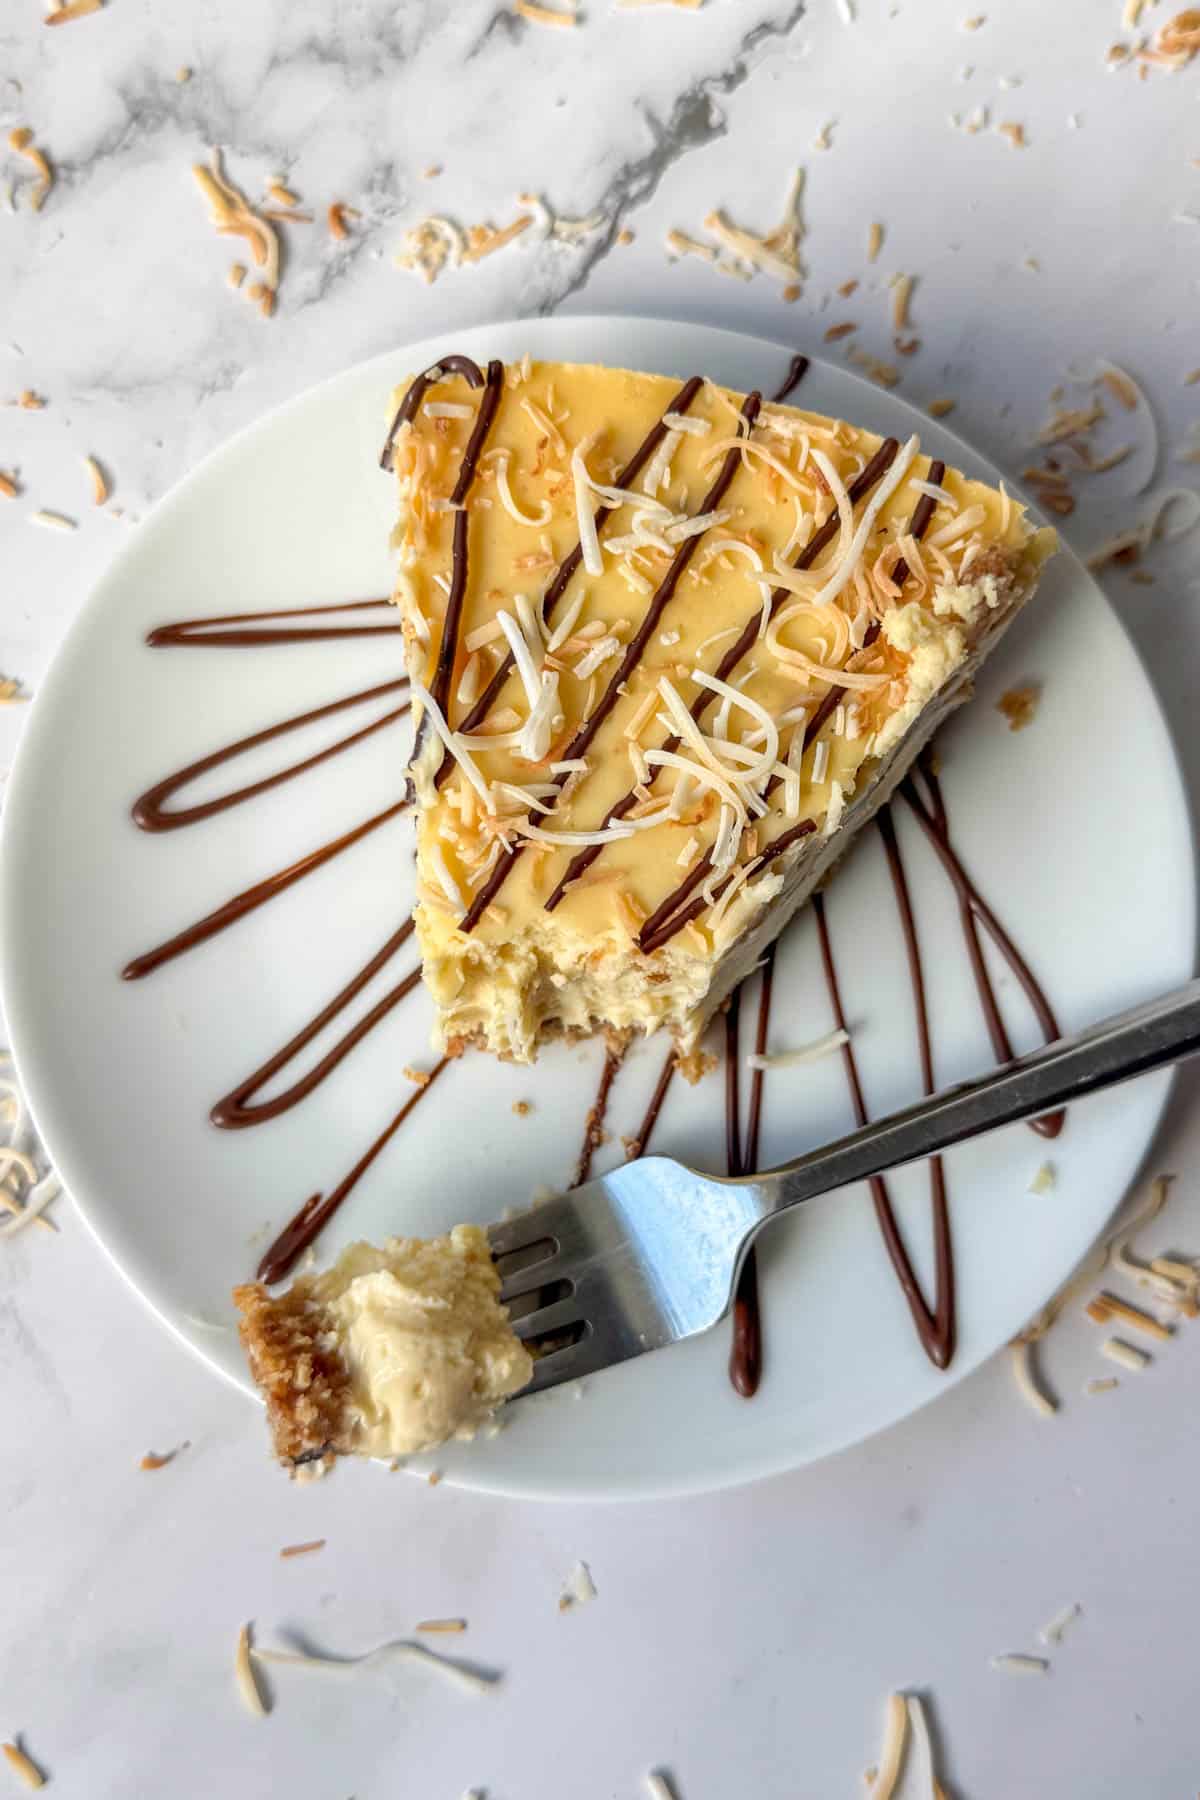
Slice of Samoas cheesecake topped with chocolate and toasted coconut on a plate with a bite of cheesecake on a fork on the plate with a box of Samoas cookies in the background.

It's so fun (and yummy!) to try and make good things even better. Like, what if we could get all the best flavors of a Samoas cookie, but in a rich, creamy cheesecake? I'm not going to lie, cheesecakes are one of my top 5 favorite desserts. Ever. So I've made a lot of cheesecakes. Like hundreds and hundreds of cheesecakes. I especially love when I can bring a new flavor to a cheesecake. The mouth watering combination of caramel, chocolate and toasted coconut is not new. There's good reason that Samoas (or Carmel deLites depending on where you live) are one of the most beloved Girl Scouts cookies of all time. And bringing those flavors to a cheesecake just takes cheesecake to a whole next level!

Need more Samoas recipes? Check out my recipe for Samoas Cupcakes!

[feast_advanced_jump_to]

Ingredients

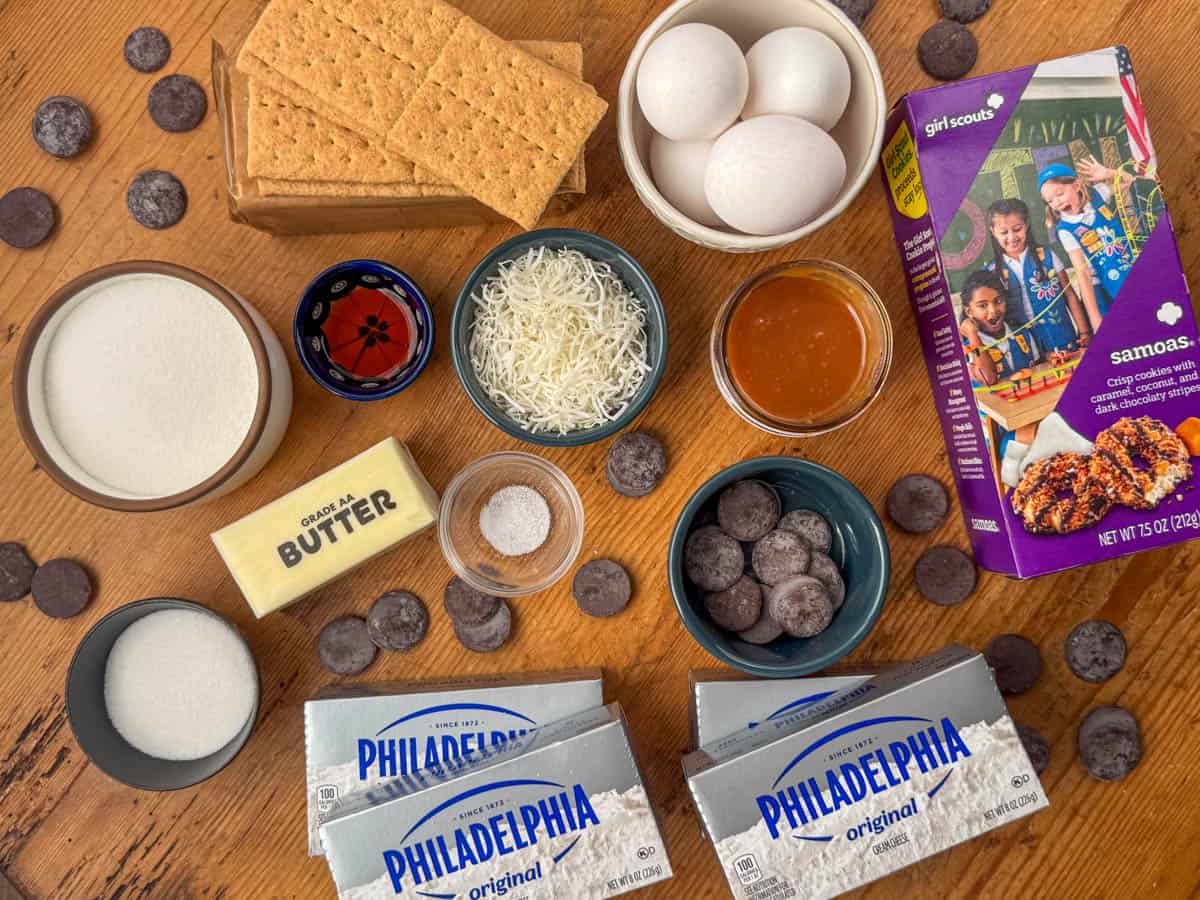
Ingredients needed to make Samoas Cheesecake: cream cheese, white sugar, eggs, salted butter, graham crackers, Samoas cookies, salt, vanilla, caramel sauce, shredded coconut, melting chocolate
  • Samoas cookies
  • Graham crackers
  • Salted butter
  • White sugar
  • Cream cheese
  • Eggs
  • Store bought or homemade salted caramel sauce
  • Vanilla
  • Salt
  • Shredded coconut
  • Melting chocolate wafers

See recipe card for quantities.

Instructions

Unbaked Samoas cheesecake crust

Step 1: Make the crust and bake at 325 degrees for 6 minutes.

Unbaked Samoas cheesecake batter

Step 2: Make the cheesecake filling and bake in a water bath at 325 degrees for 60 minutes. Cool and refrigerate overnight.

Toasted Coconut in non-stick pan
  1. Step 3: Toast the shredded coconut. Use a non-stick pan and turn the heat to medium. DO NOT use any cooking spray, oil or butter. Add the shredded or flaked coconut in a single layer and STIR CONSTANTLY until over half of the coconut is light golden brown, approximately 3-5 minutes. Remove the pan from the heat and immediately transfer the coconut to a plate to cool as it will continue cooking in the hot pan.
Overhead view of full Samoas cheesecake topped with chocolate, toasted coconut and Samoas cookies
  1. Step 4: After Samoas cheesecake has cooled completely (preferably overnight), decorate the cheesecake with ganache or melting chocolate, toasted coconut and Samoas cookies.

HOW TO BAKE A CHEESECAKE WITHOUT CRACKS

Okay, let's get to one of the biggest issues with cheesecakes: unsightly cracks. Cracks don't make the cheesecake taste any differently and, of course, they could be covered up. But, there are two main things to know to avoid cracks: baking temperature and water baths.

BAKE AT A LOWER TEMPERATURE

For temperature, cheesecakes turn out best when baked at a lower temperature. For that reason, I bake almost all of my cheesecakes, including this one, at 325 degrees.

USE THE MOAT METHOD FOR A WATER BATH

The most basic way to do a water bath is to wrap the springform pan with aluminum foil and place it in a roasting pan with water and then hope it doesn't leak. But, have you ever wrapped it super carefully with the extra wide aluminum foil only to discover that it still leaked? Yes, me too. Instead, I use the moat method. To use the moat method, place your 8 or 9 inch springform pan inside a 10 inch cake pan. Then place the 10 inch cake pan into a larger roasting pan with water. With this moat method, there is no possible way that water gets in to your springform pan. I've never had a cheesecake crack when I've combined a lower baking temperature with the moat method.

Overhead view of full Samoas cheesecake topped with chocolate, toasted coconut and Samoas cookies with box of Samoas cookies blurred in the background

Variations

  • Decorating - there are many, many ways to vary the cheesecake decorations. You can use a ganache instead of the melting chocolate for a softer texture. You can add a salted caramel drizzle on top. You could use coconut flakes instead of shreds. You can add a whipped cream topping. Crumbled cookies, only cookies on top or no cookies. So many options!
  • No cookies - Somoas cookies aren't required for this recipe. You can entirely leave them out of the crust, the filling and the toppings. While I do buy extra Girl Scout cookies, sometimes I crave this cheesecake in October when I can't get any new cookies. And I make it anyway without cookies. This Somoas cheesecake still has the great flavor profile of caramel, chocolate and toasted caramel even without the cookies. It will always be inspired by the cookie, even when we can't get the cookies.

Equipment

To make the best cheesecakes, a stand up mixer or hand held mixer is needed. Also, a springform pan is super helpful if you want to take the cheesecake easily out of the pan.

Storage

Store the Samoas cheesecake in an airtight container in the refrigerator for up to 5-7 days.

Next Level Tips

  • Always use room temperature cream cheese and room temperature eggs for cheesecakes. 
  • The very best way to avoid cheesecake cracks is to bake at a lower temperature and use the moat method, as described above and in the FAQs. This is where you place your springform pan inside of a cake pan and then put the cake pan in a roasting pan with water. This avoids leaky aluminum foil yet still doesn't allow direct heat on the springform pan.
  • Allow the cheesecake to cool in the oven without touching it for two hours. Then move the springform pan to a cooling rack and allow the cheesecake to come to room temperature before placing it in the refrigerator.
  • Cheesecake needs time to set in the refrigerator after baking. Refrigerate for at least 6 hours; however, overnight is best.
  • I love to use offset or artsy designs on the tops of cheesecakes. If you like a dead-center kind of centerpiece or a ring of whipping cream swirls around the edges, go for it. I've done lots and lots of those. Currently, I go for more of an artsy look. Another reason I love the intentionally off-center look is because that design looks like you meant to do it that way. If you are going for a dead center kind of look but are slightly off, it can look like you just missed the middle. BUT, if you go with a more extreme off-center look, it looks like it was intentional. Like art! Before you start, think of what you want to do, take a deep breath and go for it!

FAQ

Do I need to use room temperature cream cheese and eggs?

Yes! However, you can carefully speed up this process if you forgot to set out the cream cheese and eggs. Most microwaves now have a soften option. You can carefully soften the cream cheese in the microwave to room temperature but not melted. For the eggs, you can place them from the refrigerator into a bowl of warm (not hot) water to quicken up the process for the eggs. However, I do recommend letting the cream cheese and eggs come to room temperature naturally on the counter. Unless you're in a pinch, of course. We've all been there!

How do I remove the bottom of a springform pan?

The reason we pack the crust tightly, but not too tightly, into the springform pan is so that we can easily remove the bottom of the springform pan without the crust crumbling. After the rim of the springform pan is off, take a cake lifter (or metal pizza peel or a very large spatula) and gently slide it in between cheesecake crust and bottom of springform pan (see below photo). Don't lift the cheesecake up in the air. Instead, use the cake lifter to slide the cheesecake off of the springform bottom onto a serving plate or a round cardboard cake board. You can buy a cheap cake lifter on Amazon or at a Hobby Lobby type store in the baking section. If you're using a large metal spatula, run it under the entire outer edge first before using it to gently slide the cheesecake. Photo illustrating how to slide a cake lifter in between a cheesecake bottom and the bottom of a springform pan

What is the moat method?

The moat method creates a barrier between the springform pan and the direct heat of the oven. Kind of like in the olden days when castles used moats to protect the castles from invaders! So, in the moat method, we place the springform pan into a larger cake pan before putting the cake pan into a larger roasting pan with the water bath. There ends up to be a moat (of air) that separates the springform pan from the cake pan and the water bath. I highly recommend doing it this way as it works great.

What type of melting chocolate should I use?

You can use your favorite brand of candy chocolate melts or even make a ganache. I've been using Ghirardelli dark chocolate flavored melting wafers as they taste good, work well and are easily found in regular grocery stores.

Related

Looking for other recipes like this? Try these:

  • Individual slice of pumpkin cheesecake with whipped topping in shape of a rosette
    Pumpkin Spice Cheesecake
  • Close up of Samoas cupcakes on a plate with toasted coconut and a box of Samoas cookies blurred in the background
    Samoas Cupcakes
  • Photo of many Thin Mints Cupcakes on a cooling rack with a box of Thin Mints cookies in the background
    Thin Mints Cupcakes
  • Close up photo of Thin Mints cheesecake topped with chocolate drizzle, crumbled Thin Mints and two full Thin Mints
    Thin Mints Cheesecake
Overhead view of partial Samoas cheesecake topped with chocolate, toasted coconut and Samoas cookies

Samoas Cheesecake

Tracy @ Next Level Baker
Samoas cheesecake is a rich, creamy dessert inspired by the irresistible caramel, chocolate and toasted caramel flavors of the classic beloved Girl Scout cookie.
Print Recipe Pin Recipe
Prep Time 15 minutes mins
Cook Time 1 hour hr 6 minutes mins
Chill and decorating time 6 hours hrs 30 minutes mins
Total Time 7 hours hrs 53 minutes mins
Course Dessert
Cuisine American
Servings 12

Equipment

  • 1 Stand or hand mixer

Ingredients
  

Crust

  • 1½ sleeves graham crackers (approx. 13 ½ full sheets)
  • 3 Samoas cookies
  • 8 tablespoons salted butter melted
  • 2 tablespoons white sugar

Cheesecake filling

  • 4 cream cheese clocks (8 ounces each) room temperature
  • ⅓ cup store bought or homemade salted caramel sauce
  • 1 cup white sugar
  • 4 eggs room temperature
  • 3 Samoas cookies chopped
  • 1 teaspoon vanilla
  • ¼ teaspoon salt

Cheesecake toppings

  • ½ cup shredded coconut toasted
  • ½ cup melting chocolate wafers melted
  • Samoas cookies

Instructions
 

Make the crust

  • Preheat oven to 325°. Spray 8 or 9 inch springform pan with cooking spray and set aside.
  • Use a food processor to grind the graham crackers and Samoas cookies into small crumbs. It's ok to have some bigger pieces of cookie or crackers. We don't want the grind to be too fine.
  • Mix the crumb mixture, melted butter and 2 tablespoons of white sugar together until well combined.
  • Add the crumb mixture to the springform pan. Pat down flat with hands or a flat measuring cup with medium pressure. It should be packed firmly but not too hard.
  • Bake for 6 minutes and set aside to cool.

Make the Filling

  • Place the room temperature cream cheese and the salted caramel sauce into the mixing bowl and mix on low speed until creamy and all lumps are gone. Scrape down the sides of the mixing bowl.
  • Add the white sugar, vanilla and salt to the mixing bowl and mix on low speed until well combined. Scrape down the sides of the mixing bowl.
  • Next, add the eggs one at a time. Mix on low speed just until each egg is combined before adding the next egg. Between eggs, scrape down the sides of the mixing bowl.
  • Gently stir in the chopped Samoas cookies until evenly distributed.

Bake and Cool the Cheesecake

  • Add the filling to the springform pan. Place the springform pan in a larger cake pan (or cover sides of springform pan with aluminum foil). Fill the roasting pan with one inch of water. Carefully add the springform pan in a cake pan (moat method) or with an aluminum foil wrap into roasting pan filled with water. [See FAQ or post description on why the moat method is preferred.]
  • Bake at 325° for about 60 minutes until the center is mostly set. Then, turn off the oven and open the oven door to start cooling. Leave alone for two hours. After two hours, remove the cake pan (or wrapped springform pan) from the oven and the water bath and let cool on cooling rack until room temperature.
  • Before placing in the refrigerator, run a knife around the edges to loosen the cheesecake from the sides. Cover and refrigerate a minimum of 6 hours but preferably overnight.
  • After 6 hours, or preferably the next day, remove the rim. Also, remove the cheesecake from the bottom of the springform pan (see FAQ if needed) if so desired and decorate the cheesecake.

Toast the coconut

  • Use a non-stick pan and turn the heat to medium. DO NOT use any cooking spray, oil or butter. Add the shredded or flaked coconut in a single layer and STIR CONSTANTLY until over half of the coconut is light golden brown, approximately 3-5 minutes. Remove the pan from the heat and immediately transfer the coconut to a plate to cool and stop the cooking process.

Decorate the cheesecake

  • Melt the melting chocolate wafers in the microwave according to the package instructions. Most melt in less than 60 seconds. Using a decorator squeeze bottle, a piping bag or a spoon, drizzle the chocolate onto the cheesecake.
  • Finish with some Thin Mintscookies for decorations, if so desired. You can press them into the cheesecake directly or cut off a piece of the cookie on one side to make a flat side and then lightly press them into the melting chocolate.

Would you like to save this?

We'll email this post to you, so you can come back to it later!

Don't worry! We won't spam you!
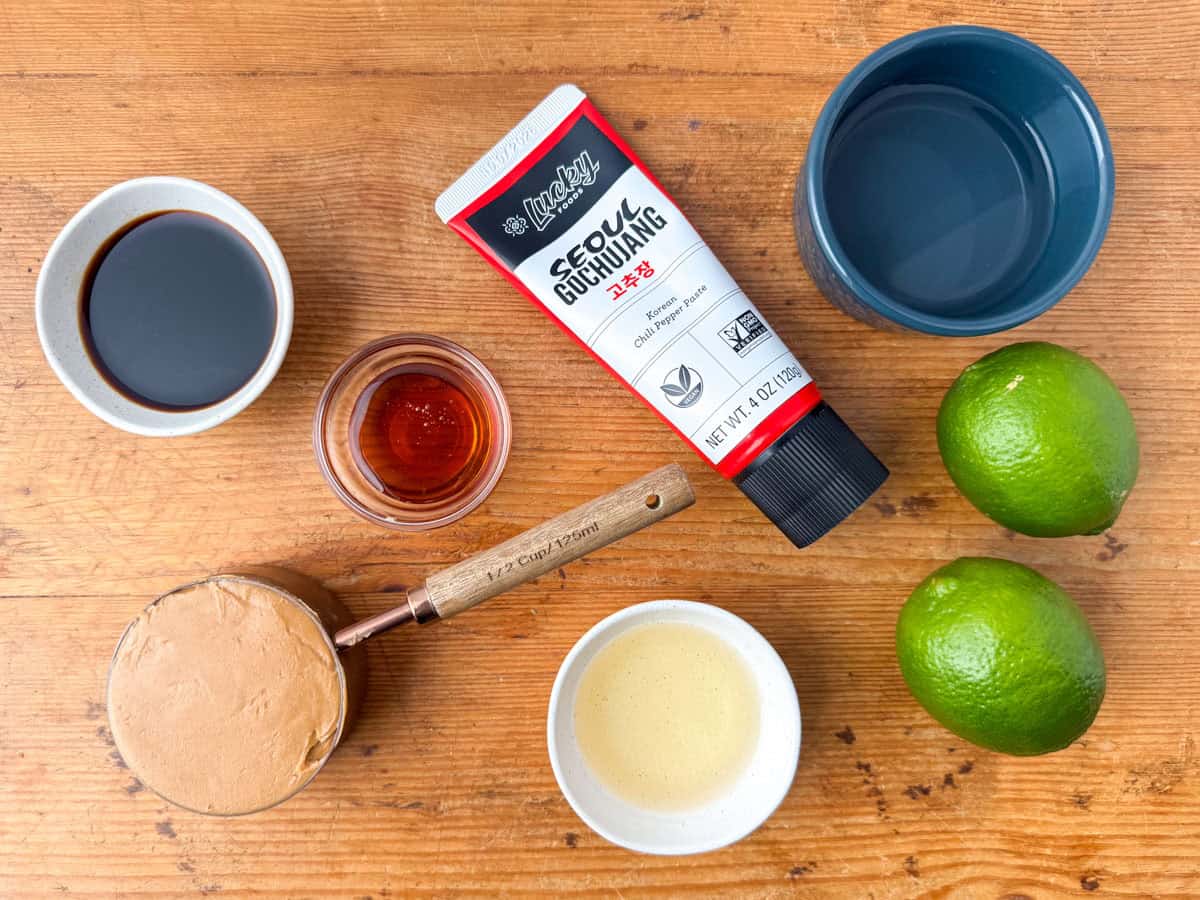
Keyword Samoas Cheesecake
Tried this recipe?Let us know how it was!
Overhead view of full Samoas cheesecake topped with chocolate, toasted coconut and Samoas cookies

Samoas Cupcakes

January 24, 2025 by Tracy @ Next Level Baker Leave a Comment

The perfect chocolate, caramel and coconut cookie meets its cupcake match! Samoas cupcakes capture the chewy, crunchy and chocolaty-caramel-toasted coconut deliciousness of the classic Girl Scout cookie. They're a perfect tribute to a favorite cookie.

Four Samoas cupcakes on a plate with a box of Samoas cookies blurred in the background

Are they Samoas or Caramel deLites? They're both heavenly bites of chocolate, caramel and coconut with a cookie crunch. But why are the names different? Well, the name depends on where you live as the Girl Scouts use two different bakers, serving different parts of the country, to produce their cookies. Since they have the same chocolate, caramel and coconut flavors, I'm just going to call them Samoas from here on out since I've mostly lived in places where these scrumptious cookies are called Samoas. And these Samoas cupcakes are a true tribute meant to highlight all the best parts of the Samoa cookies...the heavenly combination of chocolate, caramel, and toasted coconut. Coming next will be out my Samoas cheesecake recipe!

[feast_advanced_jump_to]

Ingredients

Ingredients needed to make Samoas cupcakes: Samoas cookies, cake flour, cocoa powder, white sugar, salted butter, coconut milk, baking soda, salt, coconut flakes, salted caramel sauce and powdered sugar
  • Samoas cookies
  • Cake flour
  • White sugar
  • Salted butter
  • Eggs
  • Cocoa powder
  • Baking soda
  • Salt
  • Powdered sugar
  • Store bought or homemade salted caramel sauce
  • Coconut milk
  • Unsweetened coconut flakes

See recipe card for quantities.

Instructions for toasting coconut

Toasting unsweetened shredded or flaked coconut completely transforms the coconut. It brings out a delicious nutty, caramelized flavor in the coconut. And it also takes the texture from chewy to crispy which is exactly what we need for topping cupcakes.

Toasted Coconut in non-stick pan

Stove Top Method: I prefer the stove top method for toasting unsweetened coconut as it's quicker, easier and there's less risk of burning. Use a non-stick pan and turn the heat to medium. DO NOT use any cooking spray, oil or butter. Add the shredded or flaked coconut in a single layer and STIR CONSTANTLY until over half of the coconut is light golden brown, approximately 3-5 minutes. Remove the pan from the heat and immediately transfer the coconut to a plate to cool as it will continue cooking in the hot pan.

    Substitutions

    • Coconut milk - coconut milk adds a great layer of flavor to these Samoas cupcakes. However, you can substitute buttermilk in the cupcake base and heavy whipping cream in the buttercream frosting if you wish.
    • Cake flour - you can substitute all purpose flour with corn starch for the cake flour. For this recipe, measure 1 ½ cups of all purpose flour. Remove 3 tablespoons of the flour and add 3 tablespoons of cornstarch. Then sift the all purpose flour and cornstarch together twice to combine and aerate the mixture.

    Variations

    You can also add a chocolate drizzle by using a chocolate ganache or chocolate candy melts. However, I found that the decorations can start to look messy with multiple drizzles.

    Equipment

    When making standard size cupcakes, I highly recommend using a large cookie scoop. That way, the cupcakes all come out the same size and filling the muffin tins goes much quicker too. The large 4 tablespoon cookie scoop is the perfect size for making cupcakes. A hand or stand mixer is needed for these Samoas cupcakes as well.

    5 Samoas cupcakes on a plate with toasted coconut and boxes of Samoas cookies blurred in the background

    Storage

    Store Samoas cupcakes in an airtight container at room temperature or in the refrigerator for 2-3 days.

    Next Level Tips

    • Use a high quality cocoa powder. Like I mentioned in my Chocolate Sweet Rolls recipe, my very favorite cocoa powder is the Valrhona brand found on Amazon and in the Whole Foods bulk section. After Valrhona, I'd recommend Guittard or Ghirardelli brands which can be found in regular grocery stores. 
    • For buttercream frosting, my favorite piping tips for frosting are the Wilton 1A for a round tip and a Wilton (or Ateco) 1M for a star tip. If you only have two piping tips, these are the two to own!
    • Instead of disposable piping bags, I recommend reusable piping bags. They're easy to wash, you won't unexpectedly run out, it's less waste going to the landfill and it's cheaper in the long run.
    • Girl Scout cookies aren't sold year round, but Samoas freeze really well. Buy a couple extra boxes so that you can make these Samoas cupcakes later in the year for a real treat!
    • Check out my Thin Mints cupcakes for another tribute to a Girl Scouts fan favorite cookie.
    Close up of Samoas Cupcake with bite taken out

    FAQ

    Can I make Samoas cupcakes ahead of time?

    Yes. And if you are making multiple batches of cupcakes, I highly recommend baking the base cupcakes the day before and then frosting the cupcakes the day you will be eating them.

    Why unsweetened coconut?

    Organic unsweetened coconut is the best choice for coconut to top these Samoas cupcakes. Unsweetened coconut is more natural, and the texture of unsweetened coconut is better for toasting. Plus, the process of toasting the coconut brings out the naturally sweet flavor of coconut anyway.

    Do I need a decorative squeeze bottle?

    No, decorative squeeze bottles are not necessary. Instead, you could wash out a used condiment bottle. [While I do own several Wilton squeeze bottles (meh), my very favorite decorative bottle for drizzle is actually an old balsamic glaze bottle.] Or you can also let the caramel sauce drip off the end of a spoon as you wiggle the spoon back and forth.

    Related

    Looking for other recipes like this? Try these:

    • Spoon of homemade salted caramel sauce dripping into jar of homemade salted caramel sauce
      Homemade Salted Caramel Sauce
    • Overhead view of partial Samoas cheesecake topped with chocolate, toasted coconut and Samoas cookies
      Samoas Cheesecake
    • Photo of many Thin Mints Cupcakes on a cooling rack with a box of Thin Mints cookies in the background
      Thin Mints Cupcakes
    • Close up photo of Thin Mints cheesecake topped with chocolate drizzle, crumbled Thin Mints and two full Thin Mints
      Thin Mints Cheesecake
    Close up of Samoas cupcakes on a plate with toasted coconut and a box of Samoas cookies blurred in the background

    Samoas Cupcakes (Caramel deLites)

    Tracy @ Next Level Baker
    Inspired by Samoas cookies, these Samoas cupcakes have a chocolate coconut base with caramel coconut buttercream finished with caramel drizzle and toasted coconut for the ultimate indulgent sweet treat.
    Print Recipe Pin Recipe
    Prep Time 15 minutes mins
    Cook Time 18 minutes mins
    Cooling and frosting time 1 hour hr 30 minutes mins
    Course Dessert
    Cuisine American
    Servings 20

    Equipment

    • 1 Hand or stand mixer

    Ingredients
      

    Cupcake base

    • 1½ cup cake flour
    • ½ cup cocoa powder
    • 1 teaspoon baking soda
    • ½ teaspoon salt
    • 1 ¼ cups white sugar
    • 10 tablespoons salted butter room temperature
    • 3 eggs room temperature
    • 1⅓ cups full fat coconut milk

    Buttercream frosting

    • 8 tablespoons salted butter
    • 4 cups powdered sugar
    • 2 tablespoons homemade salted caramel sauce optional
    • 2-3 tablespoons full fat coconut milk

    Toppings

    • ½ cup homemade salted caramel sauce
    • ½ cup unsweetened shredded coconut toasted
    • Samoas cookies for decoration

    Instructions
     

    • Preheat oven to 350℉. Line two 12-cup or one 24-cup muffin pans with cupcake liners. Yields 20-24 cupcakes.

    Make the cupcakes

    • Add the cake flour, cocoa powder, baking soda and salt to a small bowl. Mix well and set aside.
    • Add the butter and sugar to a mixing bowl. Mix on low until fully incorporated.
    • Add the eggs, one at a time, to the mixing bowl. Mix on low until incorporated.
    • Alternate adding half of the flour mix and half of the coconut milk. Mix on low until incorporated. Don't overman .
    • Use a large 4 tablespoon cookie scoop to fill each muffin tin.
    • Lightly tap the muffin pans on the counter. Bake for 18-19 minutes, or until a toothpick comes out clean. [If you are using two 12 cup muffin pans on different oven racks, rotate pans halfway through.]
    • Cool in the muffin tins for 10 minutes and then move the cupcakes to a wire rack to finish cooling. Allow cupcakes to cool completely before frosting.

    Toast the coconut

    • Use a non-stick pan and turn the heat to medium. DO NOT use any cooking spray, oil or butter. Add the shredded or flaked coconut in a single layer and STIR CONSTANTLY until over half of the coconut is light golden brown, approximately 3-5 minutes. Remove the pan from the heat and immediately transfer the coconut to a plate to cool and stop the cooking process.

    Make the buttercream frosting

    • Add the butter and 2 tablespoons of salted caramel sauce to a mixing bowl and mix on medium speed until combined and creamy, about 2 minutes.
    • Add the powdered sugar and 2 tablespoons of coconut milk to the mixing bowl. Mix on medium high until light and fluffy, scraping down the sides several times, about 5-6 minutes. [Depending on the temperature of the butter and the humidity of the kitchen, you may need to add more coconut milk if the frosting is too heavy/thick. Add additional coconut milk one tablespoon at a time, mix on medium high and check for fluffiness.]
    • Add the frosting to the cupcakes by using an icing (offset) spatula, a regular knife or by piping it on.

    Decorate the cupcakes

    • Heat the salted caramel sauce in the microwave for 10-15 seconds, just until it's a pourable consistency but not hot. [Hot caramel can melt the frosting.] Drizzle the salted caramel sauce on the cupcakes using a spoon or a decorator squeeze bottle.
    • Sprinkle the cooled toasted coconut on top of the caramel drizzle.
    • Cut 10-12 Samoas cookies in half. Lightly press the cookie half into the decorated frosting.
    • Serve or place in an airtight container.

    Would you like to save this?

    We'll email this post to you, so you can come back to it later!

    Don't worry! We won't spam you!
    Keyword Samoas Cupcakes
    Tried this recipe?Let us know how it was!
    Six Samoas cupcake on a plate with toasted coconut and a box of Samoas cookies blurred in the background

    Thin Mints Cupcakes

    January 22, 2025 by Tracy @ Next Level Baker Leave a Comment

    Thin Mints Cupcakes are a scrumptious peppermint chocolate cupcake with bits of Thin Mints cookies topped with refreshing peppermint buttercream frosting and a Thin Mints cookie! It's a delicious way to showcase the popular Thin Mints cookies!

    Photo of 7 Thin Mints Cupcakes on a cooling rack

    Friends, it's Girl Scouts cookie time! You're about to see a lot of sweet faces selling cookies at big box stores, grocery stores and farmer's markets. Of course, I do like to try the new cookies, but Thin Mints will always be my favorite. These chocolate peppermint cupcakes topped with Thin Mints come from a time period in my life where my cupcake phase overlapped with my Girl Scouts leader phase. The two just go together so deliciously! And like my Thin Mints cheesecake recipe, it's an awesome way to celebrate and take a favorite Girl Scout cookie to the next level!

    [feast_advanced_jump_to]

    Ingredients

    Ingredients needed to make Thin Mints cupcakes: Thin Mints cookies, cake flour, butter, eggs, white sugar, peppermint extract, baking soda, salt, cocoa powder, buttermilk, powdered sugar, heavy whipping cream
    • White sugar
    • Salted butter
    • Cake flour
    • Cocoa powder
    • Buttermilk
    • Eggs
    • Thin Mint cookies
    • Peppermint extract
    • Baking soda
    • Salt
    • Powdered sugar
    • Heavy whipping cream

    See recipe card for quantities.

    Substitutions

    • Cake flour - for these Thin Mints cupcakes, you can substitute all purpose flour with corn starch for the cake flour. For this recipe, measure 1 ½ cups of all purpose flour. Remove 3 tablespoons of the flour and add 3 tablespoons of cornstarch. Then sift the all purpose flour and cornstarch together twice to combine and aerate the mixture.

    Equipment

    When making standard size cupcakes, I highly recommend using a large cookie scoop. That way, the cupcakes are easily all the same size. Filling the muffin tins goes much quicker too. The large 4 tablespoon cookie scoop is the perfect size for making cupcakes.

    Close up photo of one Thin Mints cupcake with bite taken out with a box of Thin Mints cookies in the background

    Storage

    Store these Thin Mints cupcakes in an airtight container at room temperature or in the refrigerator for 2-3 days.

    Next Level Tips

    • My personal preference is no added food coloring for the peppermint buttercream frosting when there's a full Thin Mints cookie on top. Thin Mints cookies have a very distinctive shape. Having a full cookie on top lets everyone know exactly what flavor to expect without the food coloring. However, you can certainly add green food coloring to the buttercream. This will be our secret, but I've also used blanched and ground spinach for a green food coloring.
    • Use a high quality cocoa powder. Like I mentioned in my Chocolate Sweet Rolls recipe, my very favorite cocoa powder is Valrhona brand found on Amazon and at Whole Foods. After Valrhona, I'd recommend Guittard or Ghirardelli brands which can be found in regular grocery stores.
    • For buttercream frosting, my favorite piping tips for frosting are the Wilton 1A for a round tip and a Wilton (or Ateco) 1M for a star tip. If you only have two piping tips, these are the two to own!
    • Instead of disposable piping bags, I recommend reusable piping bags. They're easy to wash, you won't unexpectedly run out and it's less waste going to the landfill.
    • Girl Scout cookies aren't sold year round, but they do freeze really well. Buy a couple extra boxes so that you can make these Thin Mints cupcakes later in the year for a real treat!
    Photo of many Thin Mints Cupcakes on a cooling rack with a box of Thin Mints cookies in the background

    FAQ


    Can I make these Thin Mints cupcakes ahead of time?

    Yes. And if you are making a lot of cupcakes (many times I've made hundreds in a day), I highly recommend baking the base cupcakes the day before and then frosting the cupcakes the day you will be eating them.

    Can I substitute milk for the heavy cream in the peppermint buttercream frosting?

    Yes, but you will need to use less of the milk as milks are thinner than heavy cream. In addition, they are not as rich so the taste and texture will be slightly different depending on the milk used.

    Can I leave out the cookies?

    Yes, you can leave out the Thin Mints cookies in the cupcake base. You can also crumble the cookies on top or leave them off completely for just a chocolate peppermint cupake

    Close up photo of one Thin Mints cupcake with box of Thin Mints cookies in the background

    Related

    Looking for other recipes like this? Try these:

    • Close up photo of Thin Mints cheesecake topped with chocolate drizzle, crumbled Thin Mints and two full Thin Mints
      Thin Mints Cheesecake
    • Close up of Samoas cupcakes on a plate with toasted coconut and a box of Samoas cookies blurred in the background
      Samoas Cupcakes
    • Overhead view of partial Samoas cheesecake topped with chocolate, toasted coconut and Samoas cookies
      Samoas Cheesecake
    Photo of many Thin Mints Cupcakes on a cooling rack with a box of Thin Mints cookies in the background

    Thin Mints Cupcakes

    Tracy @ Next Level Baker
    Thin Mints cupcakes combine Thin Mints cookies with a rich chocolate cupcake and a refreshing mint buttercream frosting for a perfect way to showcase the always popular Girl Scout Thin Mints cookies.
    Print Recipe Pin Recipe
    Prep Time 15 minutes mins
    Cook Time 18 minutes mins
    Cooling and frosting time 1 hour hr 30 minutes mins
    Total Time 2 hours hrs 3 minutes mins
    Course Dessert
    Cuisine American
    Servings 24

    Equipment

    • 1 Stand or hand mixer

    Ingredients
      

    Cupcake base

    • 1 ¼ cups white sugar
    • 10 tablespoons salted butter room temperature
    • 3 eggs room temperature
    • 1½ cups cake flour
    • ½ cup cocoa powder
    • 1 teaspoon baking soda
    • ½ teaspoon salt
    • 1⅓ cups buttermilk room temperature
    • 1 teaspoon peppermint extract
    • ½ cup Thin Mint cookies (approx. 6 cookies) chopped

    Frosting

    • 8 tablespoons salted butter room temperature
    • 4 cups powdered sugar
    • 1 teaspoon peppermint extract*
    • 2-4 tablespoons heavy whipping cream

    Decorations

    • 24 Thin Mint cookies

    Instructions
     

    • Preheat oven to 350℉. Line two 12-cup or one 24-cup muffin pans with cupcake liners.

    Make the cupcakes

    • Add the cake flour, cocoa powder, baking soda and salt to a small bowl. Mix well and set aside.
    • Add the butter and sugar to the mixing bowl. Mix on low until fully incorporated.
    • Add the eggs, one at a time, to the mixing bowl. Mix on low until incorporated.
    • Alternate adding half of the flour mix and half of the buttermilk. Mix on low until incorporated.
    • Chop ½ cup of Thin Mint cookies (approximately 6). Add chopped cookies and peppermint extract to the mixing bowl and mix or stir just until the cookies are evenly distributed.
    • Use a large 4 tablespoon cookie scoop to fill each muffin tin.
    • Bake for 18-19 minutes, or until a toothpick comes out clean. [If you are using two 12 cup muffin pans on different oven racks, rotate pans halfway through.]
    • Cool in the muffin tins for 10 minutes and then move the cupcakes to a wire rack to finish cooling. Allow cupcakes to cool completely before frosting.

    Making the Frosting

    • Add the butter to a mixing bowl and mix on medium speed until creamy, about 2 minutes.
    • Add the powdered sugar, peppermint extract and 2 tablespoons of heavy whipping cream to the mixing bowl. Mix on medium high until light and fluffy, scraping down the sides several times, about 7-8 minutes. [Depending on the temperature of the butter and the humidity of the kitchen, you may need to add 1-2 more tablespoons of heavy cream if the frosting is too heavy/thick. Add the additional tablespoon(s) of heavy cream one at a time.]
    • Add the frosting to the cupcakes by using an icing (offset) spatula, a regular knife or by piping it on.
    • Lightly press one cookie into the frosting of each cupcake.
    • Serve or place in an airtight container.

    Notes

    *Peppermint extract can be very strong in frosting. In the cakes, it will cook out some, but extracts do not cook out of frosting. You can always start with ½ teaspoon of peppermint extract instead and then taste it. If you want them more minty, add another ½ teaspoon. 

    Would you like to save this?

    We'll email this post to you, so you can come back to it later!

    Don't worry! We won't spam you!
    Keyword Peppermint Buttercream, Thin Mints Cupcakes
    Tried this recipe?Let us know how it was!
    Photo of many Thin Mints Cupcakes on a cooling rack with a box of Thin Mints cookies in the background

    Carmelitas Cookie Bars

    January 17, 2025 by Tracy @ Next Level Baker 2 Comments

    Carmelitas cookie bars are made with layers of oatmeal cookie crumble, gooey salted caramel, chocolate and crunchy nuts. The bottom layer bakes up like a soft oatmeal cookie while the crumb topping turns lightly golden and crisp. Every bite is chewy, sweet, salty and nutty, making them a favorite for potlucks, bake sales and holiday desserts.

    Stack of 4 cut Carmelita cookie bars with parchment paper separating the cookie bars

    There's something special about the combination of chocolate, salted caramel and nuts. Sweet, salty and nutty. It's truly one of my favorite flavor combinations. And thanks to the old-fashioned rolled oats, we can almost call these Carmelitas cookie bars healthy. I'm kidding, I'm kidding. Adding oats doesn't make these Carmelitas bars healthy. But it does make them extra yummy! I mean, who can resist chocolate, caramel and nuts sandwiched between two layers of oat cookie crumble? Not me.

    [feast_advanced_jump_to]

    Ingredients

    All ingredients needed for Carmelitas bars: flour, white sugar, brown sugar, oats, pecans, walnuts, caramel sauce, chocolate chips or chunks, butter, baking soda and salt
    • All purpose flour
    • Old fashioned oats
    • White sugar
    • Brown sugar
    • Salted butter
    • Pecans
    • Walnuts
    • Semi sweet chocolate chips or chunks
    • Store bought or homemade salted caramel sauce
    • Baking soda
    • Salt

    See recipe card for quantities.

    Instructions

    Carmelitas recipe process shot #1 of crust ingredients a bowl

    Step 1: Combine the flour, baking soda and salt into a mixing bowl and stir well. Next, add the oats, brown sugar, white sugar and melted butter to the mixing bowl and mix until combined.

    Carmelitas recipe process shot #2 of crust in 9x13 baking dish

    Step 2: Place half of the crust mixture into a 9x13 baking dish and press into an even layer. Bake for 10 minutes at 350 degrees.

    Carmelitas recipe process shot #3 of crust with pecans and walnuts

    Step 3: Sprinkle pecans and walnuts evenly over the baked bottom crust.

    Carmelitas recipe process shot #4 of crust with pecan and walnuts and chocolate chunks layered on top

    Step 4: Next, sprinkle the chocolate chips/chunks evenly over the nuts.

    Carmelitas recipe process shot #5 of crust with pecans, walnuts, chocolate chunks and caramel layered on top

    Step 5: Pour the salted caramel sauce evenly over chocolate chips.

    Carmelitas recipe process shot #4 of crust with pecan, walnuts, chocolate chunks, caramel and top crust paired on top

    Step 6: Crumble the remaining crust on top. Bake the Carmelita bars for 18-20 minutes at 350 degrees.

    Substitutions and Variations

    • Gluten Free - you can substitute a one-for-one gluten free flour for the all purpose flour.
    • Vegan - to make these vegan substitute vegan chocolate chips and vegan caramel sauce and use a certified vegan sugar.
    • Nuts - you can substitute your favorite nuts. Pecans are the most common nuts used in Carmelitas. I always have walnuts on hand though, so I typically use a mix of half pecans and half walnuts. However, you can use a single nut, a combination of nuts, or leave the nuts out. The nuts part of this recipe is totally flexible.
    • Chocolate - I love chopped semi-sweet or dark chocolate but chips work just as well. You could also use milk chocolate chips.
    • Caramel sauce - homemade salted caramel sauce is one of my very favorite recipes, but you can also use store bought caramel sauce.

    Storage

    Store any leftover oatmeal caramel bars in an airtight container at room temperature for up to 3 days or in the refrigerator for up to 7 days. You can also freeze Carmelita cookie bars for up to 3 months.

    Photo of Carmelitas bars on parchment paper on top of cooling rack

    Next Level Tips

    • Many recipes for Carmelita bars involve unwrapping and melting caramel chews. That is time consuming and just doesn't taste as amazing as caramel sauce. I highly recommend using my homemade salted caramel sauce recipe for the caramel layer. Homemade salted caramel sauce adds a deeper caramel flavor and a smoother texture than melted caramel candies.
    • If your caramel sauce is too thick to pour, you can microwave it for 15 to 30 seconds and it will be pourable again.
    • Bars are always a dessert favorite. If you love bars, also try my white chocolate macadamia nut bars and my brown butter chocolate chip cookie bars. My gluten free sweet potato brownies are delicious, a fun way to add sweet potatoes to a dessert and can be made with regular flour too.

    FAQ

    Why are they called Carmelitas?

    Carmelitas are believed to get their name from their caramel filling. While the exact origin of the name is unclear, these oatmeal cookie bars have been a popular dessert for decades thanks to their layers of caramel, chocolate and nuts.

    Do I have to use nuts?

    No, you can easily skip the nuts layer.

    Can I freeze Carmelitas?

    Yes, Carmelitas freeze well. Store them in an airtight container and freeze for up to 3 months. Allow the bars to come to room temperature before serving.

    Related

    Looking for other recipes like this? Try these:

    • Spoon of homemade salted caramel sauce dripping into jar of homemade salted caramel sauce
      Homemade Salted Caramel Sauce
    • Overhead view of partial Samoas cheesecake topped with chocolate, toasted coconut and Samoas cookies
      Samoas Cheesecake
    • Close up of Samoas cupcakes on a plate with toasted coconut and a box of Samoas cookies blurred in the background
      Samoas Cupcakes
    • Overhead view of a multi layer stack of browned butter chocolate chip bars on a serving plate
      Brown Butter Chocolate Chip Cookie Bars
    Photo of Carmelitas bar with more Carmelitas bars blurred in the background
    Photo of Carmelitas cookie bar on parchment paper on top of cooling rack

    Carmelitas Cookie Bars

    Tracy @ Next Level Baker
    Carmelitas cookie bars are made with layers of buttery oat crumble, gooey salted caramel, chocolate and crunchy nuts.
    5 from 1 vote
    Print Recipe Pin Recipe
    Prep Time 10 minutes mins
    Cook Time 30 minutes mins
    Total Time 40 minutes mins
    Course Dessert
    Cuisine American
    Servings 24

    Equipment

    • 9x13 baking pan

    Ingredients
      

    Crust

    • 2 cups all purpose flour
    • 2 cups old-fashioned rolled oats
    • 1 cup salted butter melted
    • 1 cup brown sugar
    • ¼ cup white sugar
    • 1 teaspoon baking soda
    • ½ teaspoon salt

    Filling

    • ½ cup pecans chopped
    • ½ cup walnuts chopped
    • 10 ounces semi sweet chocolate chips or chunks
    • 1 cup jarred or homemade salted caramel sauce

    Instructions
     

    • Preheat the oven to 350℉ and line a 9x13 baking pan with parchment paper.
    • Add the flour, baking soda and salt to a mixing bowl and stir well. Add the oats, brown sugar, white sugar and melted butter to the mixing bowl and mix until fully combined.
    • Place half of the crust into the baking pan and press down into an even layer. Bake for 10 minutes and remove from the oven.
    • Sprinkle the nuts evenly over the baked crust.
    • Next, sprinkle the chocolate chips/chunks evenly over the nuts.
    • Heat the caramel sauce for 15-30 seconds in the microwave to make it pourable. Pour evenly over the chocolate chips.
    • Crumble the remaining crust mixture on top of the caramel sauce. Return the baking pan to the oven and bake for 18-20 minutes until the top is lightly golden brown.
    • Allow the bars to completely cool and then chill them for 30-60 minutes before removing them from the pan and slicing.

    Notes

    If you want to make a smaller batch in an 8x8 pan, here are the quick conversions:
    • 1 cup all purpose flour
    • 1 cup old-fashioned rolled oats
    • ½ cup salted butter, melted
    • ½ cup brown sugar
    • 2 tablespoons white sugar
    • ½ teaspoon baking soda
    • ¼ teaspoon salt
    • ¼ cup pecans
    • ¼ cup walnuts
    • 5 ounces chocolate chips (half bag)
    • ½ cup store bought or homemade salted caramel sauce

    Would you like to save this?

    We'll email this post to you, so you can come back to it later!

    Don't worry! We won't spam you!
    Keyword Carmelitas, Carmelitas Cookie Bars
    Tried this recipe?Let us know how it was!
    Single Carmelitas cookie bar on plate with additional cookie cars in background.

    Homemade Salted Caramel Sauce

    January 15, 2025 by Tracy @ Next Level Baker Leave a Comment

    Homemade Salted Caramel Sauce is a rich, creamy blend of caramelized sugar, cream, butter and salt that come together to make the perfect topping for ice cream, cupcakes, cheesecakes, brownies and hot drinks. Just four ingredients create one of the best sweet treats ever!

    Three different sized small jars of homemade salted caramel sauce. The jar in front has a wooden spoon in it.

    So are you with me that homemade caramel sauce is one of the best sweet treats ever? It's a shocker that I didn't even like it much growing up. I was only exposed to jarred caramel sauce and butterscotch. So in that case, I was team butterscotch. But homemade salted caramel sauce is so, soooooo much better than store bought caramel sauce. Homemade salted caramel sauce is like liquid perfection. I use it as a secret ingredient in some of my desserts but also as the star player in a lot of other desserts. I mean, the versatility is endless. It's one of those things that you could even eat straight out of the jar with a spoon like my homemade lemon curd. Or if you want to be refined, then use a piece of dark chocolate! I promise I won't tell anyone either way.

    [feast_advanced_jump_to]

    Ingredients

    Ingredients needed for homemade salted caramel sauce: white sugar, butter, heavy whipping cream and salt
    • White sugar
    • Heavy whipping cream
    • Salted butter
    • Salt

    See recipe card for quantities.

    Variations

    • Vegan - you can certainly make a vegan version of this homemade salted caramel sauce. First, you would substitute a vegan heavy whipping cream (Trader Joe's brand works great) for the heavy cream. Or if you don't mind a coconut flavor, you can use full fat coconut milk. Then, substitute a plant based butter for the salted butter. Miyokos plant milk butter or Country Crock plant butter sticks work well. Finally, make sure you use vegan labeled or organic sugar as most white sugar is not technically vegan due to how it's processed.

    Storage

    Store any unused salted caramel sauce in an airtight container in the refrigerator for up to 3 weeks.

    Next Level Tips

    • I highly recommend making more than you need! Homemade salted caramel is great to have in the refrigerator ready made. It also makes great little gifts too!
    • I often store extra sauce in decorator bottles. It's easier to reheat the caramel already in the bottle. It often only takes 15-30 seconds in the microwave depending on how thick I want it.
    • Add a splash of bourbon or rum if you want to add an extra layer of depth to the caramel sauce.
    • To make cleaning any dried caramel sauce from spoons, whisks or pans easier, just use hot water. Hot water will melt any hardened sauce back in to a liquid and then clean as normal from there.
    Overhead view of three different sized small jars of homemade salted caramel sauce. The jar in front has a spoon in the jar.

    FAQ

    Do I stir continuously or not stir at all?

    Instructions for homemade caramel sauce online can be very conflicting. Some recipes say stir continuously. Some say don't stir at all. I've tried it both ways and my answer is...well, both. Until the sugar starts to melt, don't stir it at all. This lets the sugar start to melt faster and saves time. Once the sugar starts to melt, however, is when you want to start stirring. And the more the sugar melts, the more often you want to stir until you're stirring continuously at the end.

    Why only 225 degrees Fahrenheit?

    Maybe you've heard that caramel should be heated up to 230 or 240 degrees Fahrenheit and you're wondering why I recommend stopping at 225? This is because the hotter the mixture gets, the more quickly it heats. Something like exponential heating. So if you wait too long, you run a high risk of burning your caramel by the time you get the candy thermometer out of the pan and the burner turned off. I've done it friends. Stopping once the candy thermometer reads 225 gets you a beautifully caramelized sugar sauce with no burnt aftertaste!

    Wait, do I need a candy thermometer?

    No, just make sure you are stirring or whisking constantly once the sugar really starts to melt. Once there are only a small amount of sugar clumps left, break them with a spoon. After all sugar clumps have melted, stir for another 30 seconds and remove from the heat.

    Do I need to use fancy salt?

    No, regular table salt or sea salt is fine. We want the salt to dissolve anyway. Save the fancy flaked salt for when it's used as a finishing salt that makes a dessert prettier.

    Do I have to add all the salt?

    No, you can leave out some or all of the salt and also use unsalted butter (though I highly recommend salted butter). The salt does balance the sweetness while taking the flavor up a level, but it is not an absolute necessary ingredient.

    Spoon of homemade salted caramel sauce dripping into jar of homemade salted caramel sauce

    Related

    Looking for other recipes like this? Try these:

    • Photo of Carmelitas cookie bar on parchment paper on top of cooling rack
      Carmelitas Cookie Bars
    • Close up of Samoas cupcakes on a plate with toasted coconut and a box of Samoas cookies blurred in the background
      Samoas Cupcakes
    • Overhead view of partial Samoas cheesecake topped with chocolate, toasted coconut and Samoas cookies
      Samoas Cheesecake
    Spoon of homemade salted caramel sauce dripping into jar of homemade salted caramel sauce

    Homemade Salted Caramel Sauce

    Tracy @ Next Level Baker
    Homemade salted caramel sauce is rich, creamy blend of golden deliciousness that's perfect for drizzling on desserts, adding to drinks and taking your sweet treats to the next level.
    Print Recipe Pin Recipe
    Prep Time 5 minutes mins
    Cook Time 15 minutes mins
    Total Time 20 minutes mins
    Course Dessert
    Cuisine American
    Servings 8

    Equipment

    • 1 sauce pan with high sides
    • 1 candy thermometer optional
    • 1 whisk
    • 1 funnel optional

    Ingredients
      

    • 2 cups white sugar
    • 8 tablespoons salted butter room temperature
    • 1 cup heavy whipping cream room temperature
    • 2 teaspoon salt

    Instructions
     

    • Bring the butter and heavy whipping cream to room temperature by leaving them sit out or using the microwave. Get a whisk ready and set aside.
    • Put the white sugar in a sauce pan with high sides and place on the stove over medium low heat. Do not stir until you see the the sugar around the edges start to melt and turn brown. Be patient, this could take up to 5 minutes.
    • Once the sugar starts to melt, stir occasionally with a wooden spoon so that the sugar melts evenly. As the sugar starts to melt, it will clump first. That's normal. The more the sugar melts, the more you'll want to stir.
    • Continue stirring until only a few large clumps of sugar remain. Break those up with the spoon. Remove the pan from the heat once the sauce reaches 225℉ (or no more than 30 seconds after all sugar has dissolved.)
    • Have the whisk ready. CAREFULLY pour in ¼ of the cream. The mixture will violently bubble up and that's normal. Whisk quickly until the mixture calms. [Take care to make sure you are whisking the entire pan or globs of caramel may form at the edges of the pan.] Add the next ¼ of the cream and whisk quickly. Keep repeating until all cream has been incorporated.
    • Add the salted butter 1-2 tablespoons at a time. Whisk quickly until all butter has melted and been incorporated.
    • Add the salt and whisk until incorporated.
    • Using a funnel, carefully pour the liquid caramel into storage jars (or decorating bottles) to cool. [If any chunks have formed, place a strainer over the funnel and strain the caramel through a strainer while pouring into the funnel.]
    • Allow the caramel sauce to come to room temperature before using or placing in the refrigerator.
    • Refrigerated caramel sauce becomes thick. To return refrigerated caramel back to a sauce, microwave the caramel in increments of 10-15 seconds until desired fluidity is reached. Caramel sauce heats and becomes liquid very, very quickly.

    Notes

    I highly recommend making a full batch or more! You can always find extra uses for homemade salted caramel sauce! But if you want to only make a half batch, here is a quick list of ingredients:
    • 1 cup white sugar
    • 4 tablespoons salted butter (room temperature)
    • ½ cup heavy cream (room temperature)
    • 1 teaspoon salt 

    Would you like to save this?

    We'll email this post to you, so you can come back to it later!

    Don't worry! We won't spam you!
    Keyword Homemade Salted Caramel Sauce
    Tried this recipe?Let us know how it was!
    Decorator bottle filled with salted caramel sauce with three plates in partial view that have swirly designs made with the salted caramel on them

    Grilled Cheese Appetizer

    January 10, 2025 by Tracy @ Next Level Baker Leave a Comment

    Bite-sized, cheesy, gooey baked grilled cheese sandwiches that are perfect for an appetizer or for sharing. By using four cheeses and a tomato dipping sauce, we add layers and layers of flavor into tiny appetizer-sized sandwiches.

    White plate with appetizer size pieces of baked grilled cheese sandwiches with tomato dipping sauce

    Everyone loves grilled cheese and tomato dipping sauce. So let's stop saving this amazing combination for rainy days. This recipe turns baked grilled cheese into an appetizer or a meal for a crowd. We bake the 'grilled' cheese because that's the easiest and quickest way to make a lot of grilled cheese sandwiches at one time. A baking sheet will easily fit 8 or more sandwiches. 8 grilled cheese sandwiches baked in 10 minutes? Sign me up! I have a love-love relationship with cheese too, so I always use three or four cheeses. Using multiple cheeses takes our bite size grilled cheese appetizer to a whole next level!

    [feast_advanced_jump_to]

    Ingredients

    Ingredients needed to make baked grilled cheese appetizer and tomato dipping sauce
    • Four cheeses like:
      • Gruyere for meltiness
      • Cheddar for comfort
      • Smoked Gouda for smokiness
      • Goat cheese for a little tang
    • Good bread
    • Salted butter

    See recipe card for quantities.

    Substitutions

    • Cheese - they're endless options for different cheeses. Other cheeses that work well in grilled cheese are havarati, fontina, white cheddar, brie, mozzarella and blue cheese.
    • Bread - I love using sourdough bread for baked grilled cheese appetizers, but you can use any bread that is not too thin. Ciabatti buns work great too. Or use focaccia for an interesting twist.
    Close up grilled cheese on a ciabatta bun with tomato dipping sauce on the side

    Variations

    There are tons of additional ingredients you can add for yet another layer of flavor and texture to your grilled cheese such as: sliced pears or apples, sliced tomatoes, arugula, caramelized onions, bacon or sliced ham.

    Equipment

    If you're making grilled cheese as an appetizer or for a crowd, I highly recommend baking it. Baked grilled cheese is a fast and easy way to make a lot of sandwiches at once. However, if you're only making a few sandwiches, you can use the stovetop, a grill or a panini maker.

    Storage

    Store any leftover grilled cheese in an airtight container in the refrigerator for 2-3 days.

    Close up of appetizer size pieces of baked grilled cheese sandwiches with tomato dipping sauce

    Next Level Tips

    • Yes, the cheese is important for grilled cheese appetizers, but don't skimp on the bread! A good quality sourdough bread is perfect. Or use your favorite gluten free bread, but use a good bread!
    • Don't be tempted to go overboard on the spices in the dipping sauce. The dipping sauce is a complimentary tomato flavor that won't overshadow our baked grilled cheese. If you must jazz up the dipping sauce, you can use my homemade bread dipping seasoning or an Italian seasoning that contains some crushed red pepper. If you have leftover homemade marinara sauce, you can use that as a dipping sauce for grilled cheese too.

    FAQ

    Do I really need four cheeses to make baked grilled cheese?

    No, but I would highly recommend a minimum of two to three. If you don't want to start with four cheeses, start with your favorite cheese for flavor. Next add gruyere as it's a mild cheese that's know for it's melting qualities.

    Do I need to grate the cheese?

    No, but grating the cheese helps the cheese melt evenly. Also, don't use pre-shredded cheese from the grocery store. Pre-shredded cheese often contains anti-caking agents and additives. It is also often much less flavorful than the same type of cheese that is sold in chunks. Pound for pound, it's also cheaper to grate your own cheese than buy it pre-shredded.

    Cab I use crushed tomatoes instead?

    You can, but crushed tomatoes are often too watery for a dip. It works better to use diced tomatoes, drain them and then mash them.

    Stacks of cut baked grilled cheese sandwiches next to a bowl of tomato dipping sauce

    Related

    Looking for other recipes like this? Try these:

    • Whipped Ricotta Truffle Oil Dip
      White Truffle Garlic Bread with Whipped Ricotta
    • Close Up of Chipotle Almond Dip
      Chipotle Almond Dip

    Pairing

    These are my favorite dishes to serve with baked grilled cheese:

    • Photo of salad on blue salad bowl. Salad is topped with tomatoes, red cabbage, turnips, carrots, micro greens, basil, pipits seeds, oil and lemon juice.
      How to Build a Salad
    • Three stacked Chopped White Chocolate Macadamia Nut Bars
      White Chocolate Macadamia Nut Bars
    Grey plate with appetizer size pieces of baked grilled cheese sandwiches with tomato dipping sauce

    Grilled Cheese Appetizer

    Tracy @ Next Level Baker
    Bite size sandwiches of gooey, cheesy, baked grilled cheese that is perfect for sharing or serving as an appetizer.
    Print Recipe Pin Recipe
    Prep Time 15 minutes mins
    Cook Time 10 minutes mins
    Total Time 25 minutes mins
    Course Appetizer, Main Course
    Cuisine American
    Servings 4

    Ingredients
      

    Grilled Cheese Sandwiches

    • 1 cup cheddar cheese
    • ½ cup Gryuere cheese
    • ½ cup Gouda cheese
    • ¼ cup goat cheese
    • 4 tablespoons salted butter
    • 8 slices of bread

    Dipping Sauce

    • 28 ounce can of diced tomatoes
    • 1 tablespoon olive oil
    • 1 large clove garlic minced
    • 1 teaspoon salt
    • 1 tablespoon heavy whipping cream

    Instructions
     

    • Start the dipping sauce as you preheat the oven to 425℉.

    Dipping Sauce

    • Drain the canned diced tomatoes and set aside.
    • Heat a small sauce pan over medium heat and add olive oil.
    • Add the minced garlic to the sauce pan and cook for one minute.
    • Add the canned tomatoes and salt to the sauce pan. Mash the tomatoes with a masher or a wooden spoon.
    • Allow the sauce to cook down until the sandwiches go in the oven.
    • Add the heaving whipping cream and turn temperature to medium low. Stir occasionally.
    • When the sandwiches are done, remove the tomato dipping sauce from the heat and add to dipping bowl(s).

    Baked grilled cheese

    • Grate all cheeses (except the goat cheese), mix them together and set aside.
    • Line the baking sheet with parchment paper.
    • Butter one side of all slices of bread. Place one piece of bread with the buttered side down on the baking each for each sandwich.
    • Add about ½ cup of grated cheese to each sandwich (more if larger bread slices). For the goat cheese, crumble approximately 1 tablespoon on top of the grated cheese for each sandwich.
    • Top each sandwich with one slice of bread, buttered side up.
    • Bake for 5 minutes. Carefully remove the baking sheet from the oven and flip each sandwich over. Bake for an additional 4-6 minutes until the tops are golden brown and the cheese is melted.
    • Cut the sandwiches in triangles, squares or strips. Serve with the dipping sauce.

    Would you like to save this?

    We'll email this post to you, so you can come back to it later!

    Don't worry! We won't spam you!
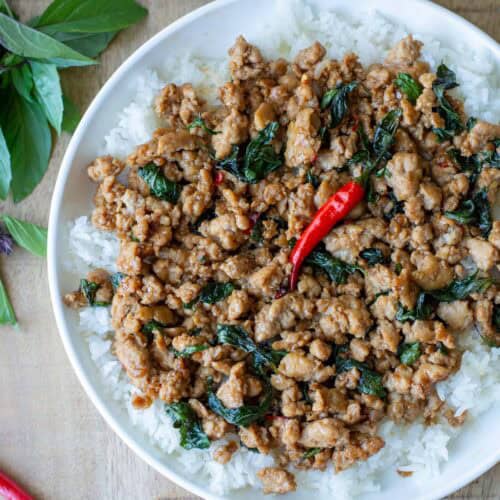
    Keyword Baked Grilled Cheese, Grilled Cheese Appetizer
    Tried this recipe?Let us know how it was!
    Grey plate with appetizer size pieces of baked grilled cheese sandwiches with tomato dipping sauce with white appetizer plate with grilled cheese sandwich with bite taken out

    How to Build a Salad

    January 8, 2025 by Tracy @ Next Level Baker 1 Comment

    A few simple instructions make building a delicious, fresh green salad at home super easy! Just pick one or more ingredients from each category and then chop, toss and serve!

    Photo of salad on plate. Salad is topped with green cabbage, red onions, tomatoes, carrots, orange bell pepper, avocados, pepita seeds, cilantro, pepper, soy sauce and olive oil. Little bowls of pepita seeds, oil and soy sauce in the background.

    I love huge green salads with layers of flavors! When I go out to eat, I like to order things that I can't or don't make at home. For a long time, I ordered a lot of salads because I just didn't know how to easily make a salad at home. Then I just decided to tackle making homemade salads head on. Since then, I've made hundreds and hundreds of salads. I eat some sort of salad every day, usually as part of my lunch. And, somewhere along the way, I realized there were categories of ingredients for salads. Once I realized this, it took all the uncertainty and guesswork out of making salads. I was able to make tons of different combinations just by picking one or more ingredients from each category. And now? Making homemade salads is super easy, and I look forward to them everyday!

    [feast_advanced_jump_to]

    1. How to build a salad: pick one or more leafy greens

    • Any single leaf lettuce
    • Spinach
    • Mixed spring greens (my current favorite!)
    • Arugula
    • Cabbage
    Photo of lettuce choices for building a salad: spring lettuce mix, arugula, spinach and cabbage

    2. Pick one or more root vegetables

    • Red onions
    • Carrots
    • Radishes
    • Turnips
    • Beets
    Photo of root vegetables choices for making a salad: sliced carrot, sliced red onion, sliced turnips and beets

    3. Pick one or more fruits

    • Cucumbers
    • Tomatoes
    • Avacadoes
    • Bell peppers (red, yellow or orange)
    Photo of fruit choices for making a salad: sliced cucumbers, diced cucumbers, halved cherry tomatoes, diced avocado, and sliced yellow bell peppers

    4. Pick one or more fresh herbs or microgreens

    • Cilantro
    • Basil
    • Dill
    • Microgreens such as cilantro, arugula or broccoli
    Photo of fresh herb choices for making a salad: chopped cilantro, chopped basil, broccoli micro greens and dill

    5. Pick one or more seeds

    • Pepitas (or pumpkin seeds)
    • Sunflower seeds
    • Sesame seeds
    • Hemp seeds
    Photo of seed choices for making a salad: pepitas, sunflower seeds, hemp seeds and sesame seeds

    6. Pick one oil

    • Olive oil
    • Sesame oil
    • Grapeseed oil
    • Any other neutral oil
    Photo of oil choices for making a salad: regular olive oil, sesame oil, grapeseed oil and roasted garlic olive oil

    7. Pick one acid

    • Balsamic vinegar
    • Soy sauce or tamari sauce (gluten free)
    • Lemons or limes
    Photo of acid choices for making a salad: lemons, limes, balsamic vinegar and tamari soy sauce

    Variations

    There are so many more options that you can use to build a salad at home:

    • Green vegetables - thinly sliced fresh asparagus, zucchini or green beans
    • Protein - grilled chicken, beef, salmon, boiled eggs, tofu or beans
    • Cheese - feta, goat cheese, blue cheese or fresh mozzarella
    • Nuts - walnuts, pecans, cashews, peanuts, almonds or pistachios
    • Berries - blueberries, strawberries, blackberries or raspberries
    • Additional toppings - dried fruits or croutons

    Meal Prep Salads

    Salads are awesome for meal prep! For lunches at work, I usually took a salad and some leftovers that I could heat up at work. For meal prep, line out your containers. Start with 2 handfuls of your leafy greens for each container. Then as you chop the ingredients from each category, add those ingredients straight to the containers. Don't worry about measuring, just use as much of each ingredient as looks good. You'll get the hang of it quickly after a few times. Add all the ingredients except for the dressing. Add the dressing on the day you will be eating the salad.

    Photo of salad in meal prep container with fork with two meal prep containers with salad in the background. Salad is topped with purple cabbage, cucumbers, carrots, tomato, yellow bell pepper, micro greens, sunflower seeds, sesame seeds and dill.

    Storage

    Store any meal prep or leftover salad in the refrigerator for up to 4 days. For meal prep salads, wait to add any dressing until the day you are eating the salad.

    Next Level Tips

    • I love to challenge myself at the grocery store to try new vegetables. It makes building and eating salads week after week more fun. Turnips, watermelon radishes, golden beets. There are so many options! And, as a bonus, root vegetables are usually not very expensive either.
    • Don't throw away leftover veggies, save them for your salads! Say you buy green onions for a recipe, but you don't need the green top parts. Chop them and save them for your salad. Or maybe you have extra asparagus or zucchini from the garden. Just thinly slice the veggies and add them to your next salad. Yes, I mean fresh, uncooked asparagus! Sliced thinly, it adds a perfect crunch and another layer of flavor to your salad!
    • Don't forget the seeds! Seeds are so healthy and salads are a perfect way to eat more seeds!
    Photo of salad on blue salad bowl. Salad is topped with tomatoes, red cabbage, turnips, carrots, micro greens, basil, pipits seeds, oil and lemon juice.

    FAQ

    Can I use premade salad dressing?

    Yes, you can use store bought salad dressing, but most are full of sugar and other yucky stuff. Skip them and save some money too! You don't even need to make your own vinaigrette. Just drizzle a little olive oil and an acid like a balsamic vinegar directly on to your salad. It works because there are so many other layers of flavors on this salad!

    Wait, soy sauce on a green salad?

    Yes! Soy sauce on salad is so, soooooo good. It adds a great umami flavor. I do suggest a reduced sodium soy or tamari sauce though. Also, don't add any additional salt on the salad if you are using soy sauce. Soy sauce and olive oil is my current favorite combination for salad dressing!

    What is tamari sauce?

    Tamari is a soy-based sauce that's been processed differently than regular soy sauce but tastes almost exactly like soy sauce. Tamari is typically gluten free, unlike regular soy sauce.

    I don't want to add oil to my salad. What else can I use as a dressing?

    You can use an acid without any oil. Frozen blueberries also work as a perfect salad dressing as they naturally juice themselves as they thaw. Room temperature, previously frozen blueberries add just enough liquid to use as a dressing. They are a low calorie and super healthy alternative to oil based salad dressings. And yummy too!

    Pairing

    These are my favorite dishes to serve with [this recipe]:

    • Whipped Ricotta Truffle Oil Dip
      White Truffle Garlic Bread with Whipped Ricotta
    • Grey plate with appetizer size pieces of baked grilled cheese sandwiches with tomato dipping sauce
      Grilled Cheese Appetizer
    • Close up of portobello mushroom parmesan on pasta on a plate
      Portobello Mushroom Parmesan
    • Close up photo of single serving jar of keto mini lemon cheesecake
      Mini No Bake Lemon Cheesecake (Keto)
    Photo of salad on blue salad bowl. Salad is topped with tomatoes, red cabbage, turnips, carrots, micro greens, basil, pipits seeds, oil and lemon juice.

    How to Build a Salad

    Tracy @ Next Level Baker
    Build a delicious green salad by picking one or more ingredients from each category and then just chop, toss and serve!
    5 from 1 vote
    Print Recipe Pin Recipe
    Prep Time 20 minutes mins
    Total Time 20 minutes mins
    Course Main Course, Salad, Side Dish
    Cuisine American
    Servings 1

    Ingredients
      

    • 2 cups (handfuls) leafy greens
    • ¼ cup pick one or more sliced root vegetables ex. carrots, red onions or beets
    • ¼ cup pick one or more diced fruits ex. tomato, cucumber or avocado
    • 1 tablespoon pick one or more seeds ex. pepitas, sunflower or sesame
    • 1 tablespoon pick one of more fresh herbs ex. cilantro, dill, or micro greens
    • ½ tablespoon pick one oil ex. olive oil, grapeseed oil or sesame
    • ½ tablespoon pick one acid ex. balsamic vinger, lemons or soy sauce
    • salt and pepper to taste

    Instructions
     

    • Start with 2 cups/handfuls of leafy greens in each salad bowl or meal prep container.
    • Choose one or more ingredients per category of root vegetables, fruits, fresh herbs and slice or dice. Layer each ingredient onto the salad bowl or meal prep container as you go. Sprinkle seed of choice on top.
    • Drizzle the oil lightly across the the salad. Drizzle the acid (balsamic vinegar, soy sauce, etc.) across the salad in the opposite direction.
    • Add salt and pepper to taste if so desired. (Do not add additional salt if using soy sauce in salad.)
    • Toss or lightly fluff with fork before serving or eating.

    Would you like to save this?

    We'll email this post to you, so you can come back to it later!

    Don't worry! We won't spam you!
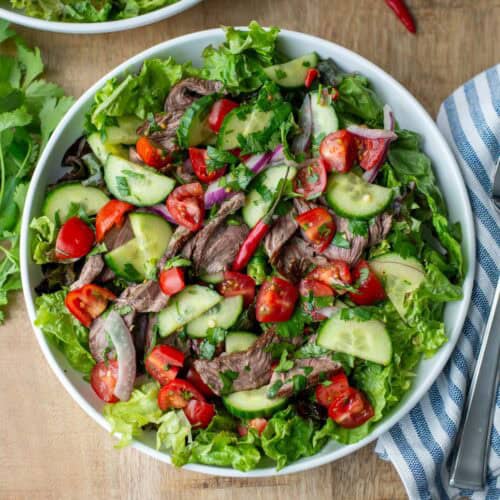
    Keyword How to Build a Salad
    Tried this recipe?Let us know how it was!
    Close up photo of salad on plate. Salad is topped with green cabbage, red onions, tomatoes, carrots, orange bell pepper, avocados, pepita seeds, cilantro, pepper, soy sauce and olive oil

    Mini No Bake Lemon Cheesecake (Keto)

    January 3, 2025 by Tracy @ Next Level Baker Leave a Comment

    These easy Keto Mini No Bake Lemon Cheesecakes are a perfect dessert for when you're craving a creamy dessert but don't want all the carbs. This four ingredient no bake cheesecake uses the tartness of lemon to balance the low carb sweetener to create the perfect easy, light and refreshing dessert.

    Close up photo of single serving jar of keto mini lemon cheesecake with additional jar of cheesecake in the background

    For many reasons, some of us can't have or don't want all the carbs of a regular cheesecake. However, personally, there is not an artificial sweetener that I truly love, love. So that's where the lemon comes in. The light lemon in this low carb cheesecake perfectly balances the aftertaste of many artificial sweeteners. Also, while regular baked cheesecakes use sugar as a sweetener, they also use sugar for structure and texture. So I strongly recommend going the no bake route when replacing the sugar. Plus, since this is a no bake cheesecake, we can fluff the batter to create a light and creamy texture that is divine. Then, we pour the batter into individual serving size jars or ramekins so that we don't have to worry about cutting the cheesecake before serving. Quick, easy and yummy!

    [feast_advanced_jump_to]

    Ingredients

    Ingredients needed to make keto mini lemon cheesecakes: cream cheese, heavy whipping cream artificial sweetener, lemon, salt and keto cookies.
    • Cream cheese
    • Heavy whipping cream
    • One-for-one powdered sugar replacement (such as Swerve brand)
    • Lemon
    • Salt (optional)
    • Gluten free keto cookies (optional)

    See recipe card for quantities.

    Substitutions

    • Lemon - if you don't like lemon, you can also use another acidic, tart fruit to cut the aftertaste of the artificial sweetener.
    • Heavy whipping cream - if you want a lower calorie dessert, you can substitute whole milk. However, it will have more of the texture of a fluff than a no bake cheesecake.
    Close up photo of two single serving jars of keto mini lemon cheesecake

    Variations

    If you ended up here looking for a regular, full carb no bake lemon cheesecake, you can replace the artificial sweetener with the same amount of regular powdered sugar. You can also mix the two if you are just starting to cut down on sugar.

    Equipment

    I highly recommend a hand or a stand mixer, but you could also whisk this no bake cheesecake by hand.

    Storage

    Store any extra mini keto no bake lemon cheesecake in an airtight container in the refrigerator for up to 4-5 days.

    Next Level Tips

    • I love no bake cheesecakes for what they are: quick and light cheesecakes. In keeping with the quick and light theme, I love to put the 'crust' on top by breaking up some cookies, nuts or berries and putting them on top. Think of it like an upside down cheesecake where the crisp crust is already broken up for you but it just so happens to be on top. It works friends! As a bonus, it makes the cheesecakes prettier too!
    • If you don't want crisp cookies on top and also want to add a little extra lemony flavor, you can dip the cookies for the topping in additional lemon juice. Just squeeze an additional 2 tablespoons of fresh lemon juice into a bowl and dip the cookies in the lemon juice before crumbling and sprinkling on top of the cheesecake.
    Close up photo of keto mini lemon cheesecake on a spoon with a jar of cheesecake in the background

    FAQ

    What type of cookies should I use for the crust?

    Any cookie works on top! That's one of the big bonuses of putting the crust on top. That means you can use whatever cookie is in keeping with your diet or your guests' diets: regular cookies, gluten free cookies or keto cookies. They all work. I also sprinkle the cookies on just before serving so that regardless of the crisp cookie you choose, the cookie retains its crispiness.

    Do I have to use heavy whipping cream?

    If you are looking for a lower calorie version, you can use whole milk instead of the heavy whipping cream. It will just have more of a fluff texture than a no bake cheesecake texture.

    Why is there salt in this recipe?

    Salt is often used as a flavor enhancer. But in this cheesecake, we use it to balance out the sweetness of the artificial sugar. It's optional.

    Close up photo of single serving jar of keto mini lemon cheesecake

    Mini No Bake Lemon Cheesecake (Keto)

    Tracy @ Next Level Baker
    The richness of cream cheese is combined with the tartness of lemon and a low carb sweetener and then whipped and served in mini jars or ramekins for the ultimate quick and light dessert.
    Print Recipe Pin Recipe
    Prep Time 15 minutes mins
    Chill time 4 hours hrs
    Total Time 4 hours hrs 15 minutes mins
    Course Dessert
    Cuisine American
    Servings 6

    Equipment

    • 1 Hand or stand mixer

    Ingredients
      

    • 16 ounces cream cheese room temperature
    • ½ cup one for one powdered sugar replacement artificial sweetener
    • ½ cup heavy whipping cream
    • 2 tablespoons fresh lemon juice* approximately 1-2 lemons
    • ¼ teaspoon salt optional
    • keto cookies for topping optional

    Instructions
     

    • Remove the cream cheese from the refrigerator and allow it to come to room temperature.
    • Add the cream cheese to the mixing bowl and mix on medium until there are no lumps and it is soft and creamy.
    • Add the sweetener, lemon and salt to the mixing bowl and mix on medium until they are fully incorporated with the cream cheese.
    • Add the heavy whipping cream to the mixing bowl. If using a stand mixer, switch to the whisk attachment. Mix on high for one minute until light and fluffy.
    • Spoon into small ramekins or jars. Makes 6 four ounce servings (or 4 large six ounce servings).
    • Refrigerate the mini cheesecakes for at least 4 hours before serving.
    • Before serving, crumble 1-2 cookies per serving and and then sprinkle the cookies on top of each mini cheesecake.

    Notes

    For a light lemon flavor, use 2 tablespoons of fresh squeezed lemon juice. For a more lemony flavor, add an additional tablespoon of lemon juice. There are no raw eggs or flour, so you may taste the batter if you want to add additional lemon juice to taste. 

    Would you like to save this?

    We'll email this post to you, so you can come back to it later!

    Don't worry! We won't spam you!
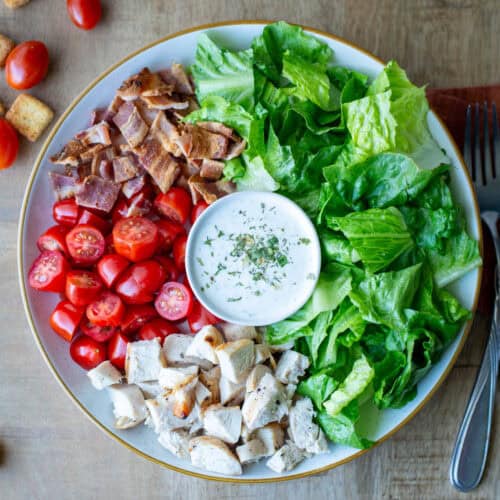
    Keyword Mini keto no bake lemon cheesecake, mini low carb lemon cheesecake
    Tried this recipe?Let us know how it was!
    Jar of keto mini lemon cheesecake next to a wooden spoon with lemons in the background

    Bourbon Sweet Potatoes

    December 21, 2024 by Tracy @ Next Level Baker Leave a Comment

    Bourbon sweet potatoes are a classic Southern holiday side dish. A little bourbon and some warm spices elevate your sweet potatoes into a side dish that is decadent, nutty and comforting. Mashed bourbon sweet potatoes are perfect for fall holiday gatherings.

    Bourbon Sweet Potatoes garnished with pecans in a Crockpot

    Confession time: I've never liked marshmallows on my sweet potatoes. Marshmallows are great for s'mores, but on sweet potatoes? Not so much. Also, I don't like canned yams drowned in maple syrup either. So at holiday gatherings, the sweet potato side dish was the one I usually skipped. Until, one day, a friend introduced me to bourbon sweet potatoes. Not too sweet, and also warm with a depth of flavor. They were so good that I think I went back for thirds that first Thanksgiving. These baked mashed bourbon sweet potatoes quickly became a family favorite, so I've been making them ever since. Almost 20 years now!

    [feast_advanced_jump_to]

    Ingredients

    Photo of ingredients needs to make bourbon sweet potatoes: sweet potatoes, bourbon, butter, brown sugar, orange, pumpkin pie spice, salt and pecan pieces
    • Sweet potatoes
    • Salted butter
    • Brown sugar
    • Bourbon
    • Orange juice
    • Pumpkin Pie Spice
    • Salt
    • Pecan pieces

    See recipe card for quantities.

    Substitutions

    • Bourbon - if you don't have bourbon, you can substitute a different type of whisky. If you don't have bourbon or whisky, then you can substitute 1 tablespoon of vanilla for a similar flavor profile. However, most extracts are alcohol based, so using vanilla does not eliminate the alcohol.
    • Pumpkin pie spice - if you don't have pumpkin pie spice already made, you can substitute ½ teaspoon of cinnamon, ¼ teaspoon of cloves, ¼ teaspoon of ground ginger, â…› teaspoon of allspice and â…› teaspoon of nutmeg for the one teaspoon of pumpkin pie spice.
    • Pecans - pecans are the perfect nut for this recipe. However, you can substitute another favorite nut or leave them out entirely.
    Close up photo of bourbon sweet potatoes on a plate with a fork and garnished with pecan pieces

    Equipment

    You'll need a stand or hand mixer, or a hand masher, to mash the sweet potatoes.

    Storage

    Store any leftover mashed bourbon sweet potatoes in an airtight container in the refrigerator for for up to 5 days.

    Next Level Tips

    • Did you know that Crockpot brand inserts are typically oven safe (without the lid) up to 400 degrees? Learning this was a game-changer for me! For any baked side dishes that I want to keep warm, I bake it in the Crockpot insert and then put it straight into the Crockpot on warm. No more sad, cold sweet potatoes! It also means you can make these ahead of time which is always helpful when you're trying to pull a large holiday meal together.
    • You can buy little bags of finely chopped nut, but they are expensive. Instead, you could buy the larger pecan halves and pule them in a food processor for 30 seconds.
    Bourbon sweet potatoes in a crockpot insert on a cooling rack

    FAQ

    How do I make pumpkin pie spice?

    You can follow my homemade pumpkin pie spice recipe. Or for this bourbon sweet potato dish, you can substitute ½ teaspoon of cinnamon, ¼ teaspoon of cloves, ¼ teaspoon of ground ginger, ⅛ teaspoon of allspice and ⅛ teaspoon of nutmeg for the one teaspoon of pumpkin pie spice.

    Do I have to boil the sweet potatoes first?

    No, you can also bake the sweet potatoes at 400 degrees for 30-45 minutes depending on the size of the sweet potatoes chunks. Bake them until the sweet potatoes are fork tender. Then proceed with the rest of the recipe.

    Can I use more Bourbon?

    Yes, this recipe can support up to ½ cup of Bourbon. After that, you're just better off drinking the Bourbon!

    Bourbon sweet potatoes on a plate with a fork and garnished with pecan pieces

    Pairing

    These are my favorite dishes to serve with [this recipe]:

    • Close up photo of a bowl of garlic mashed potatoes
      Make Ahead Garlic Mashed Potatoes
    • Bowl of Gluten Free Sausage Stuffing
      Gluten Free Sausage Stuffing
    • Individual slice of pumpkin cheesecake with whipped topping in shape of a rosette
      Pumpkin Spice Cheesecake
    Close up photo of bourbon sweet potatoes in a crockpot insert

    Bourbon Sweet Potaotes

    Tracy @ Next Level Baker
    Bourbon sweet potatoes combine the creaminess of mashed potatoes with warm spices and pecans to create a sweet yet deeply rich and indulgent side dish. Perfect for holiday gatherings!
    Print Recipe Pin Recipe
    Prep Time 15 minutes mins
    Cook Time 1 hour hr 15 minutes mins
    Total Time 1 hour hr 30 minutes mins
    Course Side Dish
    Cuisine American
    Servings 12

    Ingredients
      

    • 4 pounds sweet potatoes (4 pounds = 4 large or 6 medium)
    • ½ cup salted butter
    • ⅓ cup brown sugar
    • 3 tablespoons bourbon
    • 2 tablespoons orange juice fresh squeezed or ready made
    • 1 teaspoon pumpkin pie spice*
    • ½ teaspoon salt
    • ¼ cup pecan pieces (optional) chopped in small pieces

    Instructions
     

    • Bring a large pot of water to a boil. Cut the sweet potatoes into similar sized, large chunks. Carefully add the sweet potatoes to the boiling water. Boil until fork tender, approximately 30 minutes.
    • Remove the sweet potatoes to a strainer. Allow the sweet potatoes to cool. Once cooled, remove the skins from sweet potatoes.
    • Add the sweet potatoes to a mixing bowl and use a stand or hand mixer to mash. [Or you can also use a hand masher to mash the sweet potatoes.]
    • Add all the other ingredients, except the pecan pieces, to the mixing bowl and combine with the sweet potatoes.
    • Preheat the oven to 350℉.
    • Spray a baking dish (6-8 cups) or crockpot insert with cooking spray. Add the sweet potatoes to the baking dish.
    • Sprinkle the pecan pieces around the edges for a pretty look. [Most often, I just cover half of the dish with pecan pieces so that there is half with nuts and half without.]
    • Bake for 45 minutes.

    Notes

    If you don't have pumpkin pie spice already made, you can substitute:
    • ½ teaspoon of cinnamon
    • ¼ teaspoon of cloves
    • ¼ teaspoon of ground ginger
    • â…› teaspoon of allspice
    • â…› teaspoon of nutmeg 

    Would you like to save this?

    We'll email this post to you, so you can come back to it later!

    Don't worry! We won't spam you!
    Keyword Bourbon Sweet Potatoes
    Tried this recipe?Let us know how it was!
    Close up photo of bourbon sweet potatoes in a crockpot insert

    Chewy Ginger Molasses Cookies

    December 19, 2024 by Tracy @ Next Level Baker Leave a Comment

    Chewy ginger molasses cookies are a perfect balance between sweet and spicy. The rich, deep flavor of molasses is complimented by the ginger, cinnamon and cloves creating a warm and spicy yet sweet cookie. Perfect for the holidays or a fall treat!

    11 chewy ginger molasses cookies on a cooling rack. Some with bites taken out.

    This chewy ginger molasses cookie is basically my mom's ginger snap recipe that's been slightly altered. My family loves, loves, loves the flavors of ginger and molasses in a cookie. But the snap part? Not so much. Yes, ginger snaps are perfect for dunking in coffee. However, I think as an American society, we're just not a society of dunkers anymore. I loved living in Europe and ordering coffee at a cafe and receiving my coffee in a real cup with a little hard cookie next to it. Maybe we should bring dunking back here too? But, until then, I'll take my cookies chewy, thank you.

    [feast_advanced_jump_to]

    Ingredients

    • Vegetable shortening
    • White sugar + rolling sugar
    • Molasses
    • Egg
    • All purpose flour
    • Baking soda
    • Bsking powder
    • Salt
    • Cinnamon
    • Cloves
    • Ginger

    See recipe card for quantities.

    Variations

    • Vegan - vegetable shortening cookie recipes are among the easiest to switch to vegan since there is no butter that needs substituting. For the egg, you can make a flax egg or use an egg replacer like Bob Mill's. [For one flax egg, mix 1 tablespoon of flaxseed meal and 3 tablespoons of water and let sit for 10 minutes]. Also,make sure to use organic sugar.

    Equipment

    A hand held or stand mixer is helpful for this cookies.

    close up photo of 5 chewy ginger molasses cookies stacked on a plate

    Storage

    Store the chewy ginger molasses cookies in an airtight container at room temperature for up to 7 days. These cookies can be frozen up to 3 months as well.

    Next Level Tips

    • For chewy cookies, bake at 350 degrees. For medium cookies, make at 375 degrees. For hard ginger snaps, bake at 400 degrees.
    • If you want darker colored cookies, use a dark molasses instead of regular molasses.
    • These make great gifts for neighbors and awesome potluck contributions. Everyone loves ginger molasses cookies!

    FAQ

    What if I want harder cookies?

    With this recipe, you can adjust the temperature to get a harder cookie. For a medium cookie, bake at 375 degrees. For hard ginger snaps, bake at 400 degrees.

    top view of stack of chewy ginger molasses cookies with some additional cookies in the background

    Related

    Looking for other recipes like this? Try these:

    • Close up photo of stack of chewy ginger molasses cookies on a pedestal
      Chewy Ginger Molasses Cookies
    • Close up photo of Dutch wooden shoe filled with peppernut cookies, spiced gum drop candies and gold coins with additional shoe to the right
      Peppernut Cookies (Pfeffernusse or Pepernoten)
    • Close up photo of teddy bear colored cookie dough sugar cookie on top of other colored
      Colored Cookie Dough Sugar Cookies
    Close up photo of stack of chewy ginger molasses cookies on a pedestal

    Chewy Ginger Molasses Cookies

    Tracy @ Next Level Baker
    Chewy ginger molasses cookies are a perfect balance between sweet and spicy. The rich, deep flavor of molasses is complimented by the ginger, cinnamon and cloves for a yummy holiday treat.
    Print Recipe Pin Recipe
    Prep Time 20 minutes mins
    Cook Time 30 minutes mins
    Total Time 50 minutes mins
    Course Dessert
    Cuisine American
    Servings 36

    Equipment

    • 1 Stand or hand mixer

    Ingredients
      

    • ¾ cup vegetable shortening
    • 1 cup sugar
    • ¼ cup molasses regular or dark
    • 1 egg beaten
    • 2 cups all purpose flour
    • 2 teaspoons baking soda
    • ¼ teaspoon salt
    • 1 teaspoon cinnamon
    • 1 teaspoon cloves
    • 1 teaspoon ginger
    • ¼ cup sugar for rolling

    Instructions
     

    • Preheat oven to 350℉. Line the baking sheets with parchment paper or silicone mats.
    • Add the all purpose flour, baking soda, salt, cinnamon, cloves and ginger to a small bowl. Stir well and set aside.
    • Cream the vegetable shortening and one cup white sugar together in a stand mixer or with a hand mixer.
    • Add the molasses and beaten egg to the mixing bowl and mix well.
    • Add the flour mixture to the mixing bowl in two batches. Mix well after each addition.
    • Put ¼ cup white sugar (or organic sugar for larger crystals) into a small bowl.
    • Roll the dough into small balls. [For small cookies, I like to use a small cookie scoop.] Dip the balls into the sugar and place on the cookie sheet 2 inches apart.
    • Bake for 9-10 minutes. Let cool on baking sheet for a few minutes before moving to a cooling rack. Makes approximately 36-42 cookies.

    Would you like to save this?

    We'll email this post to you, so you can come back to it later!

    Don't worry! We won't spam you!
    Keyword Chewy Ginger Molasses Cookies
    Tried this recipe?Let us know how it was!
    5 chewy ginger molasses cookies stacked on a small pedestal

    Colored Cookie Dough Sugar Cookies

    December 17, 2024 by Tracy @ Next Level Baker Leave a Comment

    Colored cookie dough sugar cookies are a vibrant and fun twist on traditional sugar cookies. They are perfect for holidays, themed events and special celebrations or any time you want to add a little color pop to your cookies. The colored dough is so vibrant that you won't want to cover it up with frosting.

    Serving platter with colored cookie dough sugar cookies

    My daughter and I developed these cookies over 10 years ago. It came out of a time period where she become more interested in baking, I was looking to cut down on the mess, and Santa was trying to eat a little healthier. They are so fun and colorful that we didn't want to cover them up with frosting. But, also, these colored sugar cookies didn't need any frosting! They are sweet enough with out any messy frosting. And no vacuuming up sprinkles for weeks! So this recipe has been one of our must make Christmas cookies ever since. It's super fun to see how creative kids (and adults too!) get in rolling out their cookies and adding little details on top of their cookies as well. But, this colored cookie dough recipe isn't just for Christmas cookies, you can also use this recipe for any holiday, any special occasion or themed event, or any time you want to add a little extra fun in kitchen.

    Two colored cookie dough cookies with bites taken out on a plate that says "Cookies for Santa"
    [feast_advanced_jump_to]

    Ingredients

    Ingredients to make colored cookie dough sugar cookies
    • All purpose flour
    • White sugar
    • Salted butter
    • Eggs
    • Baking soda
    • Baking powder
    • Vanilla extract
    • Almond extract
    • Salt
    • Gel food coloring

    Substitutions

    I like the balance of both almond and vanilla extracts. But if you don't have almond extract, you can substitute more vanilla extract. Or vice versa. Or experiment with other extracts to match your colored cookie dough theme.

    Equipment

    A stand or hand mixer will make these colored cookie dough sugar cookies much easier to make.

    Photo of six colored cookie dough sugar cut out cookies on parchment paper on a cookie sheet

    Storage

    Store these no frosting colored sugar cookies in an airtight container at room temperature for 1-2 weeks or freeze them for up to 3 months.

    Next Level Tips

    • If you're using artificial food coloring, use gel food coloring. Gel food coloring will produce the most vibrant colors. Use only as much as you need as some brands have a bit of an aftertaste. I used Wilton brand colors for these colored cookie dough cookies. The colors used in the photos were Leaf Green, Royal Blue and Christmas Red. You can see that red doesn't get you true red, but still it's a pretty pink-red.
    Pictures of raw colored cookie dough in balls. Red, blue and green balls

    FAQ

    What kind of food coloring should I use?

    So, I'm no fan of food coloring. I'm the one that adds spinach for green and berries for purple. However, this recipe is where I make the exception. I highly recommend using a gel food coloring. You'll get a more vibrant color while using less product. I use Wilton brand gel coloring for these cookies. However, Americolor and Chefmaster brands are also readily available on Amazon. Also, most craft stores like Hobby Lobby or Michaels also have a baking section where you can buy gel food coloring.

    Can I make the dough the day before?

    Yes! That's a great way to work ahead. The dough needs to chill for a minimum of 2 hours but can be chilled overnight. You will need to let the dough sit out just until it's workable. Roll out the dough while it's still chilled.

    Can I use this recipe for sliced cookies?

    Yes, roll the colors into a log about 2 to 2 and ½ inches in diameter before chilling. Once the dough has chilled, cut into slices that are ¼ inch thick and continue with the baking instructions.

    Related

    Looking for other recipes like this? Try these:

    • Close up photo of Dutch wooden shoe filled with peppernut cookies, spiced gum drop candies and gold coins with additional shoe to the right
      Peppernut Cookies (Pfeffernusse or Pepernoten)
    • Close up photo of stack of chewy ginger molasses cookies on a pedestal
      Chewy Ginger Molasses Cookies
    Close up photo of teddy bear colored cookie dough sugar cookie on top of other colored

    Colored Cookie Dough Sugar Cookies

    Tracy @ Next Level Baker
    Colored cookie dough sugar cookies are a fun and super easy way to make holiday cookies or themed cookies. They are sweet just the way they are. No frosting needed!
    Print Recipe Pin Recipe
    Prep Time 30 minutes mins
    Cook Time 40 minutes mins
    Chilling Time 2 hours hrs
    Total Time 3 hours hrs 10 minutes mins
    Course Dessert
    Cuisine American

    Equipment

    • 1 Stand or hand mixer

    Ingredients
      

    • 3 ½ cups all purpose flour
    • ¼ teaspoon salt or ½ teaspoon if using unsalted butter
    • ½ teaspoon baking soda
    • ½ teaspoon baking powder
    • 1 cup salted butter softened
    • 1 cup white sugar
    • 2 eggs
    • 1 teaspoon vanilla extract
    • 1 teaspoon almond extract

    Instructions
     

    • Combine the all purpose flour, baking soda, baking powder and salt in a small bowl. Stir well and set aside.
    • Combine the softened butter and sugar and mix with stand mixer (or hand mixer) on medium speed until light and fluffy.
    • Add the eggs, vanilla extract and almond extra to the mixing bowl and mix on medium speed until mostly combined.
    • Add the flour mixture to the mixing bowl about a third at a time. Mix on medium until combined.
    • Separate the dough into balls by how many different colors you want to use. [I usually do three, but you can do more or less.]
    • Next, put the first ball and a small amount of food coloring back into the mixing bowl. Mix until the color is completely combined. If needed, add more coloring until the desired color is reached. Thoroughly wash the mixing bowl before repeating with the next color. [Alternatively, you can color the dough by hand. Put on kitchen gloves. Work the food coloring in by kneading the dough in your hands. Continue adding color until desired color is reached. Wash your gloved hands thoroughly. Repeat with next color.]
    • If you're making cut out cookies, cover each dough ball separately with plastic wrap and chill for two hours. If you want slice and bake cookies, pieces together the colored dough as desired and roll into a 2 to 2.5 inch log.
    • Preheat the oven to 400℉.
    • Remove the dough from refrigerator. Prepare the cookie sheets with parchment paper, if desired. The cookies have enough butter that they do not stick.
    • For cut out cookies, take chunks from the desired colors and roll out. How you roll the dough will determine if colors stay separate or blend together. It's a personal preference. Have fun! Use little to no flour as it affects the color, and it's not necessary. Use cookie cutters to make desired shapes.
    • Place the cookies two inches apart on a cookie sheet. As soon as a cookie sheet is full, place it in the oven.
    • If the dough starts to warm up, place it back in the refrigerator. You can also place scraps back in the refrigerator to use at the end.
    • Bake 5-6 minutes. Tops will not look done, but the bottoms will be lightly browned. You don't want the tops of the cookies to brown as that will affect the color. Let the cookies cool on the cookie sheet. They will firm up as they cool.

    Would you like to save this?

    We'll email this post to you, so you can come back to it later!

    Don't worry! We won't spam you!

    Keyword Colored Cookie Dough, Colored Sugar Cookies
    Tried this recipe?Let us know how it was!
    Close up photo of teddy bear colored cookie dough sugar cookie on top of other colored sugar cookies

    Lemon Raspberry Sweet Rolls

    December 12, 2024 by Tracy @ Next Level Baker Leave a Comment

    Lemon raspberry sweet rolls combine tangy citrus with sweet raspberries and a fluffy dough to make a wonderfully balanced breakfast treat. Real raspberries are used throughout including the frosting for a vibrant and happy look to match the flavor. They are a unique option when you're craving something sweet and tangy for breakfast.

    Side view of lemon raspberry sweet roll on a plate with another roll in the background

    I love fresh picked lemons. And where I live, they ripen in abundance in November and December. So I love when my neighbors have lots and lots of extra lemons. I always make homemade lemon curd and use some for vinaigrette and tea. But I love trying new recipes too. I've had lemon raspberry sweet rolls in my head all year just waiting for lemon season. I love how it turned out too!

    [feast_advanced_jump_to]

    Ingredients

    • All purpose flour
    • White sugar
    • Whole milk
    • Salted butter
    • Eggs
    • Lemon zest and lemon juice
    • Dried lemon peel (optional)
    • Active dry yeast
    • Salt
    • Powdered Sugar
    • Cream Cheese
    • Raspberries

    See recipe card for quantities.

    Substitutions

    • Berries - if you have a different favorite berry like blueberries or blackberries, you could easily substitute a different berry.
    • Citrus - you could also substitute a different citrus fruit, such as oranges, in place of the lemons.

    Variations

    There are so many different types of sweet rolls. A few of my other favorites are:

    • Overnight Cinnamon Rolls
    • Chocolate Sweet Rolls with Espresso Frosting
    • Vegan substitutions - For the eggs, you can substitute homemade flax eggs or use an egg replacer like Bob Mill's. [For three flax eggs, mix three tablespoon of flaxseed meal and nine tablespoons of water and let sit for 10 minutes]. For the butter, use your favorite plant based butter. My current favorite is Miyoko's Plant Milk Butter, but it's not always easy to find. Most grocery stores now carry some version of plant based butter like Earth Balance or Country Crock. For the milk, substitute your favorite plant based milk. I recommend oat milk for a neutral milk when baking. For the heavy cream, you can substitute plant based heavy cream (Trader Joe's is the best I've tried so far), or use a little less of a plant based milk. And, of course, use vegan sugar.
    Top view of pan of lemon raspberry sweet rolls with one missing

    EQUIPMENT

    It is easiest to use a stand mixer or hand held mixer to make these sweet rolls.

    STORAGE

    Store the lemon raspberry sweet rolls in an airtight container at room temperature for 1-2 days or in the refrigerator for 5-7 days. To warm up the sweet rolls on day 2 or thereafter, just microwave them for 15-20 seconds. Not long, just enough to warm them up!

    Next Level Tips

    • Use fresh lemons and fresh raspberries whenever possible! You can use frozen raspberries, but they thaw quickly so they are super messy so I don't recommend it.
    • Make these sweet rolls with the lemon peels you have leftover after making homemade lemon curd!
    View of sweet dough rolled out with lemon sugar and raspberries sprinkled on top

    FAQ

    Why salted butter?

    Please see my post on Salted vs. Unsalted Butter.

    How do I cut the sweet roll log into individual sweet rolls?

    There are three popular methods for cutting the log into the sweet rolls: the serrated (or very sharp knife) method, the dental floss method and the pizza cutter method.

    The serrated knife or very sharp knife method. Use a serrated knife or a very sharp knife to cut the log into rolls.

    The dental floss method. Break off a long string of (non-flavored!) dental floss and slide the floss underneath the log roll where you want to make a cut. Make sure the log is in the center of the string of floss and bring the two sides of floss together to meet each other. Then put the floss pieces into the opposite hands, cross the floss over each other across the top of the roll and pull each side until it cuts through the log. Repeat for each roll.

    The pizza cutter method. Use a pizza cutter and make 9-12 individual cuts. Roll each strip up separately. This method can be messy, so you'll need to make an extra effort to roll the rolls tightly.

    Can I make these ahead of time?

    Absolutely! To make these ahead of time, follow the instructions up through the Filling Instructions #7. Immediately after cutting the sweet rolls and placing them in the pan, cover the pan and place it in the refrigerator. The following day, take out the pan and let it sit covered on the counter to come to room temperature, approximately one hour. Remove the cover and continue with the baking instructions.

    Side view of lemon raspberry sweet roll on a plate

    Related

    Looking for other recipes like this? Try these:

    • 9 Cinnamon Rolls in Cast Iron Pan
      Overnight Cinnamon Rolls
    • Chocolate sweet roll with espresso frosting on plate
      Chocolate Sweet Rolls with Espresso Frosting
    • Close up view of jar of lemon curd
      Homemade Lemon Curd
    Top view of lemon raspberry sweet roll on a plate

    Lemon Raspberry Sweet Rolls

    Tracy @ Next Level Baker
    Lemon raspberry sweet rolls combine citrusy tang, sweet berries and fluffy dough for the perfect light and fruity twist on a classic breakfast favorite.
    Print Recipe Pin Recipe
    Prep Time 30 minutes mins
    Cook Time 30 minutes mins
    Rise Time 3 hours hrs
    Total Time 4 hours hrs
    Course Breakfast
    Cuisine American
    Servings 12

    Equipment

    • 1 Stand or hand mixer

    Ingredients
      

    Dough

    • ¾ cup whole milk
    • 2 ¼ teaspoons active dry yeast
    • ¼ cup white sugar
    • 8 tablespoons salted butter room temperature
    • 3 eggs room temperature
    • 4 ½ cups all purpose flour (4½ cups = 540 grams)
    • 1 teaspoon salt (add ⅛ teaspoon extra if using unsalted butter)
    • Zest from 1 lemon
    • 1 teaspoon dried lemon peel optional*

    Filling

    • 2 tablespoons butter very soft
    • ½ cup white sugar
    • 1 ½ teaspoons lemon juice
    • Zest from 1 lemon
    • 1 pint rasperries set aside ⅓ cup for frosting

    Frosting

    • 4 ounces cream cheese room temperature
    • 2 tablespoons salted butter room temperature
    • 3 cups powdered sugar
    • 1 tablespoon lemon juice
    • ⅓ cup fresh raspberries mashed
    • ¼ teaspoon salt

    Instructions
     

    Dough

    • Take out the butter and eggs to bring them to room temperature.
    • Heat the milk in microwave until warm 105℉ - 110℉. [It's best to use a kitchen thermometer if you have one.] Add the warm milk, yeast and a little of the white sugar to the mixer bowl. Let sit for 5-10 minutes.
    • Add the flour and salt to a small bowl and set aside.
    • Add the rest of the sugar, the softened butter and the eggs to the mixing bowl. Mix on low speed until the eggs are incorporated. The butter will not incorporate at this stage, which is normal.
    • Add the flour and salt mixture to the mixing bowl in three to four different stages. Scrape down the sides of the mixing bowl after each addition and then mix on a low speed until the flour has been incorporated. Repeat until all flour has been added.
    • After the flour has been incorporated, switch to the dough hook and knead on low speed for 5 minutes.
    • Spray a large bowl (or reuse the mixing bowl) with cooking spray. The dough is sticky and that's normal. Let the dough rise in a covered bowl for a total of two hours. After one hour, knead the dough using the stretch and fold method. If you're familiar with this method, do it in the bowl. If this is your first time, take the dough out of the bowl and set on a floured surface. Take a hold of a large piece of dough at the 12 position, stretch it away from your body, and then fold it back toward the middle of the dough ball. Rotate the ball ⅛ to ¼ of a turn and repeat the stretch out and fold back motions. Keep repeating until you have gone around 2 times and the dough becomes less stretchy. You DO NOT have to do this, BUT it does make the rolls more fluffy and soft. Put the dough back in the bowl to rise for another hour. So, the total rise time is two hours with the optional stretch and fold after one hour.

    Filling

    • Spray the 9x13 pan (or large round pan) with cooking spray and set aside.
    • After the dough has risen for the two hours, put it on a floured surface and roll it out into a 12 x 18 inch rectangle. [If the dough is ever resistant, let it rest for 10 minutes. Don't overwork the dough trying to roll it out. It should roll out easily.]
    • Brush 2 tablespoons of very soft butter on to the dough with a pastry or silicone brush. You want to use very soft but not melted butter. Think of the butter as the glue that will hold the lemon sugar mixture to the dough. You can also use your fingers or a knife to spread the butter.
    • Mix the white sugar, lemon juice and lemon zest in a small bowl until combined.
    • Sprinkle the sugar mixture evenly over the dough and lightly press it in.
    • Set aside ⅓ cup of raspberries for frosting and sprinkle rest of raspberries evenly over sugar mixture. I like to tear the raspberries first to spread them out.
    • Starting with the long side, roll the dough into a tight log.
    • Cut the dough into 9-12 pieces. I use 9 pieces for a large round pan or 12 pieces for a 9x13 pan.
    • Add the cut sweet rolls into your sprayed pan of choice, cover with aluminum foil or plastic wrap and let rise for one hour. [For overnight rolls, cover and place directly in to the refrigerator. Remove next day and let sit on the counter for one hour to get to room temperature prior to baking.]

    Baking

    • Preheat oven to 350 ℉.
    • Bake the sweet rolls uncovered for 27-32 minutes. Check them at 27 minutes. [If you made overnight rolls, they could take longer if they were colder to start with.] They will be lightly golden brown on top.
    • When you remove the sweet rolls from the oven, start making the frosting.

    Frosting

    • Put the softened cream cheese and softened butter in to a mixing bowl and mix with the whisk attachment until thoroughly combined and fluffy.
    • Add the powdered sugar, mashed raspberries, lemon juice and salt to the mixing bowl and mix until light and fluffy. It will only take a few minutes.
    • When the sweet rolls are still hot, spread a very thin layer of frosting on every part of the outer layer of the sweet rolls. It will melt, and that's perfect. It softens the outer layer of the lightly browned rolls.
    • Once the sweet rolls have cooled for at least 20 minutes, spread the rest of the frosting on the rolls. If you are not serving them warm, wait until they have completely cooled to frost them.

    Notes

    *The dried lemon peel is optional. It just makes the dough more lemony. 

    Would you like to save this?

    We'll email this post to you, so you can come back to it later!

    Don't worry! We won't spam you!
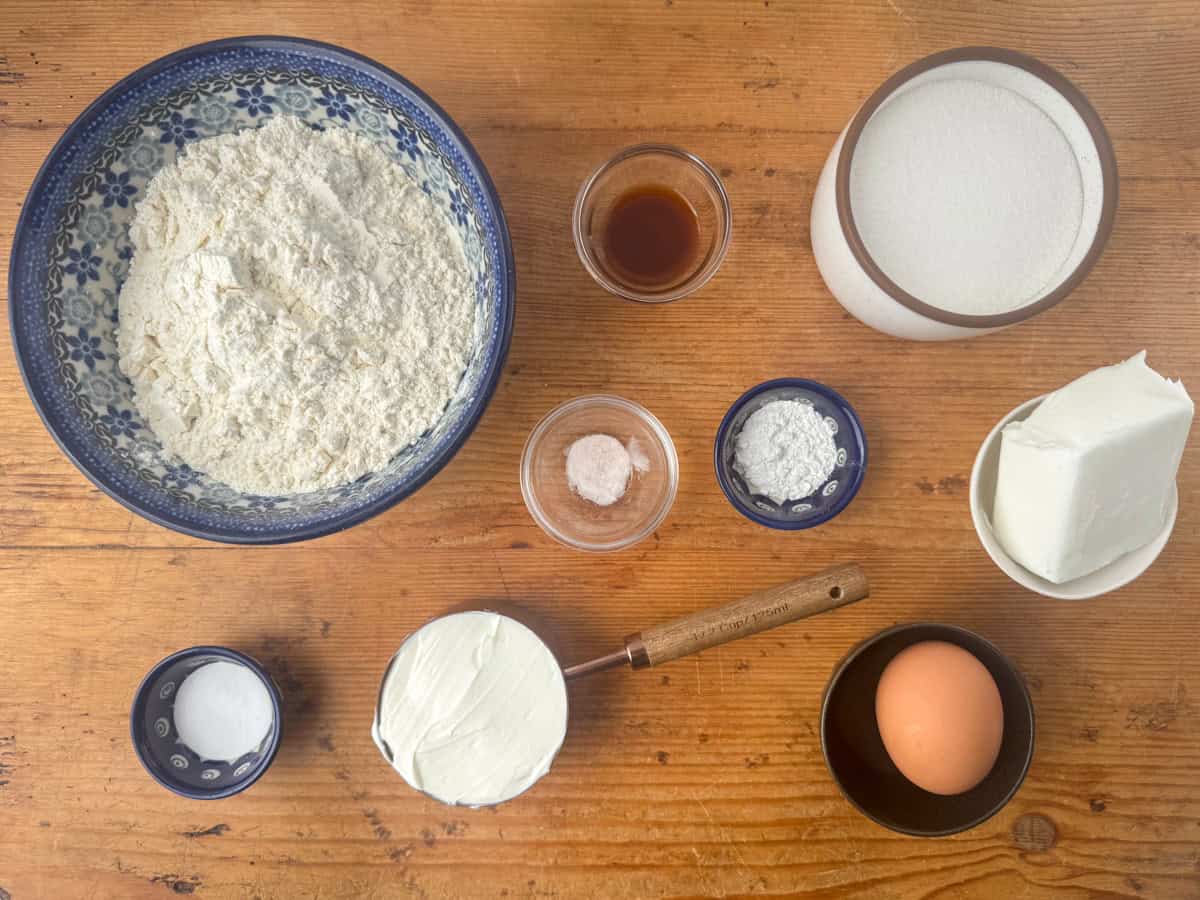
    Keyword Lemon Raspberry Sweet Rolls
    Tried this recipe?Let us know how it was!
    Top view of lemon raspberry sweet roll on plate with pan of sweet rolls in the background

    Chocolate Sweet Rolls with Espresso Frosting

    December 10, 2024 by Tracy @ Next Level Baker Leave a Comment

    Chocolate sweet rolls with espresso frosting are perfect for whenever you're craving a cinnamon roll and chocolate at the same time. They truly are the best of both words. And the espresso frosting is the perfect finishing touch that will take your chocolate sweet rolls to the next level.

    Chocolate sweet roll with espresso frosting on plate with pan of chocolate sweet rolls in background

    I've become the cinnamon roll lady. If the family is having brunch, I'm assigned to bring cinnamon rolls. Honestly, my homemade cinnamon rolls are my very favorite sweet roll, and they are easy enough to make. But, sometimes, I crave something just a bit different than the classic cinnamon rolls. The first time I brought these chocolate sweet rolls to a family gathering, I also brought my classic cinnamon rolls as I was worried about a rebellion. But, it turned out, I had worried for nothing. Everyone loved these chocolate sweet rolls with espresso frosting! Now I get requests for these too!

    [feast_advanced_jump_to]

    Dough and filling ingredients

    Ingredients for dough and filling for Chocolate Sweet Rolls
    • All purpose flour
    • White sugar
    • Brown sugar
    • Whole milk
    • Salted butter
    • Eggs
    • Cocoa powder
    • Cinnamon
    • Active dry yeast
    • Salt

    See recipe card for quantities

    Frosting ingredients

    Ingredients to make espresso frosting
    • Cream cheese
    • Salted butter
    • Powdered Sugar
    • Espresso powder
    • Vanilla
    • Salt

    Variations

    There are so many different types of sweet rolls. A few of my other favorites are:

    • Overnight Cinnamon Rolls
    • Lemon Raspberry Rolls
    • Vegan substitutions - For the eggs, you can substitute homemade flax eggs or use an egg replacer like Bob Mill's. [For three flax eggs, mix three tablespoon of flaxseed meal and nine tablespoons of water and let sit for 10 minutes]. For the butter, use your favorite plant based butter. My current favorite is Miyoko's Plant Milk Butter, but it's not always easy to find. Most grocery stores now carry some version of plant based butter like Earth Balance or Country Crock. For the milk, substitute your favorite plant based milk. I recommend oat milk for a neutral milk when baking. For the heavy cream, you can substitute plant based heavy cream (Trader Joe's is the best I've tried so far), or use a little less of a plant based milk. And, of course, use vegan sugar.

    Equipment

    It is easiest to use a stand mixer or hand held mixer to make these sweet rolls.

    Storage

    Store in an airtight container at room temperature for 1-2 days or in the refrigerator for 5-7 days. To warm up the chocolate sweet rolls on day 2 or thereafter, just microwave them for 15-20 seconds. Not long, just enough to warm them up!

    Next Level Tips

    • Use a high-quality cocoa powder. My all time favorite cocoa powder is the Valrhona brand unsweetened cocoa powder. It's simply the best! It is sold on Amazon, but it can be pricey. Another place to buy it is from the Whole Foods bulk section. I know, I know. But also, not everything at Whole Foods is super expensive. In fact, it's cheaper than Amazon, and the great thing about bulk sections is that you can buy as small of quantity as you want. However, if you order through Whole Foods via Amazon, then you'll currently need to buy a minimum of ¼ pound. Plenty for this recipe and future recipes!
    • Espresso powder. Buying ready made espresso powder is expensive and not necessary. I use the espresso powder straight out of my espresso machine. Yes, I'm one of those people who bought an espresso machine to save on coffee. I love it, and it's saved a ton of money. If you have a coffee grinder, you can grind some beans into the finest powder. You can even use a fine instant coffee. Starbucks brand single instant coffee packets are usually a fine grind. Yes, you have permission to raid your camping stash if need be!
    • Always weigh your flour and use the equivalent weight for the brand you are using. If you don't have a kitchen scale or don't want to weigh your flour, then use the fluff and scoop method. Fluff the flour in the container, and then lightly scoop the flour in to the measuring cup.
    Close up of chocolate sweet rolls in pan

    FAQ

    Why salted butter?

    Please see my post on Salted vs. Unsalted Butter.

    How do I cut the sweet roll log into individual sweet rolls?

    There are three popular methods for cutting the log into the sweet rolls: the serrated (or very sharp knife) method, the dental floss method and the pizza cutter method.

    The serrated knife or very sharp knife method. Use a serrated knife or a very sharp knife to cut the log into rolls.

    The dental floss method. Break off a long string of (non-flavored!) dental floss and slide the floss underneath the log roll where you want to make a cut. Make sure the log is in the center of the string of floss and bring the two sides of floss together to meet each other. Then put the floss pieces into the opposite hands, cross the floss over each other across the top of the roll and pull each side until it cuts through the log. Repeat for each roll.

    The pizza cutter method. Use a pizza cutter and make 9-12 individual cuts. Roll each strip up separately. This method can be messy, so you'll need to make an extra effort to roll the rolls tightly.

    Can I make these ahead of time?

    Absolutely! To make these ahead of time, follow the instructions up through the Filling Instructions #7. Immediately after cutting the sweet rolls and placing them in the pan, cover the pan and place it in the refrigerator. The following day, take out the pan and let it sit covered on the counter to come to room temperature, approximately one hour. Remove the cover and continue with the baking instructions.

    45 degree overhead view of a partial baking pan of chocolate sweet rolls with espresso frosting

    Related

    Looking for other recipes like this? Try these:

    • 9 Cinnamon Rolls in Cast Iron Pan
      Overnight Cinnamon Rolls
    • Top view of lemon raspberry sweet roll on a plate
      Lemon Raspberry Sweet Rolls
    Chocolate sweet roll with espresso frosting on plate

    Chocolate Sweet Rolls with Espresso Frosting

    Tracy @ Next Level Baker
    Chocolate sweet rolls combine a light, fluffy dough with a gooey chocolatey filling and are topped with an espresso frosting that adds a layer of flavor while complimenting the chocolate. They are a yummy and unique addition to a special breakfast or brunch.
    Print Recipe Pin Recipe
    Prep Time 30 minutes mins
    Cook Time 30 minutes mins
    Rise time 3 hours hrs
    Total Time 4 hours hrs
    Course Breakfast
    Cuisine American
    Servings 12

    Equipment

    • 1 Stand mixer or hand mixer

    Ingredients
      

    Dough

    • ¾ cup whole milk
    • 2 ¼ teaspoons active dry yeast
    • ¼ cup white sugar
    • 8 tablespoons salted butter room temperature
    • 3 eggs room temperature
    • 4½ cups all purpose flour (4 ½ cups = 540 grams)
    • 1 teaspoon salt (add ⅛ teaspoon extra if using unsalted butter)

    Filling

    • 2 tablespoons butter very soft
    • ½ cup brown sugar
    • 2 tablespoons cocoa powder
    • 1 teaspoon cinnamon optional

    Frosting

    • 4 ounces cream cheese room temperature
    • 2 tablespoons salted butter room temperature
    • 2 cups powdered sugar
    • 1 tablespoon heavy whipping cream
    • 1½ teaspoons espresso powder
    • 1 teaspoon vanilla
    • ¼ teaspoon salt

    Instructions
     

    Dough

    • Take out the butter and eggs to bring them to room temperature.
    • Heat the milk in microwave until warm 105℉ - 110℉. [It's best to use a kitchen thermometer if you have one.] Add the warm milk, yeast and a little of the white sugar to the mixer bowl. Let sit for 5-10 minutes.
    • Add the flour and salt to a small bowl and set aside.
    • Add the rest of the sugar, the softened butter and the eggs to the mixing bowl. Mix on low speed until the eggs are incorporated. The butter will not incorporate at this stage, which is normal.
    • Add the flour and salt mixture to the mixing bowl in three to four different stages. Scrape down the sides of the mixing bowl after each addition and then mix on a low speed until the flour has been incorporated. Repeat until all flour has been added.
    • After the flour has been incorporated, switch to the dough hook and knead on low speed for 5 minutes.
    • Spray a large bowl (or reuse the mixing bowl) with cooking spray. The dough is sticky and that's normal. Let the dough rise in a covered bowl for a total of two hours. After one hour, knead the dough using the stretch and fold method. If you're familiar with this method, do it in the bowl. If this is your first time, take the dough out of the bowl and set on a floured surface. Take a hold of a large piece of dough at the 12 position, stretch it away from your body, and then fold it back toward the middle of the dough ball. Rotate the ball ⅛ to ¼ of a turn and repeat the stretch out and fold back motions. Keep repeating until you have gone around 2 times and the dough becomes less stretchy. You DO NOT have to do this, BUT it does make the rolls more fluffy and soft. Put the dough back in the bowl to rise for another hour. So, the total rise time is two hours with the optional stretch and fold after one hour.

    Filling

    • Spray the 9x13 pan (or large round pan) with cooking spray and set aside.
    • After the dough has risen for the two hours, put it on a floured surface and roll it out into a 12 x 18 inch rectangle. [If the dough is ever resistant, let it rest for 10 minutes. Don't overwork the dough trying to roll it out. It should roll out easily.]
    • Brush 2 tablespoons of very soft butter on to the dough with a pastry or silicone brush. You want to use very soft but not melted butter. Think of the butter as the glue that will hold the brown sugar chocolate mixture to the dough. You can also use your fingers or a knife to spread the butter.
    • Mix the brown sugar, cocoa powder and cinnamon together in a small bowl until the cocoa powder and cinnamon are incorporated into the brown sugar.
    • Sprinkle the brown sugar mixture evenly over the dough and lightly press it in.
    • Starting with the long side, roll the dough into a tight log.
    • Cut the dough into 9-12 pieces. I use 9 pieces for a large round pan or 12 pieces for a 9x13 pan. Use your favorite cutting method. If you aren't sure how to cut the roll, see my FAQ section for different cutting methods.
    • Add the cut sweet rolls into your sprayed pan of choice, cover with aluminum foil or plastic wrap and let rise for one hour. [For overnight rolls, cover and place directly in to the refrigerator. Remove next day and let sit on the counter for one hour to get to room temperature prior to baking.]

    Baking

    • Preheat oven to 350 ℉.
    • Bake the sweet rolls uncovered for 27-32 minutes. Check them at 27 minutes. [If you made overnight rolls, they could take longer if they were colder to start with.] They will be lightly golden brown on top.
    • When you remove the sweet rolls from the oven, start making the frosting.

    Frosting

    • Put the softened cream cheese and softened butter in to a mixing bowl and mix until thoroughly combined and fluffy.
    • Combine espresso powder with heavy cream in small bowl so that some of the espresso powder dissolves.
    • Add the powdered sugar, heavy whipping cream and espresso mixture, salt and vanilla to the mixing bowl and mix until light and fluffy. It takes less than two minutes.
    • When the sweet rolls are still hot, spread a very thin layer of frosting on every part of the outer layer of the sweet rolls. It will melt, and that's perfect. It softens the outer layer of the lightly browned rolls.
    • Once the sweet rolls have cooled for at least 20 minutes, spread the rest of the frosting on the rolls. If you are not serving them warm, wait until they have completely cooled to frost them.

    Would you like to save this?

    We'll email this post to you, so you can come back to it later!

    Don't worry! We won't spam you!
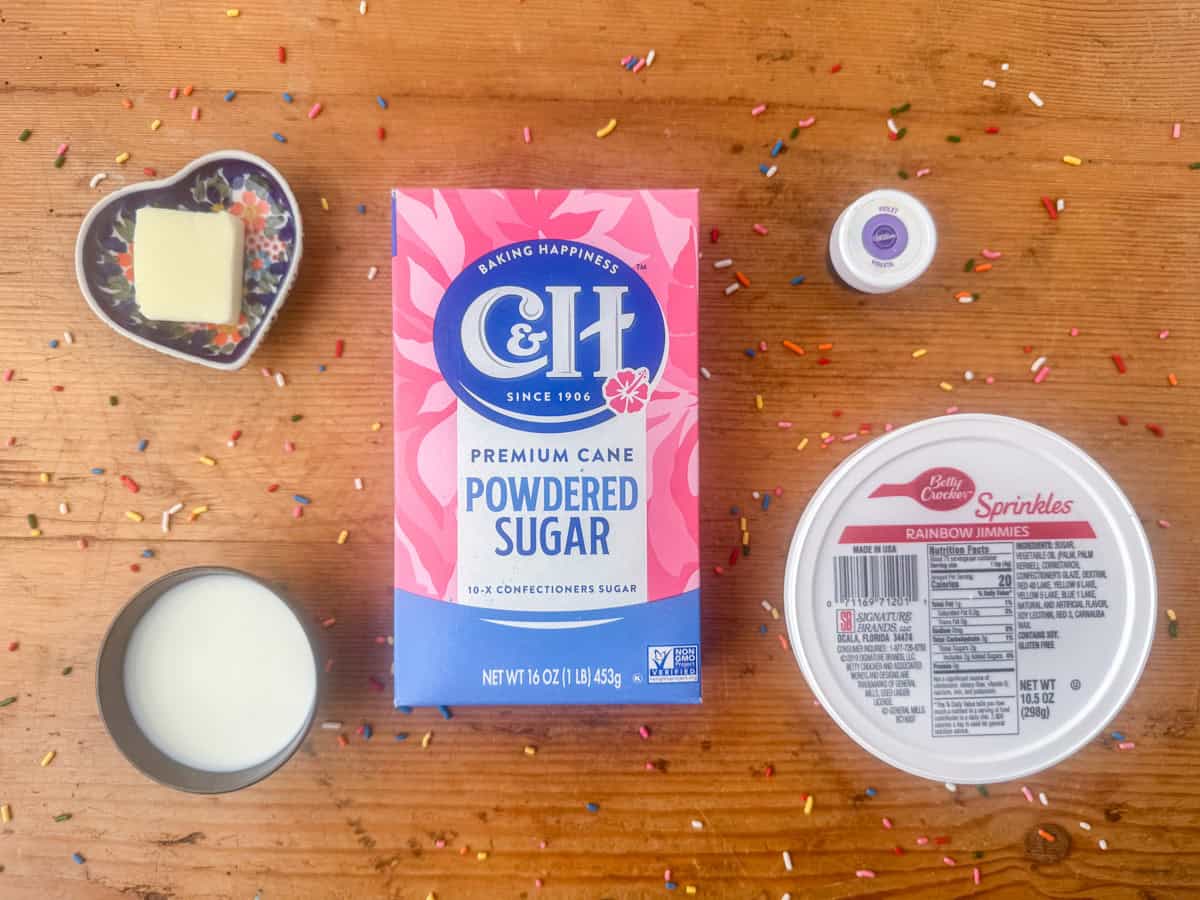
    Keyword Chocolate Sweet Rolls, Chocolate Sweet Rolls with Espresso Frosting
    Tried this recipe?Let us know how it was!
    Close up view of a chocolate sweet roll with espresso frosting

    Homemade Lemon Curd

    December 5, 2024 by Tracy @ Next Level Baker 2 Comments

    Homemade lemon curd is a rich, creamy spread that perfectly balances sweetness with citrusy tanginess. It's simple yet decadent. And it's the perfect bright addition to scones, cookies, pancakes, cheesecakes and any sweet treat.

    Close up view of jar of lemon curd

    Yes, you could buy lemon curd in the store, but it's one of those foods where there is simply no comparison between store-bought and homemade. Homemade lemon curd takes lemon curd to a whole nother level. It's extra bright, extra tangy, extra lemony and the perfect lemon addition to your baked goods or brunch table. It''s the 's a great recipe for when your neighbor drops off a bunch of lemons. And it's super easy.

    [feast_advanced_jump_to]

    Ingredients

    Ingredients to make lemon curd: lemons, eggs, sugar and butter
    • Lemons
    • White sugar
    • Egg yolks
    • Salted Butter

    See recipe card for quantities.

    Variations

    This recipe works well with other citrusy fruits too, not just lemons!

    Equipment

    You'll need a double boiler (or a regular pan) and a whisk. Some people say they get a metallic taste when they use a stainless steel pan or whisk. I've never experiences this and I've certainly used stainless steel pans and whisks. But, to be safe, use a non-metal pan and whisk to avoid an unintended chemical reaction between the acid in the lemons and the metals.

    Lemon curd on scones with raspberries sprinkled around on a plate

    Storage

    Store the homemade lemon curd in an airtight container in the refrigerator for up to 10-14 days.

    Next Level Tips

    • Use fresh picked lemons for lemon curd that's simply out of this world! I make homemade lemon curd whenever my neighbors have fresh lemons. If it's not the right time of year for fresh lemons or you don't have access to them, the next best option would be organic lemons.
    • For a brighter colored lemon curd, use organic or fresh eggs as the yolks are darker in color.
    • Use a non-metal pan and whisk to avoid an unintentional reaction between the acid in the lemons and the metals.

    FAQ

    Do I have to use a double boiler?

    No, just make sure to heat on medium low to low and whisk continually to avoid any egg cooking on the sides of the pan.

    Close up view of jar of lemon curd

    Homemade Lemon Curd

    Tracy @ Next Level Baker
    Homemade lemon curd is sweet and tangy, and also rich and creamy. It's the perfect combination to elevate and brighten your favorite baked goods and brunch table.
    5 from 1 vote
    Print Recipe Pin Recipe
    Prep Time 5 minutes mins
    Cook Time 10 minutes mins
    Cooling Time 1 hour hr 30 minutes mins
    Total Time 1 hour hr 45 minutes mins
    Course Dessert
    Cuisine American

    Ingredients
      

    • ½ cup lemon juice fresh squeezed
    • ½ cup white sugar
    • 4 egg yolks
    • 4 tablespoons salted butter cubed and softened

    Instructions
     

    • Remove the butter from refrigerator, cut into cubes and allow it to warm up. Separate the yolks from the eggs and set aside.
    • Use a non-metal double boiler on high, add water in bottom pan up to one inch lower than the top pan and bring water to a boil. [Alternatively, use a regular pan on medium low heat.]
    • Add the lemon juice, white sugar and egg yolks to the top pan of the double boiler (or a regular pan on medium low heat).
    • Whisk together with a silicone whisk until combined. Whisk occasionally as the curd starts to heat and continually once it heats up. If the mixture starts to foam, turn the heat down. Make sure to get the sides of the pan with the whisk so that the egg does not cook on the edges.
    • Cook and whisk continually until the lemon curd has thickened to the consistency of runny pudding or hollandaise sauce. It will take 7-10 minutes.
    • Remove from heat and stir in butter. Whisk until all butter has melted and combined.
    • Strain the lemon curd through a strainer into a storage or serving jar.
    • Cool to room temperature and then place in the refridgerator for one hour. The lemon curd will continue to thicken as it cools.

    Would you like to save this?

    We'll email this post to you, so you can come back to it later!

    Don't worry! We won't spam you!
    Keyword Homemade Lemon Curd
    Tried this recipe?Let us know how it was!
    Photo from above of jar of lemon curd

    Peppernut Cookies (Pfeffernusse or Pepernoten)

    December 2, 2024 by Tracy @ Next Level Baker Leave a Comment

    Peppernut cookies are small spiced cookies that are traditional holiday cookies originating from Northern Europe. In the Netherlands, they are called Pepernoten. And in Germany, they are called Pfeffernusse. The Engligh translation is Peppernuts.

    Close up photo of Dutch wooden shoe filled with peppernut cookies, spiced gum drop candies and gold coins

    When I was growing up, I loved when my dad made my great grandmother's peppernut (or pfeffernusse) cookies during the holiday season. They were always my very favorite holiday cookie. I loved the small size and the spicy flavor, and they were oh so addicting...I usually ate them by the handful.

    I knew they were from my family's German side, but that's about all I knew growing up. So fast forward many, many years to my first year living in the Netherlands. I was completely in shock when I walked in to a grocery store during my first November, and there were peppernut cookies everywhere! Rather, pepernoten as they called them. Displays and displays of them! All different kinds too! Pepernotens covered in chocolate and others covered in powdered sugar. I truly couldn't have been more shocked.

    Close up photo of Dutch wooden shoe filled with peppernut cookies, spiced gum drop candies and gold coins with

    Pepernoten Cookies

    I was even more shocked to realize this little pepernoten cookie played such a big part in the Dutch holiday traditions. When Sinterklaas arrives by boat from Spain each year, his helpers threw pepernoten in to the crowds of people that lined the canals and streets. Also, the Dutch give presents to their children from Sinterklaas on December 5th not at Christmas. In the town where we lived, it was customary for parents to give a sack filled with their children's gifts to a neighbor. The neighbor would come over, open the door, throw candies and pepernoten to distract the kids while they dropped a bag of gifts from Sinterklaas. And when Sinterklaas left to go back to Spain, he left little candies, fruit and pepenoten in the kids' shoes that they left at the door. Many grocery stores also allowed kids to leave a shoe there, and they would fill it with pepernoten, little candies and treats. I loved learning and experiencing different types of traditions while we lived in the Netherlands. And I loved how this little cookie brought my young life and current life full circle.

    Bowl of cookies with Pepernoten written on back of bowl and photo of Sinterklaas
    [feast_advanced_jump_to]

    Ingredients

    Ingredients for peppernut cookies
    • All purpose flour
    • White sugar
    • Salted butter
    • Dark molasses
    • Ground nuts (optional)
    • Cinnamon
    • Ground ginger
    • Ground cloves
    • Baking soda

    See recipe card for quantities.

    Peppernut Cookie Variations

    • Nuts - my family almost always made peppernut cookies with actual nuts. Usually ground pecans, as those were my dad's favorite. But sometimes, he used walnuts or a combination of both. Not all peppernut, pfeffernusse or pepernoten recipes have ground nuts. Different regional recipes vary. And some people have come to believe that the nut in the cookie name refers to the shape of the cookie and not the use of actual nuts. Our family version always had nuts, but they are optional.
    • Pepper - despite the name, not all peppernut, pfeffernusse or pepernoten recipes use black or white pepper either. Some modern interpretations of this cookie add a small amount of black or white pepper. However, traditionally, pepper was not included in the cookies. The spices in the cookies do create a deep, spicy flavor though. If you want to add pepper, I would suggest ¼ teaspoon of white pepper or ¾ teaspoon of black pepper.
    Bowl of Peppernut cookies with spice drop candies in background

    Storage

    Store the peppernut cookies in an airtight container at room temperature for 2-3 weeks. These cookies also freeze well.

    Next Level Tips

    • These make a fabulous, nostalgic holiday treat for friends and family with a Dutch or German heritage, especially as these cookies are not easily found in stores outside of Europe.

    FAQ

    What type of molasses should I use?

    This recipe originally calls for dark molasses. I've used all different kinds. My favorite is the Grandma's Original Molasses in the glass jar with yellow accents. Probably because it's the one that is most commonly found in regular grocery stores over the years. You can also use a very dark blackstrap molasses. Blackstrap molasses is considered a healthier molasses, but it's also more bitter. I would only recommend blackstrap molasses only if you've tried it before and know you like it.

    Do I have to include the nuts?

    No, you can skip the nuts if there's an allergy or you simply don't have or like them.

    How do I roll the dough into logs?

    Take a handful of dough and shape it into a ball-ish shape just so there ar no rough edges. Then start to flatten the ball into to a log (approximately ¾ to 1 inch in thickness) by rolling it back and forth underneath the palm of your hand against the counter or any flat surface. Repeat until all dough is used. They don't have to be perfect. Place the logs on a cookie sheet and cover. Chill for a minimum of two hours up to overnight. Peppernut cookies rolled out in logs

    Why dissolve baking soda in water?

    This recipe is quite old and the cookies are very small. Baking soda was often dissolved in a little water to make sure it was evenly distributed throughout the cookies.

    Close up photo of Dutch wooden shoe filled with peppernut cookies, spiced gum drop candies and gold coins with additional shoe to the right

    Peppernut Cookies (Pfeffernusse or Pepernoten)

    Tracy @ Next Level Baker
    Peppernut cookies are small bites of spiced cookie bliss. They are the quintessential holiday cookie for those with a Dutch or German heritage.
    Print Recipe Pin Recipe
    Prep Time 30 minutes mins
    Cook Time 1 hour hr
    Chill Time 2 hours hrs
    Total Time 3 hours hrs 30 minutes mins
    Course Dessert
    Cuisine American, Dutch, German

    Ingredients
      

    • 1 cup butter softened
    • 1 cup sugar
    • 1 cup dark molasses
    • 2 teaspooons cinnamon
    • 1 teaspoon ground ginger
    • 2 teaspoons ground cloves
    • 2 teaspoons baking soda dissolved in a little water
    • 1 cup nut meats (ex. finely chopped pecans or walnuts)
    • 5 cups all purpose flour

    Instructions
     

    • Ground 1 cup of pecans (or nut of choice) into small nut meat pieces.
    • Mix the butter, sugar and molasses together in the stand mixer, or with a hand mixer, until combined.
    • Dissolve the baking soda in a small amount of water. Add the cinnamon, ground ginger, ground cloves, dissolved baking soda and nut meats to the mixer and mix until combined.
    • Add the flour to the mixer one cup at a time. Mix until fully combined and then an additional 60 seconds.
    • Roll the dough into ¾ - 1 inch thick cigar shaped logs. Place the logs on baking sheets, cover and chill for a minimum of 2 hours up to overnight.
    • Take the logs out of refrigerator as needed. The logs made need to be lightly reshaped if they settled in the refrigerator. The logs warm up very quickly, so only take a few out of the refrigerator at a time and only handle as necessary. Slice off ¼ inch pieces.
    • Preheat oven to 350℉. It is not necessary to use cooking spray or parchment paper. As there is a lot of butter in the recipe, these cookies do not stick.
    • Place cookies on cookie sheet at least one inch apart. One half cookie sheet will usually hold approximately 48 cookies (six rows of eight cookies).
    • Bake at 350℉ for 7-8 minutes. For a softer cookie, remove from the oven before bottoms are browned. For a harder cookie, bake one minute longer. As this recipe makes hundreds of small cookies, it's best to do a test batch. Allow them to cool before touching or tasting as they do firm up as they cool. They cool quickly.

    Would you like to save this?

    We'll email this post to you, so you can come back to it later!

    Don't worry! We won't spam you!
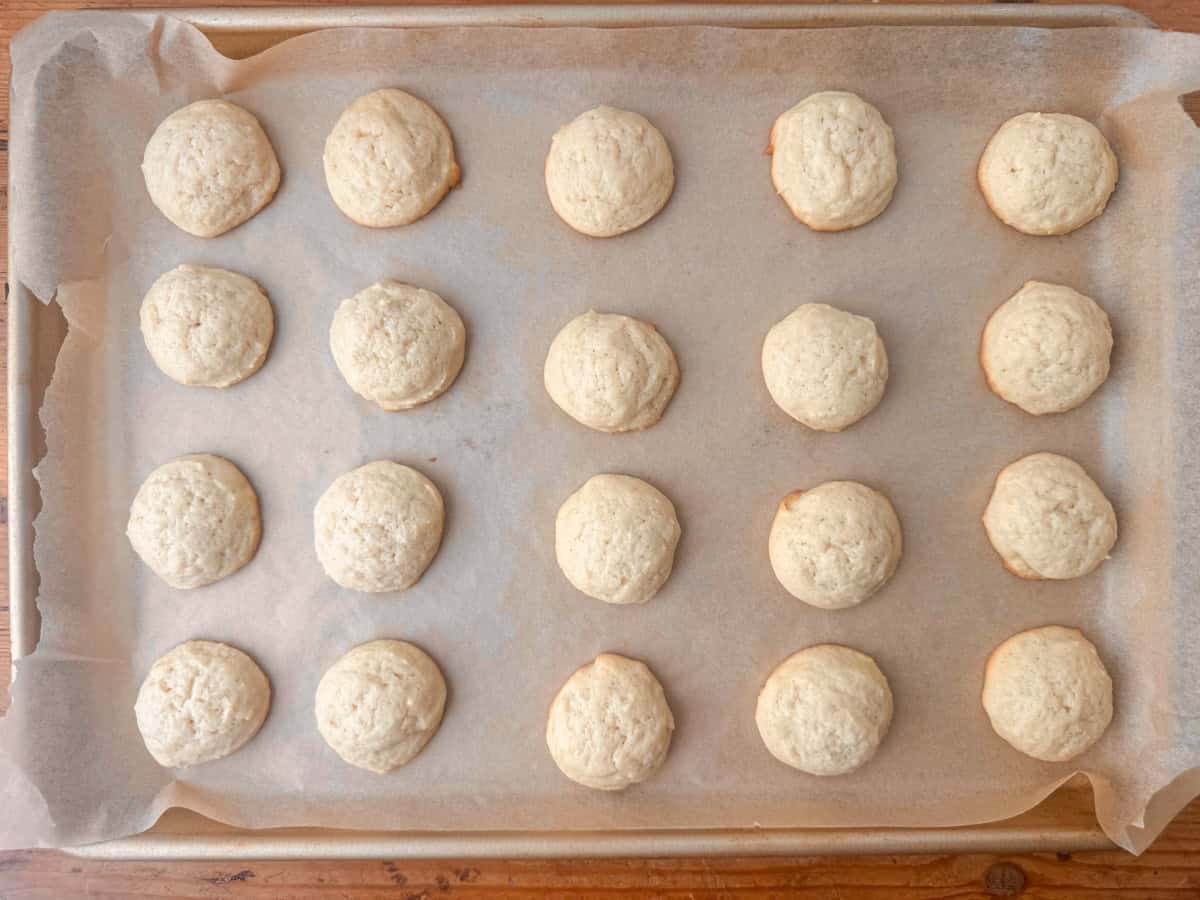
    Keyword Pepernoten, Peppernut Cookies, Pfeffernusse
    Tried this recipe?Let us know how it was!
    Close up photo of Dutch wooden shoe filled with pepernoten cookies, spiced gum drop candies and gold coins with additional shoe in background

    Make Ahead Garlic Mashed Potatoes

    November 25, 2024 by Tracy @ Next Level Baker 2 Comments

    Make ahead garlic mashed potatoes are the perfect holiday side dish. The potatoes and garlic have more time for the flavor to develop and making them ahead of time gives you a less stressful option for your holiday gathering.

    Close up of half of bowl of garlic mashed potatoes

    Have you ever had those conversations around THIS YEAR we need to plan a less stressful holiday meal? Yes? Me too. Sometimes, I try and cut down on the menu and ask everyone to choose one favorite side dish. The problem with that method seems to be that everyone has a different favorite side dish! For Thanksgiving or turkey dinners, my favorite side dishes are mashed potatoes and dinner rolls. Weird, I know. But if I get to pick mashed potatoes, the question became how do I make those less stressful? The answer was that you just make them earlier. Then you keep them in a crockpot so that they can be warm when serving. It's a total win-win.

    But why garlic mashed potatoes? Garlic mashed potatoes, made with red potatoes with the skins on, are one of those foods that were truly transcendental for me. I can still remember the exact moment I tried them. We were living in Utah at them time, and we went to the Sundance Film Festival to have dinner and see some version of the Cinderella story. I don't remember much about that version of Cinderella, I have no idea what the restaurant was called, and I can't remember what main dish I ordered. But I do know that those garlic mashed red potatoes were the most heavenly mashed potatoes I had ever eaten. And they had the skins on too! Ever since, I've left the skins on every chance I get. I try to always use red potatoes too, and I often add roasted garlic to take them to the next level.

    [feast_advanced_jump_to]

    Ingredients

    Ingredients needed to make Garlic Mashed Potatoes
    • Red potatoes
    • Roasted garlic
    • Cream cheese
    • Sour cream
    • Salt

    See recipe card for quantities.

    Substitutions

    • Red potatoes - I love using red potatoes for mashed potatoes, but you could easily substitute your favorite potato.

    Equipment

    For mashing mashed potatoes, a stand mixer, or sturdy hand mixer, is the best equipment. You could use a hand masher, but a mixer is so much quicker and easier.

    Garlic Mashed Potatoes in slow cooker

    Storage

    Store leftover garlic mashed potatoes in an airtight contained in the refrigerator for 3-5 days.

    Next Level Tips

    • Use red potatoes. I think they make the very best mashed potatoes.
    • Leave the skins on. your potatoes! The skins are rich in nutrients and fiber. They are super soft after boiling, so it also saves a lot of time not having to peel the potatoes. And it's healthier, too.

    FAQ

    How do I roast garlic?

    There are several methods for roasting garlic. You can roast garlic in the oven, in the air fryer or on the grill. I usually roast garlic in the air fryer as I think it's the quickest and most cost effective method. To roast garlic in the air fryer, cut the tops off of the garlic heads. Place garlic heads on aluminum foil. Cover each garlic head in ½ tablespoon of olive oil, and then wrap the aluminum foil around garlic heads. Cook in the air fryer at 375℉ for 30-40 minutes. Check at 30 minutes. If the tops of the garlic heads are golden brown and the garlic is soft, they are done.

    Close up photo of garlic mashed potatoes on fork

    Pairing

    These are my favorite dishes to serve with [this recipe]:

    • Bowl of Gluten Free Sausage Stuffing
      Gluten Free Sausage Stuffing
    • Individual slice of pumpkin cheesecake with whipped topping in shape of a rosette
      Pumpkin Spice Cheesecake
    Close up photo of a bowl of garlic mashed potatoes

    Make Ahead Garlic Mashed Potatoes

    Tracy @ Next Level Baker
    Make ahead garlic mashed potatoes blend creamy richness with roasted garlic. Perfectly cooked and kept warm, they save time without sacrificing flavor.
    Print Recipe Pin Recipe
    Prep Time 20 minutes mins
    Cook Time 30 minutes mins
    Total Time 50 minutes mins
    Course Side Dish
    Cuisine American

    Equipment

    • 1 Stand mixer or sturdy hand mixer

    Ingredients
      

    • 5 pound red potatoes
    • 8 ounces cream cheese
    • 8 ounces sour cream
    • 2 heads garlic roasted
    • 2 teaspoon + 1 teaspoon salt

    Instructions
     

    Roast the Garlic

    • Cut the tops off of the garlic heads and set aside. Place the garlic heads on a piece of aluminum foil. Cover each garlic head in ½ tablespoon of olive oil.
    • Wrap the aluminum foil around the garlic heads.
    • Cook in the air fryer (or oven) at 375℉ for 30-40 minutes. Check at 30 minutes. If tops of the garlic heads are golden brown and the garlic is soft, remove them from the air fryer (or oven).

    Make the Potatoes

    • Bring a large pot of water to a boil over high heat.
    • Cut the red potatoes in half and leave the skins on.
    • Carefully add the red potatoes to the boiling water. Add the garlic tops that were set aside while making the roasted garlic and 1 teaspoon of salt. Reduce temperature to medium heat.
    • Boil for 30 minutes. After 30 minutes, check to see if the potatoes are fork tender. They are fork tender when a fork can easily pierce the potato center. The skins will start to peel on some of the potatoes. If the potatoes are fork tender, remove the pot from heat. If they are not done, boil for another 5 minutes and check again.
    • In the stand mixer bowl, add half of the potatoes, the roasted garlic, the cream cheese, the sour cream and the salt. Mix until combined and there is more room in the mixing bowl. Add the rest of the potatoes and mix until combined. Don't over mix. There should still be some lumps in the potatoes .
    • Taste. Add additional salt if desired.

    Keep the potatoes warm.

    • Add the finished potatoes to a crockpot on the low setting. Keep on low setting, stirring occasionally.
    • About 30 minutes before serving, turn the temperature to high. Stir after 15 minutes and before serving.
    • Serve plain or with other optional toppings like butter or gravy.

    Would you like to save this?

    We'll email this post to you, so you can come back to it later!

    Don't worry! We won't spam you!

    Keyword Make Ahead Garlic Mashed Potatoes
    Tried this recipe?Let us know how it was!
    Bowl of garlic mashed potatoes

    Gluten Free Sausage Stuffing

    November 25, 2024 by Tracy @ Next Level Baker 4 Comments

    Gluten Free Sausage Stuffing provides all the comfort flavors of stuffing without the gluten. The savory and deep flavors of sausage, dried fruit, sauteed veggies, herbs and broth come together beautifully to deliver an elevated stuffing experience without the gluten.

    Gluten Free Sausage Stuffing in bowl with spoon with serving bowl in background

    Stuffing is such a quintessential Thanksgiving side dish, but I didn't always love it. It wasn't until I was in my 20s when I discovered that stuffing didn't have to be a flavorless mushy mess that came from a box. I learned that stuffing could be flavorful, it could have texture and it could be a dish that stood on its own. Like turkey, homemade stuffing made with sausage, veggies, fruits and herbs could fill the house with mouth watering aromas and also taste just as good. I can't even remember the last time I put stuffing inside of a turkey, but I still make stuffing every Thanksgiving. In fact, it's my daughter's favorite Thanksgiving side dish. She doesn't eat gluten, so I've adjusted my stuffing recipe into this gluten free sausage stuffing recipe. And it's so good that no one else misses the gluten either.

    [feast_advanced_jump_to]

    Ingredients

    Raw ingredients to make Gluten Free Sausage Stuffing
    • Loaf gluten free bread
    • Ground sausage
    • Onion
    • Celery
    • Apple
    • Dried fruit such as cranberries or tart cherries
    • Sage
    • Thyme
    • Parsley
    • Turkey juice or broth of choice
    • Salted butter
    • Salt

    See recipe card for quantities.

    Substitutions

    • Turkey juice - if you don't have juice from the turkey available, substitute your favorite stock. Often, I use veggie stock as I always have that on hand, but you can also use chicken stock or any other flavor of stock.
    • Gluten Free Bread - if you're in a super time crunch, you can also use gluten free croutons. Use the largest size and the same 16 ounce weight, which is approximately 8 cups lightly packed.
    • Fresh Herbs - you can substitute dried herbs for the fresh herbs. For the sage, use 1 tablespoon of dried sage. For the rosemary, use 2 teaspoons of dried rosemary. For the thyme, use 1 and ½ teaspoons of dried thyme. For the parsley, use 3 tablespoons for cooking and 1 tablespoon as garnish.
    • Ground sausage - for the ground sausage, you can use any type of sausage. I like the Jimmy Dean's Sage flavor of pork sausage, but usually that's the first sold out flavor of sausage in the grocery store. You can also use fresh ground sausage, including turkey sausage if you want to stay with the turkey theme.
    Close up photo of gluten free sausage stuffing in serving bowl

    Storage

    Store any leftover sausage stuffing in an airtight container in the refrigerator for 3-4 days

    Next Level Tips

    • Thanksgiving day can be very busy. You can do all the chopping for this recipethe day before. In addition, you can cook the sausage and veggies the day before as well.
    • I definitely recommend using fresh herbs where possible, but dried herbs also work in this recipe.
    • Experiment with the dried fruit. Dried cranberries taste great, but dried tart cherries are so much more interesting.

    FAQ

    Does this recipe also work with regular gluten bread?

    Yes, absolutely. You can substitute the same 16 ounce weight of gluten bread or 8 cups lightly packed.

    Close up photo of gluten free sausage stuffing

    Pairing

    These are my favorite dishes to serve with [this recipe]:

    • Close up photo of a bowl of garlic mashed potatoes
      Make Ahead Garlic Mashed Potatoes
    • Individual slice of pumpkin cheesecake with whipped topping in shape of a rosette
      Pumpkin Spice Cheesecake
    Bowl of Gluten Free Sausage Stuffing

    Gluten Free Sausage Stuffing

    Tracy @ Next Level Baker
    Gluten Free Sausage Stuffing pairs gluten free bread with sausage, vegetables, herbs and spices for the perfect gluten free holiday side dish.
    5 from 2 votes
    Print Recipe Pin Recipe
    Prep Time 30 minutes mins
    Cook Time 50 minutes mins
    Course Side Dish
    Cuisine American
    Servings 12

    Ingredients
      

    • 16 ounce loaf of gluten free bread (stale) left out overnight
    • 1 pound ground sausage
    • 1 medium onion (approx. 1.5 cups) diced
    • 1 cup celery diced
    • ¼ cup fresh sage (loosely packed) finely chopped
    • 2 tablespoon fresh thyme (loosely packed) finely chopped
    • ¼ cup plus 2 tablespoon fresh parsley (separated) finely chopped
    • 1 cup dried fruit (cranberries or tart cherries) chopped
    • 1 medium apple diced
    • 1 teaspoon salt
    • 1 cup turkey juice (or any broth of choice)
    • 4 tablespoon salted butter melted

    Instructions
     

    • Leave bread out overnight uncovered on a plate to become hard.
    • Preheat oven to 350℉. Spray 9x13 pan with cooking spray.
    • Cut bread into small cubes and add to 9x13 pan.
    • Cook sausage and onions in a pan on the stove on medium-high heat until the sausage is browned and cooked through.
    • Add the celery, sage, thyme, rosemary and salt to the sausage and onions and cook for 3 minutes for celery to soften and spices to combine.
    • Add the sausage mixture on top of the bread crumbs in the 9x13 pan.
    • Add the apple, dried fruit and ¼ cup of parsley on top of sausage.
    • Mix stuffing mixture together so ingredients are evenly distributed in the 9x13 pan.
    • Take 1 cup of broth from leftover turkey juices (or any broth of choice) and slowly pour it over the stuffing mixture taking extra care to soak all exposed bread cubes.
    • Melt 4 tablespoons of butter in the microwave and pour over the stuffing mixture taking extra care to pour over all exposed bread cubes.
    • Cover the 9x13 pan with aluminum foil and bake covered for 30 minutes. After 30 minutes, remove the cover and bake for an additional 15-20 minutes until the exposed bread is golden and crispy. [Check after 15 minutes and bake an additional 5 minutes if needed.]
    • Sprinkle 2 tablespoons of fresh parsley over cooked stuffing and serve.

    Would you like to save this?

    We'll email this post to you, so you can come back to it later!

    Don't worry! We won't spam you!

    Keyword Gluten Free Sausage Stuffing
    Tried this recipe?Let us know how it was!
    Bowl of Gluten Free Sausage Stuffing

    No Bake Pumpkin Cheesecake with a Gluten Free Crust

    November 22, 2024 by Tracy @ Next Level Baker Leave a Comment

    No Bake Pumpkin Cheesecake combines the flavor of pumpkin and warm spices with the light mousse-like texture of a no bake cheesecake all on gluten free sweet cracker crust. It's a quick and easy way to add a delicious homemade pumpkin dessert to the holiday dessert table.

    Side view of full Glute Free No Bake Pumpkin Cheesecake

    Look, I love baked cheesecake. I've made hundreds and hundreds and hundreds of them. But, confession time: sometimes, I don't always have the time. And, sometimes, I just crave the lighter, mousse-like texture of a no bake cheesecake. Also, let's just say that life gets extra busy starting in October. So this no bake pumpkin cheesecake with a gluten free crust is a quick fix for your holiday pumpkin cravings. As a bonus, the crisp crust is gluten free. [If you want a regular crust on your no bake cheesecake, you can easily use the crust from my baked pumpkin spice cheesecake recipe.]

    [feast_advanced_jump_to]

    Ingredients

    Ingredients to make gluten free no bake cheesecake
    • Cream cheese
    • Powdered sugar
    • Heavy whipping cream
    • Pumpkin puree
    • Pumpkin pie spice
    • Vanilla
    • Salt
    • Gluten free sweet crackers
    • White sugar
    • Salted butter

    See recipe card for quantities.

    Substitutions

    • Powdered sugar - the powdered sugar in no bake cheesecake makes it extra fluffy and light. You can easily substitute white sugar for a less airy texture.
    • Gluten Free Crust - you can use other sweet crackers or cookies for the gluten free crust. Please read the section below titled Gluten Free Crusts and the Squeeze Method on how to make cracker substitutions.
    • Regular Crust - if you want a no bake cheesecake with a graham cracker crust, you can substitute the regular graham cracker crust from my Pumpkin Spice Cheesecake recipe.

    Gluten Free Crusts and the Squeeze Method

    For this no bake pumpkin cheesecake with a gluten free crust, I use one of my favorite gluten free sweet crackers: Simple Mills Honey Cinnamon Sweet Thins. They're made from a seed and nut flour blend. My Costco and my regular grocery store both currently carry it, but what if your store doesn't? How would you make a crust with a different sweet cracker? There are three main ingredients in a crust: the sweet crackers, a little white sugar for binding and melted butter. The amount of sweet cracker crumbs and the white sugar will stay the same. However, the amount of butter may change depending on the fat content and other ingredients in your sweet cracker of choice. Start with 4 tablespoons of melted butter to 1 ½ cups of gluten free sweet cracker crumbs and 2 tablespoons of white sugar.

    Once the sweet cracker crumbs, white sugar and butter are combined, grab a handful and squeeze tight. If it mostly stays together, you're good! If it doesn't stay together and crumbles, add extra butter (one tablespoon at a time) until the mixture stays together when squeezed. But, if you accidentally added too much butter and the squeezed mixture is greasy, then add more cracker crumbs. I promise, it is that easy. The Squeeze Method hasn't let me down yet.

    Side view of individual slice of Glute Free No Bake Pumpkin Cheesecake with full cheesecake in background

    Equipment

    To make the best cheesecake, a stand up mixer or hand held mixer is needed. Also, a springform pan is super helpful if you want to take the cheesecake easily out of the pan.

    Storage

    Store the no bake pumpkin cheesecake in an airtight container in the refrigerator for up to 5-7 days.

    Next Level Tips

    • Always use room temperature cream cheese!
    • You can skip par-baking the crust, but I don't recommend skipping it. Par-baking your crust only takes 6 minutes. It will keep your crust together and maintain the crispiness of the sweet crackers. It will also help you easily remove the bottom of the springform pan.
    • For best results, allow the cheesecake to set overnight.
    Top view of Gluten Free No Bake Pumpkin Cheesecake with plate and one slice of cheesecake in the background

    FAQ

    Do I really need to use room temperature cream cheese?

    Yes! However, you can carefully speed up this process if you forgot to set out the cream cheese. Most microwaves now have a soften option. You can carefully soften the cream cheese in the microwave to room temperature but not melted.

    How do I remove the bottom of a springform pan?

    One of the reasons that we par-bake the crust is so that we can easily remove the bottom of the springform pan without the curst crumbling. After the rim of the springform pan is off, take a cake lifter (or metal pizza peel or a very large spatula) and gently slide it in between cheesecake crust and the bottom of springform pan. Don't lift the cheesecake up in the air (especially if the whole crust is not supported). Rather, use the cake lifter to slide the cheesecake off of the springform bottom onto the serving plate. You can buy a cheap cake lifter on Amazon or at a Hobby Lobby type store in the baking section. If you're using a large metal spatula, run it under the entire outer edge first before using it to slide the cheesecake.

    I don't have to whip and fold in the heavy whipping cream?

    No! It's not truly necessary to fold in whipped cream for no bake cheesecakes especially if you start with room temperature cream cheese. Room temperature cream cheese is naturally thinner and easier to mix. So we start by mixing in all the other ingredients slowly. The filling is thin enough that we can add the heavy whipping cream in to the mixer last and slowly turn up the mixer until it's at medium-high to high. We beat it on high all together until medium peaks form. For no bake cheesecakes, this works even better than folding in whipped cream as there is no chance that it will deflate. And, as a bonus, it's a lot easier and quicker! My favorite kind of bonuses!

    Related

    Looking for other recipes like this? Try these:

    • 5 spices needed to make pumpkin pie spice separated on a plate: cinnamon, cloves, ginger, nutmeg and allspice
      How to Make Pumpkin Pie Spice
    • Individual slice of pumpkin cheesecake with whipped topping in shape of a rosette
      Pumpkin Spice Cheesecake
    Top view of Gluten Free No Bake Pumpkin Cheesecake

    No Bake Pumpkin Cheesecake with a Gluten Free Crust

    Tracy @ Next Level Baker
    No bake pumpkin cheesecake is the perfect quick and light cheesecake. It combines the creaminess of cream cheese with the warmth of pumpkin and the spice of pumpkin pie spice. All on a gluten free crust.
    Print Recipe Pin Recipe
    Prep Time 20 minutes mins
    Cook Time 6 minutes mins
    Setting Time 1 day d
    Course Dessert
    Cuisine American
    Servings 12

    Ingredients
      

    Crust

    • 1 ½ cups gluten free sweet cracker (like Simple Mills Honey Cinnamon Sweet Thins) crumbs
    • 4 tablespoon salted butter
    • 2 tablespoon white sugar

    Cheesecake Filling

    • 24 ounces cream cheese (3 blocks) room temperature
    • ¾ cup powdered sugar* see notes
    • ¾ cup pumpkin puree
    • 1¼ teaspoon pumpkin pie spice** see notes
    • 1 teaspoon vanilla
    • ¼ teaspoon salt
    • ½ cup heavy whipping cream

    Instructions
     

    Make the crust

    • Preheat the oven to 325℉. Spray an 8 inch springform pan with cooking spray.
    • Use a food processor to grind the sweet crackers into mostly fine and small crumbs.
    • Mix the sweet cracker crumbs, melted butter and 2 tablespoons of white sugar together with a wooden spoon until well combined.
    • Add the sweet cracker mixture to the springform pan. Pat down flat with hands or a flat bottom measuring cup. It should be packed firmly but not too hard.
    • Bake for 6 minutes and set aside to cool.

    Make the Filling

    • Place the room temperature cream cheese into the mixing bowl and mix on low speed until creamy and all lumps are gone. Scrape down the sides of the mixing bowl.
    • Add the powdered (or white) sugar to the cream cheese in the mixing bowl and mix on low speed until well combined. Scrape down the sides of the mixing bowl.
    • Next, add the pumpkin puree, pumpkin pie spice, vanilla and salt to the mixing bowl and mix on low speed until well combined. Scrape down the sides of the mixing bowl.
    • Add the heavy whipping cream to the mixing bowl. Increase the mixing speed until you get to medium high to high. Mix on high until light and airy and medium peaks start to form. Approximately 3-5 minutes. Watch closely once filling starts to fluff up.
    • Pour the filling on top of the crust in springform pan. Refrigerate for at least 6 hours but preferably overnight.

    Top the cheesecake

    • After 6 hours, or preferably the next day, run a knife around the edges of the springform pan. Remove the rim. Also, remove the cheesecake from the bottom of the springform pan (see FAQ if needed) if so desired.
    • Top with favorite topping if so desired or leave it plain. No-bake cheesecakes are already light and airy, so I usually skip the whipped topping. Often, I will break up more sweet crackers and sprinkle them on the top for a bit of decoration and extra flavor like shown in the photos.

    Notes

    *For a less airy texture, use ¾ cup regular white sugar. 
    **If you don't have store bought or homemade pumpkin pie spice ready, you can use the following substitution for the 1 ¼ teaspoon of pumpkin pie spice needed for this recipe:
    • ½ teaspoon cinnamon
    • ¼ teaspoon ground ginger
    • ¼ teaspoon ground cloves
    • â…› teaspoon nutmeg
    • â…› teaspoon allspice

    Would you like to save this?

    We'll email this post to you, so you can come back to it later!

    Don't worry! We won't spam you!

    Keyword No Bake Pumpkin Cheesecake Gluten Free Crust
    Tried this recipe?Let us know how it was!
    Top view of Gluten Free No Bake Pumpkin Cheesecake

    Pumpkin Spice Cheesecake

    November 20, 2024 by Tracy @ Next Level Baker Leave a Comment

    Pumpkin spice cheesecake combines the flavors of pumpkin and warm spices with the texture of cheesecake on a graham cracker crust. Its rich flavor and creamy texture is the perfect dessert for fall or anytime you have a pumpkin craving.

    Side angle of pumpkin spice cheesecake on cake stand

    I love, love, love cheesecake. If I had to pick only one kind of dessert to eat for the rest of my life, it would be cheesecake. I love the creaminess and bit of tang from the cream cheese, a hint of sweetness, and a crisp crust. Pumpkin cheesecake made with pumpkin pie spice is one of my very favorite cheesecakes too. It's the perfect alternative to pumpkin pie and a great addition to the dessert table for the family Thanksgiving. I also make it for no special reason. Every bite reminds me of cozy fall evenings!

    [feast_advanced_jump_to]

    Ingredients

    Ingredients to make Pumpkin Spice Cheesecake
    • Cream cheese
    • Eggs
    • White sugar
    • Pumpkin puree
    • Pumpkin pie spice
    • Vanilla
    • Salt
    • Graham crackers
    • Salted butter

    See recipe card for quantities.

    Slice of pumpkin spice cheesecake with rest of cheesecake in background

    How to bake a cheesecake without cracks

    Okay, let's get to one of the biggest issues with cheesecakes: unsightly cracks. Cracks don't make the cheesecake taste any differently and, of course, they could be covered up. But, there are two main things to know to avoid cracks: baking temperature and water baths.

    Bake at a lower temperature

    For temperature, cheesecakes turn out best when baked at a lower temperature. For that reason, I bake almost all of my cheesecakes, including this one, at 325 degrees.

    Use the moat method for a water bath

    The most basic way to do a water bath is to wrap the springform pan with aluminum foil and place it in a roasting pan with water and then hope it doesn't leak. But, have you ever wrapped it super carefully with the extra wide aluminum foil only to discover that it still leaked? Yes, me too. That's when I discovered that, sometimes, it is just condensation that collects in the aluminum foil even if it's wrapped really well. A step up from the aluminum foil wrap is the moat method. It's my very favorite method and one that I've been using for over 10 years to make hundreds of cheesecakes. Amazon used to sell a moat cheesecake pan, but it is no longer available so I will spare you the link. However, I'll explain how to recreate the moat method. For the moat method, place your 8 or 9 inch springform pan inside a 10 inch cake pan. Then place the 10 inch cake pan into a larger roasting pan with water. With this moat method, there is no possible way that water gets in to your springform pan. I've never had a cheesecake crack when I've combined a lower baking temperature with the moat method.

    Baked cheesecake still in springform pan in water bath

    Equipment

    To make the best cheesecake, a stand up mixer or hand held mixer is needed. Also, a springform pan is essential. To use the moat method, you will also want to use a cake pan that is larger than your springform pan, and a roasting pan that will fit the cake pan.

    Substitutions

    Gluten Free: If you need a gluten free crust, you can use the crust from my No Bake Pumpkin Cheesecake with a Gluten Free Crust recipe.

    Storage

    Store the cheesecake in an airtight container in the refrigerator for up to 5-7 days.

    Next Level Tips

    • Always, always, always use room temperature cream cheese and room temperature eggs for cheesecakes.
    • The very best way to avoid cracks is to bake at a lower temperature and use the moat method, as described above and in the FAQs. This is where you place your springform pan inside of a cake pan and then put the cake pan in a roasting pan with water. This avoids leaky aluminum foil and direct heat on the springform pan.
    • Allow the cheesecake to cool in the oven without touching it for two hours. Then move it to a cooling rack and allow it to come to room temperature before placing it in the refrigerator.
    • Cheesecake needs time to set in the refrigerator after baking. The texture and taste is the very best when you actually make it two days ahead of time. Yes, two days! If you are making this pumpkin spice cheesecake for Thanksgiving, I would recommend making it on Tuesday. This is actually a bonus, as it cuts down on the to-do list of everything that needs to be done the day before or the day of Thanksgiving too!
    Finished cheesecake cooling on wire cooling rack

    FAQ

    Do I really need to use room temperature cream cheese and eggs?

    Yes! However, you can carefully speed up this process if you forgot to set out the cream cheese and eggs. Most microwaves now have a soften option. You can carefully soften the cream cheese in the microwave to room temperature but not melted. For the eggs, you can place them from the refrigerator into a bowl of warm (not hot) water to quicken up the process for the eggs. However, I do recommend letting the cream cheese and eggs come to room temperature naturally on the counter. Unless you're in a pinch, of course. We've all been there!

    How do I remove the bottom of a springform pan?

    The reason we pack the graham cracker crust tightly, but not too tightly, into the springform pan is so that we can easily remove the bottom of the springform pan without the curst crumbling. After the rim of the springform pan is off, take a cake lifter (or metal pizza peel or a very large spatula) and gently slide it in between cheesecake crust and bottom of springform pan. Don't lift the cheesecake up in the air (especially if the whole crust is not supported). Rather, use the cake lifter to slide the cheesecake off of the springform bottom onto the serving plate. You can buy a cheap cake lifter on Amazon or like at a Hobby Lobby type store in the baking section. If you're using a large metal spatula, run it under the entire outer edge first before using it to slide the cheesecake. [See photo below.]

    What is the moat method?

    The moat method creates a barrier between the springform pan and the direct heat of the oven. Kind of like in the olden days when castles used moats to protect the castles from invaders! So, in the moat method, we place the springform pan into a larger cake pan before putting the cake pan into a larger roasting pan with the water bath. There ends up to be a moat (of air) that separates the springform pan from the cake pan and the water bath. I highly recommend doing it this way as it works every time. I've seen silicon springform covers on Amazon, but I have not tried them as they get mixed reviews.

    Partial view of cheesecake with cake lifter slid between cheesecake and bottom of springform pan

    Pairing

    Looking for other recipes to pair with this? Try these:

    • 5 spices needed to make pumpkin pie spice separated on a plate: cinnamon, cloves, ginger, nutmeg and allspice
      How to Make Pumpkin Pie Spice
    Individual slice of pumpkin cheesecake with whipped topping in shape of a rosette

    Pumpkin Spice Cheesecake

    Tracy @ Next Level Baker
    Pumpkin Spice Cheesecake combines the flavor of pumpkin and warm spice with the creaminess of cheesecake and a graham cracker crust for the perfect dessert.
    Print Recipe Pin Recipe
    Prep Time 30 minutes mins
    Cook Time 1 hour hr 6 minutes mins
    Cooling Time 1 day d
    Total Time 1 day d 1 hour hr 38 minutes mins
    Course Dessert
    Cuisine American
    Servings 14

    Equipment

    • 1 Stand up mixer or hand held mixer
    • 1 8 or 9 inch springform pan

    Ingredients
      

    Graham Cracker Crust

    • 2 cups graham crackers crumbs approx. 14 full crackers
    • 2 tablespoon white sugar
    • 8 tablespoon salted butter (one stick) melted

    Cheesecake Filling

    • 32 ounces cream cheese room temperature
    • 1 cup white sugar
    • 4 eggs room temperature
    • 1 cup canned pumpkin puree
    • 1 tablespoon pumpkin pie spice*
    • 1 teaspoon vanilla
    • ¼ teaspoon salt

    Whipped Cream Topping (optional)

    • 2 cups heavy whipping cream
    • ½ cup powdered sugar

    Instructions
     

    Make the Crust

    • Preheat oven to 325°. Spray 8 or 9 inch springform pan with cooking spray and set aside.
    • Use a food processor to grind the graham crackers into mostly fine crumbs. (It doesn't have to be all super fine though.)
    • Mix the graham cracker crumbs, melted butter and 2 tablespoons of white sugar together until well combined.
    • Add the graham cracker mixture to the springform pan. Pat down flat with hands or a flat bottom glass or measuring cup with medium pressure. It should be packed firmly but not too hard.
    • Bake for 8 minutes and set aside to cool.

    Make the Filling

    • Place the room temperature cream cheese into the mixing bowl and mix on low speed until creamy and all lumps are gone. Scrape down the sides of the mixing bowl.
    • Add the white sugar to the cream cheese in the mixing bowl and mix on low speed until well combined. Scrape down the sides of the mixing bowl.
    • Next, add the pumpkin puree, pumpkin pie spice, vanilla and salt to the mixing bowl and mix on low speed until well combined. Scrape down the sides of the mixing bowl.
    • Add the eggs to the mixing bowl one at a time. Mix on low speed until each egg is combined before adding the next egg. Between eggs, scrape down the sides of the mixing bowl.

    Bake and Cool the Cheesecake

    • Add the filling to the springform pan. Place the springform pan in a larger cake pan (or cover sides of springform pan with aluminum foil). Fill roasting pan with one inch of water. Carefully add the cake pan with springform pan into roasting pan. Or, alternatively, add the springform pan wrapped in aluminum foil into roasting pan. [See FAQ or post description on why the moat method is preferred.]
    • Bake at 325° for about 60 minutes until center is mostly set. Then, turn off the oven and open the oven door to start cooling. Leave alone for two hours. After two hours, remove the cake pan (or wrapped springform pan) from the oven and the water bath and let cool on cooling rack until room temperature.
    • Before placing in the refrigerator, run a knife around the edges to loosen the cheesecake from the sides. Cover and refrigerate a minimum of 6 hours but preferably overnight or longer.
    • After 6 hours, or preferably the next day, remove the rim. Also, remove the cheesecake from the bottom of the springform pan (see FAQ if needed) if so desired and top with favorite topping like whipped cream topping.

    Whipped Cream Topping (optional)

    • Put the metal mixing bowl in the refrigerator or freezer until cold.
    • Add the heavy whipping cream and powdered sugar to the mixing bowl and mix on medium-high to high speeds until stiff peaks form. The time this takes depends on how cold the bowl and cream are as well as the speed of the mixing. Plan on 5-8 minutes but watch it carefully once it starts to fluff. You can stop the mixer at any time and check for stiff peaks. If the consistency is not at stiff peaks then continue mixing and checking.
    • Spoon or pipe on the whipped cream topping to entire cheesecake or individual pieces as desired.

    Notes

    *If you don't have homemade or store-bought pumpkin pie spice, you can substitute the following amounts for one tablespoon of pumpkin pie spice:
    • 1 and ¼ teaspoon cinnamon
    • ½ teaspoon ground ginger
    • ½ teaspoon ground cloves
    • ¼ teaspoon ground nutmeg
    • ¼ teaspoon ground allspice
     

    Would you like to save this?

    We'll email this post to you, so you can come back to it later!

    Don't worry! We won't spam you!

    Keyword Pumpkin Cheesecake, Pumpkin Spice Cheesecake
    Tried this recipe?Let us know how it was!
    Three difference plates with individual slices of cheesecake

    How to Make Pumpkin Pie Spice

    November 20, 2024 by Tracy @ Next Level Baker Leave a Comment

    Homemade pumpkin pie spice blends cinnamon, ginger, cloves, nutmeg and allspice together for the perfect balance of sweet, spicy and earthy. It's the perfect blend to take pumpkin pie to the next level, but you can use it for so much more! Pumpkin pie spice elevates lattes, cookies, cheesecakes, breads and even savory dishes.

    Jar of opened Pumpkin Pie Spice tipped on its side with loose spices in front

    I absolutely love pumpkin pie spice. Even just the smell of it makes me think of fall, pie and Thanksgiving. But, confession time: while I love to eat pumpkin pie, I don't actually like to make pumpkin pie. It's messy and the crust is never crisp enough. My very favorite way to use homemade pumpkin pie spice in a dessert is my pumpkin cheesecake. You get the taste of pumpkin pie but with the creaminess of a cheesecake and a crisp crust. But the uses for pumpkin pie spice blend are truly limitless. It is one of my favorite spice blends.

    You can buy pumpkin pie spice at the store, but it's also very easy to make. Most likely you already have the needed spices anyway. As a bonus, then you know exactly what's in it. Companies are famous for adding anti-caking agents and other gross things to spice mixes sold in the store.

    [feast_advanced_jump_to]

    Ingredients

    5 spices needed to make pumpkin pie spice separated on a plate: cinnamon, cloves, ginger, nutmeg and allspice
    • Cinnamon
    • Ground ginger
    • Ground cloves
    • Ground nutmeg
    • Ground allspice

    See recipe card for quantities.

    Storage

    Store the spices in a jar away from heat and moisture.

    Next Level Tips

    • Use organic spices whenever you can!
    • Cinnamon is such an underrated spice. Use a single source, organic cinnamon. It truly makes a difference and tastes amazing! If you want to read more about cinnamon, I go more in depth about different types of cinnamon in my overnight cinnamon roll recipe.

    These are my favorite dishes to use pumpkin pie spice in:

    • Individual slice of pumpkin cheesecake with whipped topping in shape of a rosette
      Pumpkin Spice Cheesecake
    • Top view of Gluten Free No Bake Pumpkin Cheesecake
      No Bake Pumpkin Cheesecake with a Gluten Free Crust
    • Overhead view of slices of gluten free pumpkin bar cake with cream cheese frosting. The middle slice is turned on its side so that you can see the density and crumb of the cake.
      Gluten Free Pumpkin Cake
    5 spices needed to make pumpkin pie spice separated on a plate: cinnamon, cloves, ginger, nutmeg and allspice

    How to Make Pumpkin Pie Spice

    Tracy @ Next Level Baker
    Pumpkin pie spice blend is a warm, earthy blend of spices that is perfect for elevating pumpkin pie, cheesecake, lattes, breads and cookies.
    Print Recipe Pin Recipe
    Prep Time 5 minutes mins
    Total Time 5 minutes mins
    Course Side Dish
    Cuisine American

    Ingredients
      

    • 3 tablespoon cinnamon
    • 1½ teaspoon ground ginger
    • 1½ teaspoon ground cloves
    • 1 teaspoon nutmeg
    • 1 teaspoon allspice

    Instructions
     

    • Add all spices to a jar and shake well to combine. One serving is perfect for a 4 ounces spice jar, with room left to shake.

    Would you like to save this?

    We'll email this post to you, so you can come back to it later!

    Don't worry! We won't spam you!
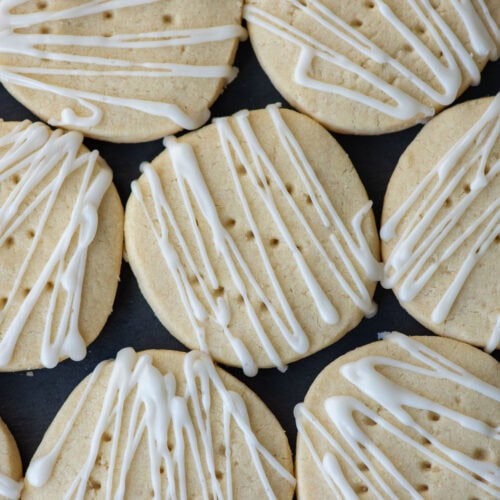
    Keyword Pumpkin Pie Spice
    Tried this recipe?Let us know how it was!
    Jar of Pumpkin Pie Spice tipped on its side with loose spices in front

    White Truffle Garlic Bread with Whipped Ricotta

    November 13, 2024 by Tracy @ Next Level Baker Leave a Comment

    White Truffle Garlic Bread with Whipped Ricotta is a quick appetizer when you want to treat yourself or your guests. Whipped Ricotta with truffle oil is a silky, creamy spread with the rich, distinct flavor of truffles. It adds the perfect umami flavor to garlic bread, and it's super simple to make.

    Whipped Ricotta Truffle Oil with Garlic Bread

    Confession time: I love bread. Like I really, really love bread. It's my comfort food. It's one of my top 5 favorite foods. You know, the kind of food you could eat everyday if you were deserted on a desert island? There aren't many things that can make bread better. But garlic butter with truffle oil and creamy whipped Ricotta cheese? It's the perfect savory, heavenly combination. And the Grana Padano takes this White Truffle Garlic Bread with Whipped Ricotta to a whole next level!

    This is an easy yet impressive appetizer for a party. Or it's quick enough to use as a side dish for a family dinner too. So many options!

    [feast_advanced_jump_to]

    Ingredients

    Ingredients needed to make whipped ricotta with truffle oil and garlic bread
    • Ricotta cheese
    • Grana Padano cheese
    • White truffle oil
    • Galic cloves
    • Salted butter
    • Salt
    • Parsley
    • Bread for serving

    See recipe card for quantities.

    Substitutions

    • Truffle Oil - you can also use black truffle oil or another flavored truffle oil if you already have one on hand.
    • Grana Padano Cheese - you can substitute Parmigiano Reggiano (or Parmesan cheese). However, Grana Padano is usually cheaper than real Parmigiano Reggiano cheese. Grana Padano and Parmigiano Reggiano are made differently and come from different parts of Italy, but they do have a similar flavor profile. Grana Padano is a bit more mild, but I use the two cheeses interchangeably.
    White truffle whipped ricotta dip with garlic bread and grater in background

    Storage

    Store the whipped ricotta and any leftover garlic bread in the refrigerator, separately, in an airtight container for 2-3 days.

    Next Level Tips

    • This recipe adds truffle oil at multiple different stages for layers of flavor! Don't skip any of the stages.
    • If you are already using the grill for other food, grill this garlic bread after the other food is done. The grill adds that distinct smoky flavor that elevates your garlic bread to an even higher level. Plus, then the oven won't heat up the house in the summer. Check out my recipe for grilled garlic bread for tips, times and temperatures.
    Whipped Ricotta Truffle Oil with Garlic Bread

    FAQ

    Can I use a different type of truffle oil?

    Yes! You can easily substitute black truffle oil. Black truffle oil is often less expensive as well. There are also other different flavors of truffle oil that you can experiment with as well. Costco often sells a multi-flavored assortment of truffle oils.

    What is in truffle oil?

    Truffle oil is typically an olive oil base, but some brands use neutral oils. The oil is then often infused with truffles, truffle oil concentrate or extract and/or truffle favoring. Always check the ingredient list!

    Why Salted Butter?

    Please see my article on Salted vs. Unsalted Butter.

    Pairing

    These are my favorite dishes to serve with white truffle garlic bread and whipped ricotta:

    • Close up of portobello mushroom parmesan on pasta on a plate
      Portobello Mushroom Parmesan
    Whipped Ricotta Truffle Oil Dip

    White Truffle Garlic Bread with Whipped Ricotta

    Tracy @ Next Level Baker
    White truffle garlic bread with whipped ricotta is a savory, creamy delight that combines earthy truffle oil, garlicky bread and airy Ricotta for an out of this world taste.
    Print Recipe Pin Recipe
    Prep Time 10 minutes mins
    Cook Time 5 minutes mins
    Course Appetizer
    Cuisine American
    Servings 8

    Equipment

    • 1 Food processor

    Ingredients
      

    Whipped Ricotta

    • 1 cup Ricotta cheese
    • 2 tablespoon Grana Padano cheese
    • 1 teaspoon plus ½ teaspoon white truffle oil separated
    • 1 tablespoon parsley finely chopped
    • ¼ teaspoon salt

    Garlic Bread

    • 1 baguette
    • 2 tablespoon melted salted butter
    • 2 garlic cloves finely minced
    • 1 teaspoon white truffle oil
    • salt for finishing
    • 1 tablespoon Grana Padano for finishing

    Instructions
     

    Whipped Ricotta

    • Add Ricotta cheese, 2 tablespoons of Grana Padano cheese, 1 teaspoon of white truffle oil, and ¼ teaspoon of salt to food processor and whip until creamy. It will take approximately 30-60 seconds. It comes together very quickly.
    • Put whipped Ricotta in small dipping bowl and drizzle ½ teaspoon white truffle oil on top. Top with chopped parsley as garnish.

    Garlic Bread

    • Preheat oven to broil. Or turn grill to medium high heat.
    • Cut baguette (or bread of choice) into 8 pieces and set aside.
    • Melt 2 tablespoons of butter in the microwave for 15-30 seconds. Add minced garlic and 1 teaspoon of white truffle oil to melted butter.
    • With a pastry brush or a small spatula, spread melted garlic butter on to each piece of bread.
    • Place bread on baking sheet with buttered side up and broil until edges are browned to taste (approximately 2 minutes). [Grilling takes a similar amount of time. To grill, place bread on grill with the buttered side up and turn after 1 minute so that buttered side is down. Check for browning after an additional minute and remove when grill marks appear on bread.]
    • Place garlic bread on serving plate and sprinkle 1 tablespoon of Grana Padano over the garlic bread. Finish with a light dusting of salt from a salt shaker.
    • Serve with whipped Ricotta on the side and enjoy!

    Would you like to save this?

    We'll email this post to you, so you can come back to it later!

    Don't worry! We won't spam you!
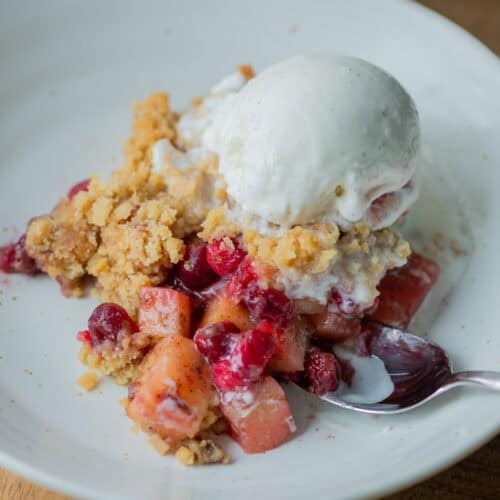
    Keyword White Truffle Garlic Bread with Whipped Ricotta
    Tried this recipe?Let us know how it was!
    Whipped Ricotta Truffle Pie with Garlic Bread

    White Chocolate Macadamia Nut Bars

    November 6, 2024 by Tracy @ Next Level Baker Leave a Comment

    There is just something magical about the combination of white chocolate and macadamia nuts! And putting them in a blondie bar = perfection! These white chocolate macadamia nut bars are an easy crowd pleaser.

    Chopped White Chocolate Macadamia Nut Bars

    I love blondie bars so much. They're such a versatile dessert bar and always delicious. One of my favorite mix-in combinations for blondie bars is white chocolate and macadamia nuts. They're a classic combination and one of my husband's favorite, and the combination fits perfectly with the chewy structure of a blondie bar. So whenever I want to combine white chocolate and macadamia nuts, I always make these bars.

    Jump to Recipe [feast_advanced_jump_to]

    Ingredient Info

    Gather all the ingredients and chop the chocolate and macadamia nuts into equal size pieces.

    Variations

    There are so many great ways to add different mix-ins to these blondie bars. You can really do any combination of mix-ins, but limit the total amount of mix ins to 1 and ½ cups. Here are a few other options:

    • Dark chocolate and macadamia nuts, hazelnuts or another favorite nut
    • White chocolate and cashews, pistachios or another favorite nut
    • Any chocolate with dried fruit such as dried cherries, cranberries or apricots
    • Macadamia nuts with dried figs
    • Pistachios or cashews with dried apricots

    Equipment

    No special equipment is needed for these bars. You can use a regular mixer, stand up mixer or even just a spatula.

    Storage

    Store in air tight container at room temperature for up for 4 days or in the refrigerator for up to 7 days.

    Chopped White Chocolate Macadamia Nut Bars

    Next level tips

    • I love taking blondie bars to the lake or a potluck. They are not messy and you can cut them into as little of pieces as you want.
    • You can substitute about ¾ cups of white chocolate chips for the white chocolate bar, but I highly recommend the white chocolate bar. The bars are usually less expensive than a bag of white chocolate chips, and they're usually a higher level of quality.
    • If you don't already have one, buy a kitchen scale and weigh the flour. It's actually easier than measuring and flours do have different weights. Usually, a serving of flour is ¼ cup. This recipe calls for 1 and ¼ cups of flour. So take a serving of the flour that you use and multiple by 5. I use Costco's organic all-purpose flour any time that I use all-purpose flour.

    FAQ

    Why Salted Butter?

    Please see my post on Salted vs. Unsalted Butter.

    Close up of one Chopped White Chocolate Macadamia Nut Bars with bite

    Related

    Looking for other recipes like this? Try these:

    • Cut peanut butter fudge squares topped with salt flakes on parchment paper
      Peanut Butter Fudge with Condensed Milk
    Three stacked Chopped White Chocolate Macadamia Nut Bars

    White Chocolate Macadamia Nut Bars

    Tracy @ Next Level Baker
    White Chocolate Macadamia Nut Bars are a chewy, buttery blondie bar that combines the crunch of macadamia nuts and the creaminess of white chocolate.
    Print Recipe Pin Recipe
    Prep Time 15 minutes mins
    Cook Time 30 minutes mins
    Total Time 45 minutes mins
    Course Dessert
    Cuisine American
    Servings 9

    Ingredients
      

    • ½ cup salted butter softened
    • ¾ cup brown sugar
    • ¼ cup white sugar
    • 1 egg room temperature
    • 1 teaspoon vanilla
    • 1¼ cups all purpose flour (150 g)
    • ½ teaspoon baking powder
    • ½ teaspoon salt (omit if nuts are salted)
    • 4 ounce white chocolate bar roughly chopped
    • ¾ cup macadamia nuts roughly chopped

    Instructions
     

    • Take out the butter and egg to bring them to room temperature.
    • Preheat the oven to 325°. Line an 8x8 pan with parchment paper or spray with cooking spray.
    • Add flour, baking powder and salt to a small bowl and set it aside
    • Chop white chocolate and macadamia nuts and set aside.
    • Combine butter, white sugar and brown sugar in mixer and cream until thoroughly combined.
    • Add the egg and vanilla to the sugar mixture and mix until combined.
    • Add the dry ingredients and mix until combined.
    • Fold in the white chocolate and macadamia nuts.
    • Bake at 325° for 28-32 minutes Check at 28 minutes. I usually bake mine for 30 minutes.

    Would you like to save this?

    We'll email this post to you, so you can come back to it later!

    Don't worry! We won't spam you!
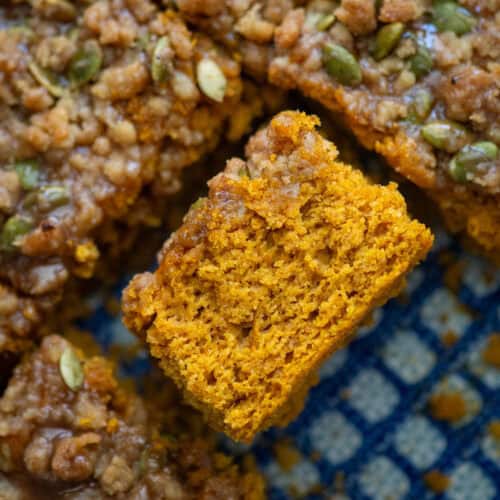
    Keyword White Chocolate Macadamia Nut Bars
    Tried this recipe?Let us know how it was!
    Four stacked Chopped White Chocolate Macadamia Nut Bars

    Overnight Cinnamon Rolls

    October 29, 2024 by Tracy @ Next Level Baker Leave a Comment

    Cinnamon rolls are fluffy bites of sweet, gooey cinnamony heaven. And overnight cinnamon rolls complete the second rise in the refrigerator, so they are super easy to bake up and frost in the morning.

    9 Cinnamon Rolls in Cast Iron Pan

    Seriously, overnight cinnamon rolls are the best because who wants to wake up at 3 am to start cinnamon rolls for breakfast? Not me! I love my family and friends, but I love my sleep too. And, often, I am making cinnamon rolls for a special occasion where there's a lot of other stuff that needs to get done, so I love, love, love special recipes that I can start the day before.

    With this recipe, we make the cinnamon roll dough the day before, roll out the dough, cut them, put them in the baking pan, cover it with aluminum foil or plastic wrap and put in the refrigerator. In the morning, just take them out of the refrigerator, let them come to room temperature, bake, frost and eat! The work is split into two days, so it's super easy and the slow rise in the refrigerator makes them extra delicious!

    [feast_advanced_jump_to]

    Dough and Filling Ingredients

    Ingredients for Cinnamon Roll dough
    • All purpose flour
    • White sugar
    • Brown sugar
    • Whole milk
    • Salted butter
    • Eggs
    • Cinnamon
    • Active dry yeast
    • Salt

    See recipe card for quantities.

    Frosting Ingredients

    Ingredients for cinnamon rolls frosting
    • Cream Cheese
    • Salted Butter
    • Powdered Sugar
    • Heavy Cream
    • Vanilla (optional)
    • Salt

    See recipe card for quantities.

    Close up of cinnamon rolls ready to be baked

    Types of Cinnamon

    I feel like that sometimes cinnamon is an underrated spice. One that people just kind of take for granted. But, fun fact: did you know there are a different types of cinnamon? Namely, there are three main different types:

    • Ceylon cinnamon (higher quality, bolder flavor)
    • Cassia cinnamon(typical grocery store cinnamon)
    • Saigon cinnamon (very intense)

    There are also some subtypes and differences based on where the cinnamon is grown. I was looking for organic cinnamon about 10 years ago and tried Ceylon cinnamon from Amazon after a bunch of research. I instantly feel in love and have never gone back. All cinnamon is good, but Ceylon cinnamon is just amazing. Soft, sweet and intense!

    I know, I know. You might be thinking that organic cinnamon is expensive. However, the thing to keep in mind is that organic cinnamon is typically sold in 16 ounce pouches, whereas a large family size hard plastic container of regular cinnamon is typically sold in 6-8 ounces sizes in the grocery store. So if you compare the per ounce price, it's actually not that different. You might have to initially buy more organic cinnamon, but then you get a higher quality of organic cinnamon often for the same per ounce price as regular grocery store cinnamon. If you compare the bulk organic cinnamon to small jars of grocery store cinnamon, the bulk organic is often cheaper per ounce. I go through a lot of cinnamon, and you just can't beat a great tasting cinnamon. If good cinnamon is a splurge purchase, then it's definitely worth the splurge!

    12 frosted cinnamon rolls in 9x11 pan

    Substitutions

    • Vegan- I have made vegan versions of these overnight cinnamon rolls, and it's pretty easy to make the substitutions. For the eggs, you can make flax eggs or use an egg replacer like Bob Mill's. [For three flax eggs, mix three tablespoon of flaxseed meal and nine tablespoons of water and let sit for 10 minutes]. For the butter, use your favorite plant based butter. My current favorite is Miyoko's Plant Milk Butter, but it's not always easy to find. Most grocery stores now carry some version of plant based butter like Earth Balance or Country Crock. For the milk, substitute your favorite plant based milk. I recommend oat milk for a neutral milk when baking. For the heavy cream, you can substitute plant based heavy cream (Trader Joe's is the best I've tried so far), or use a little less of a plant based milk. And, of course, use vegan sugar.

    Storage

    Store in an airtight container at room temperature for 1-2 days or in the refrigerator for 5-7 days. To warm up cinnamon rolls on day 2 or thereafter, just microwave them for 15-20 seconds. Not long, just enough to warm them up!

    One partially eaten cinnamon roll on plate with fork

    Next Level Tips

    • Everyone loves cinnamon rolls, but the kind of cinnamon you use can take your sweet rolls to a whole other level! Try a single source organic brand. I'm currently in love with Ceylon cinnamon from Indonesia. Think of cinnamon like coffee and chocolate. Where it's made and how it made matters!
    • Add these overnight cinnamon rolls to your next brunch menu because if you're planning a large brunch, anything you can do before the big day helps!
    • Weigh your flour. I definitely recommend buying a kitchen scale if you don't already have one. They are fairly cheap now on Amazon, and it will save you a lot of headaches. Different brands of flour have different weights, and not everyone measures flour the same. If you don't have a kitchen scale, the next best way to measure flour is the fluff and scoop method. Fluff the flour in its container and then lightly scoop the flour into the measuring cup with a spoon. Lightly level the measuring cup with a knife. I use Kirkland's organic all-purpose flour from Costco, and I always weigh flour even if I don't weigh any other of the ingredients.

    FAQ

    Why Salted Butter?

    Please see my post on Salted vs. Unsalted Butter.

    How do I cut the cinnamon roll log into individual rolls?

    There are three popular methods for cutting the log into cinnamon rolls: the serrated (or very sharp knife) method, the dental floss method and the pizza cutter method.

    The serrated knife or very sharp knife method. Use a serrated knife or a very sharp knife to cut the log into rolls.

    The dental floss method. Break off a long string of (non-flavored!) dental floss and slide the floss underneath the log roll where you want to make a cut. Make sure the log is in the center of the string of floss and bring the two sides of floss together to meet each other. Then put the floss pieces into the opposite hands, cross the floss over each other across the top of the roll and pull each side until it cuts through the log. Repeat for each roll.

    The pizza cutter method. Use a pizza cutter and make 9-12 individual cuts. Roll each strip up separately. This method can be messy, so you'll need to make an extra effort to roll the rolls tightly.

    These cinnamon rolls were inspired by and adapted from Vanilla Bean Blog's Pillowy Soft Cinnamon Rolls. I found that recipe when I read this bake off blog post by The Kitchn where it was the winner. It was the first cinnamon roll recipe that made me stop looking for a great cinnamon roll recipe, because I had finally found one.

    Close up of frosted cinnamon rolls in pan

    Related

    Looking for other recipes like this? Try these:

    • Chocolate sweet roll with espresso frosting on plate
      Chocolate Sweet Rolls with Espresso Frosting
    • Top view of lemon raspberry sweet roll on a plate
      Lemon Raspberry Sweet Rolls
    9 Cinnamon Rolls in Cast Iron Pan

    Overnight Cinnamon Rolls

    Tracy @ Next Level Baker
    Make mornings easier with overnight cinnamon rolls. These fluffy, gooey treats are perfect for brunch or any special occasion.
    Print Recipe Pin Recipe
    Prep Time 30 minutes mins
    Cook Time 30 minutes mins
    Rise and rest time 14 hours hrs
    Total Time 15 hours hrs
    Course Breakfast
    Cuisine American

    Equipment

    • 1 Stand up mixer or hand mixer

    Ingredients
      

    Dough

    • ¾ cup whole milk
    • 2 ¼ teaspoon active dry yeast
    • ¼ cup white sugar
    • 8 tablespoon salted butter room temperature
    • 3 eggs room temperature
    • 4 ½ cups all purpose flour (540 grams)
    • 1 teaspoon salt add extra ⅛ teaspoon if using unsalted butter

    Filling

    • 2 tablespoon butter very soft
    • ½ cup brown sugar
    • 2 tablespoon cinnamon

    Frosting

    • 4 ounces cream cheese room temperature
    • 2 tablespoon salted butter room temperature
    • 2 cups powdered sugar (8 ounces)
    • 1 tablespoon heavy cream
    • ¼ tsp salt
    • 1 teaspoon vanilla optional

    Instructions
     

    Dough

    • Take out the butter and eggs to bring them to room temperature.
    • Heat the milk in microwave until warm 105℉ - 110℉. [It's best to use a kitchen thermometer if you have one.] Add the warm milk, yeast and a little of the white sugar to the mixer bowl. Let sit for 5-10 minutes.
    • Add the flour and salt to a small bowl and set aside.
    • Add the rest of the sugar, the softened butter and the eggs to the mixing bowl. Mix on low speed until the eggs are incorporated. The butter will not incorporate at this stage, which is normal.
    • Add the flour and salt mixture to the mixing bowl in three to four different stages. Scrape down the sides of the mixing bowl after each addition and then mix on a low speed until the flour has been incorporated. Repeat until all flour has been added.
    • After the flour has been incorporated, switch to the dough hook and knead on low speed for 5 minutes.
    • Spray a large bowl (or reuse the mixing bowl) with cooking spray. The dough is sticky and that's normal. Let the dough rise in a covered bowl for a total of two hours. After one hour, knead the dough using the stretch and fold method. If you're familiar with this method, do it in the bowl. If this is your first time, take the dough out of the bowl and set on a floured surface. Take a hold of a large piece of dough at the 12 position, stretch it away from your body, and then fold it back toward the middle of the dough ball. Rotate the ball ⅛ to ¼ of a turn and repeat the stretch out and fold back motions. Keep repeating until you have gone around 2 times and the dough becomes less stretchy. You DO NOT have to do this, BUT it does make the rolls more fluffy and soft. Put the dough back in the bowl to rise for another hour. So, the total rise time is two hours with the optional stretch and fold after one hour.

    Filling

    • Spray the 9x13 pan (or large round pan) with cooking spray and set aside.
    • After the dough has risen for the two hours, put it on a floured surface and roll it out into a 12 x 18 inch rectangle. [If the dough is ever resistant, let it rest for 10 minutes. Don't overwork the dough trying to roll it out. It should roll out easily.]
    • Brush 2 tablespoons of very soft butter on to the dough with a pastry or silicone brush. You want to use very soft but not melted butter. Think of the butter as the glue that will hold the brown sugar and cinnamon to the dough. You can also use your fingers or a knife to spread the butter.
    • Mix the brown sugar and cinnamon together in a small bowl until the cinnamon is incorporated into the sugar.
    • Sprinkle the brown sugar and cinnamon mixture evenly over the dough and lightly press it in.
    • Starting with the long side, roll the dough into a tight log.
    • Cut the dough into 9-12 pieces. I use 9 pieces for a large round pan or 12 pieces for a 9x13 pan. Use your favorite cutting method. If you aren't sure how to cut the roll, see my FAQ section for different cutting methods.
    • Add the cut sweet rolls into your sprayed pan of choice, cover with aluminum foil or plastic wrap and put in the refrigerator overnight.

    The next day

    • Take the sweet rolls from the refrigerator and let them come to room temperature on the counter which takes approximately 30-60 minutes. Take the cream cheese and salted butter for the frosting out of the refrigerator to start softening now as well.
    • After 30 minutes, preheat the oven to 350℉. Once the oven is preheated, the rolls should be about room temperature. Bake them for 27-32 minutes. Check them at 27 minutes. They could take longer if they were colder to start with. They will be lightly golden brown on top.
    • When you remove the cinnamon rolls from the oven, start making the frosting.

    The frosting

    • Put the softened cream cheese and softened butter in to a mixing bowl and mix until thoroughly combined and fluffy.
    • Add the powdered sugar, heavy whipping cream, salt and vanilla and mix until light and fluffy. It takes less than two minutes. The vanilla is optional. It adds a nice touch of flavor but it also tints the frosting, so keep that in mind. The salt cuts some of the sweetness of the sugar.
    • When the cinnamon rolls are still hot, spread a very thin layer of frosting on every part of the outer layer of the cinnamon rolls. It will melt, and that's perfect. It softens the outer layer of the lightly browned rolls.
    • Once the sweet rolls have cooled for at least 20 minutes, spread the rest of the frosting on the rolls. If you are not serving them warm, wait until they have completely cooled to frost them.

    Would you like to save this?

    We'll email this post to you, so you can come back to it later!

    Don't worry! We won't spam you!
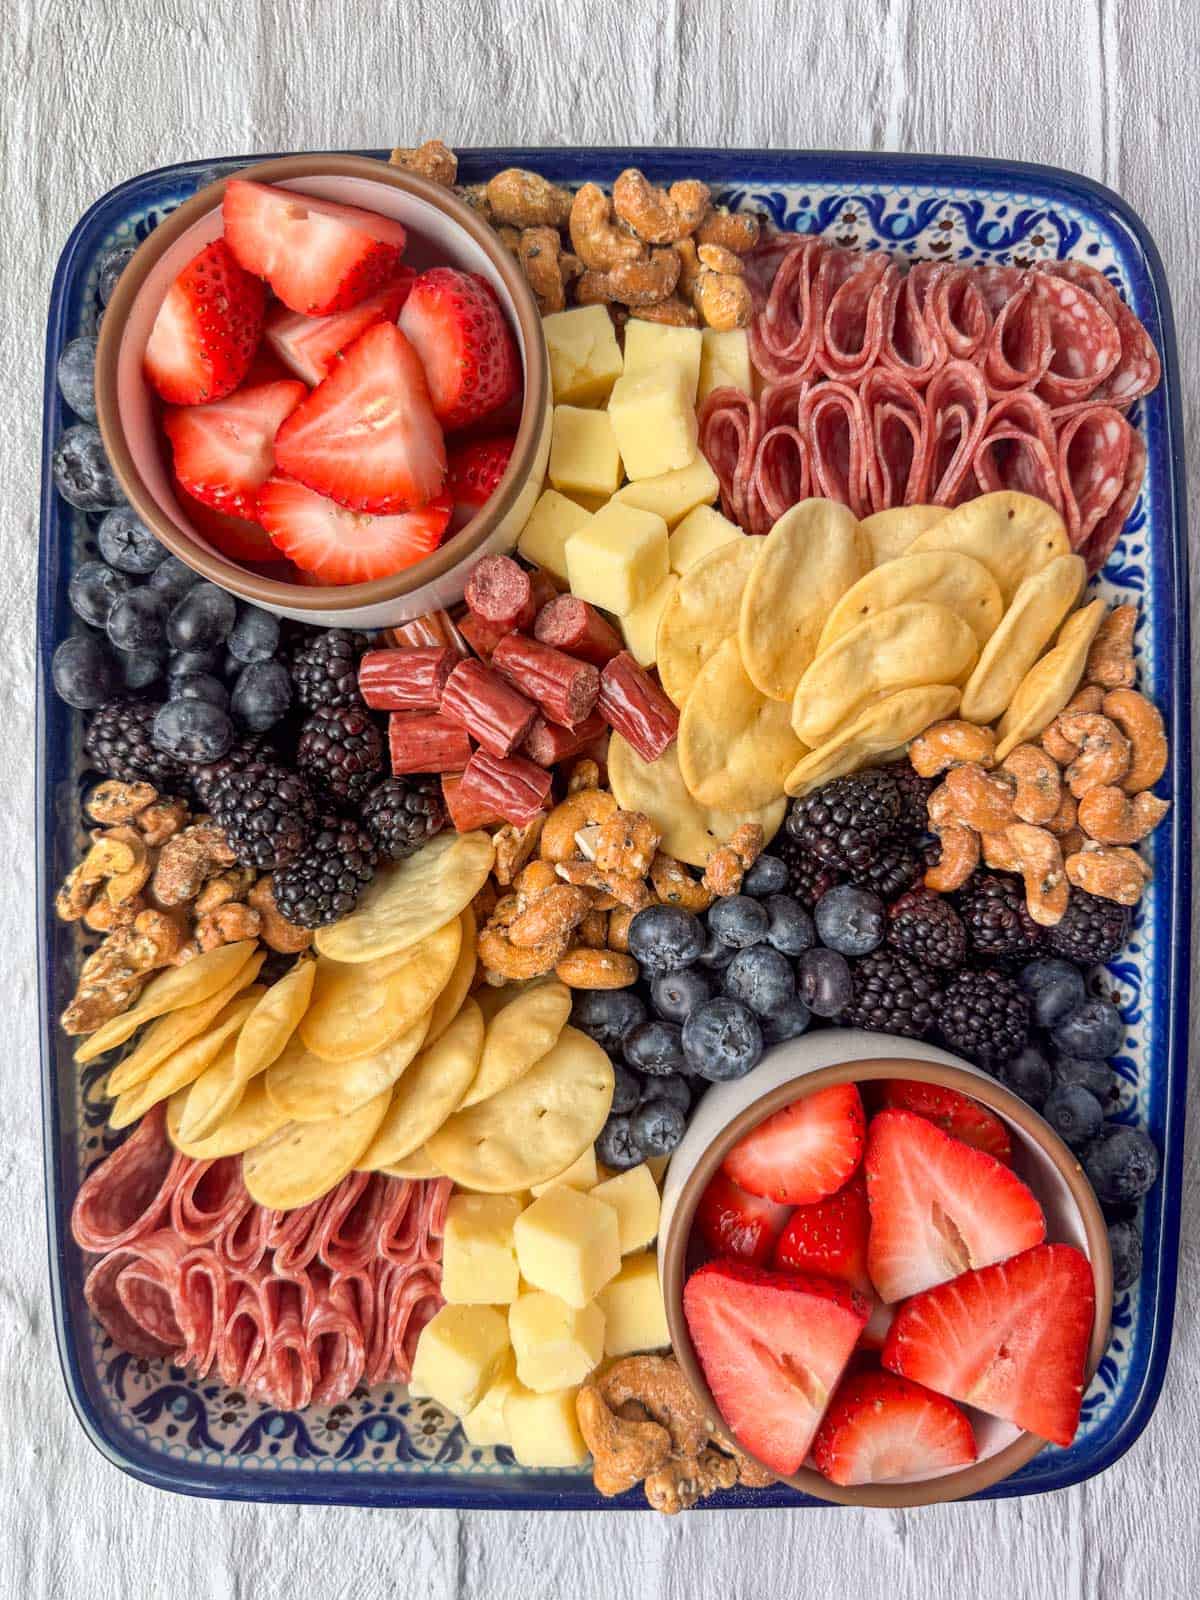
    Keyword Overnight Cinnamon Rolls
    Tried this recipe?Let us know how it was!
    9 Cinnamon Rolls in Cast Iron Pan

    Bread Dipping Seasoning

    October 28, 2024 by Tracy @ Next Level Baker Leave a Comment

    Just add some olive oil to this bread dipping seasoning blend for a quick, flavorful appetizer that everyone will love!

    Plate with bread dipper seasoning in oil and bread in the background

    We were blessed to live in Europe where the bread is high quality, readily available, inexpensive and indescribably delicious. If we were traveling, we always knew we could pop in any bakery and get a baguette for a snack. And if we were at home, a fresh baguette (ripped or sliced) dipped in this bread dipper seasoning and olive oil was the perfect appetizer. This recipe works well for a party appetizer or even just one of those 'dinner is taking a little longer than expected, come munch on this' kind of appetizer! I have very fond memories of my family of four hovered over a plate of homemade bread dipping seasoning and olive oil just chatting, laughing and dipping away.

    [feast_advanced_jump_to]

    Ingredients for bread dipper

    9 little spice bowls with spices to make bread dipper seasoning
    • Oregano
    • Parsley
    • Granulated garlic
    • Minced onion
    • Salt
    • Basil
    • Rosemary
    • Black pepper
    • Red pepper

    See recipe card for quantities.

    bread dipper seasoning in oil on plate with bread and olive oil in the background

    Instructions

    Measure out the spices into a jar and shake!

    After the bread dipping seasoning is made, it's ready to use. For a small, appetizer plate (like shown), sprinkle 1 tablespoon of the bread dipper seasoning on to the plate and then pour olive oil over the seasoning until the seasoning is fully covered, approximately 3 tablespoons of oil. You can adjust the ratios to larger plates and bowls as well.

    Variations

    • Spicy - if you like it spicy, add more crushed red chili peppers
    • Salty - if you like a salty dipper, add more salt.
    • Fancy - you can also add a few drops of balsamic vinegar (it will not mix) and/or some finely grated Parmigiano Reggiano cheese on top for a fancier touch.
    Jar of bread dipper seasoning

    Storage

    Store all spices and spice blends in an airtight container in a cool, dark place.

    Next Level Tips

    • Choose a quality bread to pair this like a sourdough baguette freshly made without preservatives or additives.
    • I highly recommend organic spices. I buy a lot of spices in bulk from Amazon, Costco and bulk food sections. If you buy spices in bulk, organic spices are often cheaper, ounce for ounce, than their non-organic counterparts from regular grocery stores.
    • This recipe makes a great little gift too. I gave away little jars of this dipper with little plates as Mother's Day gifts this year, and my mother in law told me recently that she sprinkles it on all of her Italian dishes.
    • Thanks to my mother in law, I now use this seasoning on all my Italian dishes too. It's yummy on my Portobello Mushroom Parmesan recipe.
    Plate with 9 different spices used to make bread pepper seasoning

    FAQ

    Can I substitute garlic powder for the granulated garlic?

    Yes, you can substitute garlic powder. However, garlic powder tends to sink to the bottom of the jar so you'll have to remember to shake more. Also, granulated garlic has a flavor that's more intense and closer to fresh garlic than garlic powder does.

    Can I use fresh garlic instead of granulated garlic?

    Yes, just mix the rest of the dry spice mix blend without any garlic and store in the pantry that way. When you are adding olive oil to the spice blend on a plate, you would add minced fresh garlic at that time. Fresh garlic is more intense, so start with one smaller garlic clove for a small batch of the dipping oil blend and adjust to taste.

    Can I substitute onion powder for the minced onion?

    Yes, you can substitute onion powder. However, onion powder tends to sink to the bottom of the jar so you'll have to remember to shake more. If you've never tried dried minced onion, I would highly recommend trying it.

    Bread dipper seasoning in oil on plate with bread and olive oil in the background

    Bread Dipping Seasoning

    Tracy @ Next Level Baker
    Homemade bread dipping seasoning combines dried herbs and spices with extra virgin olive oil to create a rich and savory dipper. Serve it with crusty bread for a simple but flavorful and elegant appetizer.
    Print Recipe Pin Recipe
    Prep Time 5 minutes mins
    Total Time 5 minutes mins
    Course Appetizer
    Cuisine American, Italian

    Ingredients
      

    • 1 tablespoon dried oregano
    • 1 tablespoon dried parsley
    • 1 tablespoon dried granulated garlic
    • ½ tablespoon dried minced onion
    • ½ tablespoon course salt
    • ½ tablespoon dried basil
    • 1 teaspoon dried rosemary
    • 1 teaspoon black pepper
    • 1 teaspoon crushed red pepper
    • olive oil extra virgin

    Instructions
     

    • I've you don't have a ½ tablespoon measuring spoon, then ½ tablespoon = 1½ teaspoons.
    • Measure each spice and add it to a storage jar. [I group my spices with the corresponding measuring spoon so that I don't forget where I'm at when making multiple servings.]
    • Shake jar to combine spices.

    To Serve

    • For a small appetizer plate or bowl, start by adding 1 tablespoon of the seasoning blend to the plate and covering it completely with 3 tablespoons of a high quality olive oil. Adjust quantities for a larger plate or to taste.
    • Stir spice seasoning blend and olive oil. Let sit for 10 minutes for flavors to blend. Serve with a crusty baguette or bread of your choice.

    Notes

    One serving is fills a 4 ounce jar about â…” full. This leaves plenty of room to shake the spices to combine. 

    Would you like to save this?

    We'll email this post to you, so you can come back to it later!

    Don't worry! We won't spam you!

    Keyword Bread Dipping Seasoning
    Tried this recipe?Let us know how it was!
    bread dipper seasoning in oil on plate with bread in the background

    Portobello Mushroom Parmesan

    October 28, 2024 by Tracy @ Next Level Baker Leave a Comment

    Portobello Mushroom Parmigiana is the perfect easy, vegetarian weeknight dinner. The mushrooms provide a hearty, meaty texture that pairs perfectly with the tangy marinara sauce and crusted, melty cheese. This recipe is even easier, healthier and yummier because we also skip the breading.

    Cooked portobello mushroom parmesan on pasta on a plate

    There are so many different types of parmesan and parmigiana recipes, but this is one of my favorites. It's an easy, healthy dinner that's perfect for weeknights. There's no meat to prep or precook, and nothing difficult to assemble. Just wash the mushrooms, start piling on the toppings, and pop them into the oven or air fryer. While the mushroom parmigiana is baking, I recommend making pasta (regular or gluten free) to serve with the mushrooms. If you make my homemade marinara sauce, you can use that marinara sauce on the mushrooms and also on the pasta.

    Portobello Mushroom Parmesan also pairs well with a nice French baguette and olive oil with a homemade bread dipper.

    [feast_advanced_jump_to]

    What's in Portobello Mushroom Parmesan?

    Two pre-cooked portobello mushrooms on a baking sheet

    Portobello mushroom parmesan contains a few key ingredients:

    • Portobello mushrooms
    • Marinara sauce (jarred or homemade)
    • Mozzarella cheese
    • Oregano
    • Salt
    • Parmigiano Reggiano cheese (or Parmesan cheese)

    See recipe card for quantities.

    Parmigiano Reggiano Cheese vs. Parmesan Cheese

    Maybe you're wondering what the difference is between Parmigiano Reggiano cheese and Parmesan cheese. Well, Parmigiano Reggiano cheese is only made in certain regions in Italy, only with specific ingredients, and it must be aged for a minimum of one year. The term Parmesan is not regulated in the U.S., so Parmesan cheese is much more generic. Parmesan cheese can be made anywhere, without specific ingredients and is often aged for less than a year. So Parmesan cheese is not true Parmigiano Reggiano cheese. But can you taste the difference? Oh yes! Parmigiano Reggiano has a stronger, richer, nuttier flavor with a more crumbly texture. If you grate it on a fine microplane, then it literally just melts in your mouth. Parmigiano Reggiano typically costs more than Parmesan as it's imported, but it's worth it! Especially if you're looking for high quality ingredients with a heavenly taste.

    Substitutions

    • Cheese - so I recommend Parmigiano Reggiano over Parmesan cheese. But a great, lesser expensive option to try is Grana Padano cheese. It's also from Italy, but it's from different regions with less strict regulations. The flavor is very similar. If I was blind folded, I definitely think I could tell the difference between Parmigiano Reggiano and Parmesan cheeses, but I am not sure I could tell the difference between Parmigiano Reggiano and Grana Padano cheeses. I just buy what's cheaper at Costco between Parmigiano Reggiano and Grana Padano, but that can be our secret. Unfortunately, my Costco doesn't always carry Grana Padano though.
    Two cooked portobello mushrooms on baking sheet

    Storage

    Mushroom Parmesan can be stored in an airtight container in the refrigerator for 3-4 days.

    Next Level Tips

    • Use good quality cheeses. Cheese always tastes best when you buy it in blocks or chunks and shred it yourself. The only pre-shredded cheese I buy is Mozzarella cheese, and that's mostly for my other half who eats way more of it than I do. Freshly shredded Mozzarella is amazing though! But for the Parmesan cheese, I always buy a Parmigiano Reggiano cheese (or Grana Padona) in a chuck and shred it myself. It's less expensive at Costco too. Can you tell I'm a Costco girl yet? I totally am!
    • If you want to take the seasoning to the next level, use an Italian seasoning blend like my homemade bread dipper seasoning instead of the oregano. I gave away little jars of the bread dipper seasoning and plates as little Mother's Day gifts last year, and my mother in law told me she uses it on all her Italian pasta dishes!
    Close up of Portobello Mushroom Parmesan on plate with pasta

    Pairing

    These are my favorite dishes to serve with portobello mushroom parmesan:

    • Bread dipper seasoning in oil on plate with bread and olive oil in the background
      Bread Dipping Seasoning
    • Close up of Marinara Sauce in ladle
      Easy Homemade Marinara Sauce
    • Whipped Ricotta Truffle Oil Dip
      White Truffle Garlic Bread with Whipped Ricotta
    • Overhead close up photo of a stack of grilled garlic bread with nice grill char marks and garnished with extra salt and fresh parsley on a serving plate
      Grilled Garlic Bread
    Close up of portobello mushroom parmesan on pasta on a plate

    Portobello Mushroom Parmesan

    Tracy @ Next Level Baker
    Portobello Mushroom Parmesan is a hearty vegetarian dish that combines meaty, earthy mushrooms, tangy tomato sauce and bubbly, crusted cheese into the perfect, easy dinner.
    Print Recipe Pin Recipe
    Prep Time 5 minutes mins
    Cook Time 12 minutes mins
    Course Main Course, Side Dish
    Cuisine American, Italian
    Servings 4

    Ingredients
      

    • 4 portobello mushrooms one per person
    • 1 cup jarred or homemade marinara sauce
    • 1 cup mozarella cheese shredded
    • ¼ cup Parmigiano Reggiano (or Parmesan) cheese grated
    • 1 teaspoon oregano
    • ½ teaspoon salt
    • olive oil

    Instructions
     

    • Preheat oven to 375℉ and start boiling water for pasta. Spray baking sheet with cooking spray or use parchment paper.
    • Wash portobello mushrooms and remove the stems.
    • Brush the tops of the portobello mushrooms with olive oil.
    • Lay the portobello mushrooms top side down onto the baking sheet. Fill each mushroom cap with approximately ¼ cup of marinara sauce and then ¼ cup of mozzarella cheese. Sprinkle oregano and salt over mozarellacheese.
    • Bake for approximately 12-14 minutes until cheese is melted and mushrooms are tender but still firm. If you prefer a crispier top, you can broil it for an additional minute, keeping a close eye on it to prevent burning.
    • Immediately after removing pan from oven, sprinkle Parmigiano Reggiano (or Parmesan) cheese on top. Serve over pasta or as a side dish.

    Notes

    Parmigiano Reggiano is usually used as a finishing cheese. So for this recipe, we add it right after the mushrooms come out of the oven. It will melt on its own since the mushrooms are so hot. 
    Also, sometimes if I am only using two portobello mushrooms, I will use my air fryer. All air fryers are a little different. Set the temperature to 375 and check it after 9 minutes. 

    Would you like to save this?

    We'll email this post to you, so you can come back to it later!

    Don't worry! We won't spam you!

    Keyword Portobello Mushroom Parmesan
    Tried this recipe?Let us know how it was!
    Overhead view of a Portobello Mushroom Parmesan on a plate of spaghetti with homemade pasta sauce
    Portobello Mushroom Parmesan. Photo Credit: Next Level Baker

    Easy Homemade Marinara Sauce

    October 28, 2024 by Tracy @ Next Level Baker 2 Comments

    Marinara sauce is a simple, flavorful and versatile sauce that's perfect for pasta, pizza or dipping. With just a few ingredients, this homemade marinara sauce is simmered to deepen and blend the flavors and thicken the sauce. The bonus is that it's super easy and your kitchen will smell divine!

    Pan of Marinara Sauce with ladle in background

    My whole family gets excited when they walk in the door and the house smells like homemade marinara sauce simmering. This sauce is slow cooked, so it just fills your whole kitchen and house with the heavenly smell of cooking tomatoes and herbs. Becuase marinara sauce is easy to make, it's a great replacement for jarred pasta/pizza sauce. Jarred sauce has gotten super expensive and too many of them contain added sugar.

    Homemade marinara sauce is so versatile too. You can use it for dipping, on pizza, or over any pasta. I use it for many dishes including my easy weeknight Portobello Mushroom Parmesan and Veggie Lasagna recipes. Make a batch on Sunday just like our grandmas did and use it throughout the week for pastas and also on pizza night!

    [feast_advanced_jump_to]

    Ingredients

    Ingredients to make marinara sauce
    • Crushed tomatoes
    • Tomato sauce
    • Red wine (optional)
    • Olive oil
    • Garlic
    • Dried oregano
    • Bay leaves
    • Crushed red pepper
    • Salt and black pepper
    • Carrot
    • Fresh basil (optional for serving)

    See recipe card for quantities.

    Wait, why a carrot?

    Yes, you read that right. There's a carrot in this slow cooked sauce. A lot of times, there is added sugar in jarred pasta sauce and also homemade pasta sauce recipes. Sugar is used to balance the acidity in the tomatoes. I also tried the baking soda method once. Once. That was a complete fail. No one wants pasta sauce to taste like hint of baking soda. Then, I read that some old, traditional Italian marinara recipes used carrots to add some sweetness and cut the acidity in the sauce. I tried it and was hooked. I now always add a carrot to my homemade marinara sauce.

    Substitutions

    • Red wine - instead of red wine, you can use red wine vinegar or balsamic vinegar or you can skip it entirely.
    • Carrot - if you don't have a carrot, you can substitute one teaspoon of sugar. If you also aren't using red wine, then you could substitute grape juice for both the red wine and carrot.

    Storage

    Store homemade marinara sauce in the refrigerator in an airtight container for 5-7 days.

    Next Level Tips

    • If you drink red wine, don't skip the red wine. It's a perfect reason to open a bottle and also pour yourself a glass! But it also adds a little extra something to the marinara sauce. It's definitely not something found in jarred marinara sauce, so it will definitely take your sauce to the next level.
    Photo of pasta with homemade marinara sauce on plate

    Pairing

    These are my favorite dishes to serve with this homemade marinara sauce:

    • Close up of portobello mushroom parmesan on pasta on a plate
      Portobello Mushroom Parmesan
    • Overhead partial view of a finished pan of veggie lasagna
      Easy Gluten Free Veggie Lasagna
    • Overhead close up photo of a stack of grilled garlic bread with nice grill char marks and garnished with extra salt and fresh parsley on a serving plate
      Grilled Garlic Bread
    Close up of Marinara Sauce in ladle

    Easy Homemade Marinara Sauce

    Tracy @ Next Level Baker
    Homemade marinara sauce is an easy, classic tomato-based sauce that starts with a few fresh simple ingredients. It is slow simmered to allow the flavors to develop and blend. It's the universal dip and a favorite topping for pasta and pizza.
    Print Recipe Pin Recipe
    Prep Time 15 minutes mins
    Cook Time 2 hours hrs
    Total Time 2 hours hrs 15 minutes mins
    Course Main Course
    Cuisine Italian
    Servings 8

    Ingredients
      

    • 1 can crushed tomatoes (28 ounce) unsalted
    • 2 cans tomato sauce (14 ounce each) unsalted
    • 1 tablespoon olive oil
    • 3 large garlic cloves minced
    • 2 tablespoon dried oregano
    • 2 bay leaves
    • ½ teaspoon crushed red pepper
    • 1 medium carrot peeled
    • 2 tsp salt
    • 2 ounces red wine
    • fresh basil for garnish

    Instructions
     

    • Heat large pasta pot or Dutch oven pot over medium heat.
    • Add the olive oil and garlic and sauté until fragrant but not golden. About 1-2 minutes.
    • Add the crushed red pepper and sauté for another 30 seconds.
    • Next, add the remaining ingredients. The carrot can go in as a whole, peeled carrot.
    • Bring the sauce to a low boil.
    • After the sauce comes to a boil, turn the heat down and simmer for a minimum of two hours.
    • After two hours, remove the bay leaves and the carrot. Discard the bay leaves but feel free to snack on the carrot. It will be nice and soft.
    • Taste and add more salt if needed. [It's best to wait until the flavors have had a chance to blend before adding more salt if needed.]

    Would you like to save this?

    We'll email this post to you, so you can come back to it later!

    Don't worry! We won't spam you!
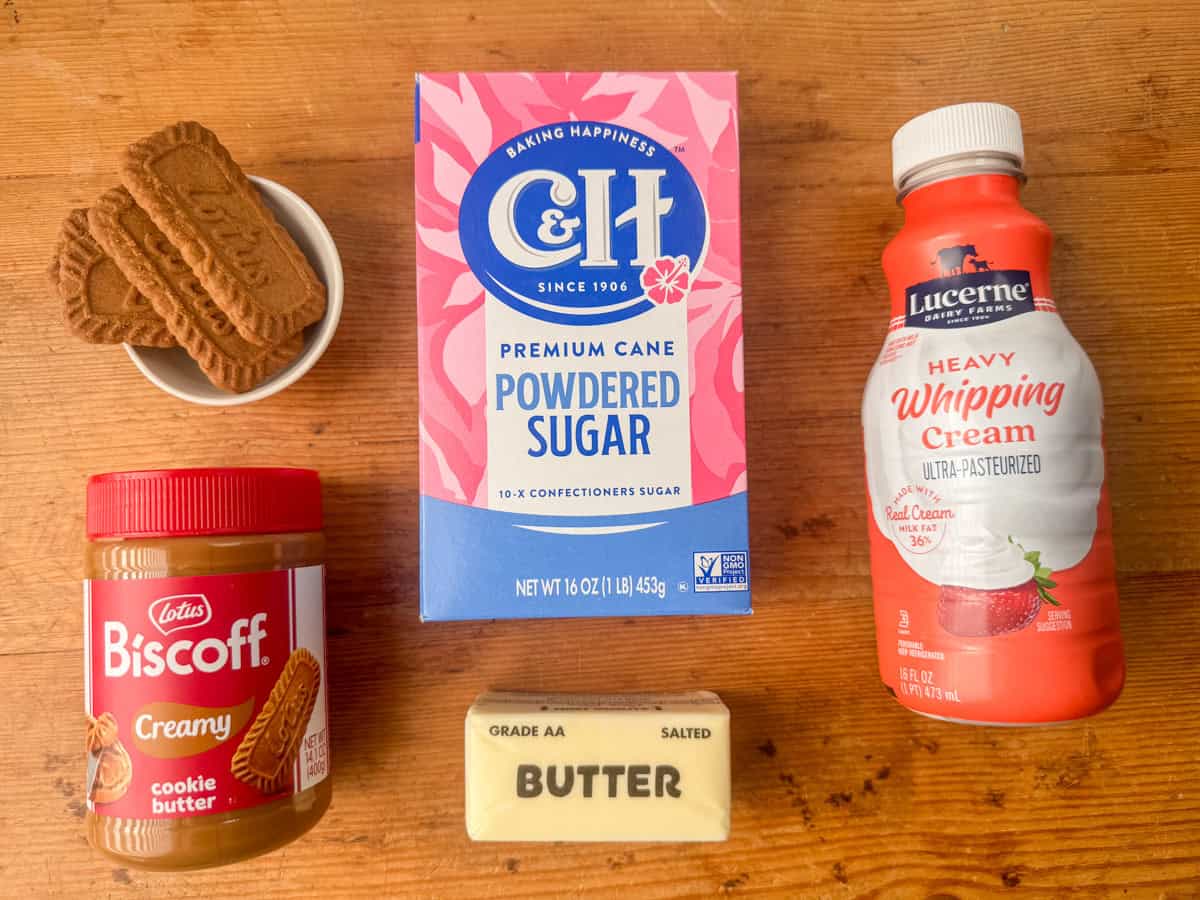
    Keyword Easy Homemade Marinara Sauce
    Tried this recipe?Let us know how it was!

    Chipotle Almond Dip

    October 24, 2024 by Tracy @ Next Level Baker Leave a Comment

    Chipotle almond dip is a creamy, southwestern inspired dip that pairs perfectly with crackers and veggies. But it's so good that you'll want to put it on tacos, wraps, sandwiches and salads too. It's perfect for anything that needs a little smoky, southwestern zing. It's also naturally vegan.

    Chipotle Almond dip with crackers and carrots

    I fell in love with chipotle almond dip a few years ago when I first tried Chipotle Bitchin' Sauce at Costco. Yes, it was one of those times where you try a sample and are instantly hooked. And it gets extra bonus points for being vegan. The problem is that Costco doesn't always stock it, and it's hard to find at regular grocery stores. So I've been making my own for almost just as long. I recently discovered Trader Joe's has a version, but it's just not as good. And, while I do love Trader Joe's, there isn't one near my house, so I don't get there very often either.

    Chipotle almond dip is super versatile. It's great served immediately with crackers and veggies. Carrot chips (carrots cut in rounds instead of sticks) make yummy, healthy and naturally gluten free dippers! But this dip is also currently my favorite condiment. I use it in wraps, sandwiches and every type of tacos including my Air Fryer Fish Tacos. I also thin it with a little water and use it in place of salad dressing or as a substitute for aioli or crema.

    [feast_advanced_jump_to]

    Ingredients

    Ingredients for Chipotle Almond Dip
    • Neutral oil (grapeseed, sunflower or your whatever neutral oil you have on hand)
    • Water
    • Almonds
    • Lime juice
    • Chipotle peppers in adobo sauce
    • Nutritional Yeast
    • Garlic
    • Tamari (or soy) sauce
    • Onion powder
    • Paprika
    • Salt
    • Chipotle chili powder

    See recipe card for quantities.

    Instructions

    This dip is simply delicious. But the next best thing about this recipe is that you can just dump all of the ingredients in a high powered blender and start blending! There's enough liquid that you don't even have to worry about the order that the ingredients are added which is always a bonus! If you don't have a high powered blender, you can use a regular food processor. You'll just want to soak the almonds in water for a minimum of two hours to soften them up before adding them to the food processor.

    Substitutions

    • Oil - use your favorite neutral oil. I've used grapeseed, sunflower, and canola oil. All work great! I even tried olive oil in a pinch. Don't do that! Olive oil is not a neutral oil, and it does affect the final flavor of the dip.
    • Lime juice - you can substitute lemon juice. Both Bitchin' Sauce and Trader Joe's versions use lemon juice, but I think limes pair better with chipotles.
    • Nutritional Yeast - there aren't great substitutes for nutritional yeast. It's used in vegan recipes to provide a 'cheesy' flavor. I definitely recommend it if you've never tried it before. Otherwise, you can substitute a tablespoon of miso paste or an extra teaspoon of soy sauce for a little extra zing.
    • Almonds- you can substitute another nut like cashews. However, cashews soak up liquid differently than almonds and taste differently than almonds. So if you do use another nut, reduce the water by ¼ cup initially to test the consistency and expect that it will also taste differently.
    • Tamari sauce - for a gluten free substitution, you can use coconut aminos. You can also use regular soy sauce if you're not gluten free.

    Variations

    • More spicy - add more chipotles, more adobo sauce or chipotle chili powder. Just do it slowly and taste it as you go.
    • For a very mild version, you can skip the chipotles, adobo sauce and chipotle chili powder entirely.
    • For a green chili version, substitute a 4 ounce can of green chilis for the chipotle chilis, the adobo sauce and the chipotle chili powder. Use smoked paprika instead of regular paprika to add a smoky flavor.
    Chipotle almond dip with crackers

    Equipment

    If you have a high powdered blender, use it! If you don't, then soak the almonds in water for two hours to soften them. Then use a food processor and follow the same instructions.

    Storage

    Store chipotle almond dip in the refrigerator for 5-7 days. The almonds will continue to soak up water, so you may need to add additional water the longer it is stored in the refrigerator.

    Next level tips

    • If you've never tried tamari sauce, I highly recommend it! It's sold right next to the regular soy sauce. It has a deeper and richer flavor than regular soy sauce, and it's naturally glute free.
    • You can easily thin out this dip by adding a little water at a time to turn it into a fabulous substitution for crema or aioli.
    • If you're having a party, make it as an appetizer dip. Then save any leftovers (if you have any!) for taco night.
    Chipotle almond dip with crackers and carrots

    FAQ

    What if I don't have a high powered blender?

    Simply soak your almonds in water for a minimum of two hours to soften them. To soak nuts, simply add them to a bowl, completely cover the nuts with room temperature water and add an extra inch of water.

    What is tamari sauce?

    Tamari sauce is very similar to soy sauce. It's also made from fermented soy beans, but it is processed differently without the use of wheat. It's basically gluten free soy sauce, but it's also known to be darker, richer and with a more balanced flavor.

    What is nutritional yeast?

    Nutritional yeast is a deactivated yeast that's used as a seasoning in vegan dishes. Since it's deactivated, it won't make dough rise, but it does add a nice 'cheesy' flavor to plant-based dishes.

    Why did my dip get thicker overnight?

    Almonds will continue to soak up water. You can stir in a small amount of water to adjust the consistency at any time. Bitchin Sauce is very thin and the Trader Joe's version is very thick. I'm a medium kind of girl, but it's super easy to adjust the consistency to your liking. Adding more water doesn't change the flavor.

    Pairing

    These are my favorite dishes to serve with [this recipe]:

    • Fish Tacos on Plate with Cilantro in background
      Air Fryer Fish Tacos
    Close Up of Chipotle Almond Dip

    Chipotle Almond Dip

    Tracy @ Next Level Baker
    Insanely delicious chipotle almond dip that's a quick appetizer served with crackers and veggies. It also adds a perfect amount of southwestern zing to any taco, salad or wrap. The options are endless!
    Print Recipe Pin Recipe
    Prep Time 15 minutes mins
    Cook Time 3 minutes mins
    Total Time 18 minutes mins
    Course Appetizer
    Cuisine American, Mexican
    Servings 12

    Equipment

    • 1 High speed blender (or food processor)

    Ingredients
      

    • 1 cup water
    • ¾ cup neutral oil (like grapeseed or sunflower)
    • ¾ cup almonds
    • ¼ cup lime juice approx. 2 limes
    • ¼ cup nutritional yeast
    • 4 small canned chipotles (or two large)
    • 2 teaspoon sauce from canned chipotles
    • 2 teaspoon tamari sauce
    • 2 garlic cloves
    • 1 teaspoon salt
    • ½ teaspoon onion powder
    • ½ teaspoon paprika
    • ¼ teaspoon chipotle chili powder

    Instructions
     

    • Add all ingredients to a high speed blender in any order.
    • Start the blender on the lowest speed and gradually move to higher speeds as ingredients blend and chunks get smaller. Blend on medium high speed until a smooth, creamy texture is achieved. It usually takes less than 3 minutes.

    Notes

    If you don't have a high speed blender, soak the almonds in water for two hours prior to making the dip. 

    Would you like to save this?

    We'll email this post to you, so you can come back to it later!

    Don't worry! We won't spam you!

    Keyword Chipotle Almond Dip
    Tried this recipe?Let us know how it was!

    Air Fryer Fish Tacos

    October 24, 2024 by Tracy @ Next Level Baker Leave a Comment

    Delicious and easy weeknight air fryer fish tacos for Taco Tuesday or any other night!

    Fish Tacos on Plate with Cilantro and pico de Gallo in background

    I'm always reading that I should eat more fish. Well, air fryer fish tacos are the perfect way to add a little more fish to your life!

    [feast_advanced_jump_to]

    Ingredients

    Gather all your ingredients!

    Fish tacos raw ingredients
    • White fish (thawed if using frozen)
    • Corn or flour tortillas
    • Red onion
    • Cilantro
    • Shredded cabbage
    • Taco Seasoning
    • Limes (optional for finishing)
    • Chipotle almond dip (optional for finishing)

    Instructions for the Fish

    If you are using frozen fish, make sure to thaw it ahead of time. I love Costco's frozen Mahi Mahi for fish tacos, but you can use any white fish.

    1. Step 1: Coat both sides of thawed white fish with taco seasoning. Cook in the air fryer at 375° for 12 minutes. Fish is done when it reaches internal temperature of 145°.
    Photo of flaked fish for fish tacos
    1. Step 2: When it's done, the fish will flake easily with a fork. Flake or chop all of the cooked fish.

    You can also cook the fish in the oven. I live in Arizona where it's super hot most of the year, so I try to use my air fryer over the oven whenever possible. But you can certainly bake the fish. However, it comes out just as yummy in the air fryer AND there's no preheating time, so dinner finishes quicker!

    Substitutions

    • Tortillas - if you are gluten free, make sure to use corn tortillas.
    • Onion - any color onion is fine!
    • Cabbage - you can substitute lettuce for the cabbage, but I love the crunch of cabbage and it's generally healthier too.
    • Seafood - while I recommend white fish, you can easily substitute another kind of fish or even shrimp.

    Variations

    Use your favorite taco toppings. I always have onions and cilantro on hand. Always. So I know I can always do street taco style tacos. But maybe you're someone who thinks cilantro tastes like soap? I'm so sorry, because it's one of my very favorite herbs and I eat it on almost everything! But use whatever toppings you like. Add Cojita or other Mexican cheese, avocado (smashed or wedges), chopped tomatoes or whatever you have on hand. Sometimes I eat beans on the side, and sometimes I use them as the first layer of my taco. The options are endless!

    Equipment

    You'll need an air fryer, oven or toaster oven to bake the fish.

    Storage

    Store any leftover finished fish tacos in an airtight container in the refrigerator for 2-3 days.

    Next Level Tips

    • Try making your own homemade taco seasoning so that you're always ready for taco night! It's easy and delicious!
    • If your onions are really pungent, soak them in ice water for 10 minutes to soften the flavor and scent. Rinse well and dry off before using.
    • Optional side dishes I'd recommend are beans and Pico de Gallo. Homemade beans take some planning, so canned refried or blacks beans are perfectly fine. However, homemade Pico de Gallo will take all of your Mexican meals to the next level!
    • Optional toppings would be Chipotle Almond Dip. You can make your own, buy it at Trader Joes or as Bitchin Sauce in some regular stores. Costco also carries it sometimes. But definitely try making your own. It's easy and simply to die for. I always have some in the refrigerator, and eat it in some way almost every single day!

    Pairing

    • Close Up of Chipotle Almond Dip
      Chipotle Almond Dip
    • Taco seasoning spices separated on plate with measuring spoon
      Homemade Taco Seasoning
    • Bowl with Pico de Gallo and cilantro in background
      Pico de Gallo
    Fish Tacos on Plate with Cilantro in background

    Air Fryer Fish Tacos

    Tracy @ Next Level Baker
    Delicious fish tacos for a quick and easy weeknight dinner.
    Print Recipe Pin Recipe
    Prep Time 15 minutes mins
    Cook Time 12 minutes mins
    Total Time 27 minutes mins
    Course Main Course
    Cuisine Mexican
    Servings 4 people

    Ingredients
      

    • 1 pound white fish
    • 1 tablespoon olive oil (or cooking spray)
    • 2 tablespoon Taco Seasoning
    • 1 medium red onion diced
    • ¼ head of red cabbage shredded
    • ½ bunch cilantro chopped
    • 1-2 limes quartered
    • 12 small corn or flour tortillas
    • Chipotle Almond Dip optional

    Instructions
     

    • Thaw white fish (if using frozen), put it dry, and then brush both sides of the thawed fish with olive oil (or cooking spray).
    • Next, coat both sides of the fish with taco seasoning.
    • Cook the fish in air fryer (or oven) for 12 minutes or until fish reaches an internal temperature of 145°.
    • While fish is cooking, prepare toppings. Chop onions, cilantro, cabbage, and limes.
    • Heat tortillas if desired.
    • When fish is done, flake fish with a fork.
    • Assemble the tacos and enjoy!

    Would you like to save this?

    We'll email this post to you, so you can come back to it later!

    Don't worry! We won't spam you!
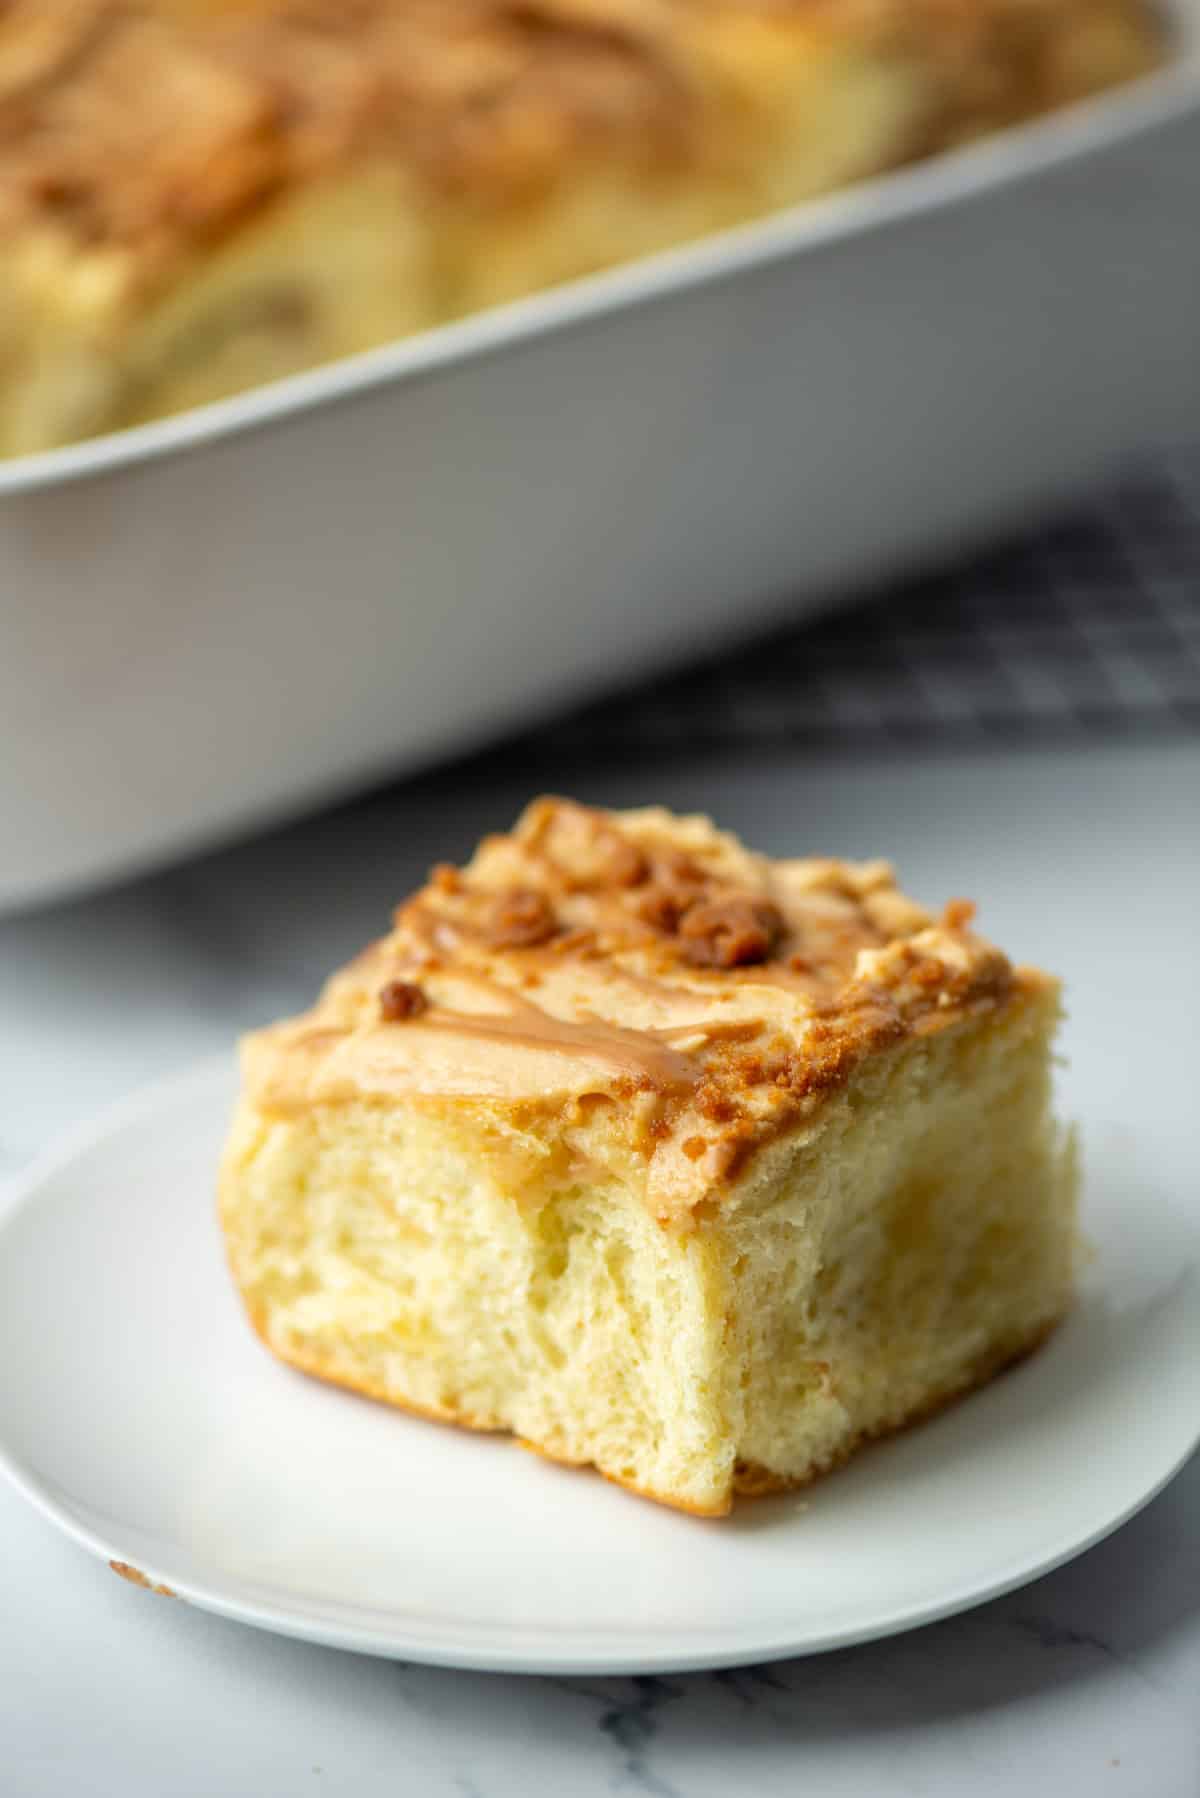
    Keyword Air Fryer Fish Tacos
    Tried this recipe?Let us know how it was!

    Pico de Gallo

    October 24, 2024 by Tracy @ Next Level Baker 2 Comments

    Pico de Gallo, also known as Salsa Fresca, is a salsa made entirely with fresh ingredients. It's chunky and vibrantly red, white and green. It's a perfect topping for chips, tacos or any Mexican dish.

    Pico de Gallo in bowl with chips

    There are endless varieties of salsas, but Pico de Gallo is my very favorite. It's also known as Salsa Fresca since all of the ingredients are fresh. Some salsas use cooked or canned ingredients, but this one uses only fresh ingredients. It's vibrant and happy, and I always use white onions as then the colors are red, white and green which are the main colors in the flag of Mexico.

    Pico de Gallo is often served with chips as an appetizer, but it's also a healthy and tasty topping for tacos, fajitas or any Mexican dish, and even scrambled eggs. It goes perfectly with my air fryer fish taco recipe too.

    [feast_advanced_jump_to]

    Ingredients

    Ingredients for Pico de Gallo
    • Roma tomatoes
    • White onion
    • Jalapeno
    • Cilantro
    • Lime
    • Salt

    See recipe card for quantities.

    Salsa fresca is very easy to make. Just chop all of the ingredients, add them to a bowl and wait an hour or so for the flavors to blend. I do suggest de-seeding the tomatoes though.

    How to de-seed the tomatoes

    For Pico de Gallo, the tomatoes are usually de-seeded. It makes the salsa less watery, and it's also easier to chop de-seeded tomatoes. I like to use Roma tomatoes as they are less watery in general too.

    Photo of process of de-seeding tomatoes

    First, cut the Roma tomatoes into quarters the long way. Then, with a spoon, scoop out the watery, seeded section. It's the same method that you would use to scoop out the seeds of a cantaloupe. Or maybe you call it muskmelon? Same-same!

    I highly recommend de-seeding the tomatoes. It takes less than 5 minutes to de-seed all of the tomatoes, and the Pico de Gallo is a lot less watery. As a bonus, de-seeded tomatoes are much easier to chop. So while you do spend time de-seeding the tomatoes, you save time in the chopping of the tomatoes. And, as a bonus, it looks prettier too!

    Substitutions

    • Jalapeño - instead of jalapeños, you can use Serrano pepper. You can also use green bell pepper for a very mild version.
    • Onion - I highly recommend white onions for the pretty factor, but you can use yellow or red onions too.
    • Cilantro - there is no substitute for cilantro! It's simply the bestest, best herb! But if you are someone who thinks cilantro tastes like soap (I'm so sorry), just leave it out. You could substitute other herbs, but, honestly, I would just skip it if you don't like it.
    • Lime juice - fresh lime juice is so good, but if you only have bottled juice, then substitute 2 tablespoons of bottled juice for the one medium lime.
    Close up photo of Pico de Gallo

    Variations

    • Spicy - for a spicier version, leave the seeds in the jalapeño, add extra jalapeño or use both jalapeño and Serrano peppers.
    • Mild - use less jalapeño and none of the seeds. Or use green bell pepper for a very mild version.

    Storage

    Store the in the refrigerator for 5-7 days.

    Next Level Tips

    • Make the Pico de Gallo the day before if you can. There are a few foods that taste better when the flavors have time to blend together, and this is definitely one of them!
    • Take the few minutes to de-seed the tomatoes. It doesn't have to be perfect, but it will help the salsa be less watery.
    • Don't ever drain off the "water" at the bottom of the Salsa Fresca. Yes, it's part water from the tomatoes, but it's also the lime juice and contains a spicy flavor from the jalapeños.
    • We all love to taste test recipes as we go, but resist the urge on this one. Give the flavors time to blend before you add more salt or any other ingredients.
    Chips and Pico de Gallo on plates with bowl of Pico de Gallo in background

    FAQ

    How do I de-seed tomatoes?

    Please read the section about called How to de-seed the Tomatoes.

    How do I de-seed jalapeños?

    De-seed jalapeños the same way as the tomatoes except that you only need to cut the jalapeños in half instead of quarters. Then scoop the seeds and innards out with a spoon. Easy peasy! Just wash your hands straight away after touching jalapeños so you don't accidentally touch your eyes or something even worse.

    Pairing

    These are my favorite dishes to serve with [this recipe]:

    • Fish Tacos on Plate with Cilantro in background
      Air Fryer Fish Tacos
    Bowl with Pico de Gallo and cilantro in background

    Pico de Gallo

    Tracy @ Next Level Baker
    Pico de Gallo, also known as Salsa Fresca, is a quick, healthy condiment that pairs well with everything from tortilla chips to tacos to scrambled eggs.
    5 from 1 vote
    Print Recipe Pin Recipe
    Prep Time 20 minutes mins
    Resting/melding time 1 hour hr
    Total Time 1 hour hr 20 minutes mins
    Course Appetizer
    Cuisine Mexican
    Servings 8

    Ingredients
      

    • 5 Roma tomatoes (approx. one pound) small diced
    • one medium white onion (approx. ¾ cup) small diced
    • ½ cup cilantro chopped
    • ½ medium jalapeno de-seeded small diced
    • 1 medium lime juiced
    • 1 teaspoon salt

    Instructions
     

    • De-seed the tomatoes (optional), dice them into small pieces and add to a medium bowl.
    • Dice the onion into small pieces and add to bowl.
    • De-seed the jalapeño (optional), dice it into very small pieces, and add to bowl.
    • Chop the cilantro into small pieces and add to bowl.
    • Add juice of one lime to bowl.
    • Add salt and stir all ingredients.
    • Let sit for a minimum of one hour in the refrigerator. The best pico de Gallo is made the day before to give the ingredients enough time to blend.

    Would you like to save this?

    We'll email this post to you, so you can come back to it later!

    Don't worry! We won't spam you!
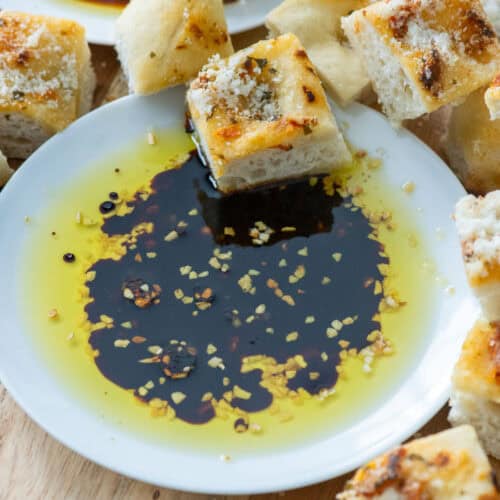
    Keyword Pico de Gallo, Salsa Fresca
    Tried this recipe?Let us know how it was!

    Homemade Taco Seasoning

    October 24, 2024 by Tracy @ Next Level Baker 2 Comments

    Easy homemade taco seasoning that ensures your tacos are bursting with flavor and made from high quality ingredients. This blend is ideal for medium spicy tacos, but I'll give you some tips on adjusting the spice level as well.

    I have been making my own homemade taco seasoning for at least 10 years. Back then, you couldn't find organic taco seasoning in the grocery store. I also didn't like that most regular taco seasoning packets contained monosodium glutamate (MSG) and other additives. I just want the spices, so I started making my own seasonings. It's super easy too. And homemade taco seasoning is perfect for everything from air fryer fish tacos to shrimp burrito bowls and everything in between.

    [feast_advanced_jump_to]

    Ingredients

    Taco seasoning is a combination of 7 different spices.

    Taco Seasoning spices separated on plate
    • Chili powder (American)
    • Cumin
    • Paprika (I prefer smoked)
    • Mexican oregano*
    • Onion powder
    • Garlic powder
    • Salt

    *Not all grocery stores carry Mexican oregano. It would typically be with the other Mexican spices or possibly in a bulk spice section. It's also on Amazon. If you can't find it or don't want to buy it, you can substitute regular oregano.

    What is in chili powder?

    Have you ever looked at the ingredient list on a jar of American chili powder? It's actually a spice blend not a pure spice! It usually contains red chili peppers, oregano, garlic and salt at a minimum. Watch for anti-caking agents in any spice blends too. Why would I want to eat anti-caking agents? I'll just shake my spice bottles, thank you. It's not that hard. Also, American chili powder is made as a blend so that it's not too spicy. If you want to use pure red chili pepper powder in this seasoning mix, you can do a one-for-one substitution if you want a spicy seasoning, or use half for a medium spicy seasoning.

    Spices needed to make homemade taco seasoning each on a different spoon: red chili powder, cumin, Mexican oregano, garlic powder, onion powder, paprika and salt

    Substitutions

    • Paprika - I love using smoked paprika for taco seasoning. It adds a nice hint of smokiness. You can substitute any other kind of paprika, though be careful with hot paprika.
    • Oregano - if you don't have Mexican oregano, you can substitute regular oregano.
    • Chili Powder - for a spicy version, substitute pure red chili powder for the American chili powder. For a milder version, cut the American chili powder in half.

    Storage

    I store my taco seasoning in glass jars. Spices are best kept in a dark place away from heat and moisture.

    Overhead view of white plate with a shrimp burrito bowl made with seasoned shrimp, cilantro rice, black beans, diced avocado, cherry tomatoes, and corn garnished with cilantro and chipotle almond drizzle. Additional chipotle almond dressing, a bowl of salsa, tortilla chips, a napkin and a fork surround the plate.

    Next Level Tips

    • I usually make 4 servings at a time in an 8 oz jar. 2 servings is perfect for a 4 ounce jar. That way, you always have extra taco seasoning on hand!
    • Taco seasoning isn't normally something you have to measure out once you have made it. Just generously cover the meat, veggies, tofu or whatever you are cooking with the seasoning.
    • I highly recommend organic spices. I buy a lot of spices in bulk from Amazon, Costco or bulk food sections. If you buy spices in bulk, organic spices are actually cheaper, ounce to ounce, than their non-organic counterparts from regular grocery stores.
    • Try something new! Smoked paprika is amazing! And Mexican oregano adds nice flavor to taco seasoning.
    • Homemade taco seasoning makes a great little gift too!

    Pairing

    These are my favorite dishes to serve with homemade taco seasoning:

    • Overhead view of white plate with a shrimp burrito bowl made with seasoned shrimp, cilantro rice, black beans, diced avocado, cherry tomatoes, and corn garnished with cilantro and chipotle almond drizzle. Additional chipotle almond dressing, tortilla chips, a napkin and a fork surround the plate.
      Shrimp Burrito Bowls
    • Fish Tacos on Plate with Cilantro in background
      Air Fryer Fish Tacos
    • Overhead view of bowl of restaurant style blender salsa made with fire roasted tomatoes on an orange plate with half regular tortilla chips and half blue corn tortilla chips
      Restaurant Style Blender Salsa
    • A bowl of guacamole with a chip sticking out surrounded by chips on a plate
      Easy 4-Ingredient Guacamole Recipe
    Taco seasoning spices separated on plate with measuring spoon

    Homemade Taco Seasoning

    Tracy @ Next Level Baker
    Easy and delicious blend of seven spices to make your own homemade taco seasoning. No more weird ingredients, just spices!
    Print Recipe Pin Recipe
    Prep Time 5 minutes mins
    Total Time 5 minutes mins
    Course Spice Blend
    Cuisine Mexican
    Servings 1

    Ingredients
      

    • 1 tablespoon Chili Powder (American)
    • 1 ½ teaspoon Cumin
    • 1 teaspoon Paprika Smoked
    • 1 teaspoon Mexican Oregano
    • 1 teaspoon Onion Powder
    • 1 teaspoon Garlic Powder
    • 1 teaspoon Salt

    Instructions
     

    • Combine all ingredients into a jar and shake.

    Notes

    This blend makes a medium spicy taco seasoning. For a spicy version, substitute pure red chili powder for the American chili powder or double the American chili powder. For a milder version, cut the American chili powder in half.

    Would you like to save this?

    We'll email this post to you, so you can come back to it later!

    Don't worry! We won't spam you!
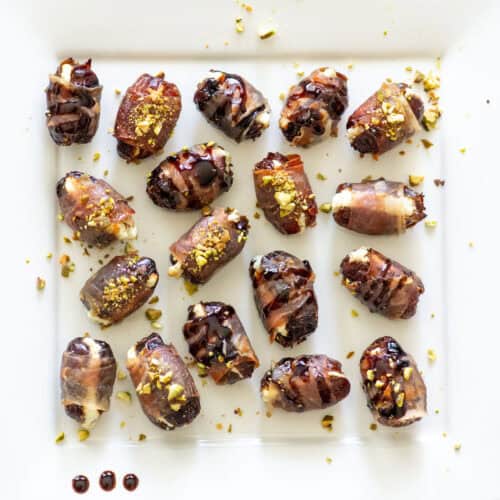
    Keyword Homemade Taco Seasoning
    Tried this recipe?Let us know how it was!
    Homemade Taco seasoning spilling out of jar on its side

    Gluten Free Sweet Potato Brownies

    October 9, 2024 by Tracy @ Next Level Baker Leave a Comment

    These are the perfect Gluten Free Sweet Potato Brownies. They are not too gooey and not too cakey. Sweet potatoes give the brownies the perfect texture, make the brownies a little healthier and you won't even taste it!

    Horizontal shot of two stacked gluten free sweet potato brownies separated by parchment paper

    Brownies were always a special treat when I was growing up. I wanted to create the same experience for my daughter, but she doesn't eat gluten. So I took my mom's depression era brownie recipe and converted it to be gluten free. While I was doing that, I added a lot more chocolate, because I feel like brownies with just a hint of chocolate just don't cut it in 2024. I also added a touch of espresso powder to bring out the chocolate even more.

    [feast_advanced_jump_to]

    Ingredients

    Gather all of your ingredients before you start!

    Gluten Free Brownies - Photo of all ingredients
    • Mashed medium-sized sweet potato
    • Rice flour or gluten-free one-for-one flour
    • Chocolate baking bar
    • High quality cocoa powder
    • White sugar
    • Eggs
    • Butter
    • Baking Powder
    • Espresso Powder
    • Vanilla
    • Salt
    • Flaked salt for decorating (optional)

    Sweet Potatoes

    Sweet potatoes are the secret ingredient in these brownies. They add structure in place of the gluten and give the brownies a nice moist texture. They can be easily cooked in the microwave too.

    Gluten Free Brownies - Photo of Sweet Potato with fork pricks and fork
    1. Step 1: Prick a medium sweet potato multiple times and then microwave it for 5 minutes. Carefully, cut it in half and check for doneness with a fork. If it's not soft inside, microwave for 2 more minutes.
    Gluten Free Brownies - Mashed Sweet Potato
    1. Step 2: Let the sweet potato cool. Then scoop out ½ cup of insides. Mash with a fork until thoroughly mashed. Set it aside. Discard (or eat!) the skins and any left over potato.

    Chocolate

    Chocolate is the main flavor in brownies, so it's best to use high quality chocolate. For the semi-sweet baking bar, I would recommend Organics brand or Guittard brand from the baking aisle. If you like dark chocolate, use dark chocolate! For the cocoa, I love the Valrhona brand. You can order Valrhona from Amazon, but it's actually cheaper in the bulk section of Whole Foods, and you can buy a smaller amount. Valrhona cocoa powder is one of my favorite splurge foods, and it's so worth it! Next, I would recommend a brand from the grocery store that starts with a G like Guittard or Ghirardelli.

    This recipe combines chocolate in multiple forms for the ultimate chocolate flavor. There's cocoa powder and the roughly chopped baking bar added in two ways. Half of the baking bar is completely melted and the other half is folded in at the end. The part that's folded in at the end doesn't melt completely, so it's just heavenly to bite into a semi-melted piece of chocolate.

    Substitutions

    • Vegan - substitute plant based butter and substitute flax eggs or egg replacer (such as Bob Mill's) for the eggs.
    • Chocolate baking bar - you can substitute chocolate chips for the baking bar if needed. Use 1 cup of chocolate chips, separated in half. You can also substitute a high quality chocolate bar from the candy aisle.
    • Espresso powder - you can buy espresso powder in a jar, but I just take regular espresso grinds out of my machine. You can also substitute instant coffee for the espresso powder.

    Equipment

    The great thing about brownies is that you don't need any special equipment. Like none, not even a mixer. Brownies should not be over mixed, so it's perfectly fine to combine all the ingredients by hand with a wooden spoon or spatula. I start by melting my butter in a large bowl and continue to add the rest of my ingredients to that same bowl.

    Storage

    Store the gluten free sweet potato brownies in an airtight container for 3-4 days at room temperature or up to 7 days in the refrigerator.

    Close up of one brownie on plate with brownie pan in backgroundd

    Next Level Tips

    • Use high quality ingredients.
    • Don't overmix the brownies.
    • Definitely don't skip the mashed sweet potatoes!

    FAQ

    Why Salted Butter?

    Please see my post on Salted vs. Unsalted Butter.

    Related

    Looking for other dessert recipes? Try these:

    • Overhead photo of raspberry white chocolate cupcakes where one is centered and surrounded by others in partial view
      Raspberry White Chocolate Cupcakes
    • Close up view focused on one vanilla bean cupcake with vanilla bean buttercream with sprinkles surrounded by other cupcakes in partial view
      Vanilla Bean Cupcakes with Vanilla Bean Buttercream
    • Angled overhead photo of a carrot cake bundt cake topped with toasted coconut
      Carrot Bundt Cake
    • Overhead photo of 25 chocolate peanut butter truffles on a square, white plate. Some are decorated with crushed peanuts.
      Chocolate Peanut Butter Truffles
    Close up shot of two stacked Gluten Free Sweet Potato Brownies

    Gluten Free Sweet Potato Brownies

    Tracy @ Next Level Baker
    These are the perfect Gluten Free Brownies. They are not too gooey and not too cakey. The sweet potatoes give the brownies structure and a moist texture without taking away from the chocolatey flavor.
    Print Recipe Pin Recipe
    Prep Time 20 minutes mins
    Cook Time 35 minutes mins
    Total Time 55 minutes mins
    Course Dessert
    Cuisine American
    Servings 16

    Ingredients
      

    • ½ cup salted butter
    • 4 ounces chocolate baking bar (separated) roughly chopped
    • 1 cup sugar
    • 2 eggs
    • 1 teaspoon vanilla
    • 1 medium sweet potato
    • ½ cup rice flour or one-for-one gluten free flour
    • ⅓ cup cocoa powder
    • ½ teaspoon salt (add extra ⅛ teaspoon if using unsalted butter)
    • ½ teaspoon espresso powder optional
    • 1 teaspoon baking powder
    • Flaked salt or extra cocoa powder for finishing optional

    Instructions
     

    • Preheat the oven to 325℉. Line a 8x8 or 9x9 square pan with parchment paper or spray with cooking spray.
    • Prick the medium sweet potato multiple times and microwave it for 5 minutes. Carefully cut it in half. Test for doneness with a knife. If done, set it aside. If it's still hard, microwave for additional 2 minutes. Set aside to cool.
    • Add the gluten-free flour, cocoa powder, salt, espresso powder and baking powder to a medium bowl. Mix together so that there are no white lumps of flour. Set aside.
    • Microwave the butter, in a large bowl, approximately 45-60 seconds to melt it.
    • Add half of the chopped chocolate to the melted butter and stir until the chocolate is melted.
    • Add the sugar to the melted butter and chocolate and stir until combined.
    • Mash the cooled sweet potato with a fork. Add ½ cup of the mashed sweet potato to the wet mixture and stir until combined.
    • Add the eggs and vanilla to the wet mixture and stir until combined.
    • Add the dry ingredients to the bowl and stir only until combined.
    • Fold in the other half of the chopped chocolate.
    • Pour into the baking pan. Bake at 325℉ for 35-40 minutes. Check at 35 minutes. Gluten free brownies will typically need a few more minutes than regular brownies. A toothpick will not come out clean but it should not be coated either.
    • Let the brownies completely cool before cutting.
    • Optional: sprinkle flaked salt or cocoa powder on top for extra decoration.

    Would you like to save this?

    We'll email this post to you, so you can come back to it later!

    Don't worry! We won't spam you!
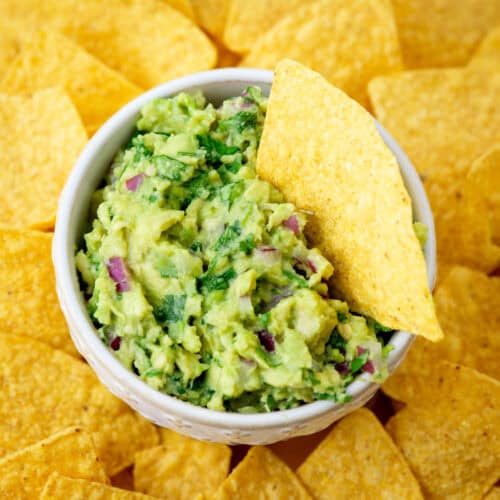
    Keyword Gluten Free Sweet Potato Brownies
    Tried this recipe?Let us know how it was!
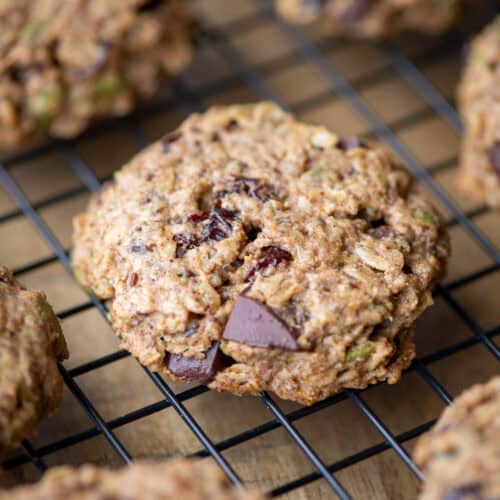
    Close up photo of cut brownies in pan
    • « Previous Page
    • 1
    • 2
    • 3
    • 4
    • Next Page »

    Hi, I'm Tracy! I'm a baker, photographer and writer who specializes in desserts for special occasions as well as everyday healthy recipes. I'm so happy you're here! More about me

    Favorites

    • Close up of an oatmeal breakfast cookie on a wire rack
      Oatmeal Breakfast Cookies
    • Overhead view of dried spices for ranch seasoning mix in lines on a cutting board: parsley, minced onion, dill, onion powder, chives, garlic powder, salt and pepper with a measuring spoon on top and one to the side
      Dairy Free Ranch Seasoning Mix
    • Overhead photo of ground chicken stir fry with green beans and rice and a side of Gochujang on the side
      Spicy Ground Chicken Stir Fry with Green Beans
    • Overhead photo if pasta pesto with sun dried tomatoes on a plate with a napkin and silverware to the side
      Pesto Pasta with Sun Dried Tomatoes

    Footer

    ↑ back to top

    About

    • Privacy Policy
    • Disclaimer
    • Terms & Conditions

    Newsletter

    • Sign Up! for emails and updates

    Contact

    • Contact
    • Work with me
    • FAQ

    Copyright © 2025 Next Level Baker